I had the opportunity to design and built a wargaming room from scratch. This page gives an overview of the design intent and the final result. Since this room was built, I have expanded my “gaming realm” to a few neighbouring rooms which are briefly described at the end.
Objective
Develop a fully functional game and hobby room with good visual appeal and comfort level.
- Comfortable hosting of a full sized 9’x5’ game with 2-6 players
- Large, well-lit painting station with elevated table top for comfort
- Work area with drawer space for tools and materials
- Display cabinet able to hold ~40 armies (~10,000 miniatures)
- Accessible storage for terrain boards and skirmish display bases
- Kid-security for each cabinet and the whole room (wide door for entry of larger terrain items).
- Phone, PC and hands-free intercom (wife’s answer to “lockable door”)
To preserve the visual appeal and “dust-free” status of the room, all heavy duty work is limited to an attached work room not shown in the design. The work room includes a work bench with Dremel scroll saw, drill press, belt sander, various hand tools, a 6’ wide cast iron sink and various hand tools. The work room connects to the exterior and/or garage for summer/winter spray painting.
Design
The design is custom made in terms of layout and cabinetry to meet the requirements above. The layout divides a work area with multiple stations from the gaming area and the display area where miniatures and terrain are stored.
The colour scheme was inspired by the Games Workshop Museum but with lighter grey walls for practical reasons (painting requires light which makes black walls impractical).
The primary elements of the design are a work area along the south wall, a display cabinet on the north wall, an accessory cabinet on the east wall and the main gaming table in the centre.


Painting Station
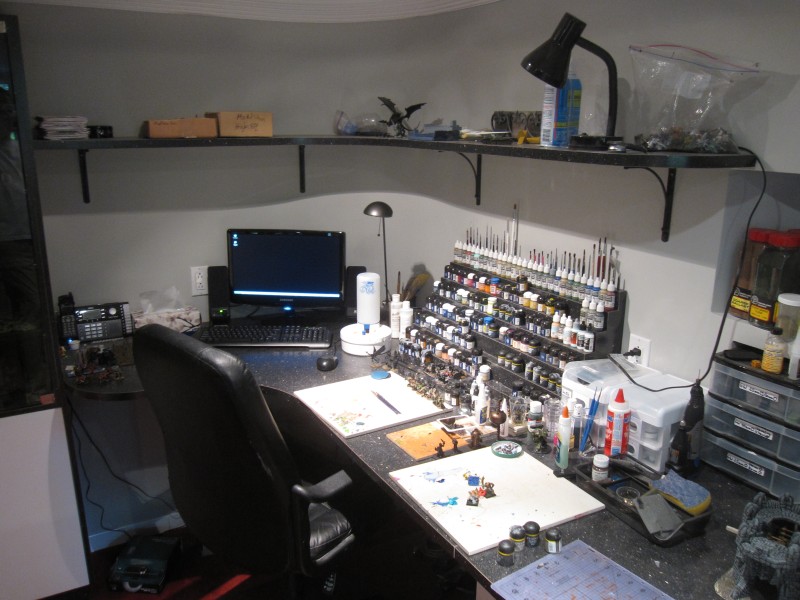
The work area is separated into a curved painting station (no drawers for comfortable seating) and a straight work area for bigger projects such as terrain (12” deeper than the painting section to allow for larger activities).
The painting station has a custom made painting rack supporting approximately 150 conventional paint pots and slots for 30 brushes (varying diameter). Lighting is provided by three daylight lamps: a flood light in the ceiling directly above the painting station chair (not shown), a broad beam lamp on the top shelf and a narrow beam lamp with a flexible support (next to the PC). The top shelf serves for active project storage (labelled boxes on the left). The paint area is protected by 16”x16” ceramic tiles (convenient for ad hoc paint mixing as well). The PC is mostly for reference material and podcasts. Apart from the normal Ethernet, TV and phone access, the PC has a hardwired line through the ceiling to a camera mounted in the ceiling above the main gaming table (USB via CAT6e with converter). The camera has a wide angle lens and can be used from the PC to easily capture birds-eye images of ongoing games.
Terrain & Photo Station
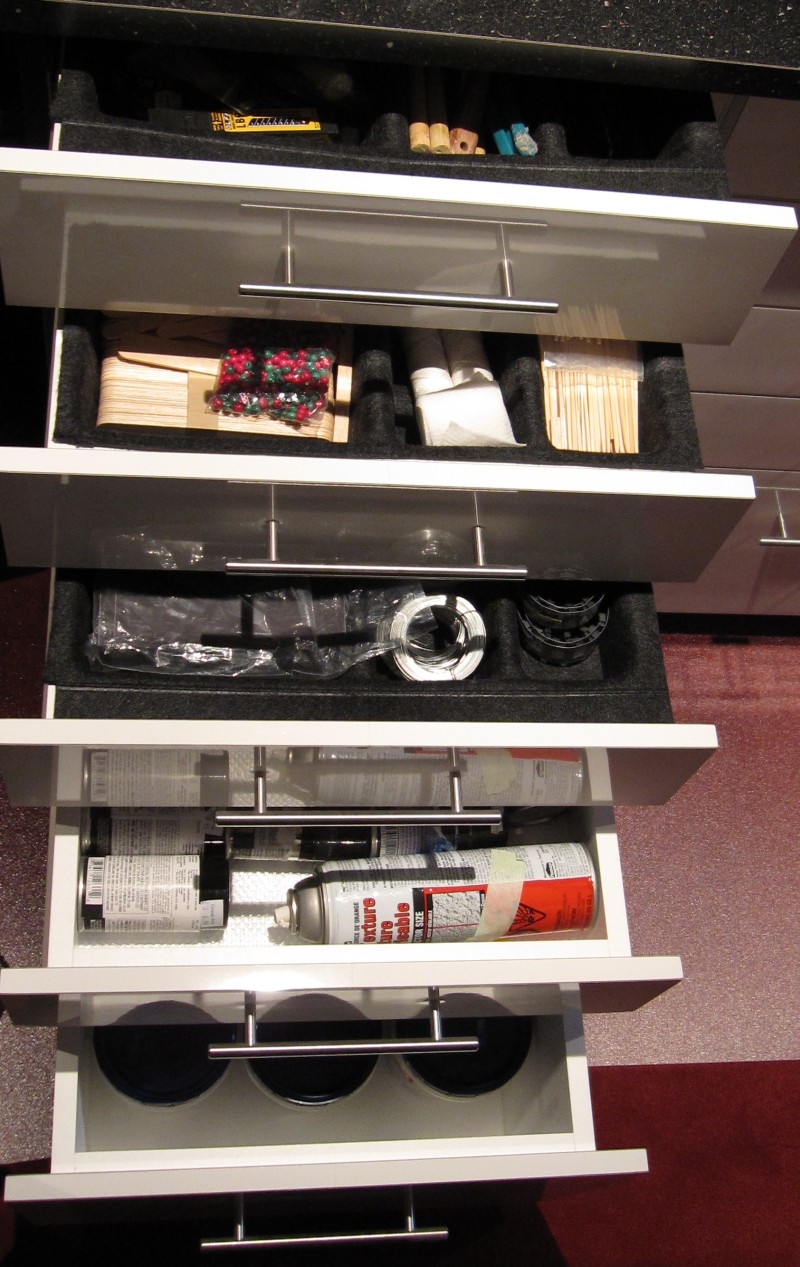
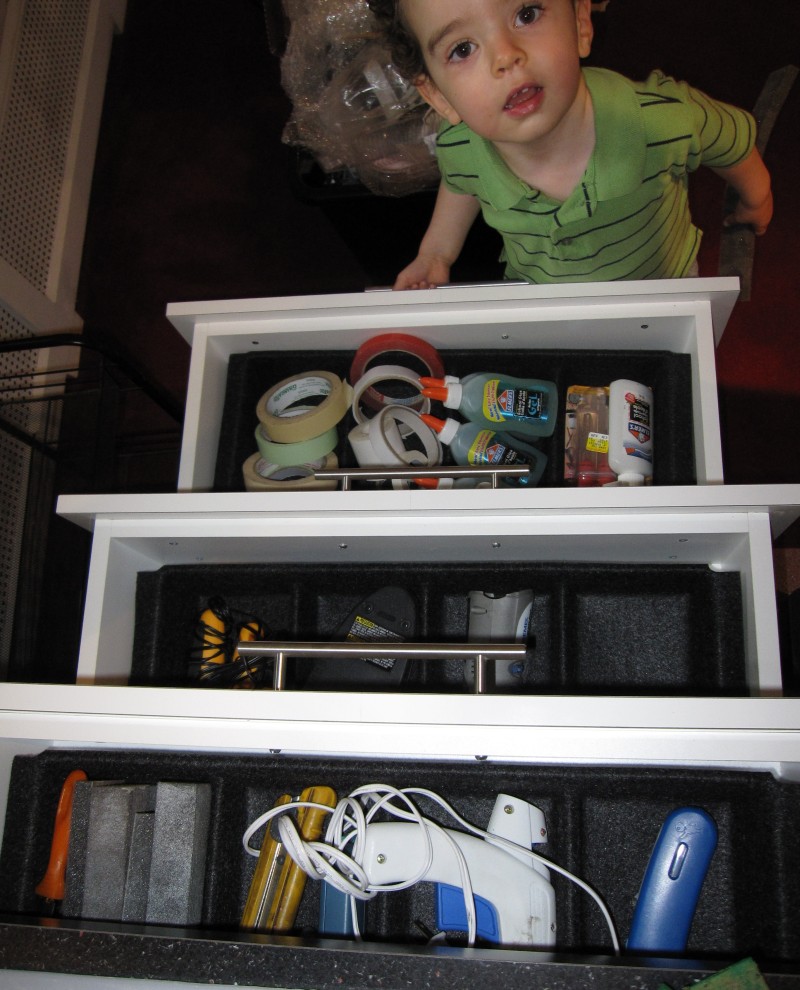
The work area is designed for larger projects. The total work surface is nearly 4’ deep and the usual area (excluding the plastic drawers) is about 3’ deep. The drawers on top of the surface contain ready-access material such bits, decals, cleaning supplies, plastic card, balsa wood, etc. The stack of plastic tackle boxes behind the photo box contain sorted bits by army and scale. The shelf holds ready-access terrain material such as flock, static grass, rocks, etc. The small white drawers on the shelf contain compartments with all types of conventional base sizes (GW round & square, FoW, DBA, etc). Lighting is provided by two ceiling flood lights (100W MR16 wide angle) directed onto the counter top. The photo box has independent lighting from two daylight corrected photography lights. The box is 24”x24”x24” in size.

The drawers under the terrain section are 3’ deep and grouped into four columns:


Display Cabinet
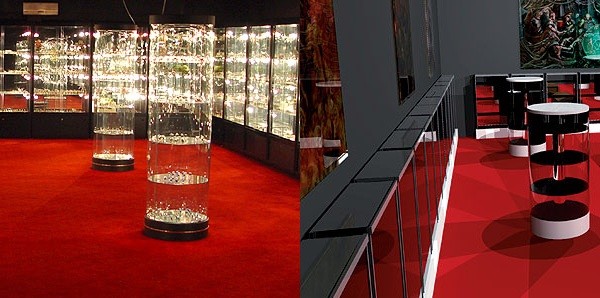
The display cabinet has six columns of adjustable mounts for 24” wide display bases (12” to 18” deep). Each column is 6’ tall (6’8” for the overall cabinet with leveled base). The default configuration is 6 display bases with a 10” spacing (plus the floor of the cabinet).
The columns are illuminated from top to bottom by two vertically mounted low-UV “warm white” LED light strips (to prevent bleaching and give a lighting colour rendering index similar to sunlight). A small reflector barrier prevents direct visibility of the LED strips from the front. Tempered glass doors secured by strong magnets provide protection from dust and kids.
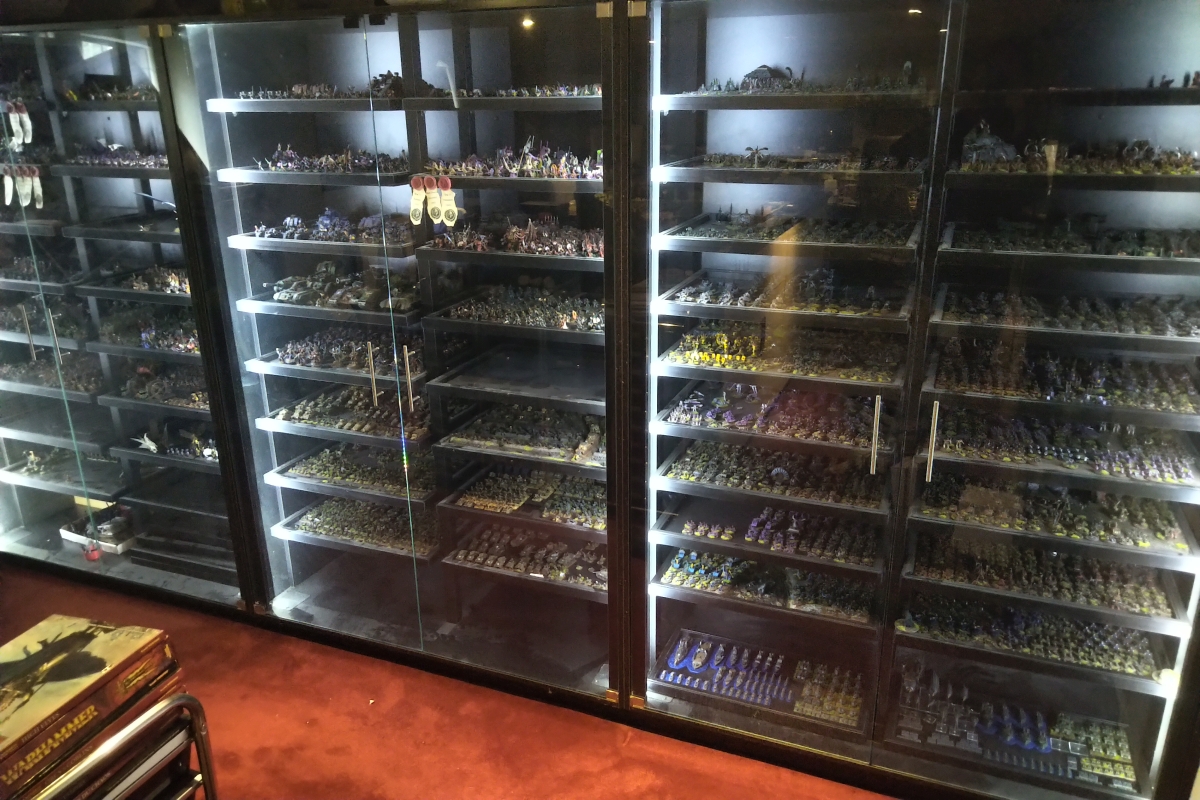
The display bases are custom made trays with a decorative framing. The trays are ¾” deep to allow for terrain inserts (see “Display Bases” for details on the construction of some display bases). Most display bases are 18” deep (40 bases) to provide enough space for full armies. Ten shorted 12” display bases can be switches in for small armies or vignettes that do not require the deep tray.
Side Cabinet:
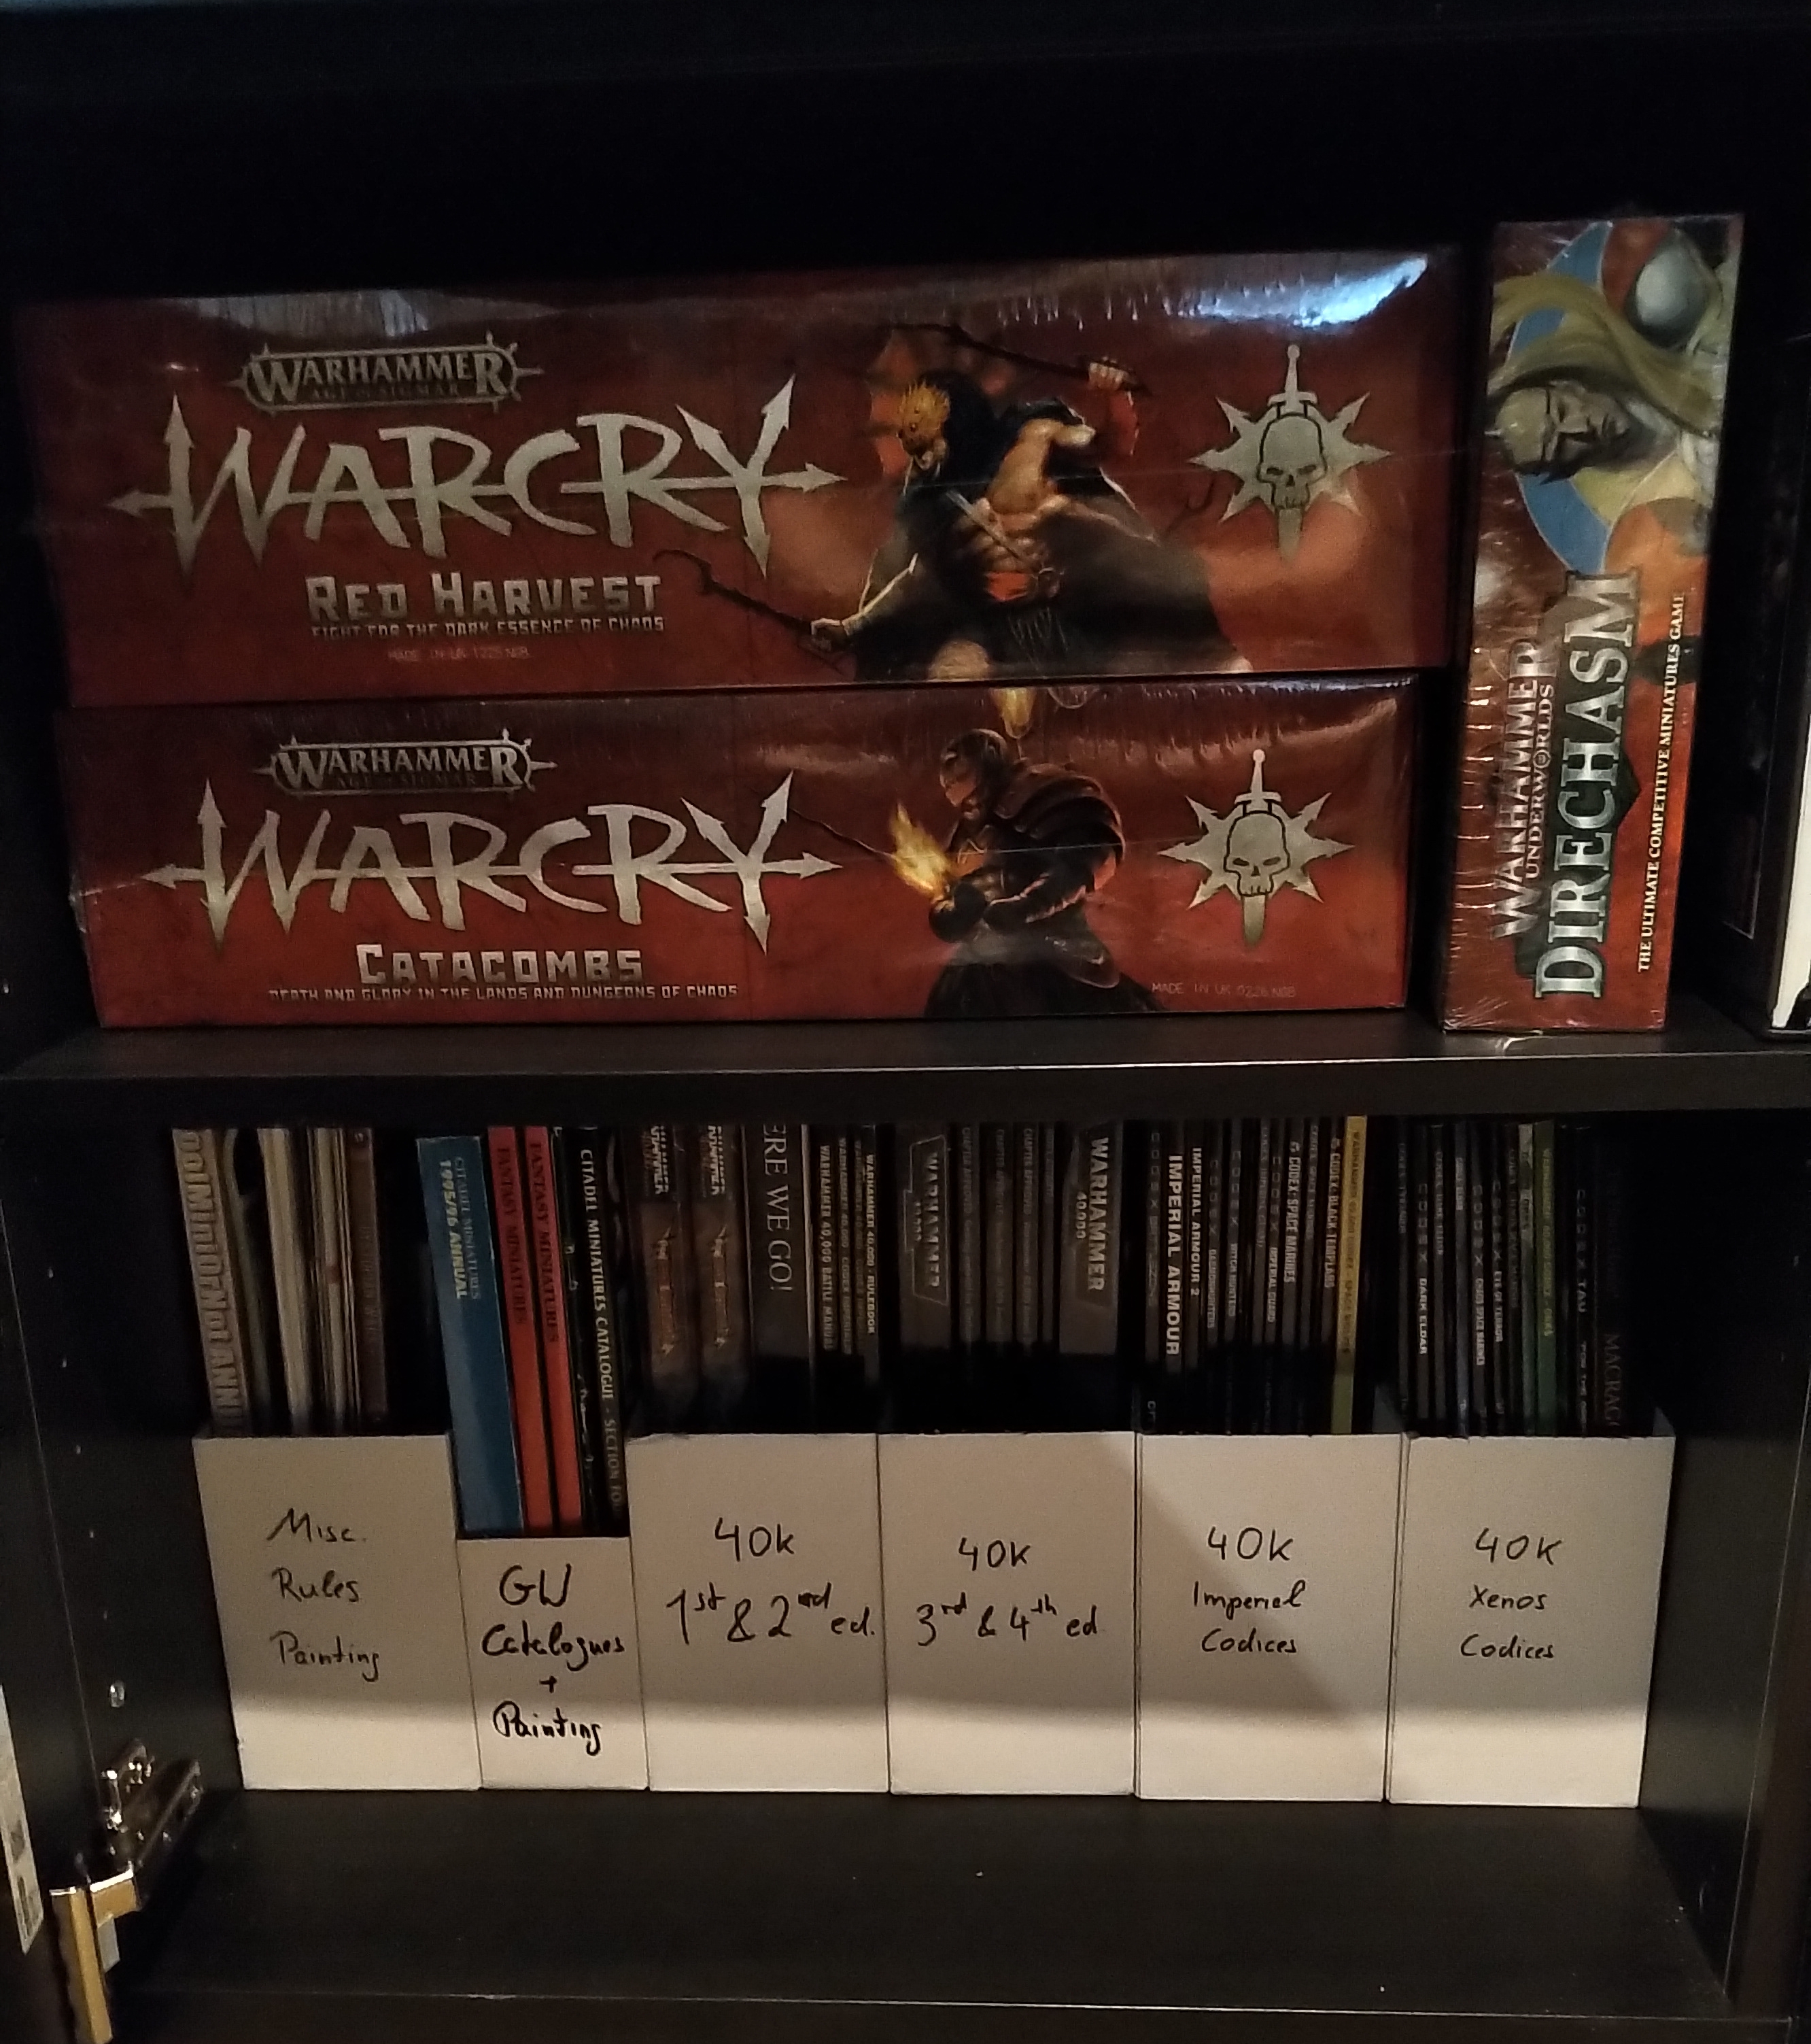
The side cabinet has three 3’ columns each with five shelves of visible storage and two taller shelves for hidden storage, plus a curved end piece. Tempered glass doors secured by strong magnets provide protection from dusk and kids. The glass cabinets hold skirmish game figures and anything else that doesn’t require the large trays in the main cabinet. The closed units on the bottom hold game books, magazines, game boxes and gaming accessories.


Main Table
The main table is designed to accommodate full scale games and act as a storage unit for larger components. The table top is 9’3”x5’3” in size with an elevated height of 42” for easy use in a standing position. The high stools provide a comfortable seating option without forcing standing players to bend over during game play. The surface is sufficient for large 8’x’4’ game boards with sufficient space on all the edges for reserve figures and game accessories.

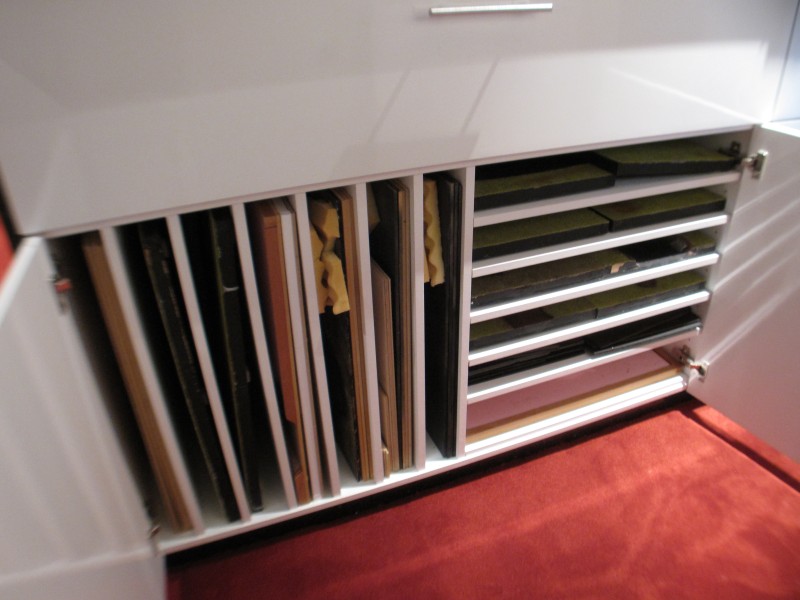
The table contains several custom compartments for the storage of larger gaming component and terrain. The top four compartments are designed for terrain tile storage (two compartments per side). Each compartment has three shelves that can each hold a 4’x2’ terrain tile up to 4” in height. The compartment doors tilt downward for easy access. Three of the four bottom compartments feature standard shelves with a 4’3″x2’3″ surface area each. These compartments hold construction material and longer term storage items. The fourth bottom compartment features custom vertical and horizontal slots for storage of smaller 2’x2’ terrain tiles (e.g. Mordheim, cityfight, space or water tiles).

A later addition to the room were four drawer units for active painting projects. They stand in pairs on both short ends of the main table. I also added a storage system for all the various bases needed, as well as devoted some cabinets to my growing collection of bits for conversion (in sorting boxes by army/era).


Historical Room
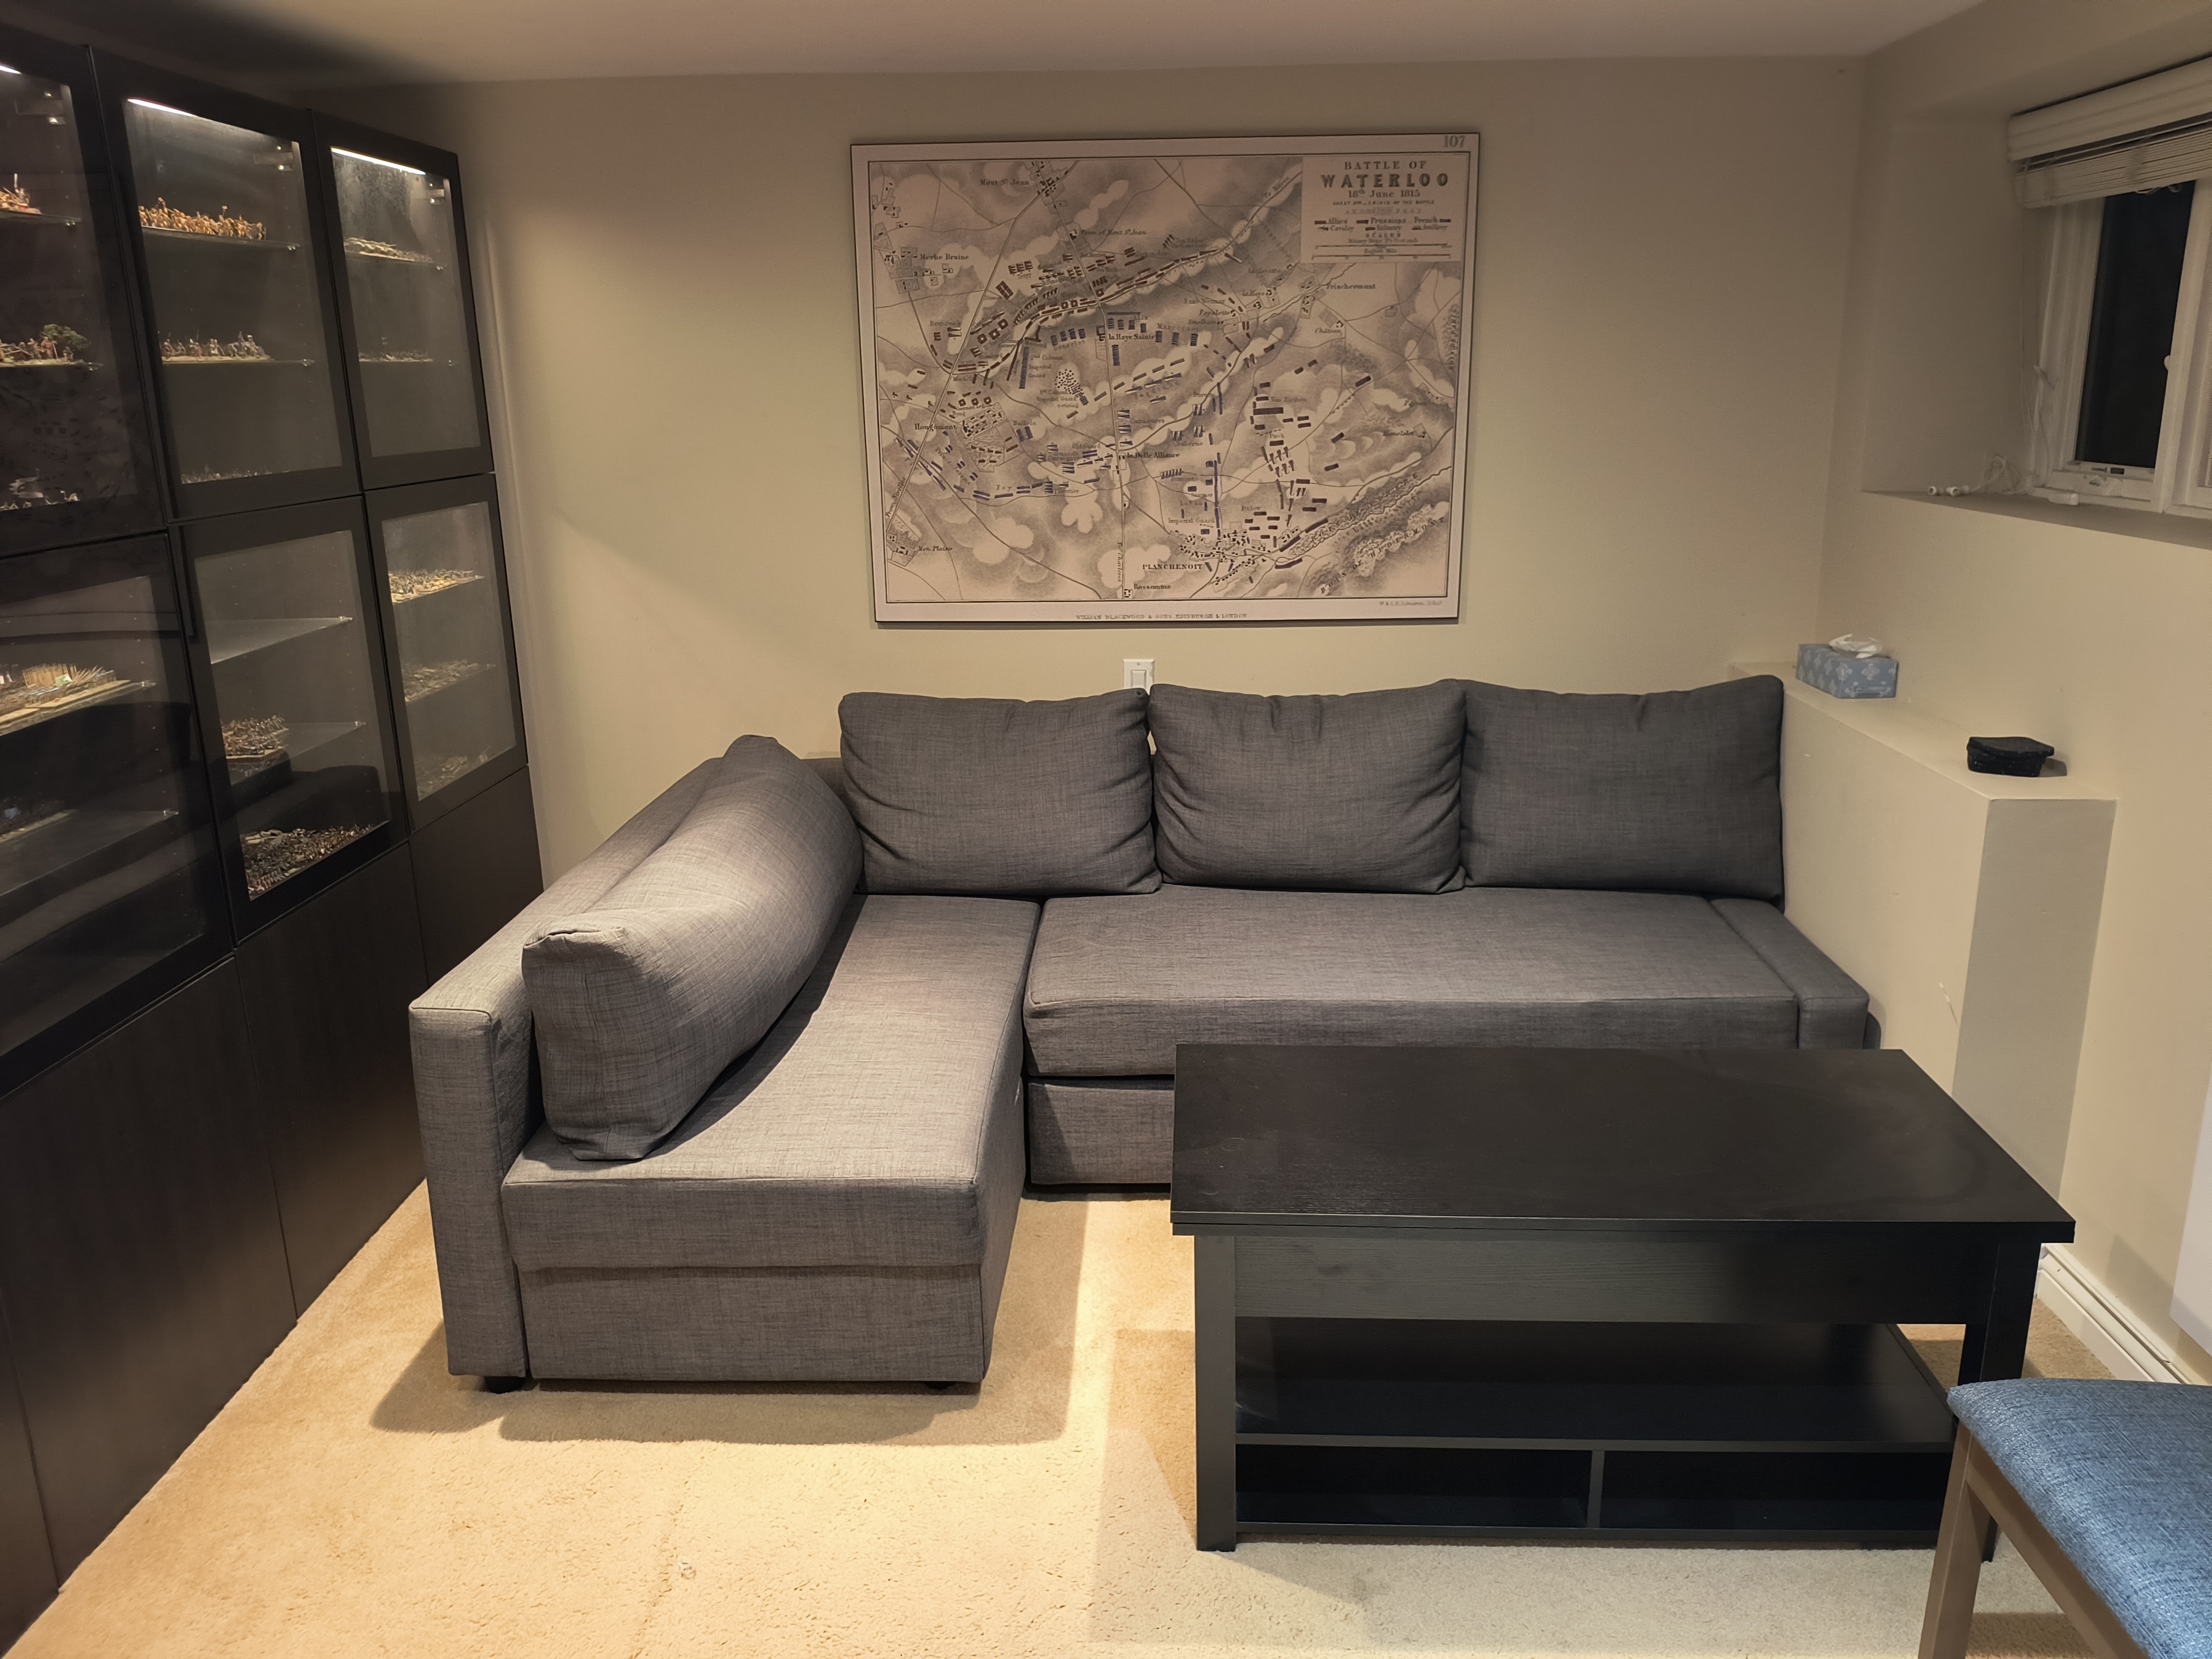
Even the ample display cabinet capacity of the original game room just wasn’t enough for my growing collection. I have therefore gradually expanded into adjacent rooms. The first of those is my Historical Room which now holds all my historical collections, freeing up the original room for fantasy and sci-fi figures.

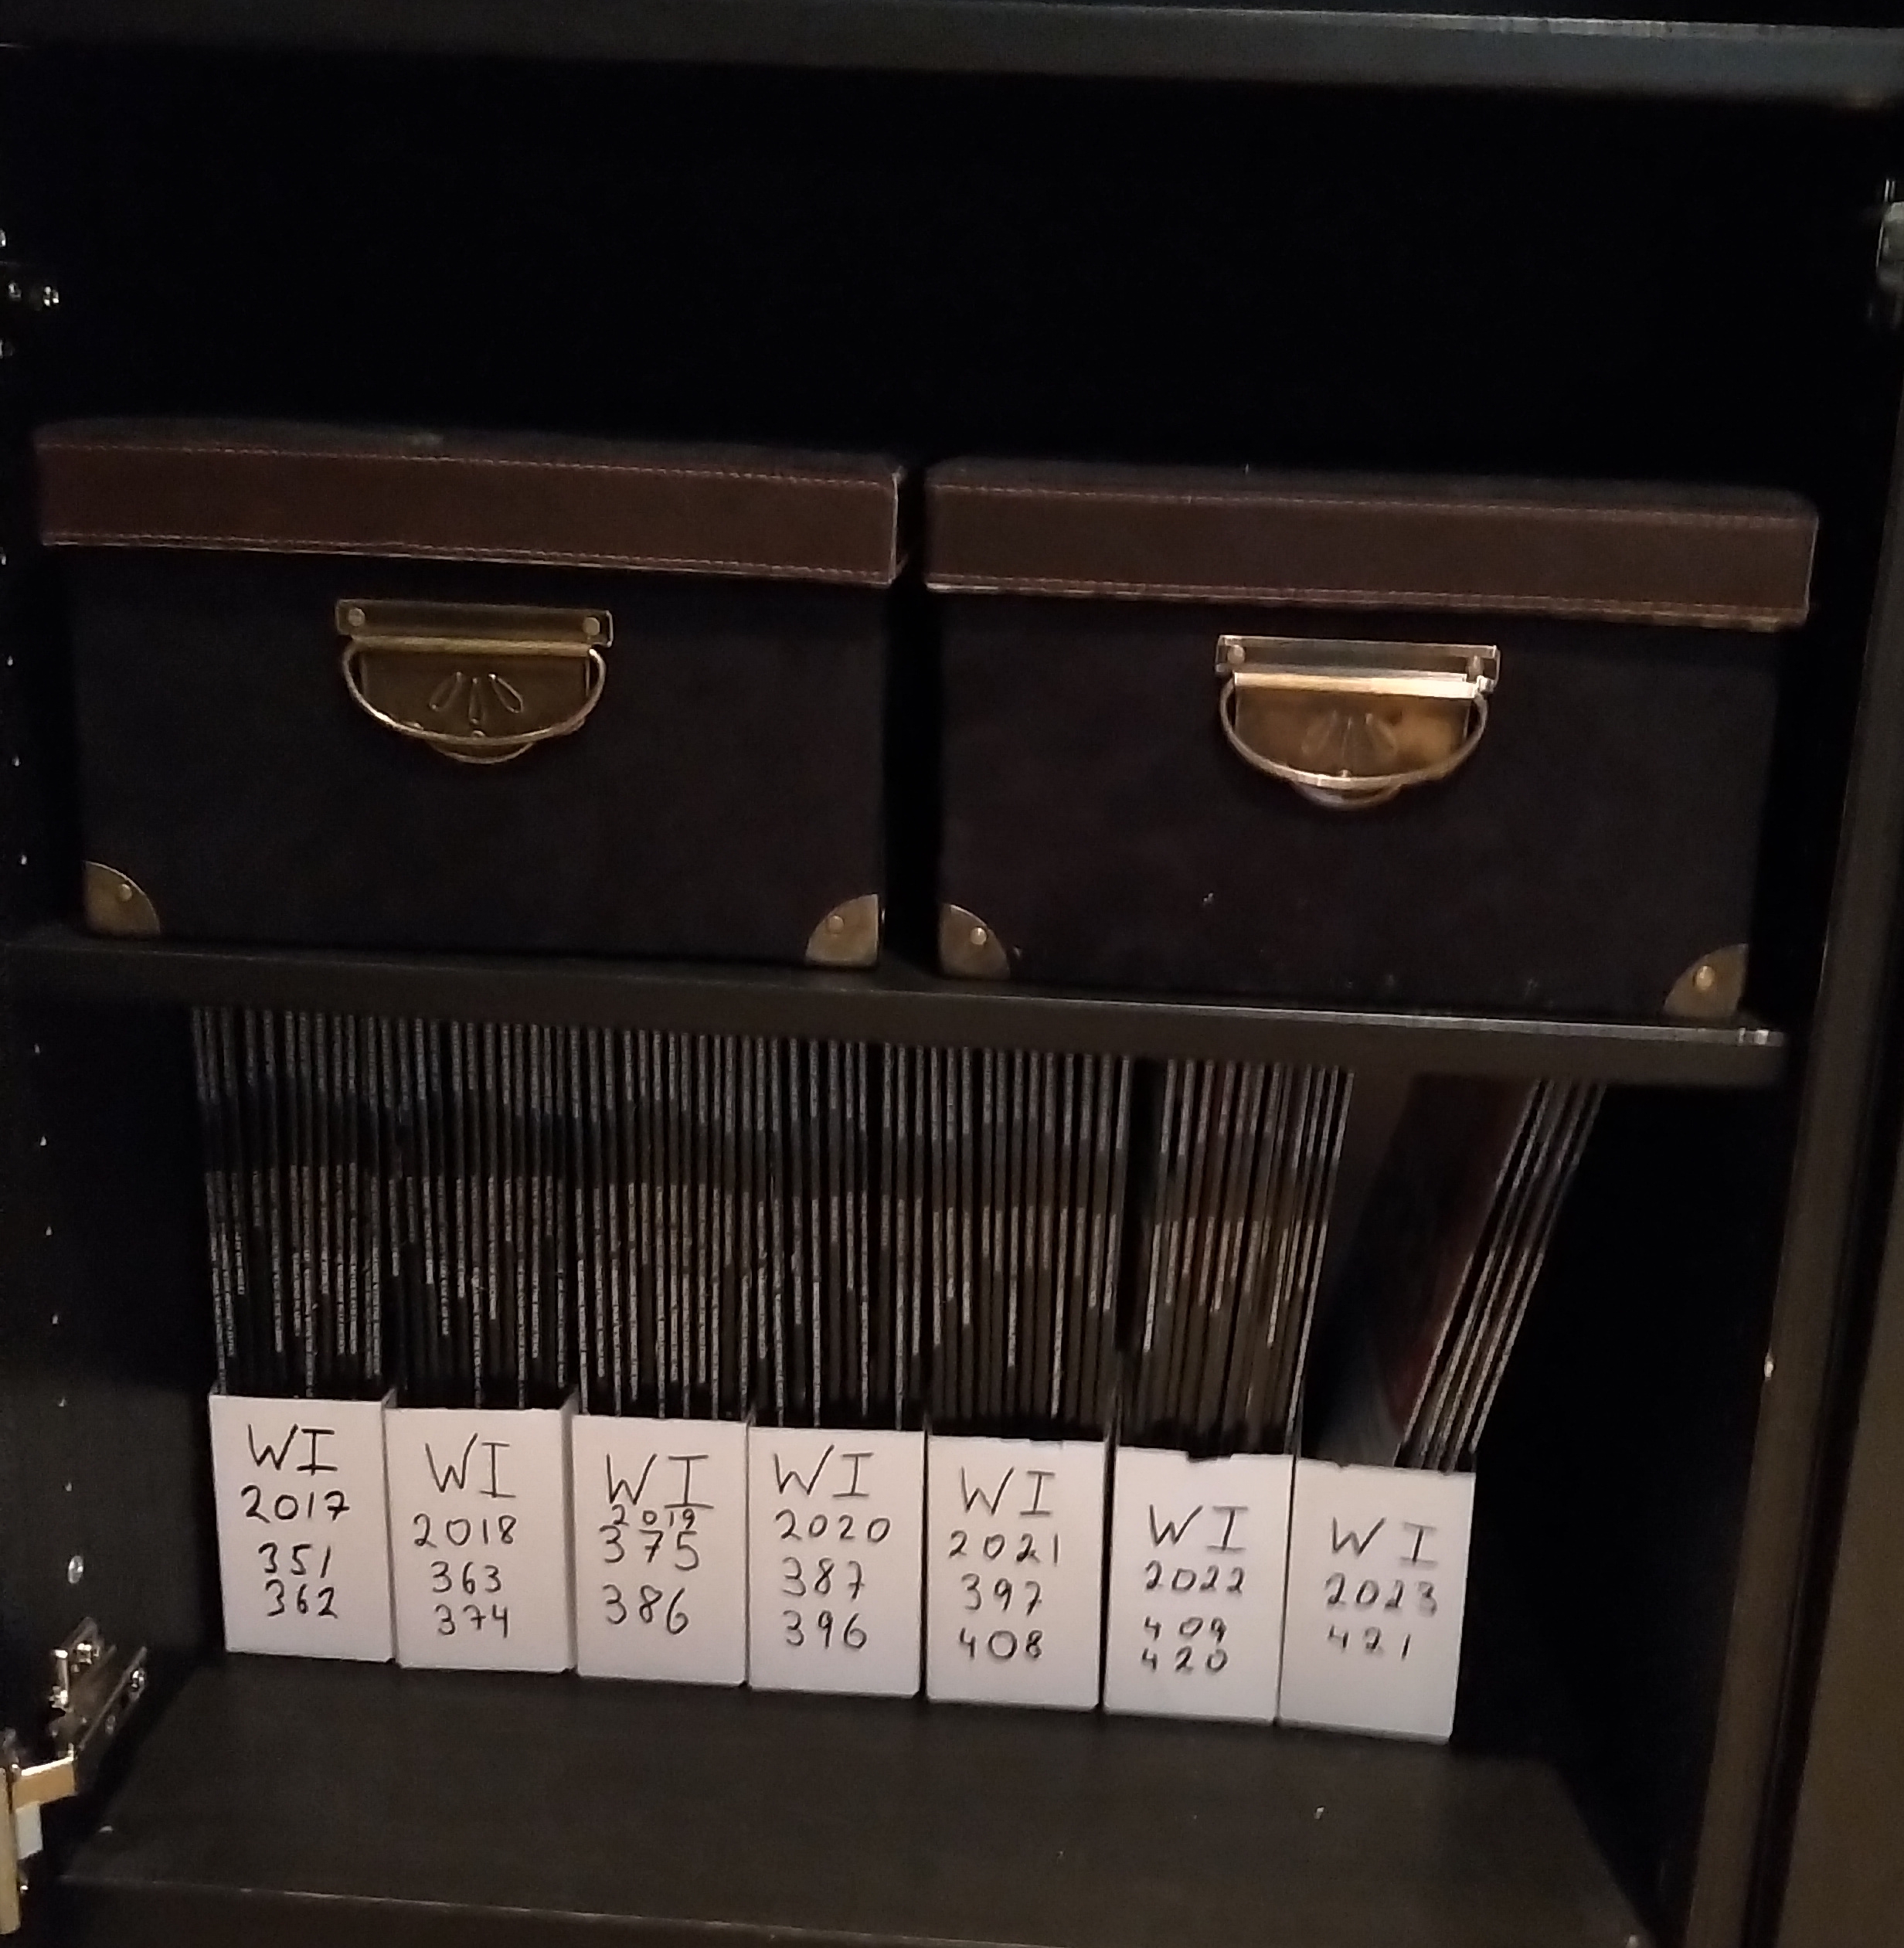
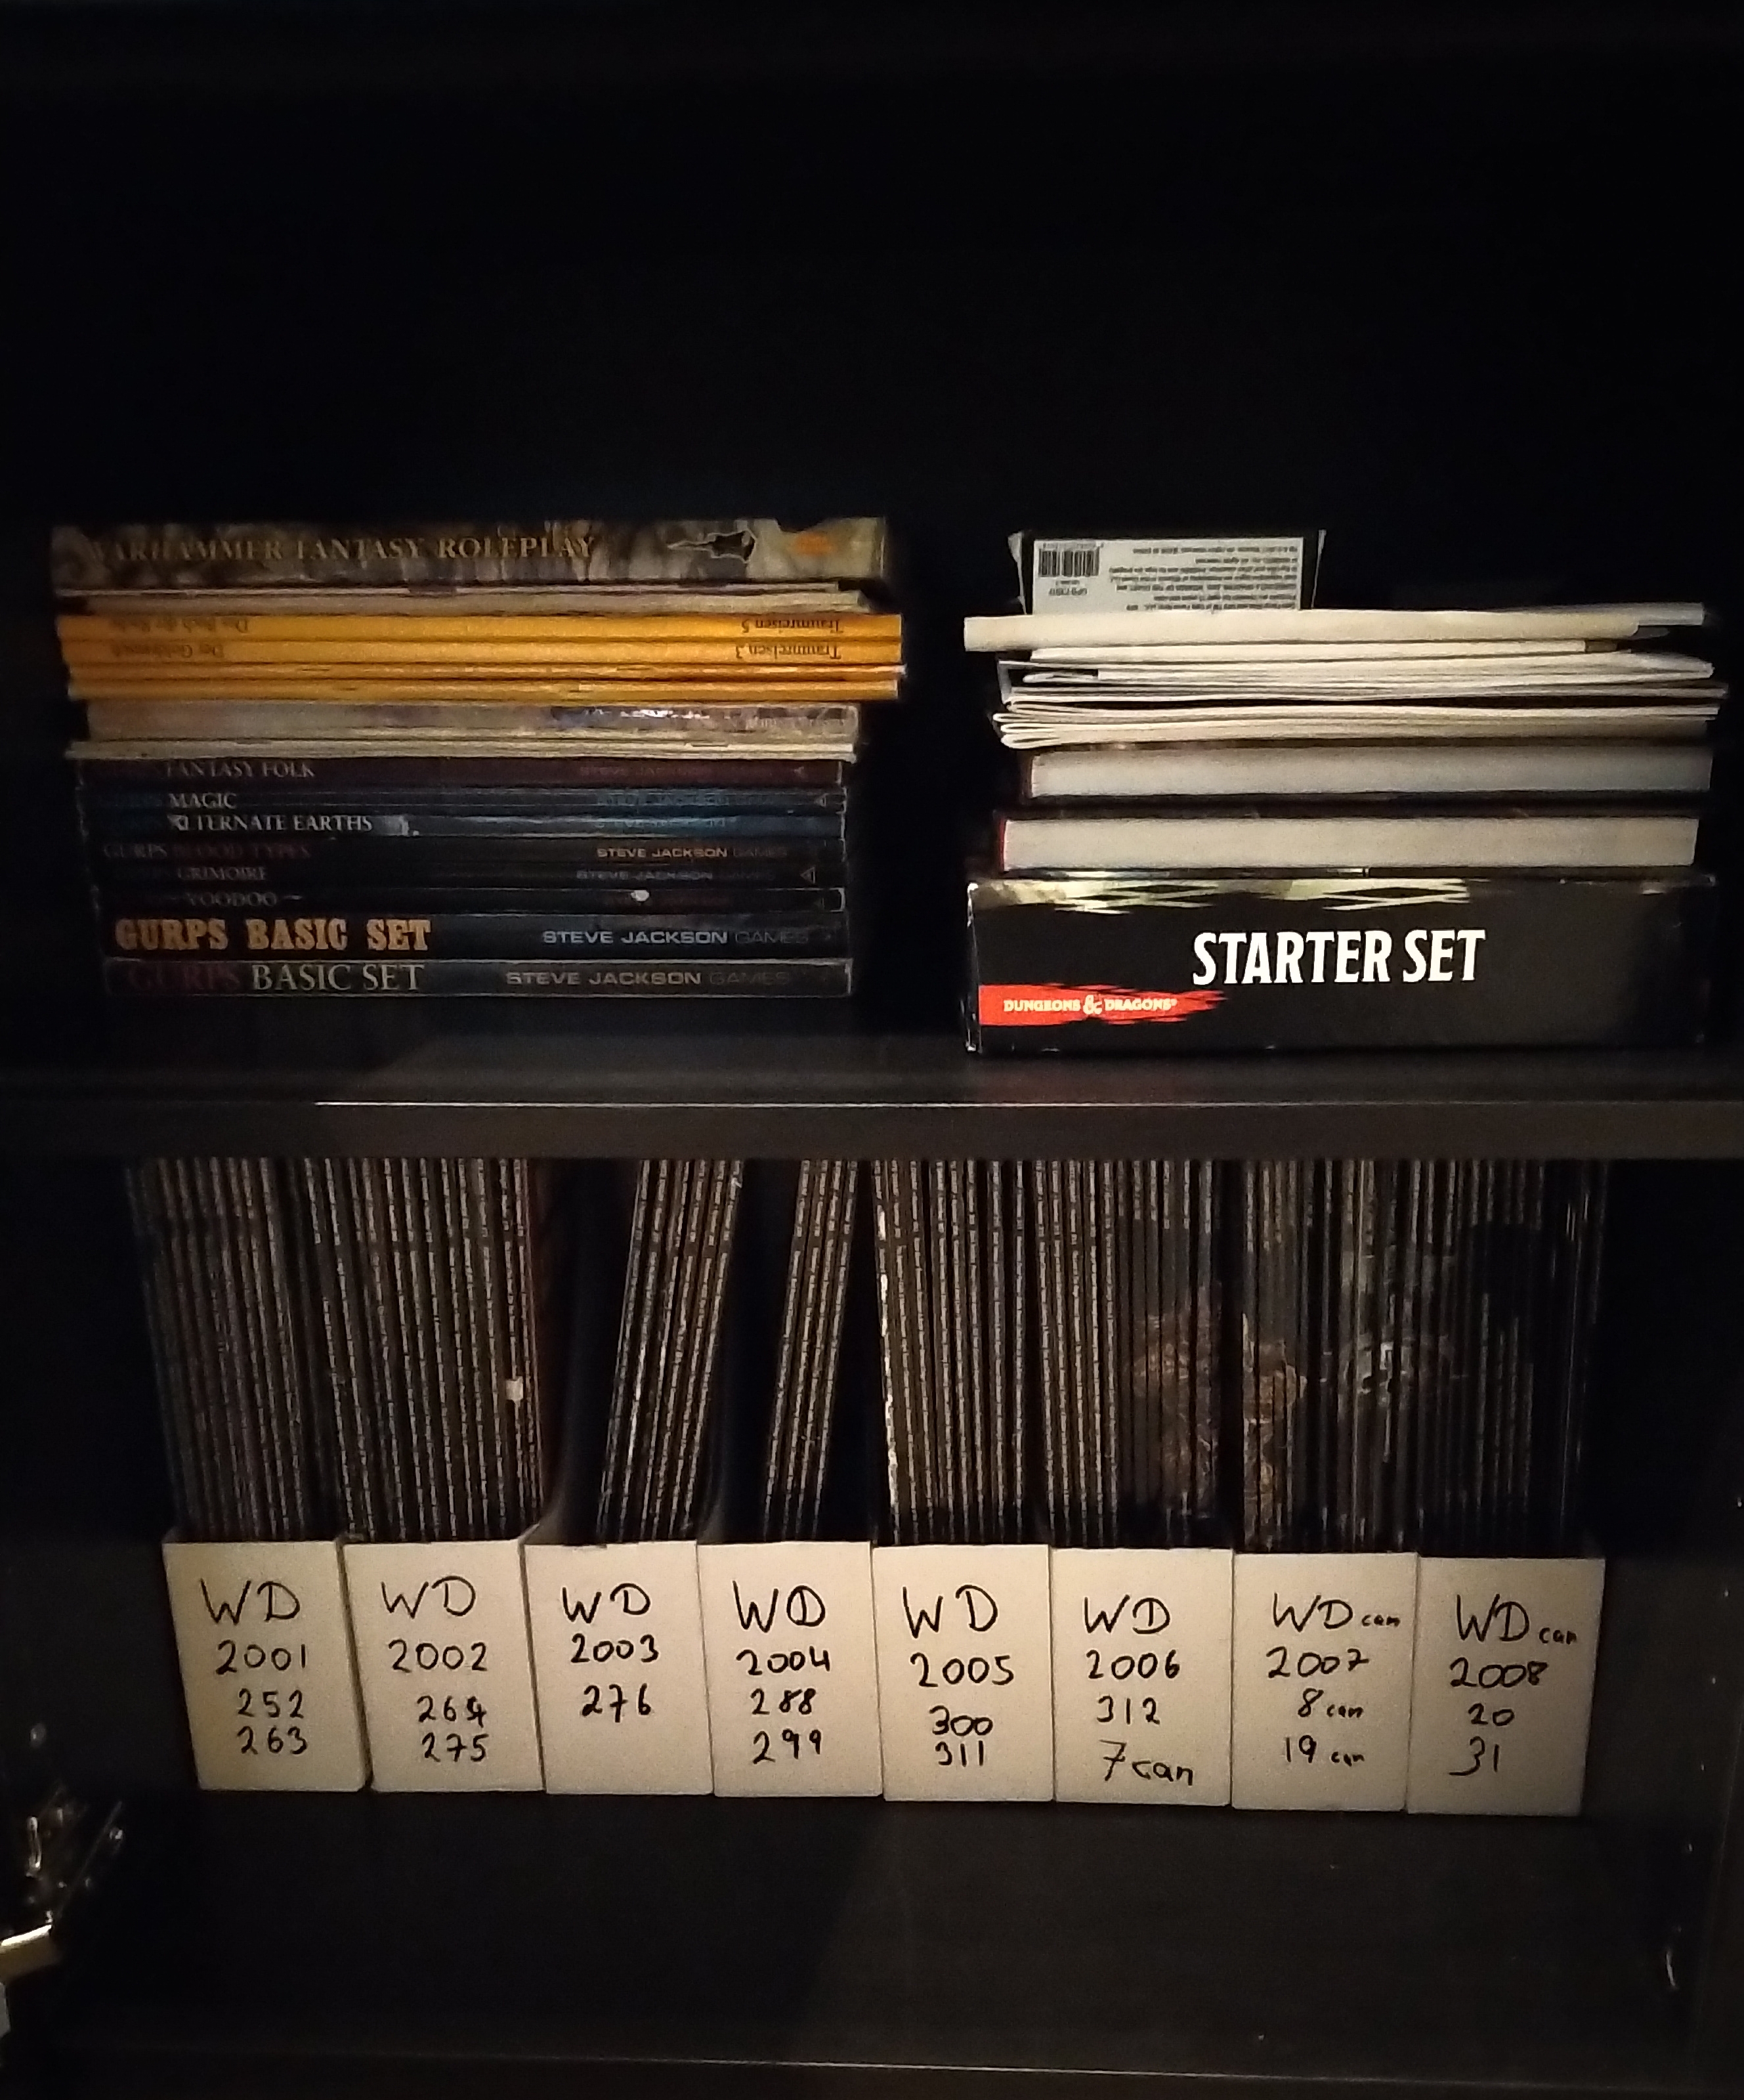
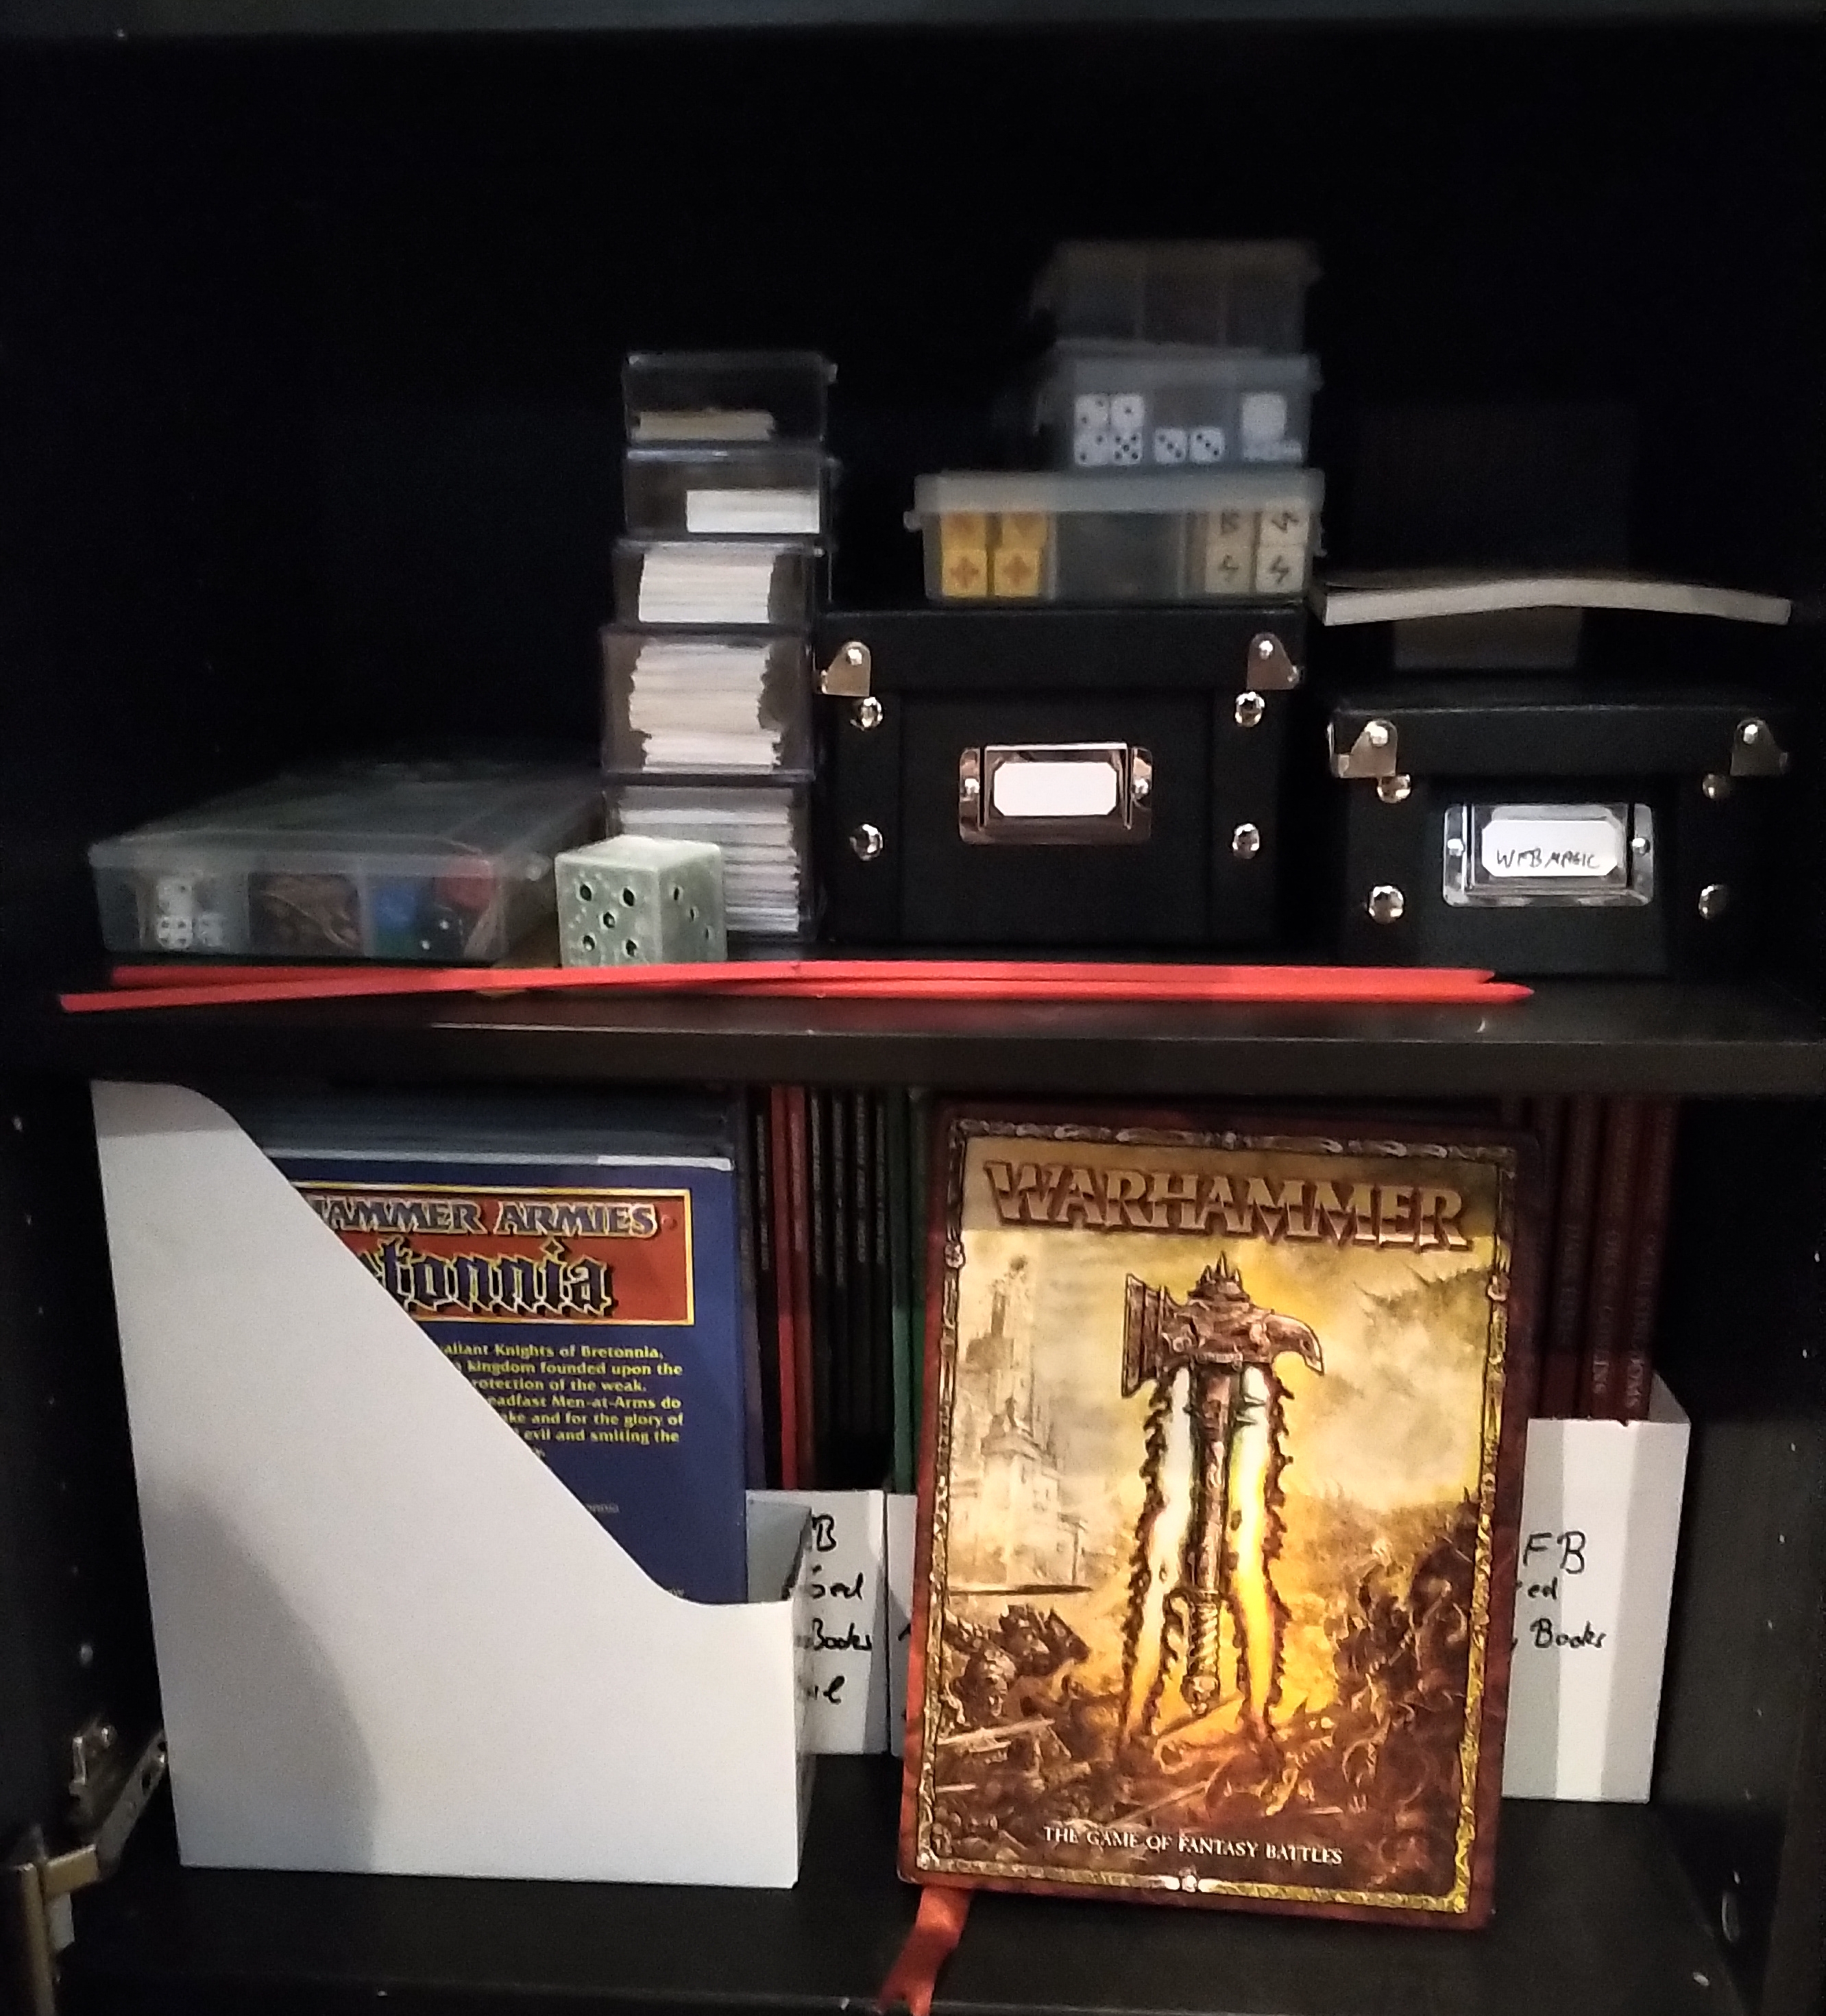
The room has a long cabinet with 18′ feet of glass cabinets. Each holds 6 shelves of 24″x14″ and built-in lighting. The bottom section of each cabinet hold various rulebooks, game boxes, and my collection of Wargames Illustrated and White Dwarf magazines.
 |  |  |
 |  |  |
 |  |  |
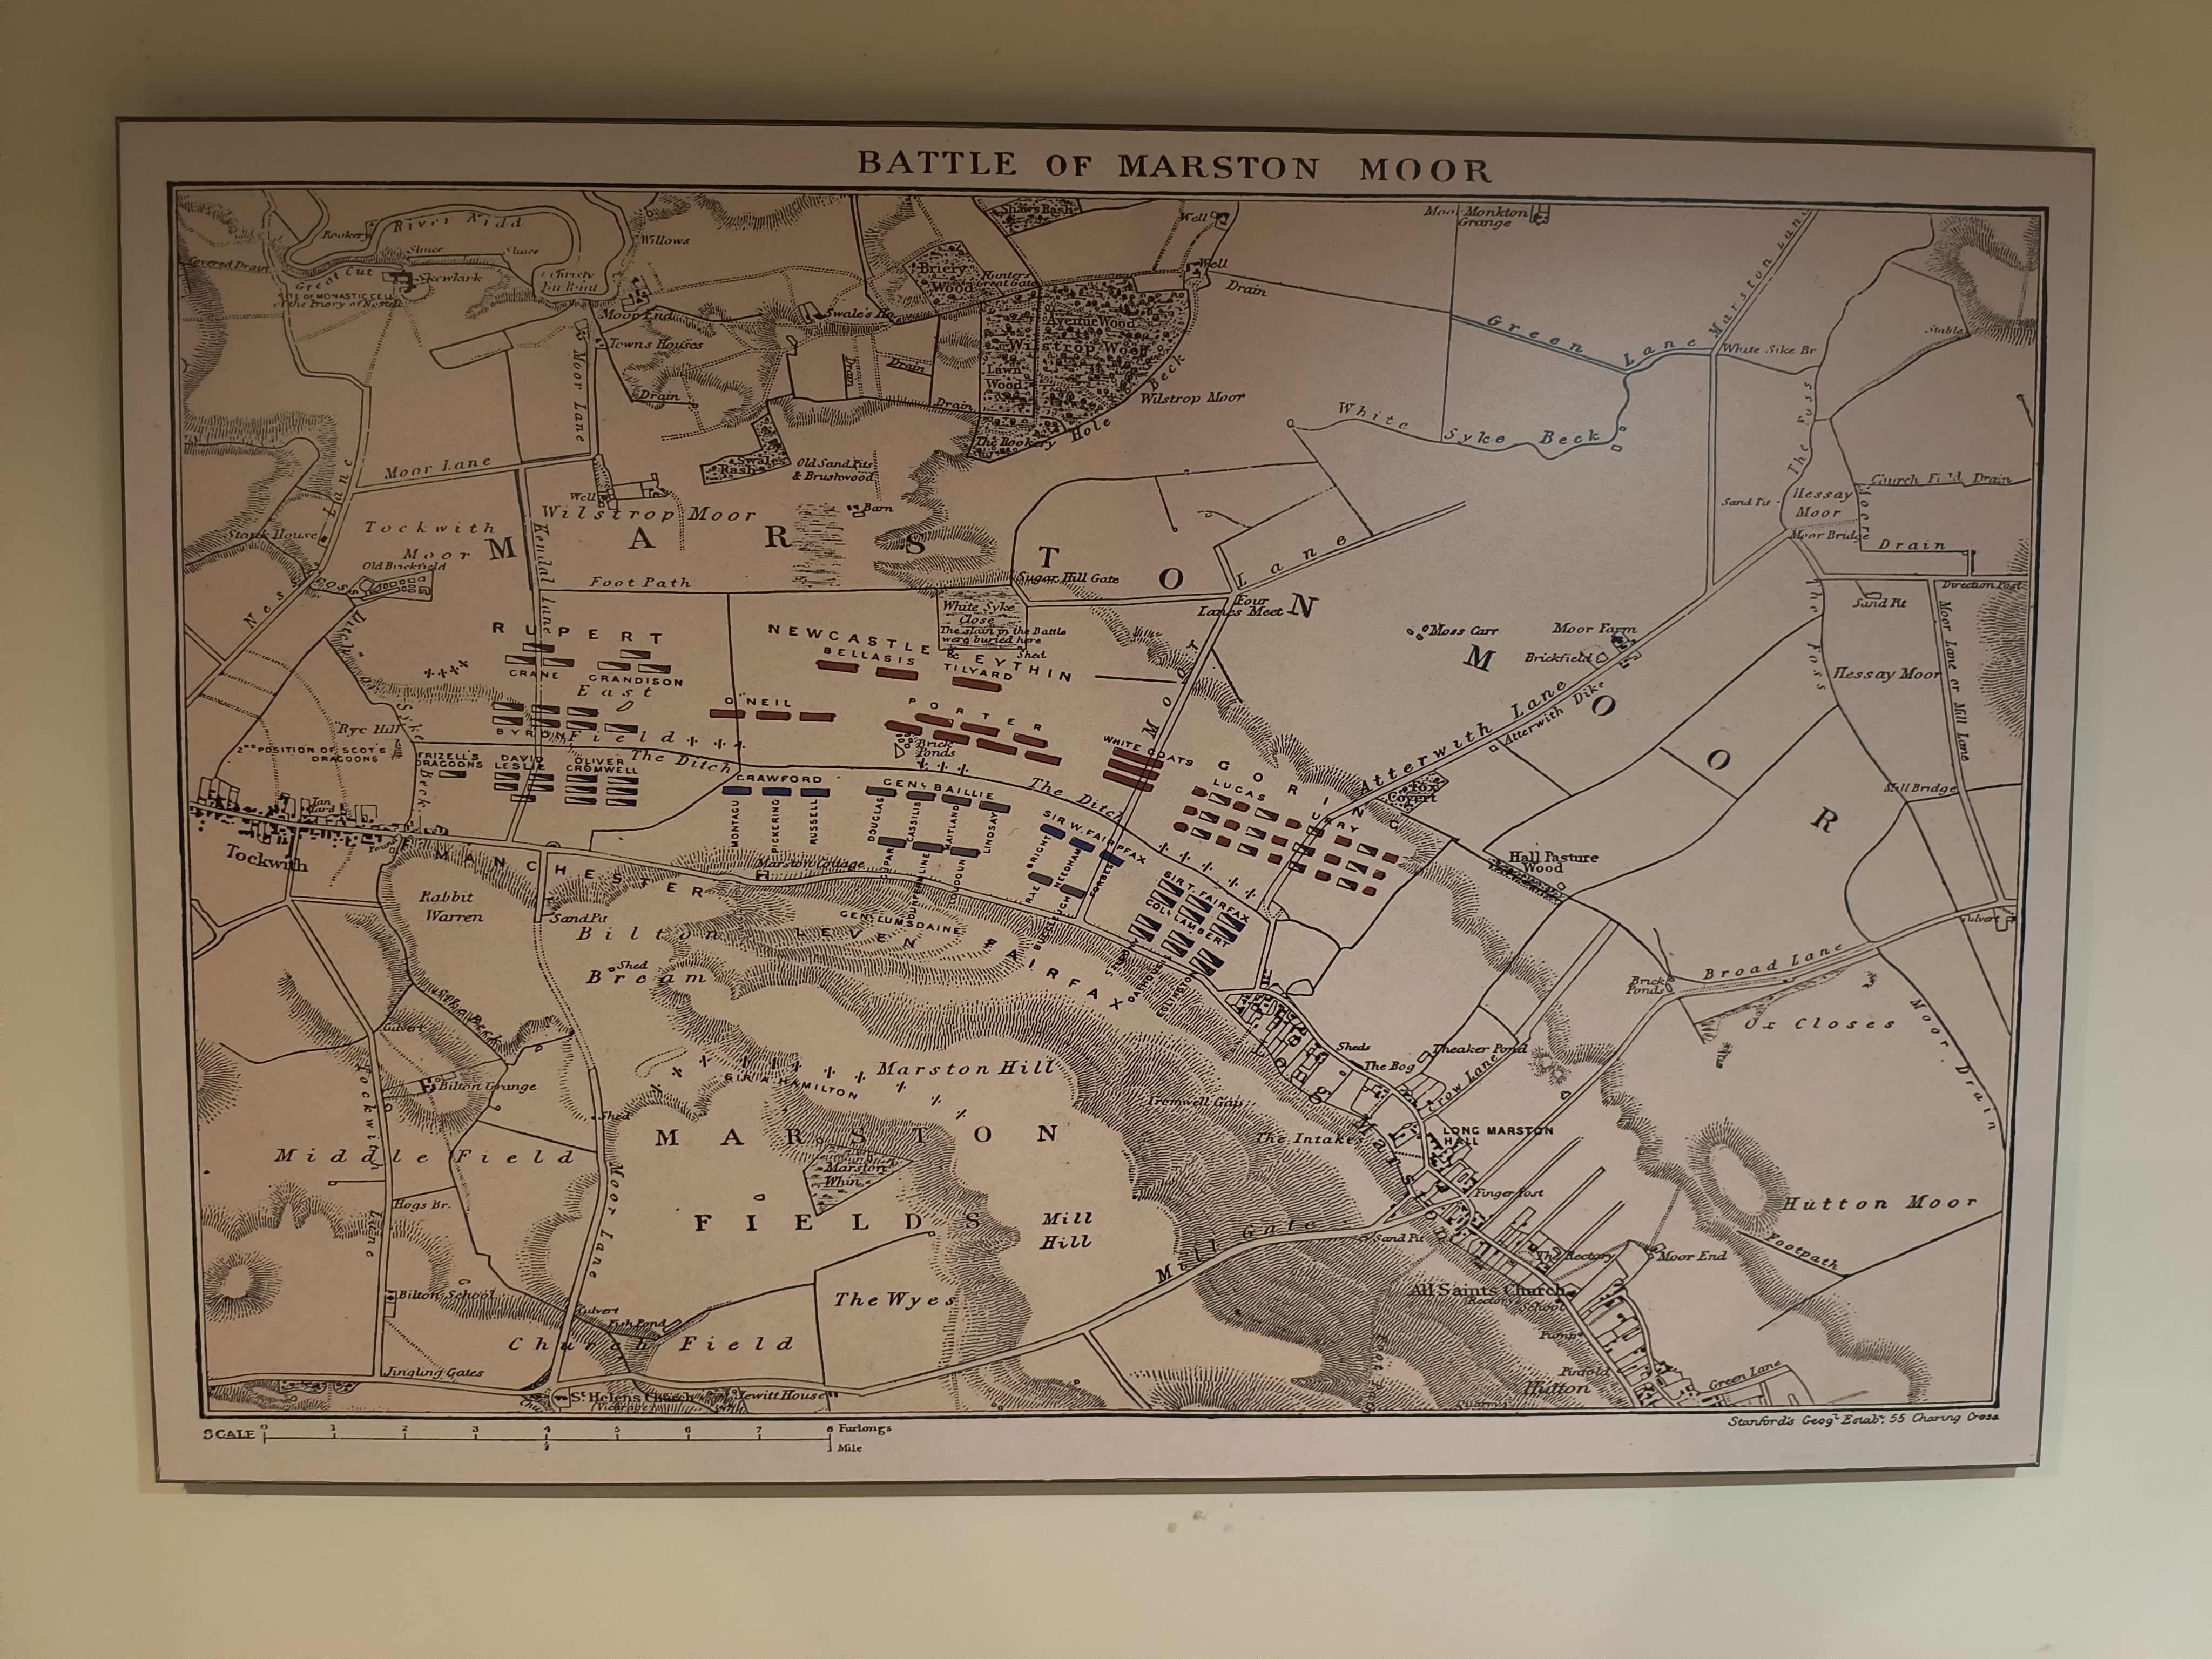
To anchor the historical theme, I commissioned restored maps and had them printed on large wood panels. They represent the three big battles on which most of my historical collection centers: Waterloo, Marston Moor, and Gettysburg. Each panel is custom-made to have a frame on the rear side in which a terrain board is mounted. This gives me a 4’x3′ board behind the Waterloo map and two 3’x2′ boards behind the others. The small coffee table expands into a 3’x3′ table on which they boards can be placed for sit-down skirmish games.

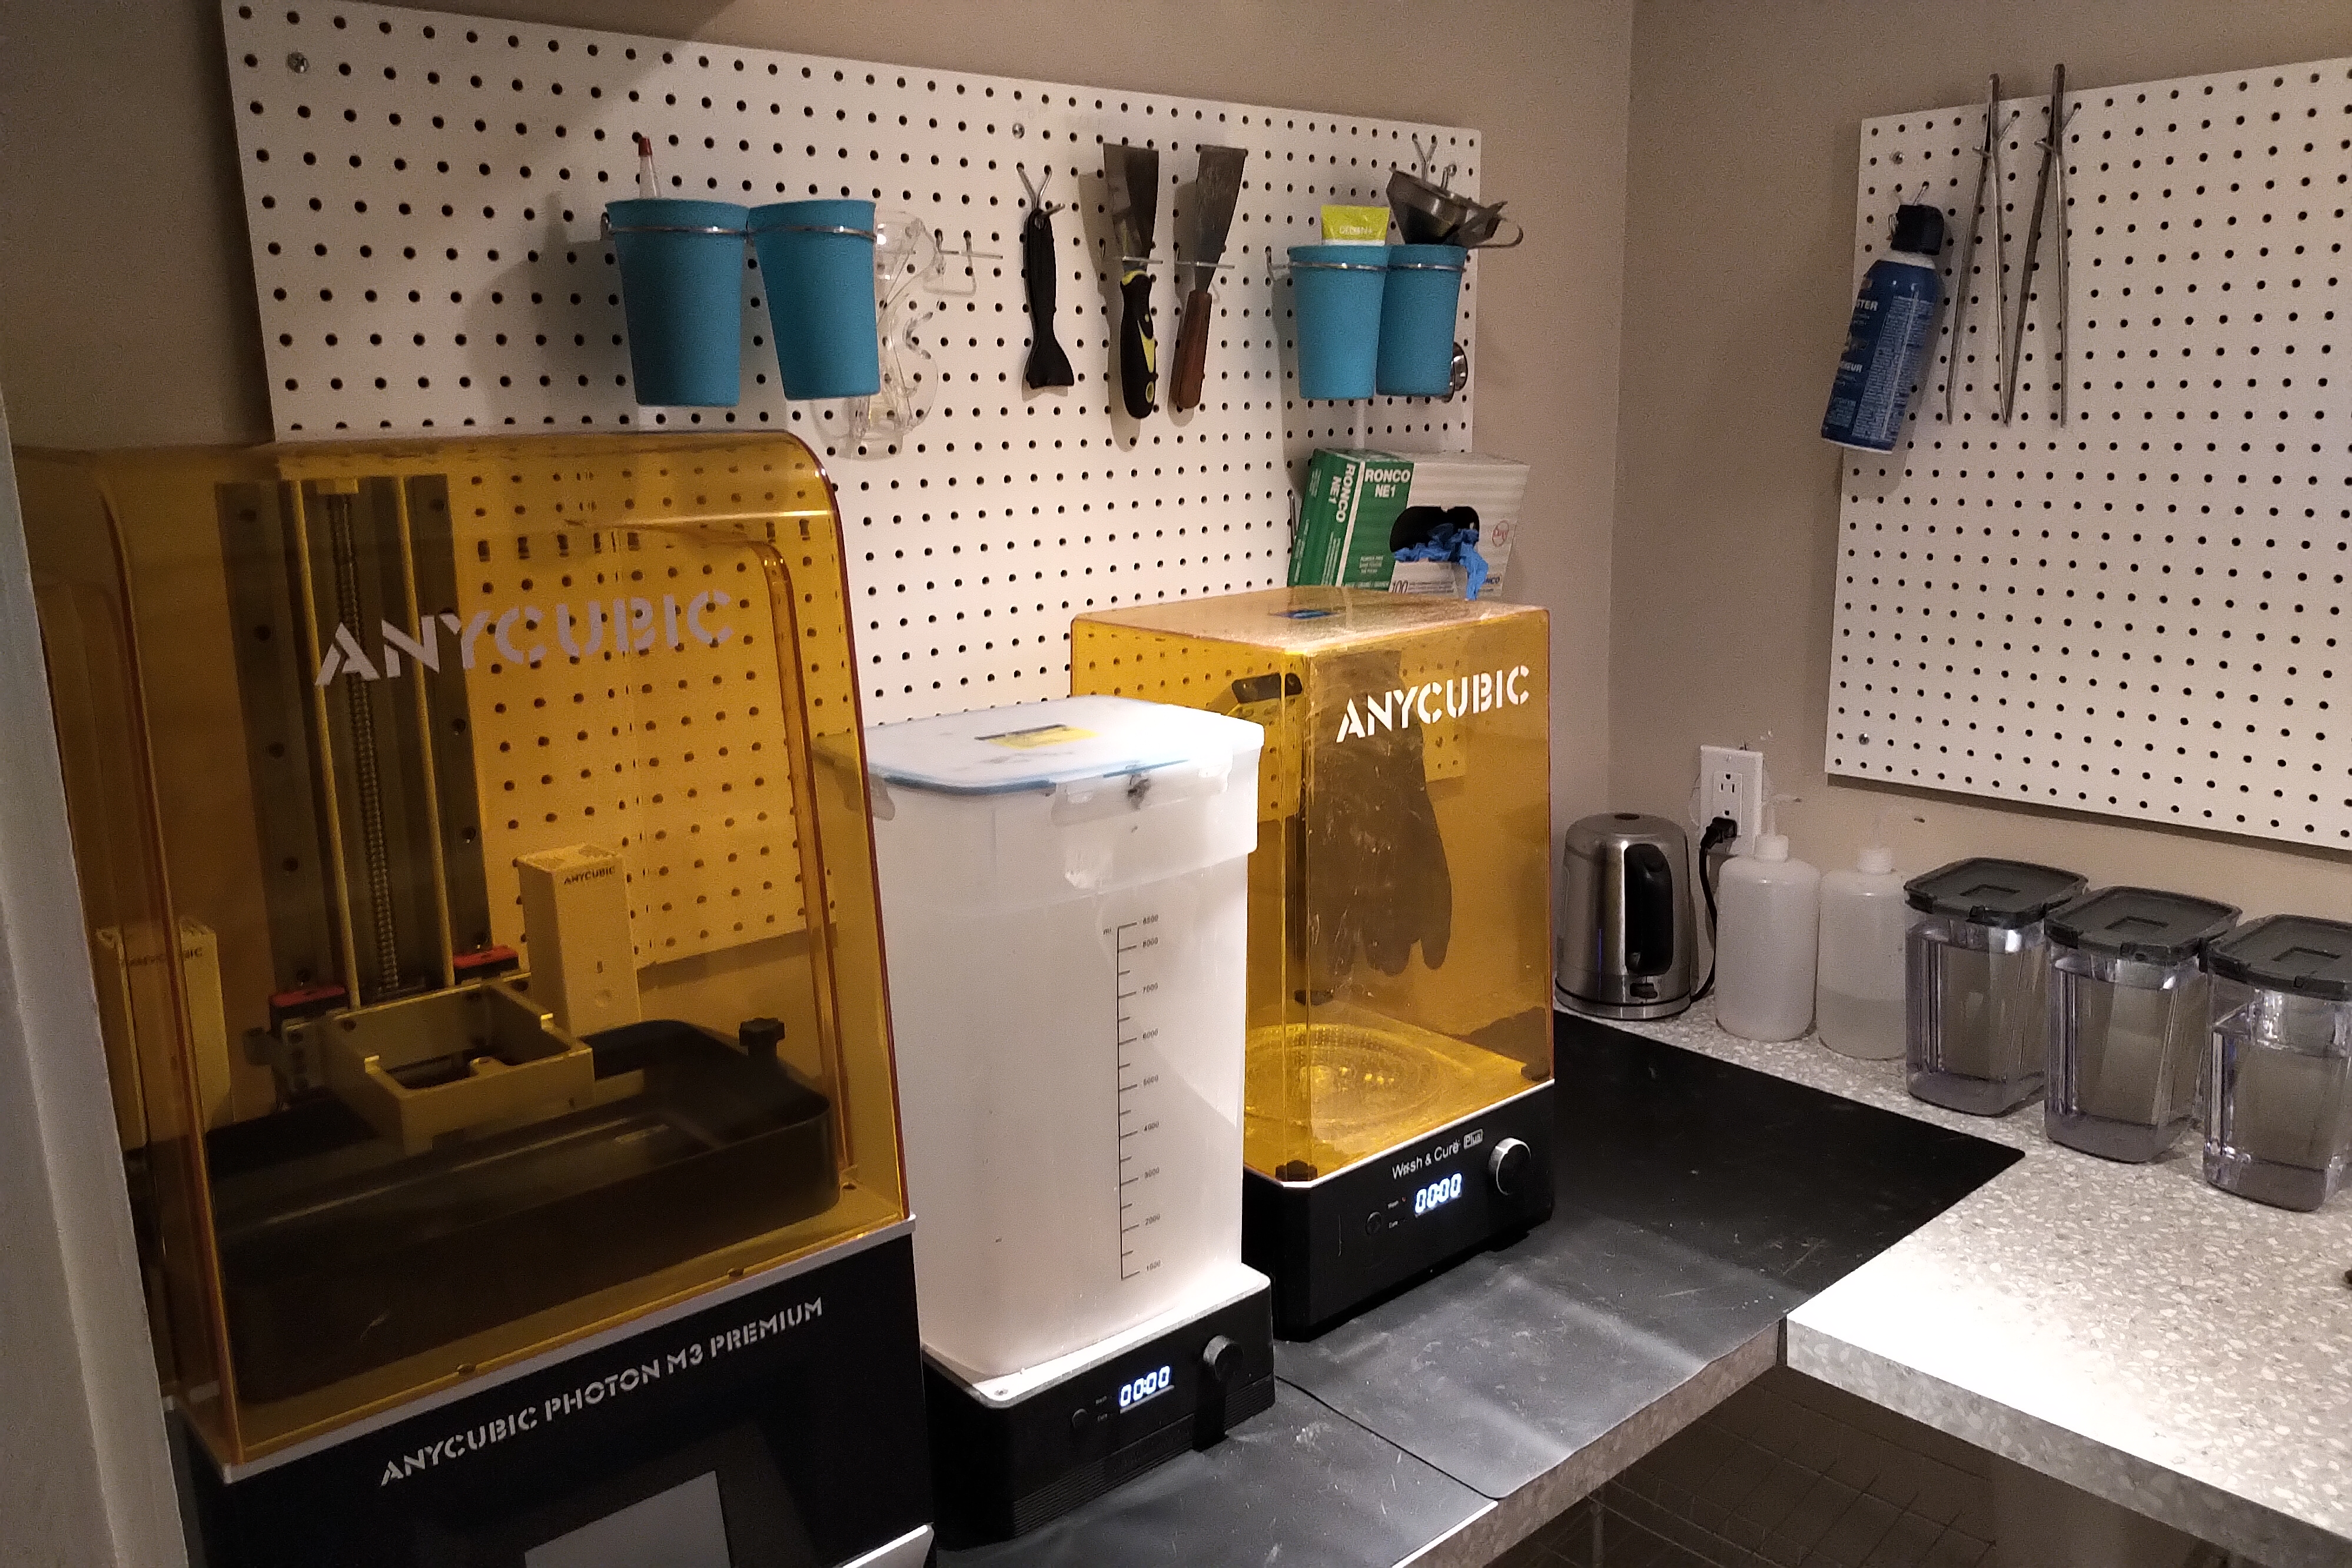
3D Printing Room
Like many, I jumped into the 3D printing hobby shortly after my original room was ready. Printing requires a separate, enclosed, temperature controlled, and well ventilated space, so that’s yet another room! I set up a print station for resin and another for FDM printing. The rest of the room holds a large shelf space for long term project storage.


65 replies on “Wargaming Room”
jaw… dropped…
Oh god!!!! This is Heaven!!!
When I die I want rest in that room!
Amazing work. How do the terrain tiles stay without moving?
They have little “anti-slide” rubber feet under them. Combined with the weight of the tile itself this makes them super stable. The tiles are 1/4″ MDF base, 1/2″x1/2″ MDF framing screwed on top of the base, interior filled with 1/2″ foam and spackled out. Net weight is about 2lbs(1kg) per 2’x2′ tile.
This is absolutely spectacular!!! I hope 1 day to have some a grand game room 🙂
The paint station alone made my jaw drop. By the time I saw the area just for the modular table pieces, I was in heaven
This is awesome. How much did it cost you?
That’s like asking a woman for her age… 🙂
Best. Room. Ever. I often daydream about a games room, but that really is beyond my imagination.
Your wife must be a very tolerant woman!
Brilliant. Whilst we have a gaming room it’s nowhere near this awesome. I think when we move house our main criteria will have to be that it can fit a 9ft gaming table in it!
Lovely. How did you make the paint stand?
It was custom-made, like all the other furniture in the room. That said, it’s one of the easier pieces. Each tier is 1″ wide, so you build a step out of 1″ thick plywood of 1″, 2″, 3″, 4″, etc. lenght. Nail it all together and then laminate everything (the laminate all furniture in the room is heavy duty kitchen laminate with a mottled black pattern (resistant to modelling activities and the odd paint splatter). Lastly, drill in different diameter holes into the top step as brush holders.
[…] to me this weekend that made me realize I have a long way to go. Do yourself a favor and check out this guy’s setup. This is where God would war […]
It certainly beats a blanket over the kitchen table!
Thanks for sharing something of the design and process too.
You. Are. My. Hero.
This is an astonishingly nice hobby centre you’ve created for yourself! I will hopefully soon have a much modified version of a room that could only dream of being like yours! Well done, and beautiful work!
Awesome room!! How big is the the room?
Thanks, Lee
About 20′ (6.5m) by 30′ (10m).
fantastic! You made my pants wett with you great room! In my new/next apartment I’ll have an extra room for gaming too, but it will be al long way to go, to got such a wonderfull room! thumbs up! hihi
That’s an absolutely fantastic piece of work, sir!
It must be a bitch to keep clean…
wow…
You win
Ganz grosses Kino! 🙂
Oh god, where do you live?
you are a god!!! I have the garage all to myself, and I like my gaming room, but yours…man..you rock. Nice job. I wish I could be in the house. I have like 8 castles, 15,000 28’s, too much terrain, and I am out of room…and the wife wont let me invade the house. Well, I sorta already have. I am “displaying” some of my very best wargamming buildings in the bedroom…but that it it. Although she is letting me make a Alamo Diorama incased in Glass for a coffee table., but I have to buy a new couch to go with it.
Cheers,
Tom
If I win the lotto, I will call you!!
You’re bookmarked in my favorites folder as “My Hero”
I’m about to embark on a similar, though more modest project, before I lose the room to a potential future nursery… I was hoping I might be able to ask you for some advice on construction materials and techniques?
Wow, very nice. Thank you for sharing the thought process around the design as well as the pictures. You have provided some great motivation as well.
Hello from France,
Not too diffult to play on the table ? Not much place for legs.
But it’s really tremendous ! BRAVO !
Greetings,
I love the gaming room. Any way to get the blueprints/ diagrams for it? What about your custom suppliers website links?
Wow! That is all.
[…] Who made an amazing game room for table-top wargaming and miniature painting. You can read all about his room here: https://wargamingworkshop.wordpress.com/gaming/wargaming-room/ […]
I sold my last house strictly on the basis of the studio we built, double glazed heated and triple skinned for winter warm. 10ft by 25ft there was also a store room built in you could only access from the inside for added security. Yours however takes the biscuit, the paint area will re-appear in the next studio we have planned, which will sit opposite the blacksmiths forge also being built. Should be completed by next summer. Here is the rub the folks, I have to stop my wife Victoria spending on new armies at the show’s. Wont put any pictures up yet but will do so with a weekly blog once we get the project underway. The last cost just under 4k to complete this will be done upon a much smaller budget as most materials are recycled. Again my hat is well and truly tipped to you sir, and the appropriate sideburn tugged.
….Um…. Wow ! …..uncharacteristically speechless !…. when I grow up …. I want one of these …
…the room that is … and a wife who will let me do this ….
[…] As a result I started wondering what would be the perfect Man Cave for a wargamer like me. I’ve found on the internet some very nice example of War rooms: – http://greenstuffandbrass.blogspot.fr/2011/04/recent-napoleonic-game-part-2-game.html – https://wargamingworkshop.wordpress.com/gaming/wargaming-room […]
[…] amazing stuff, check out this post from the Wargaming Workshop. […]
Absolutely incredible. I’m totally stealing at least a dozen ideas directly from this design when I build out my games building. Great work!
Best game room I’ve ever seen, mine is WIP but this is another level, pure awesomesauce
[…] Related article here: https://wargamingworkshop.wordpress.com/gaming/wargaming-room/ […]
I was wondering what the dimensions of the room are and if there’s anything you’d do differently now. I’m in the planning stages of my own office/game room.
why you could not be my daddy 🙂
Quite simply brilliant. That is the most astounding room I have ever seen. It would be such an honor among those inclined to own such a haven.
Nice work, where did your lovely glass door cabinets from, the ones in figure 8?
So beautiful…
Should have sent a poet…
Any chance of higher resolution architectural diagrams
That is an inspired setup you have there. Very impressive.
Wow. Just wow….. I’m in awe! Sooooooooooo jealous! lol
AWESOME ! I actually think i will build my own room… when i leave my school and i earn money…… i want to build this in my flat. i think i can rebiuld your room? but with different colors!
YOU ARE AWESOME !
you Sir, are a flippin genius!
[…] tabletop gamer Helge, who runs the blog Wargaming Workshop, has built the ultimate wargaming room. The spacious, carpeted, and well-lit room is big enough to […]
[…] creator, Helge, describes the process of crafting his house-bound battlefield on his blog, Wargaming Workshop. He starts by outlining the needs of the […]
Dude!!!! No Fridge???? Why??? 😉
What games is this for?
[…] <Quick update time> – I came across this online; a fantastic example of a gaming room which meets many of the requirements I have here! https://wargamingworkshop.wordpress.com/gaming/wargaming-room/ […]
First of fantastic gaming room and amazing pieces! Second what do you do for a living and are they or you hiring because you must be doing pretty well income dept.
What are you? A Millionaire? The ONLY way I could afford something like this is if 1) I won a Billion Dollar lottery 2) Bought/ built a house with a room of suitable size 3) Buy everything needed to put all this together!
awesome job and will follow your lead on my own construction… I believe I have the worlds largest collection of painted minies, so I may have to double the size..lol
And now i just wnna cry
Can I get a clean, scalable version of the diagrams you loaded? I am building a gaming “barn” at my retirement house, and I would like to mimic these ideas, but in an English Pub or Gentleman’s Library/Club finish, I love this clean look, but I am looking for more of an antique or vintage look for my own room. My current man cave/game room is about 16’x18′, but no painting or projects allowed, only display and gaming on temporary tables, then back to media room afterwards. All projects/painting are consigned to the garage (Hoarder’s Heaven for Wargamers)
thanks for sharing
After using your room for a few years, if you did it again, what would you different?
That is a truly amazing hobby room!
Absolutely gorgeous! I’m trying to figure out how to do something similar in one of our rooms, it’s not quite 20×30. But close. I showed my husband and he also loved it, great area to keep all the gaming stuff. At this point now we have a separate area for painting and such, mainly as we do that in our sitting room with the tv and all.
This is the coolest thing I have ever seen. I wish I could do something like this. Since my home is ruled by cats, my miniatures have sadly been relegated to wire shelving in the garage.
As a matter of interest what are the dimensions of the room this is set in, please?