I participated in our local Saga tournament this weekend at the Abyss Game Store. We had 16 players competing for glory with armies spanning the Age of Vikings and Age of Invasions. Both ages received significant adjustments just a few weeks ago, so there were a lot of new combinations to explore for all players. My schedule was tight before the event, so I only got in 3 practice games with my new Sassanid army. Having played only a few enemies and just one of the tournament scenarios – another one very wrongly – I had some trepidation going into the event…
Sassanid Army
I painted my Sassanid army specifically for this tournament. The figures are all metal from Aventine except for the 3D-printed baggage markers. While I only had a few weeks to paint them, I tried to push myself to do this colourful culture justice. On the day, it was composed as follows:
Warlord on Cataphract Horse
6 Hearthguard on Cataphract Horse (1.5 points)
12 Mounted Warriors with Composite Bows (1.5 points)
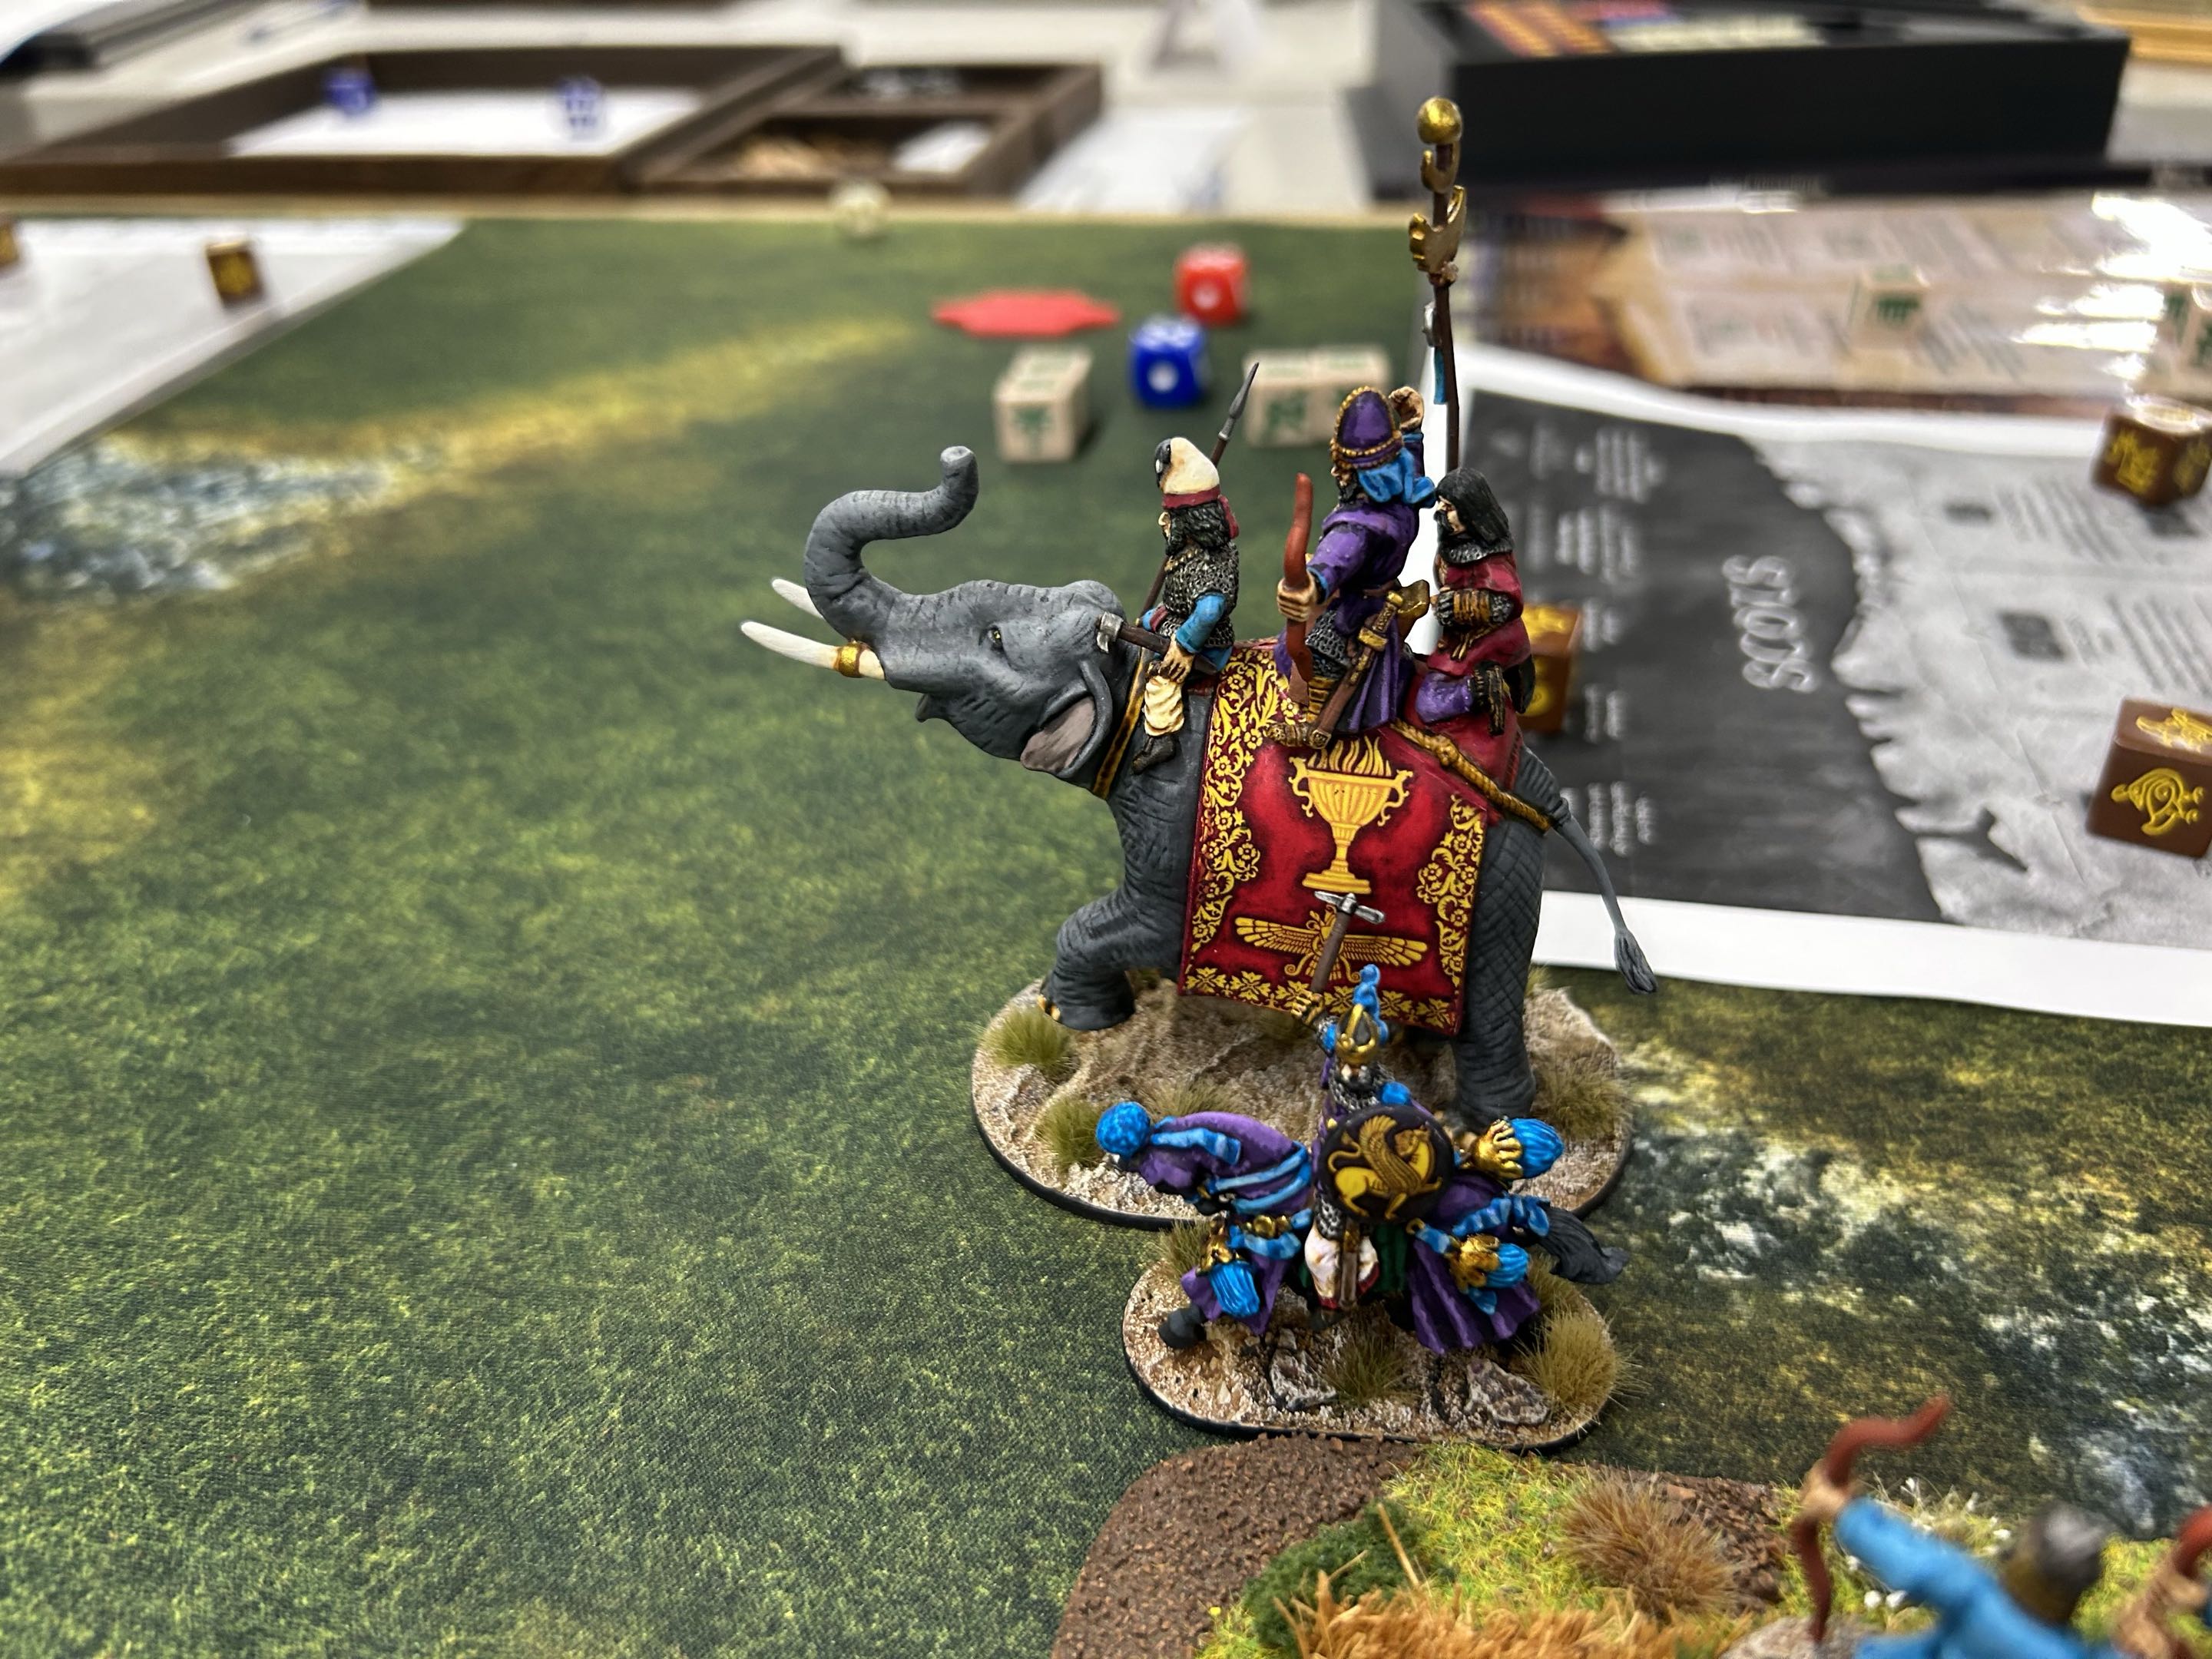
1 Elephant (1 point)
12 Levy with either Bows or Spears (1 point)
8 Deserter Mercenaries represented by Sughdian figures (1 point)
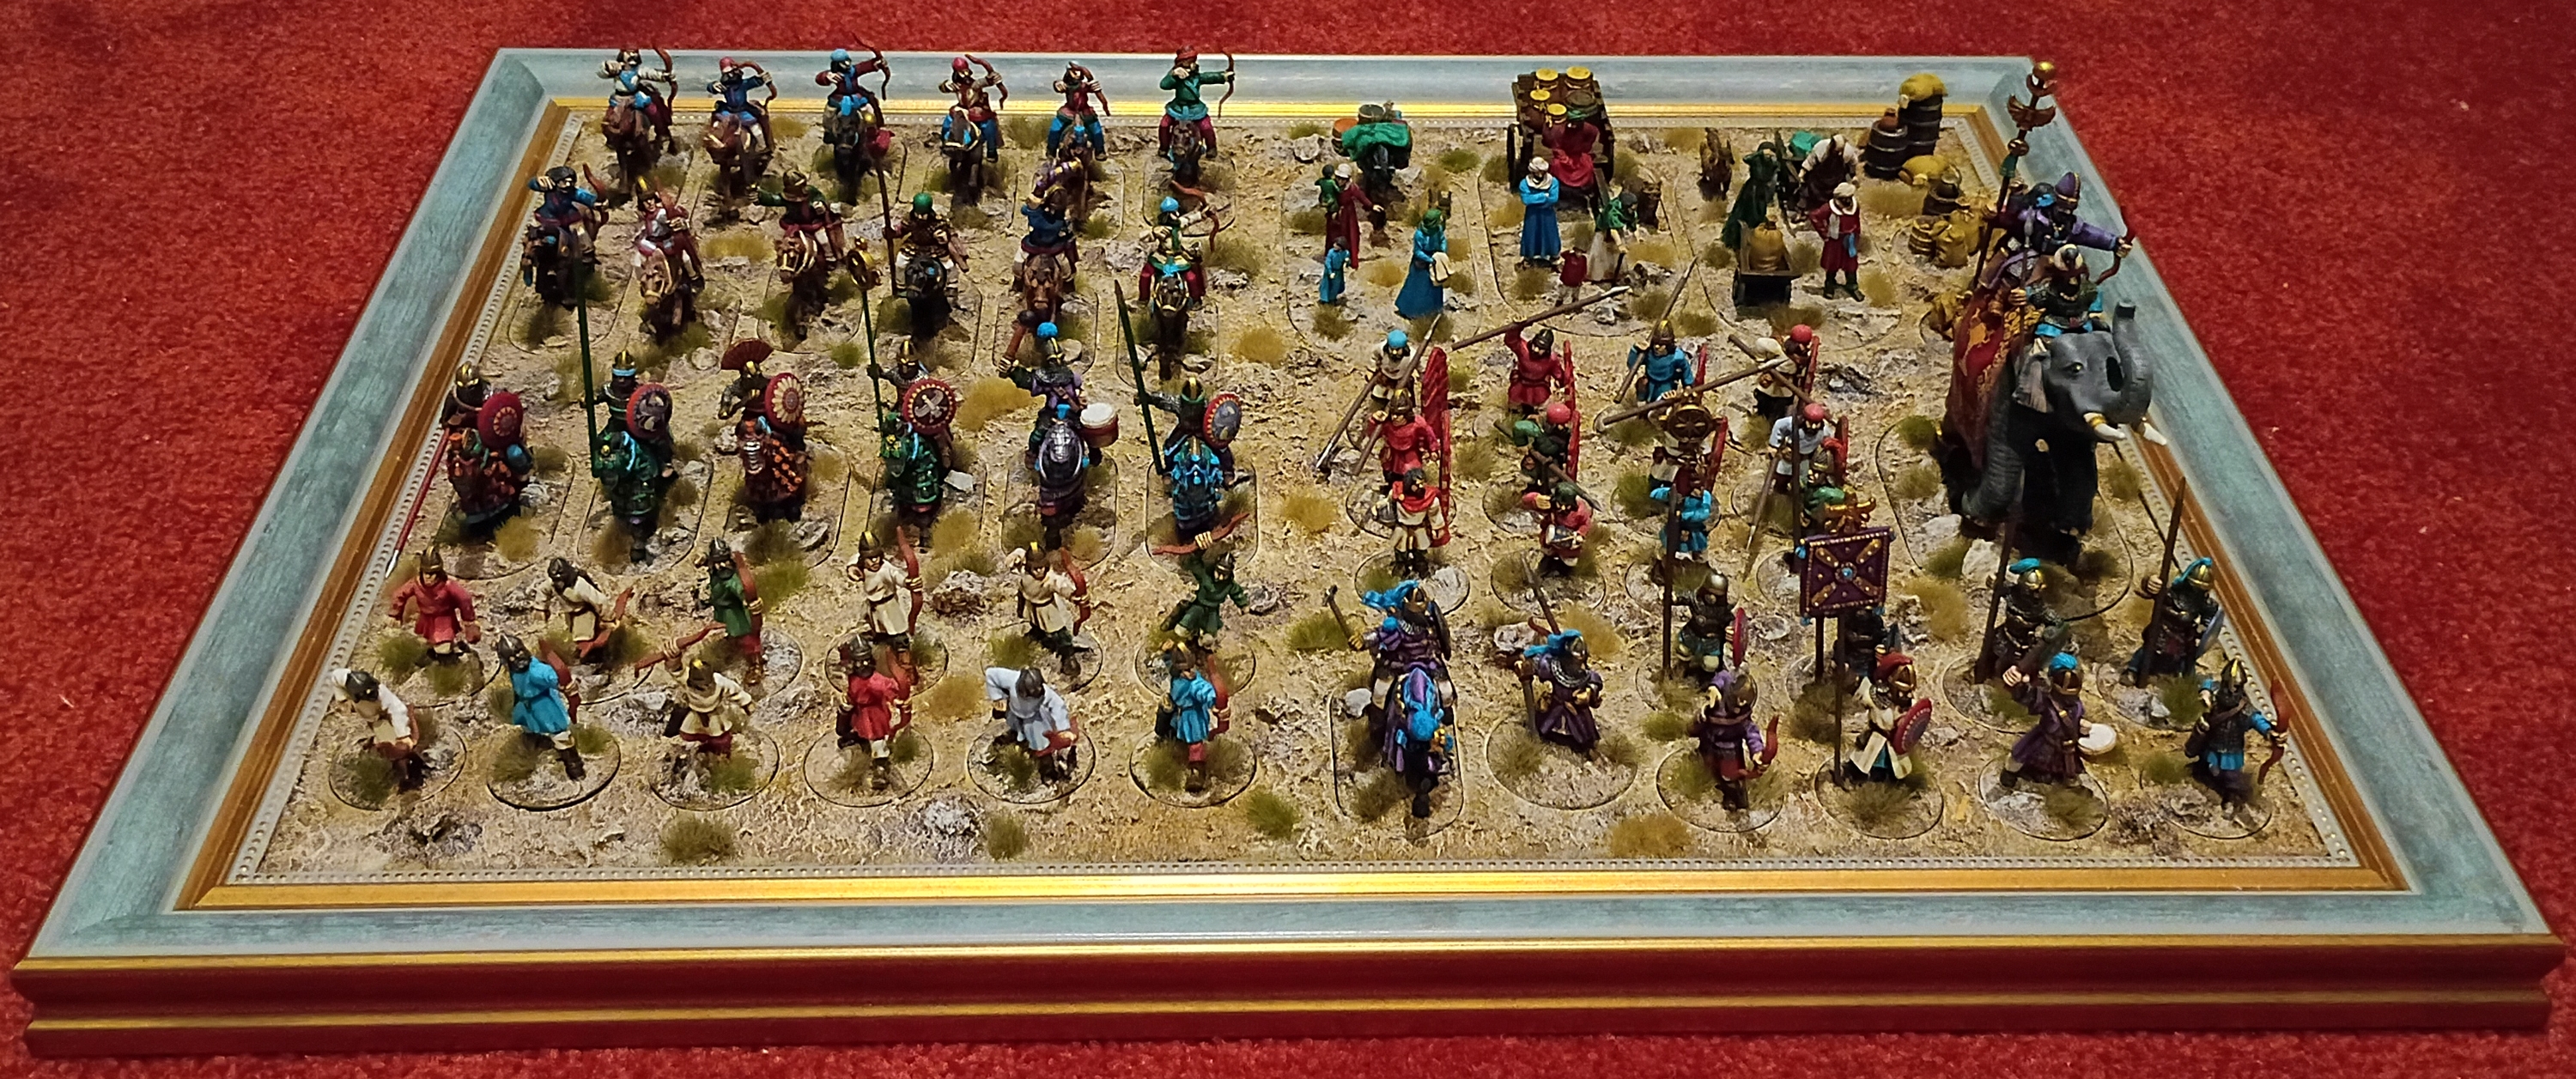
I went with a very diverse list with a bit of everything rather than focus on one unit type. Not only does this look better on the table, it also gives me the right tool for each match-up. Against slow infantry units, I can shoot with the horse archers and levy archers until the Cataphracts finish off any survivors when they reach my line). Against fast enemies, I can use the mercenaries and spear levy to create a defensive wall on which the enemy can exhaust itself until my cavalry/elephant sallies forth. The infantry can also hold ground while the cavalry can reach far objectives for scenarios as needed.
Game 1 – Doug’s Scots (Ambush)
Doug brought a well-rounded Scots force: a unit of 6 mounted hearthguards, two packs of 12 warriors, and two groups of 9 levy slingers. He deployed in a broad front with the warriors closest to the baggage train on the right side of the board (all from my perspective), then the slingers, and finally the mounted hearthguards on the extreme end of the table. I countered with my Cataphracts opposing his riders, the elephant on the other flank ready to eat a baggage, and the rest in the centre. The opening turns were fairly uneventful with our missile troops exchanging some volleys, his warriors capturing the baggage closest to them, and my elephant doing the same on my side. By the fifth turn I had a slight point advantage from shooting attrition and tried to seal the deal by capturing the remaining central baggage before it moved off the table. To my dismay, charges from first my mercenaries and then my Cataphracts – in desperation – both bounced off the baggage. Adding insult to injury, the baggage recovered all its fatigue right after.
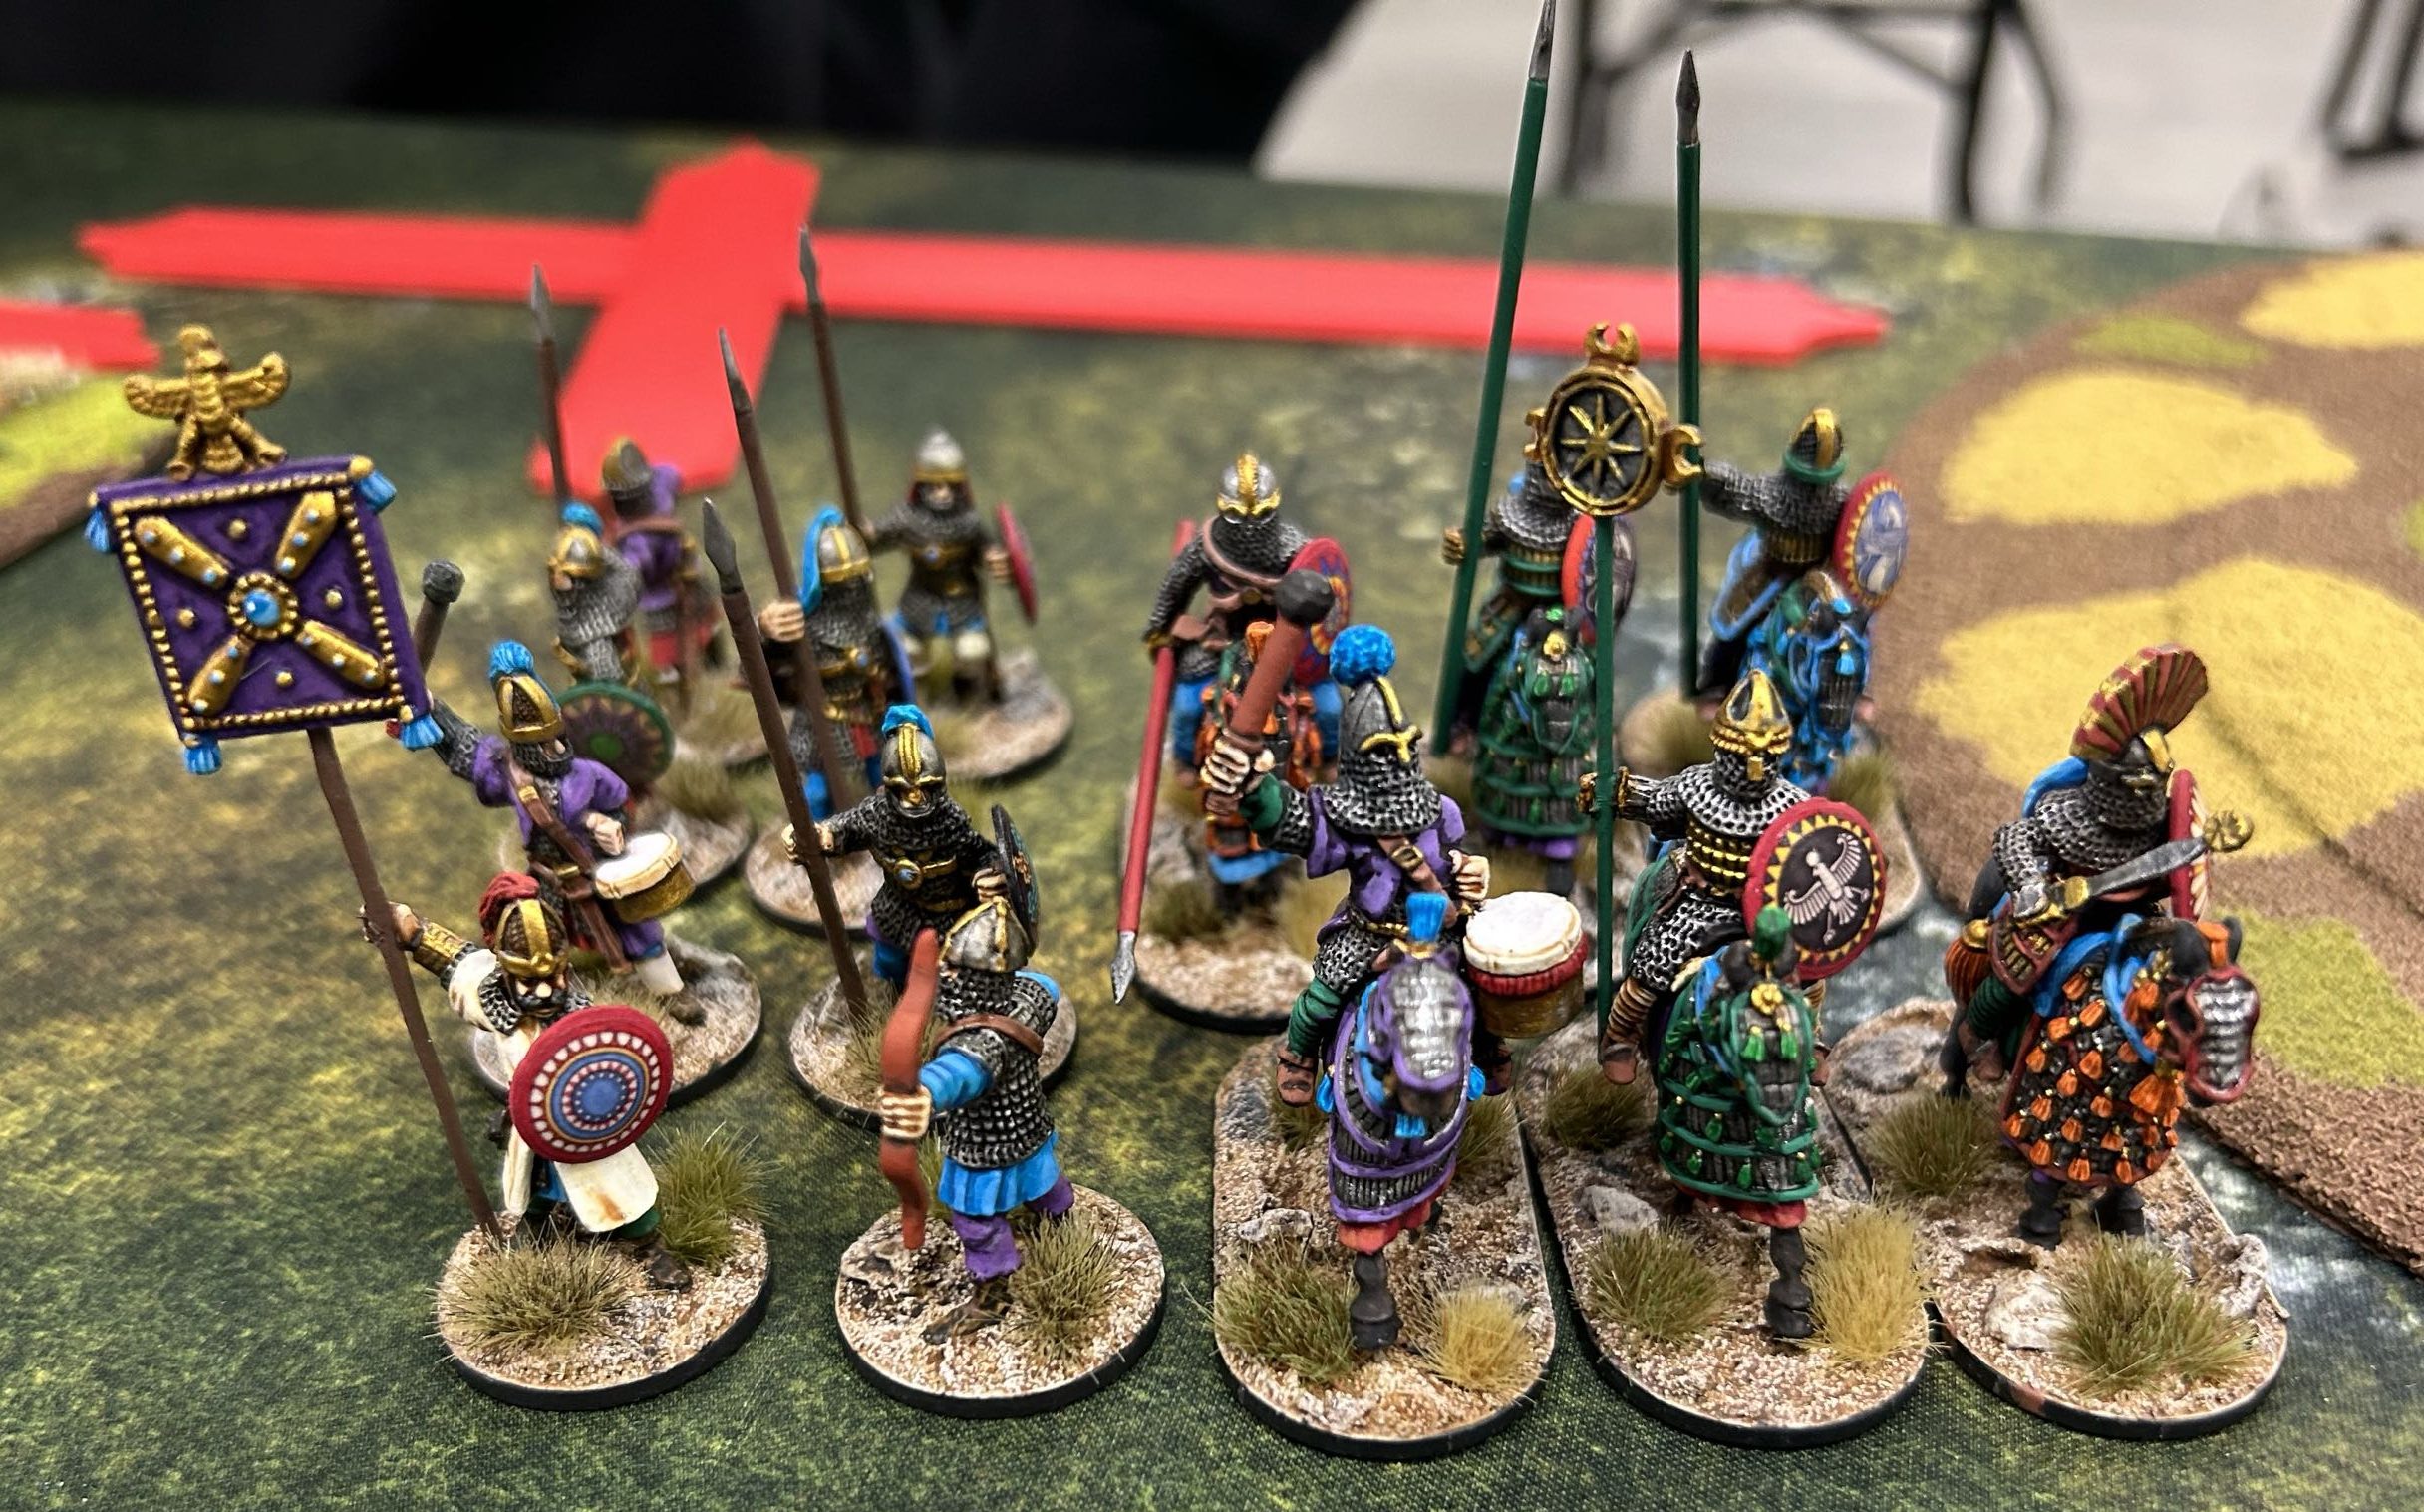
Now it was Doug’s turn to make the attempt. With an incredible roll, his slingers placed three fatigues onto the baggage in one volley and his hearthguards did what mine couldn’t – captured the baggage. He tried to move his warriors to screen, but my horse archers were able to slow them down with Flames of Atar. My last turn needed some serious action to regain the lead. Fortunately, my army was still generating full dice, so I set about to systematically dismantling Doug’s position. My horse archers wove through his lines to charge and destroy the remains of a slinger unit and inflict fatigue all around. My mercenaries charged and pushed back his semi-screening warriors, who were also subjected to shooting from much of my army before and after. Finally, my Cataphracts launched themselves against his now fatigued hearthguards and wiped them out in one mighty charge. Doug’s forces were too dispersed and slow at this point to recapture the objective, so the game ended in a victory for me.
I had never faced Scots before, so I played tentatively in the early turns to get the measure of my enemy. Fortunately, this works well with the Sassanid list since my line can be static while the horse archers sally forth to do their thing. By the end of the game I thought I understood what Doug’s options were and could strike accordingly. The Scots have brutal melee abilities that can interact with each other quite powerfully, but limited movement abilities. This opened the door to my concentrated punch in the final turn, save in the knowledge that the rest of his army wouldn’t be able to reach me afterwards. The combination of Flames of Atar to slow down his units, using fatigue from the destruction of the slingers to slow down/cancel moves of his other units, and Doug mixing up some of his abilities, meant that his final turn counter just never materialized.
Game 2 – Marc’s Jomsvikings (Frozen River)
Marc’s force was entirely composed of hearthguards in four units of 6 with a mix of weapons. I am very familiar with the Jomsvikings – my previous tournament army – and it was clear that he would be on the back foot for this game. To compound his disadvantage. I placed two large marshes onto his side of the river opposite the two fords to constrain his deployment. Once he had deployed his small force into the central space, I marched my horse archers over the left ford and then “sealed” both fords with my infantry: mercenaries with Cataphracts in support for one, spear levy with elephant for the other. Marc responded by splitting his force into two equal groups. On the left, my horse archers pin-cushioned his infantry while slowly withdrawing behind the marsh. He caught them eventually with just two surviving hearthguards, who promptly crushed 6 horse archers! Still, the arrows ultimately proved too much with my Cataphracts destroying the last survivors on that flank in the final turn.
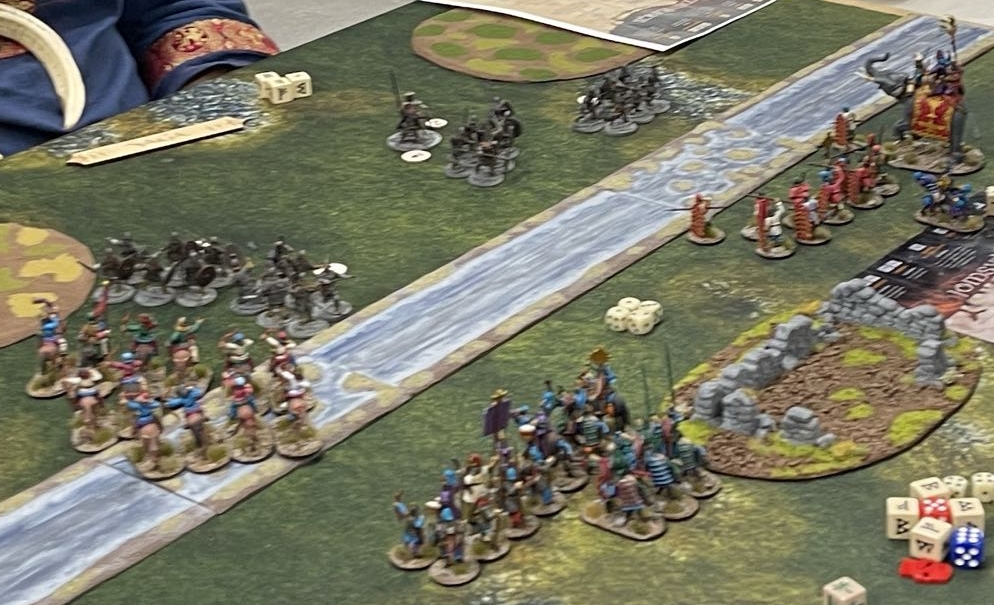
On my right, his units had an uninterrupted march to the ford only to bounce off my spear levy. Once they were suitably exhausted from fighting the levy and my Inexorable Advance ability, my elephant ate first one and then two units (using their fatigue to bring the elephant to armour 6 means that exhausted units can’t hit him no matter their millions of attacks…). My warlord delivered the coup de grace to his, and no more Jomsvikings were left on the field. With my entire army essentially intact and across the river, this was as solid a victory as possible.
Game 3 – Robbie’s Irish (New Feud)
Robbie is our local Irish expert with years of experience with the warband, so I knew that I would be in for a tough game. I had only played the Irish once – years ago with my Jomsvikings – and their battleboard had changed recently, so I was pretty pessimistic at the start of the game. The first few turns only deepened that pessimism…
Robbie had deployed massive forests on either side of the central hill. In and around those, he deployed two packs of 10 javelin warriors, two packs of 9 slingers, and a unit of war hounds. In the centre, he had his gaggle of heroes including Warlord, two Curaidh – all on foot with javelins – and his Traitor special character for the scenario. And those guys went to work! In the opening turns they first pin-cushioned my elephant to death, followed by my entire Cataphract unit. I was able to kill one Curaidh and weaken some of his other troops, but my entire heavy punch had died ignominious deaths. The free Traitor hero for the scenario meant that his Old Ways ability gave him four free activations on a single dice each turn. Add to this the three Determination abilities from his heroes and free javelin shots from all units, and I was facing 15+ shots every turn plus some brutal charges when his warriors joined in. Meanwhile, his heroes were largely invulnerable due to getting Resilience 2 each turn. And of course they were sitting on the hill, scoring two extra points each turn from his Traitor. Bleak days…
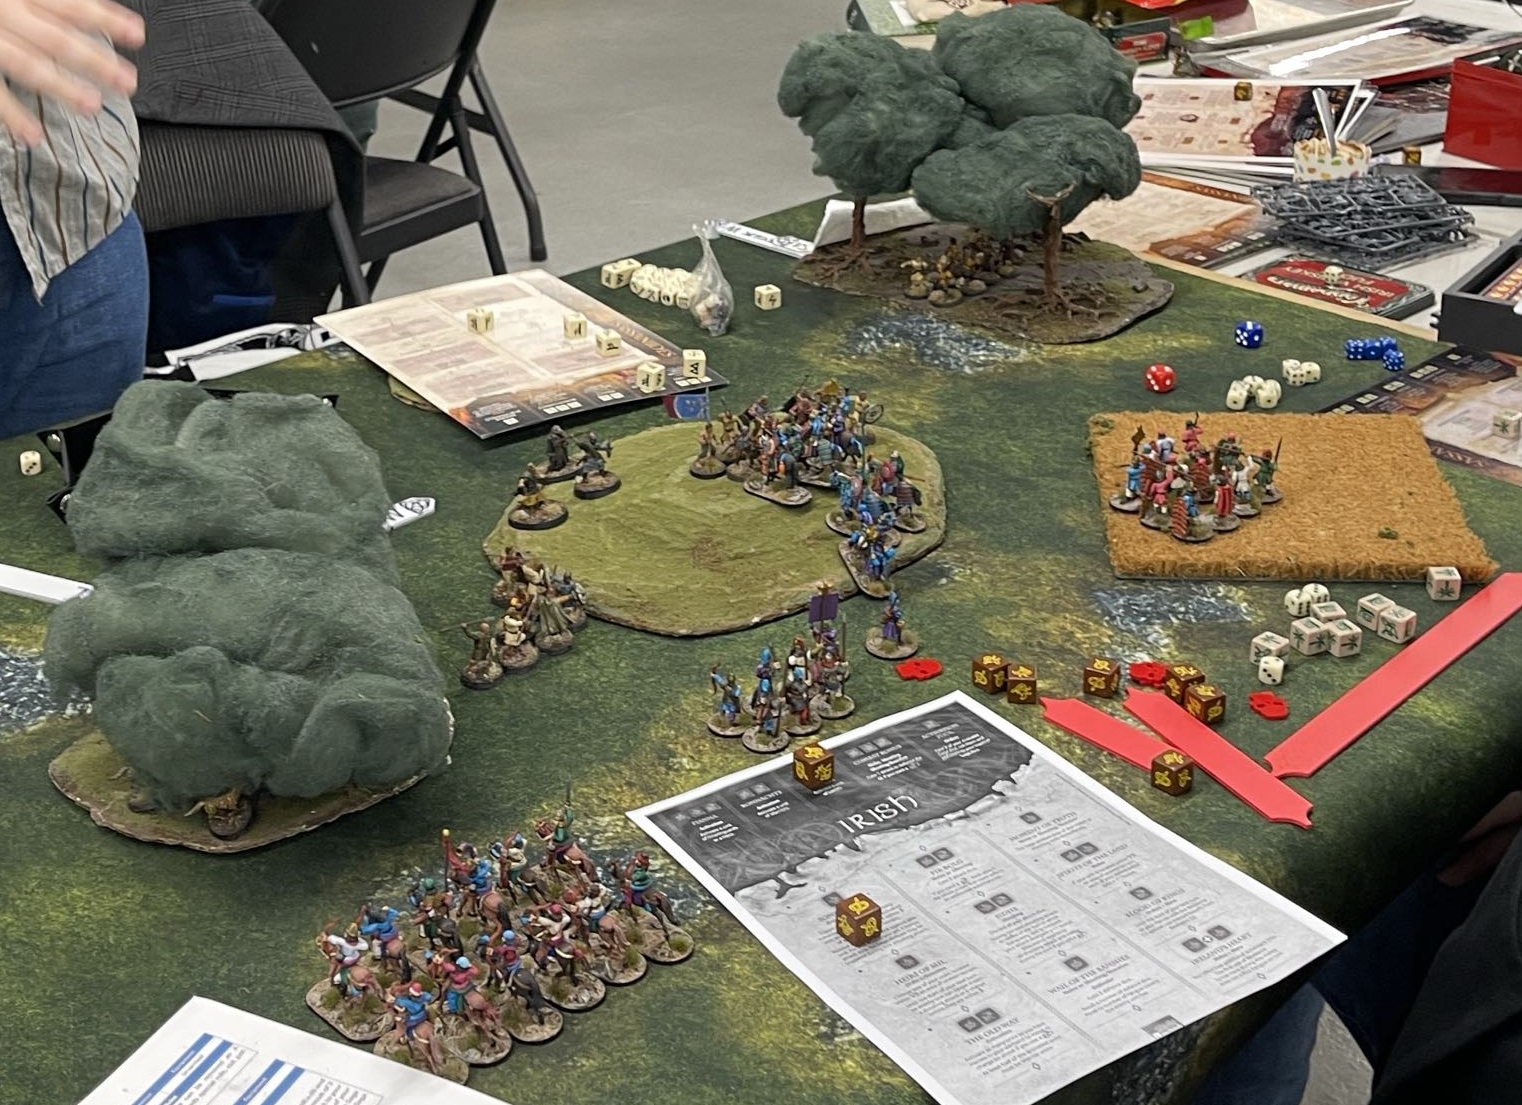
With defeat looming large, it was time for some desperate moves in the final turns. My only hope was to kill his Traitor while keeping my Councillor scenario character alive (and push him onto the hill at the end). My horse archers had done their usual thing to weaken some of his infantry on the flanks, so now it was their turn to shine. A lucky string of rare dice allowed me to load up my board with plenty of activations with which the horse archers went on a rampage. First, they pushed onto the hill from my left flank – bombarding his remaining infantry along the way. Then, they charged several times into his Traitor to build up fatigue and shot at the local neighbourhood in between. My Warlord joined the fray by adding more fatigue with Inexorable Advance, and finally the Traitor fell. This fatigued his tightly clustered heroes who had already taken some fatigue from the destruction of his warriors during my horse archers charge of the Rohirrim up the hill. Having indirectly weakened the heroes, I was able to kill one more of them before finally shielding my Councillor with the remains of my mercenaries (and sitting back with a wave of relief passing through my body). A somewhat shell-shocked Robbie tried to even the odds by shooting my Councillor with his surviving slingers, but only one unit could march into reach from the forest and just didn’t have the dice to kill him. The final turn saw some more destruction of Irish forces and the movement of my Councillor – for the first time in the game – onto the hill to seal the victory.
This was by far the hardest battle of the tournament for me. The more complex scenario with the extra characters, against a tough opponent, and at the end of a long day where few of my neurons were still firing! The first turns were brutal and utterly demoralizing. I just couldn’t figure out a way to stop his hero horde with Resistance 2, a million free activations, and their javelin machine guns. It took me a while to understand that attacking the heroes is essentially pointless due to their high Resilience and defensive abilities. My Cataphract unit eventually manage to kill one Curaidh but only by wiping itself out in the process which just isn’t a viable trade. Instead, I needed to cause indirect fatigue to his heroes to bypass Resilience. Lots of small cuts, not one big punch. That meant Inexorable Advance and cycle charges from my horse archers. Those never did any actual damage in the fight, but the extra fatigue at the end of each melee slowly built up on the Traitor. I was fortunate that Robbie kept using my fatigue to make his Traitor even harder to hit so that I could keep charging/shooting as long as I had activations (of which I had a good number due to lucky rare rolls, double We Obey from my Warlord and Councillor, as well as the extra Saga Die generated by the Councillor). Once the first hero died, fatigue spread like wildfire which then made it easy to kill the others. Lesson learned for future games! Interestingly, once his heroes crumbled, they shed so many victory points that I was actually 10 points ahead (35-25) and the “sudden death” condition of being the only survivor on the hill wasn’t even needed at the end.
Outcome
Robbie and I were on the “winner’s table” so my victory scored the tournament win for me. To my surprise, given the high quality of armies on display, I also won the vote for Best Painted Army. A very gratifying finish after the work I had put into my Sassanids. The tournament was as always superbly organized by our local Saga champion David and ran smoothly. All three of my opponents – two of whom I had never met before and who travelled many hours to the event – were skilled and gracious players. Saga is a very tactical game with high mental load, so all of us were pretty exhausted by the end of the day. Fortunately, the Abyss kept the drinks and food flowing!

