The allied army features quite a few nations and unique units. In total, the Allied Army is represented by 78 infantry battalions including 20 light formations, 95 cavalry squadrons in 31 regiments, and 25 artillery batteries. This represents the full order of battle for Waterloo except a few Landwehr units held in the extreme rear that remained unengaged. With over 3,000 figures, this army needs a wall of display cabinets all by itself…
This project is completed. I made a short video review of the entire force which you can watch here. It barely fits on my 10’x6′ gaming table!
The allied army is a polyglot mix of troops from Britain, the crack Germans of the King’s German Legion (KGL), Germans from the British King’s possessions in Hannover, Dutch and Belgian troops of the newly formed Kingdom of the Netherlands, a large contingent from Brunswick (Braunschweig in modern day Germany), and three regiments from the German principality of Nassau. I am using German spelling for the German formations so it’s Hannover instead of Hanover and Bataillon instead of Battalion. Same for the Dutch and Belgian contingents with the latter using French unit designations.
The figures are in this collection are predominantly from Perry Miniatures – plastic and metal – with additions from Warlord Games, Victrix, Rapier Miniatures, Eagle Miniatures, and others where I could find options for variety. Everything is based on 3mm MDF bases of generally 50x50mm size, though you can find some more commentary on the choice of base sized and formation scale here.
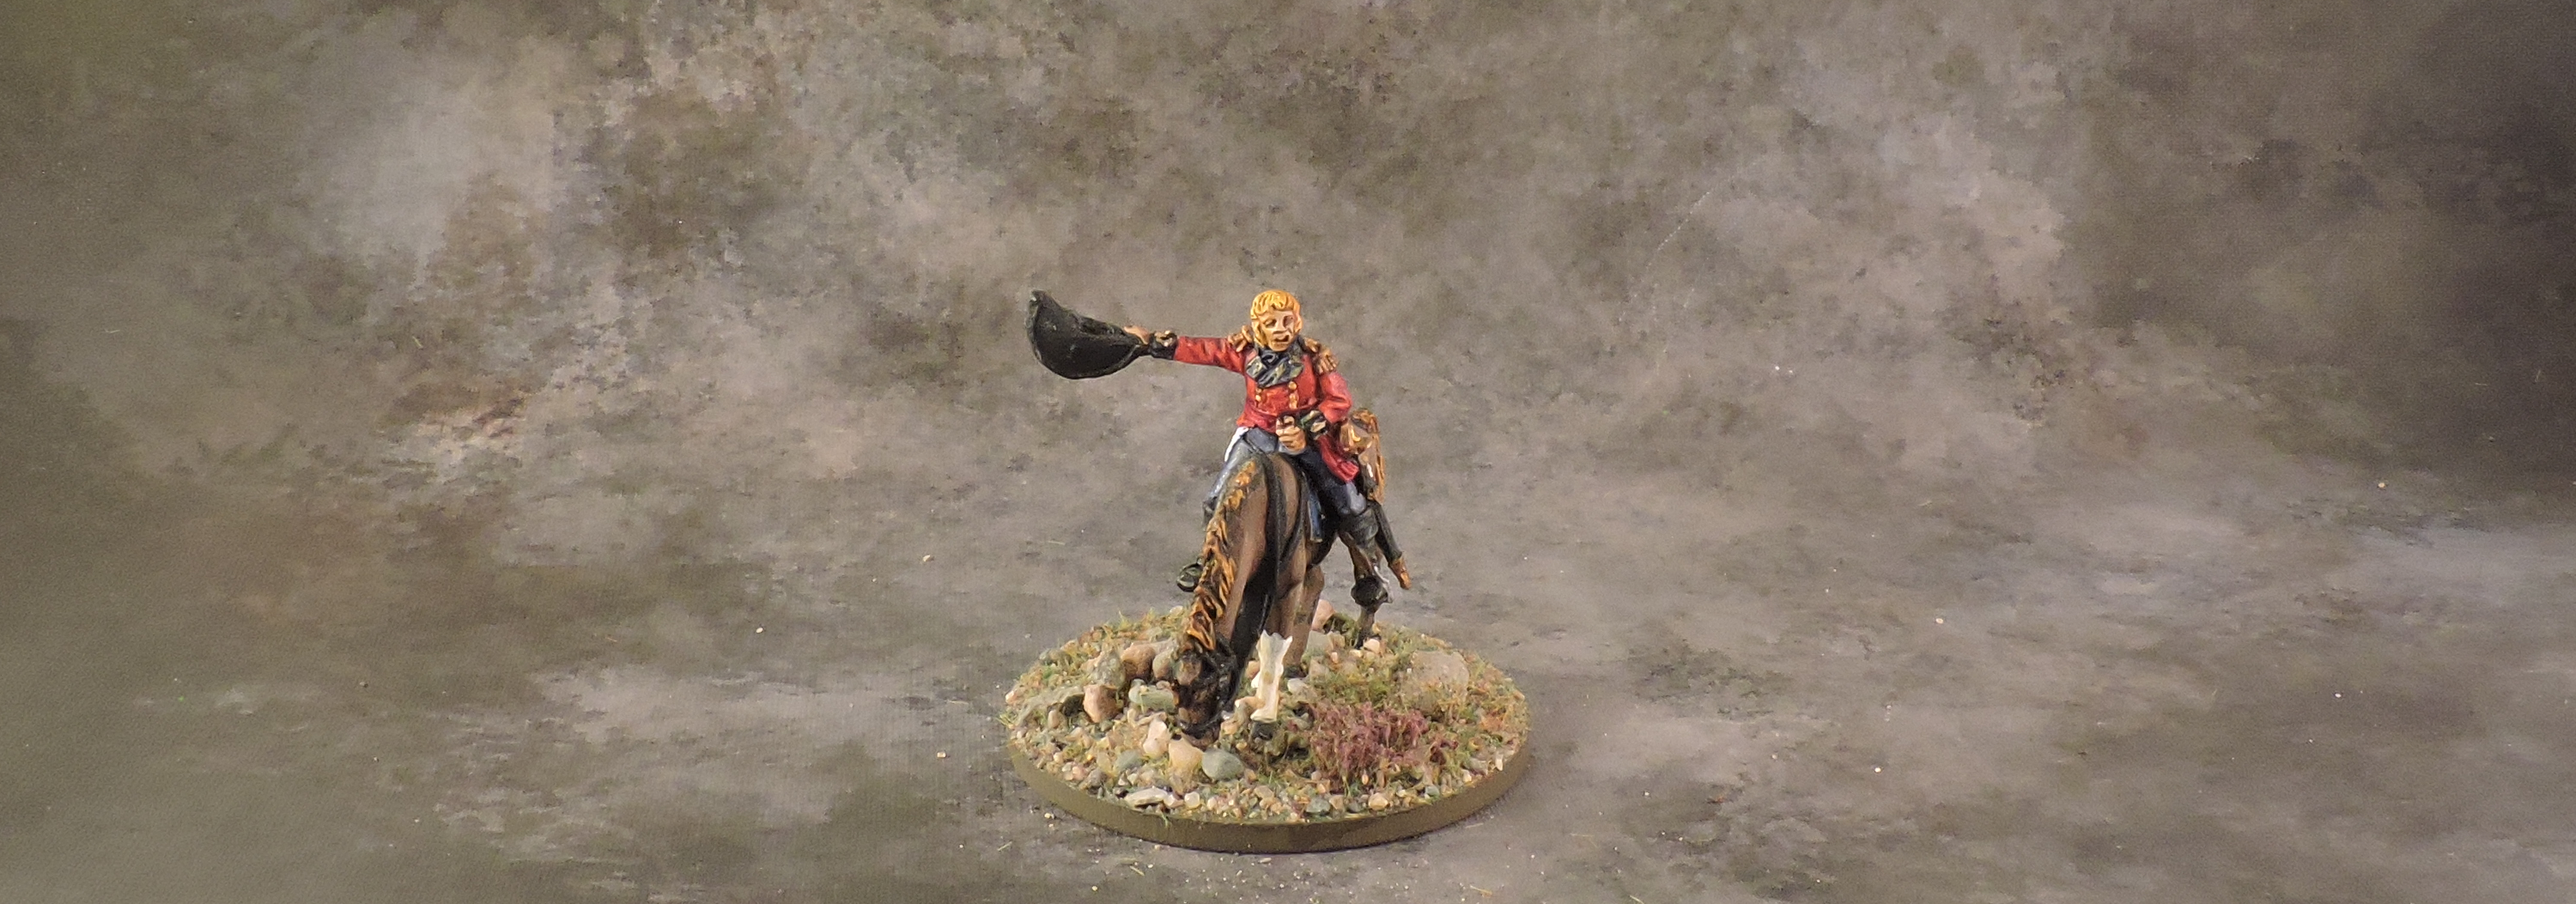
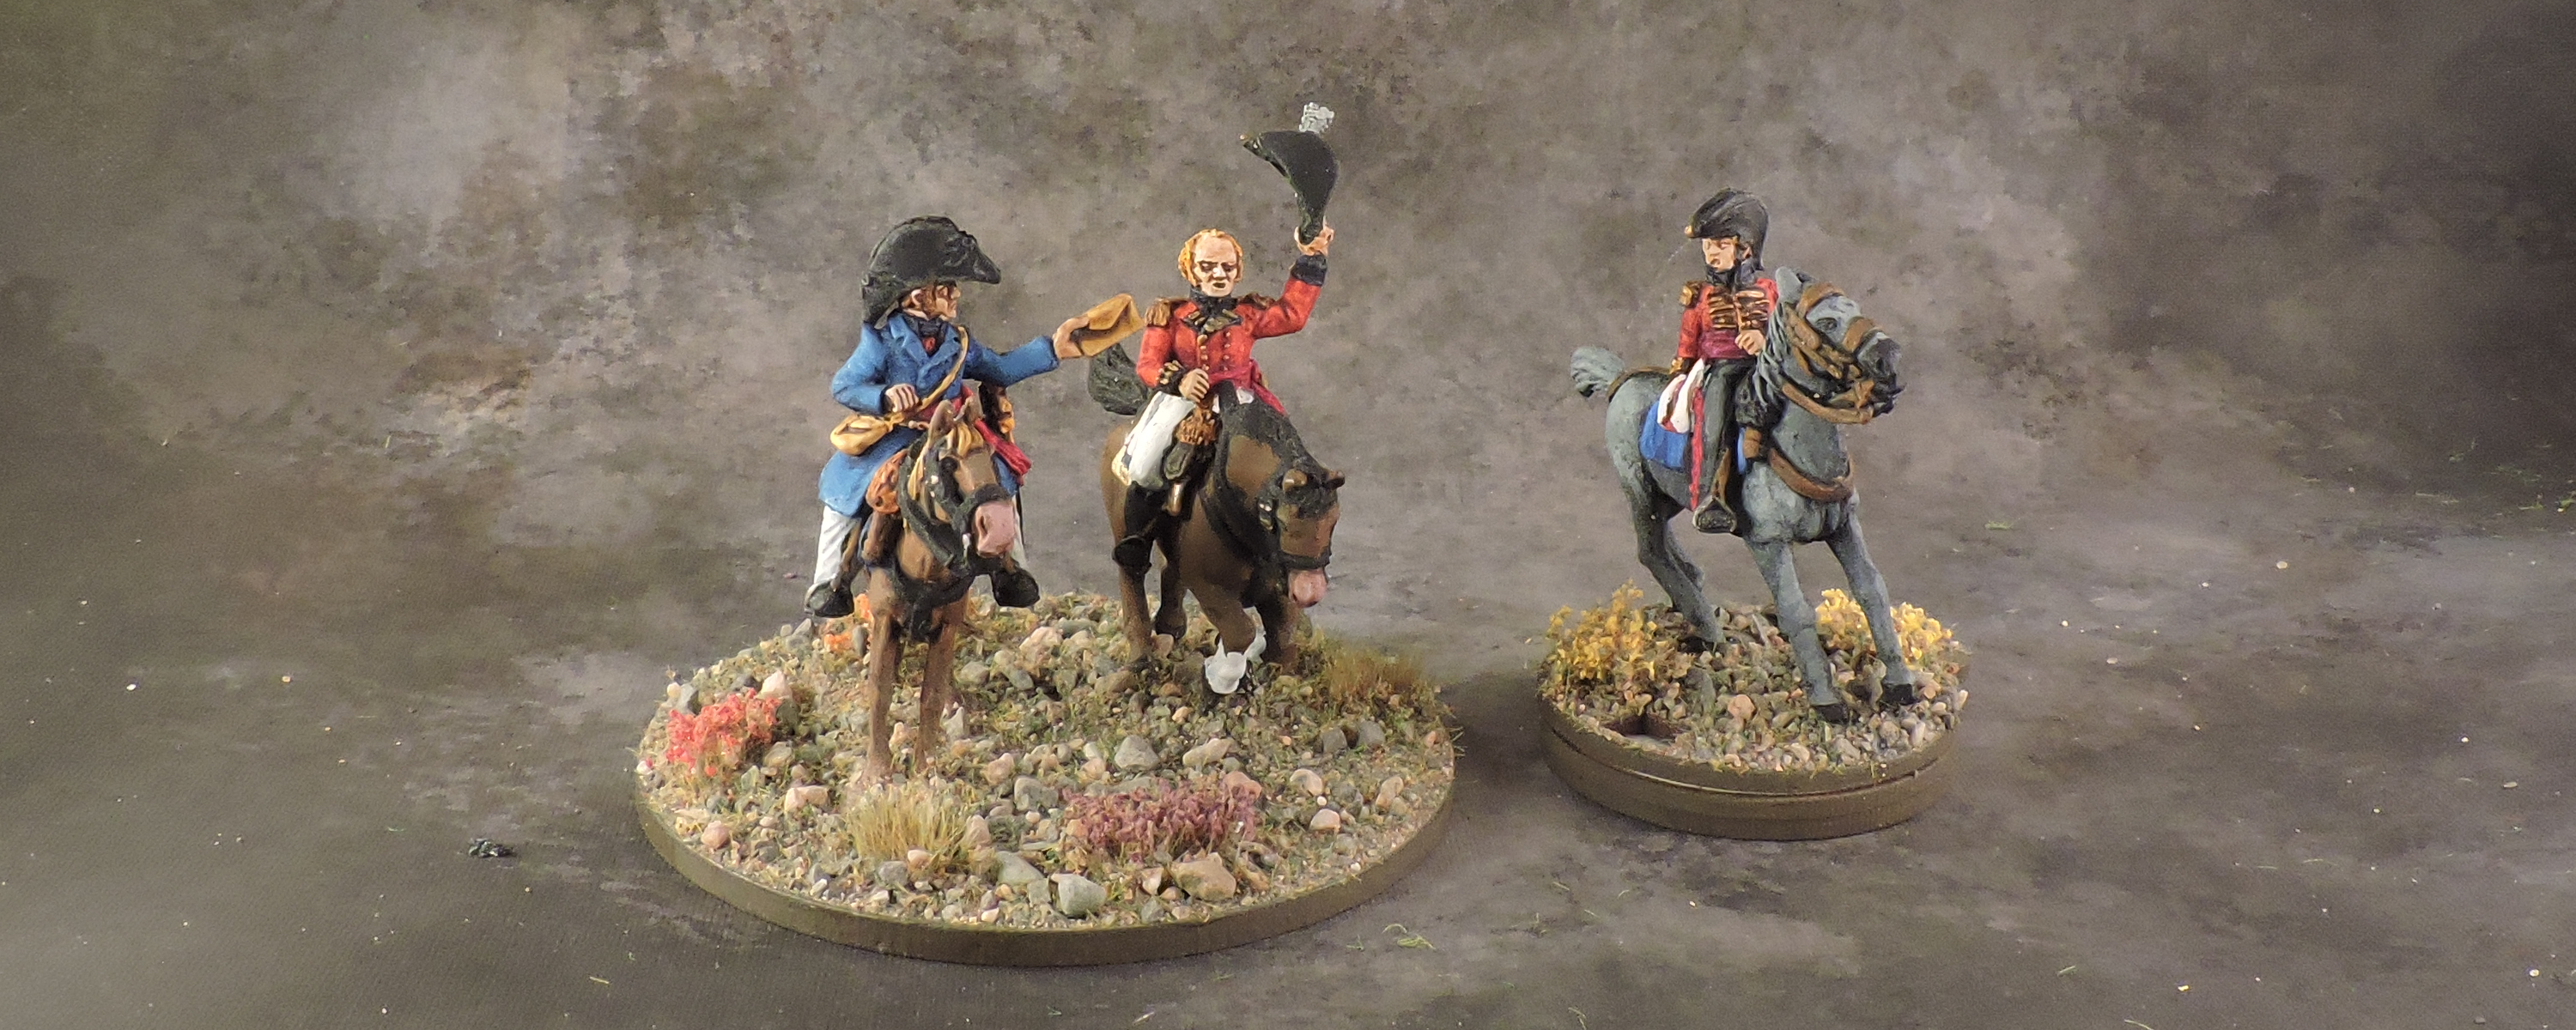
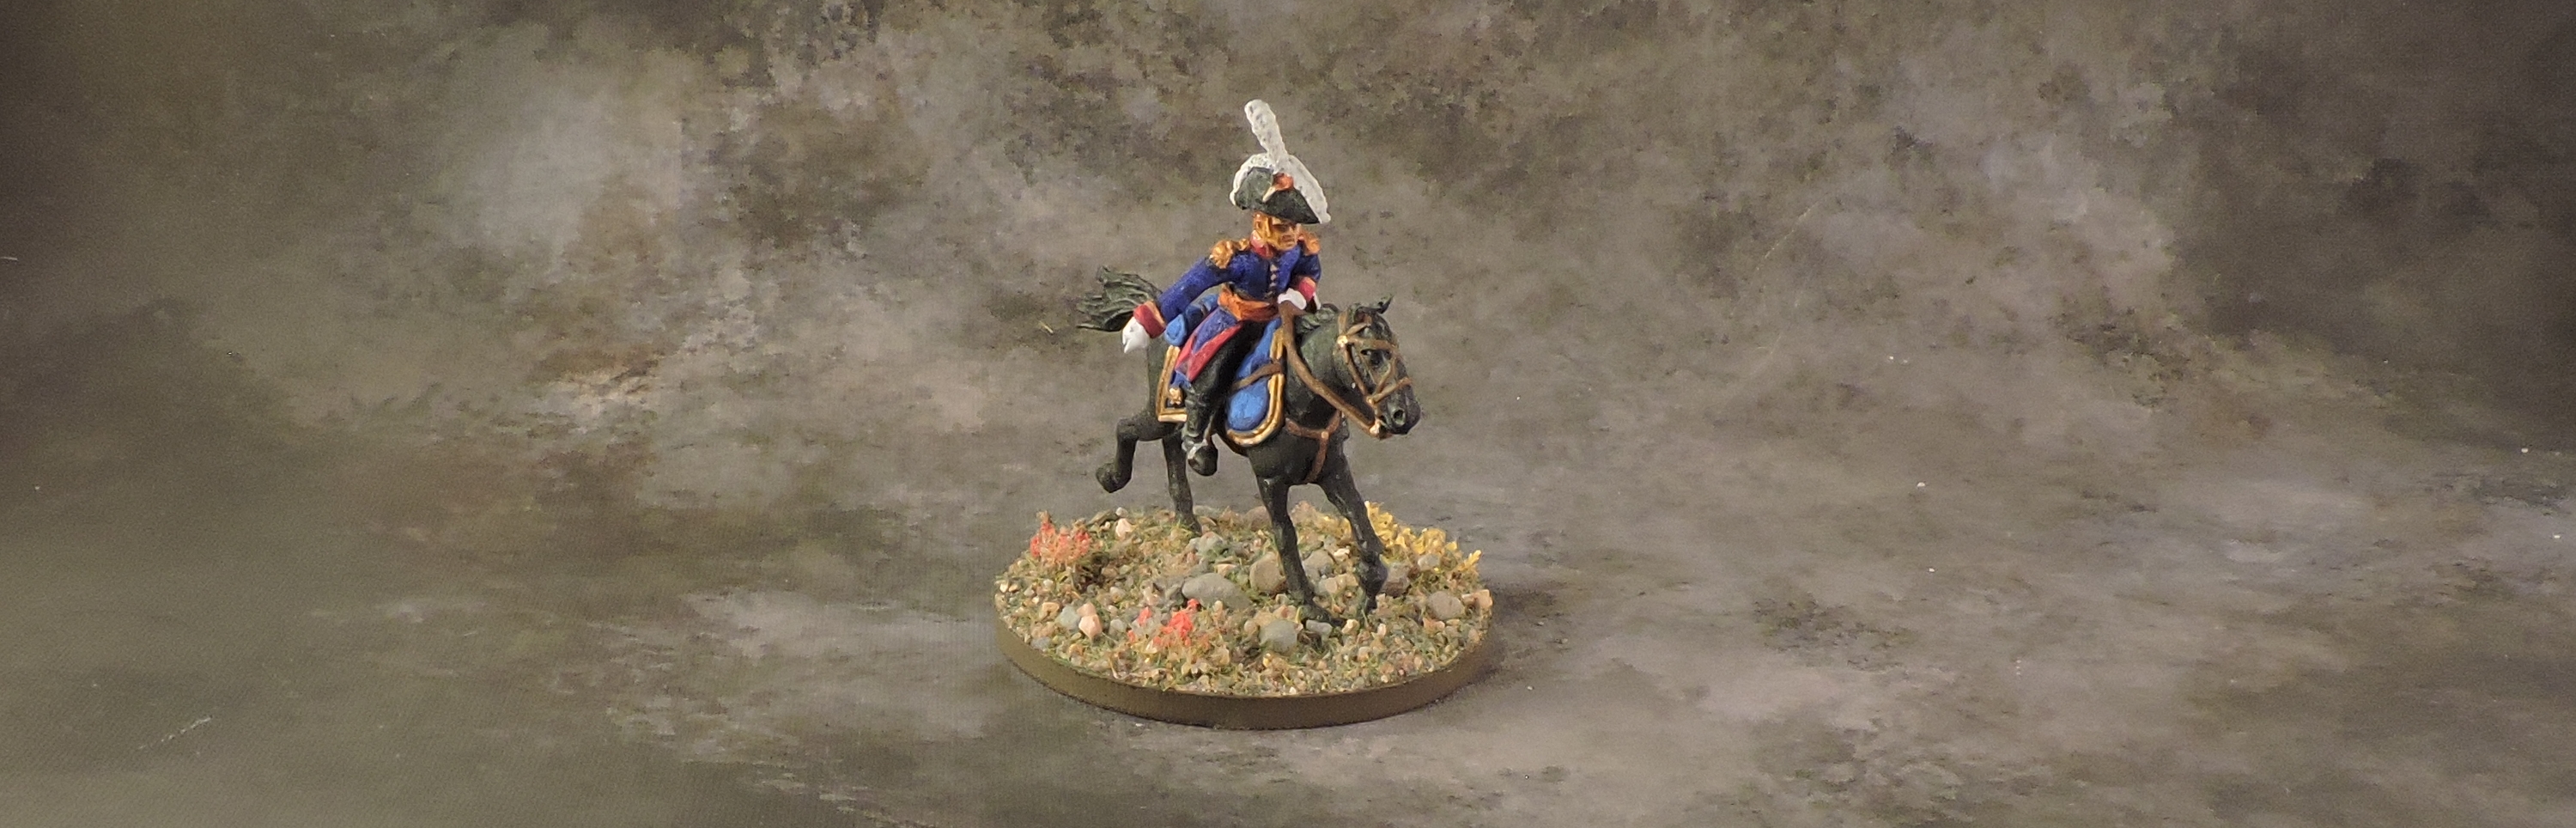
Central command rests with the Duke of Wellington on an imposing 100mm base. He is accompanied by his Colonel of Engineers James Carmichael, and personal secretary Lt.-Col. Somerset, as well as trusty hound. A separate base represents his Artillery commanders Col. Sir Wood and Lt.-Col Sir Hartmann of the Kings’ German Legion artillery. Wellington’s ADC is a Major of the 92nd Highlander Foot.


I Corps
The Prince of Orange led I Corps, though historians disagree on his actual leadership influence beyond sending a few units to their doom. His ADC is a Major of the Guards regiment. The real work seems to have been done by Major General Baron de Constant-Rebecque shown on a separate base with his staff, though that might just be British propaganda. Either way, the I Corps divisions are scattered across the allied front so it is unlikely that anybody exercised Corps-wide command. I Corps is composed of four divisions – two British (1st & 3rd) and two from the Netherlands (2nd and 3rd). The 3rd Netherlands Division remained in reserve on the Allied right wing to protect against a feared flanking march from Napoleon. They were ultimately brought forward to repulse the final French assault with only the leading units becoming engaged.

1st British Division – 1st & 2nd British Infantry Brigades (Guards)
Major General Cooke commands the 1st Division with its two brigades of the Guards. He is supported by an ADC of the Guards. The four Guard battalions were among the largest British formations on the field and had a well-deserved reputation for discipline. Light companies of the Guards held Hougoumont against determined French assaults – ripping the heart of nearly an entire Corps in the process.

The 1st Brigade is led by Major General Maitland and includes the II and III battalion of the 1st Foot Guards. These would later be known Grenadier Guards in the mistaken belief that they drove off the French Grenadiers de la Garde Imperial during the final assault. Instead, they faced the Chasseurs de la Garde Imperial while the Grenadiers were slaughtered by much less flamboyant German youth…


The four guard units are large formations of six bases each. I am using Victrix figures to distinguish them from the regulars. Sadly, the Victrix backpack is much too small so mixing in Perry/Warlord figures isn’t viable anyhow.
The 2nd Brigade is commanded by MG Sir Byng and composed of II/2nd Foot Guards (Coldstream Guards) and II/3rd Foot Guards (Scots Guards).


Evidence suggests that the white trousers of the 2nd and 3rd Foot Guards are incorrect, but they provide at least a bit of variety so I kept them.
1st British Division – Divisional Artillery
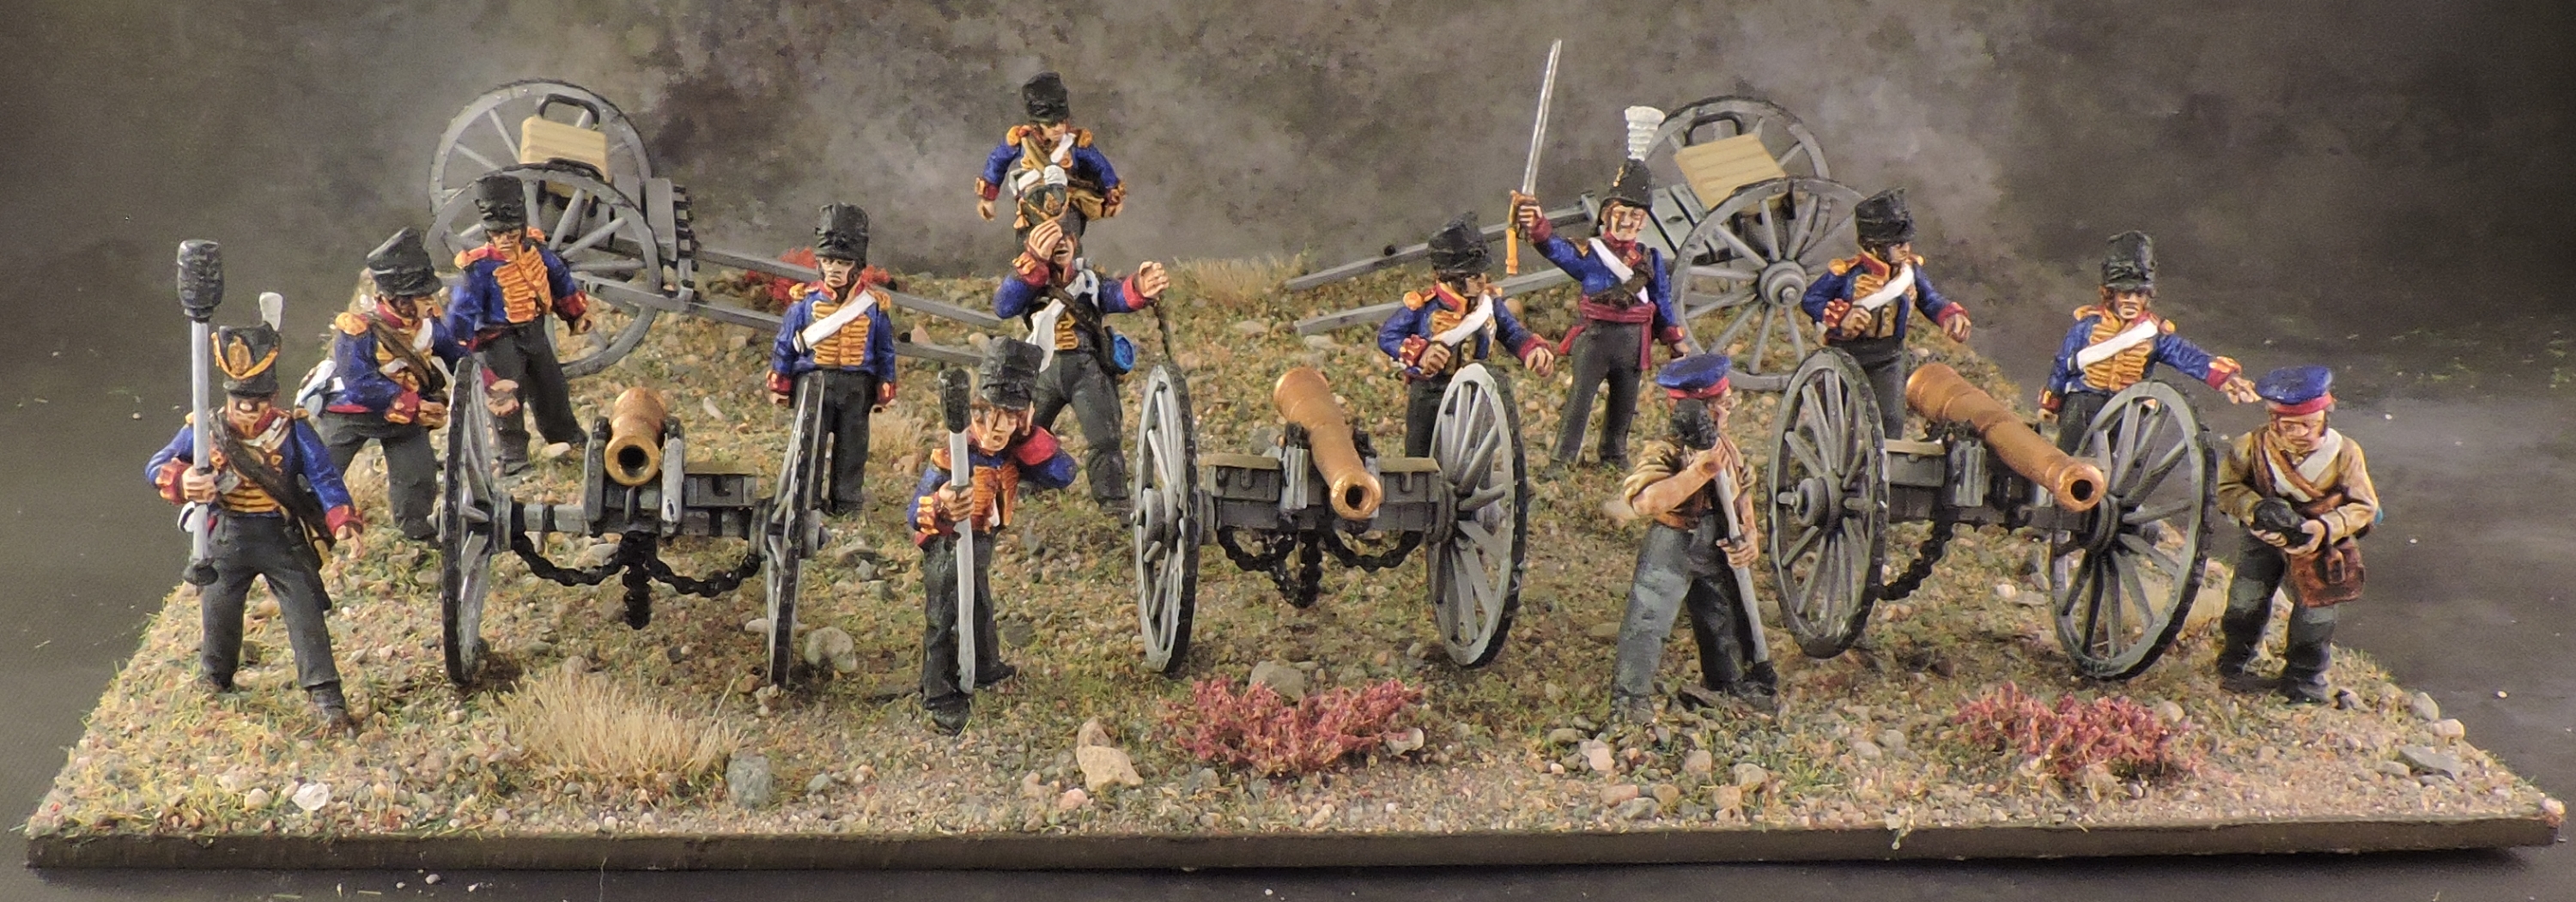
Divisional artillery is composed of Sandham’s company of the 3rd Royal Foot Artillery and the 2nd KGL Horse Artillery, both with 9pdr guns. For consistency throughout the Allied force, I am using Victrix plastic figures for all Royal Foot Artillery 9pdr guns, Perry metal figures for all Royal Horse Artillery 6pdr and 9pdr guns, and some other manufacturers for the non-British artillery for differentiation. Crew on the other hand is a motley mix of Victrix, Perry, Warlord, Elite, Avant Post, Foundry, and every other option I could find to lend variety to the bases.

3rd British Division
Commanded by Major General Count Sir Karl von Alten, the 3rd Division is a mix of British and Hannover brigades. The figure from MG von Alten is a slightly converted Danish general from Perry (with rotated fore-and-aft bicorne). His ADC is a Captain of the KGL Light.
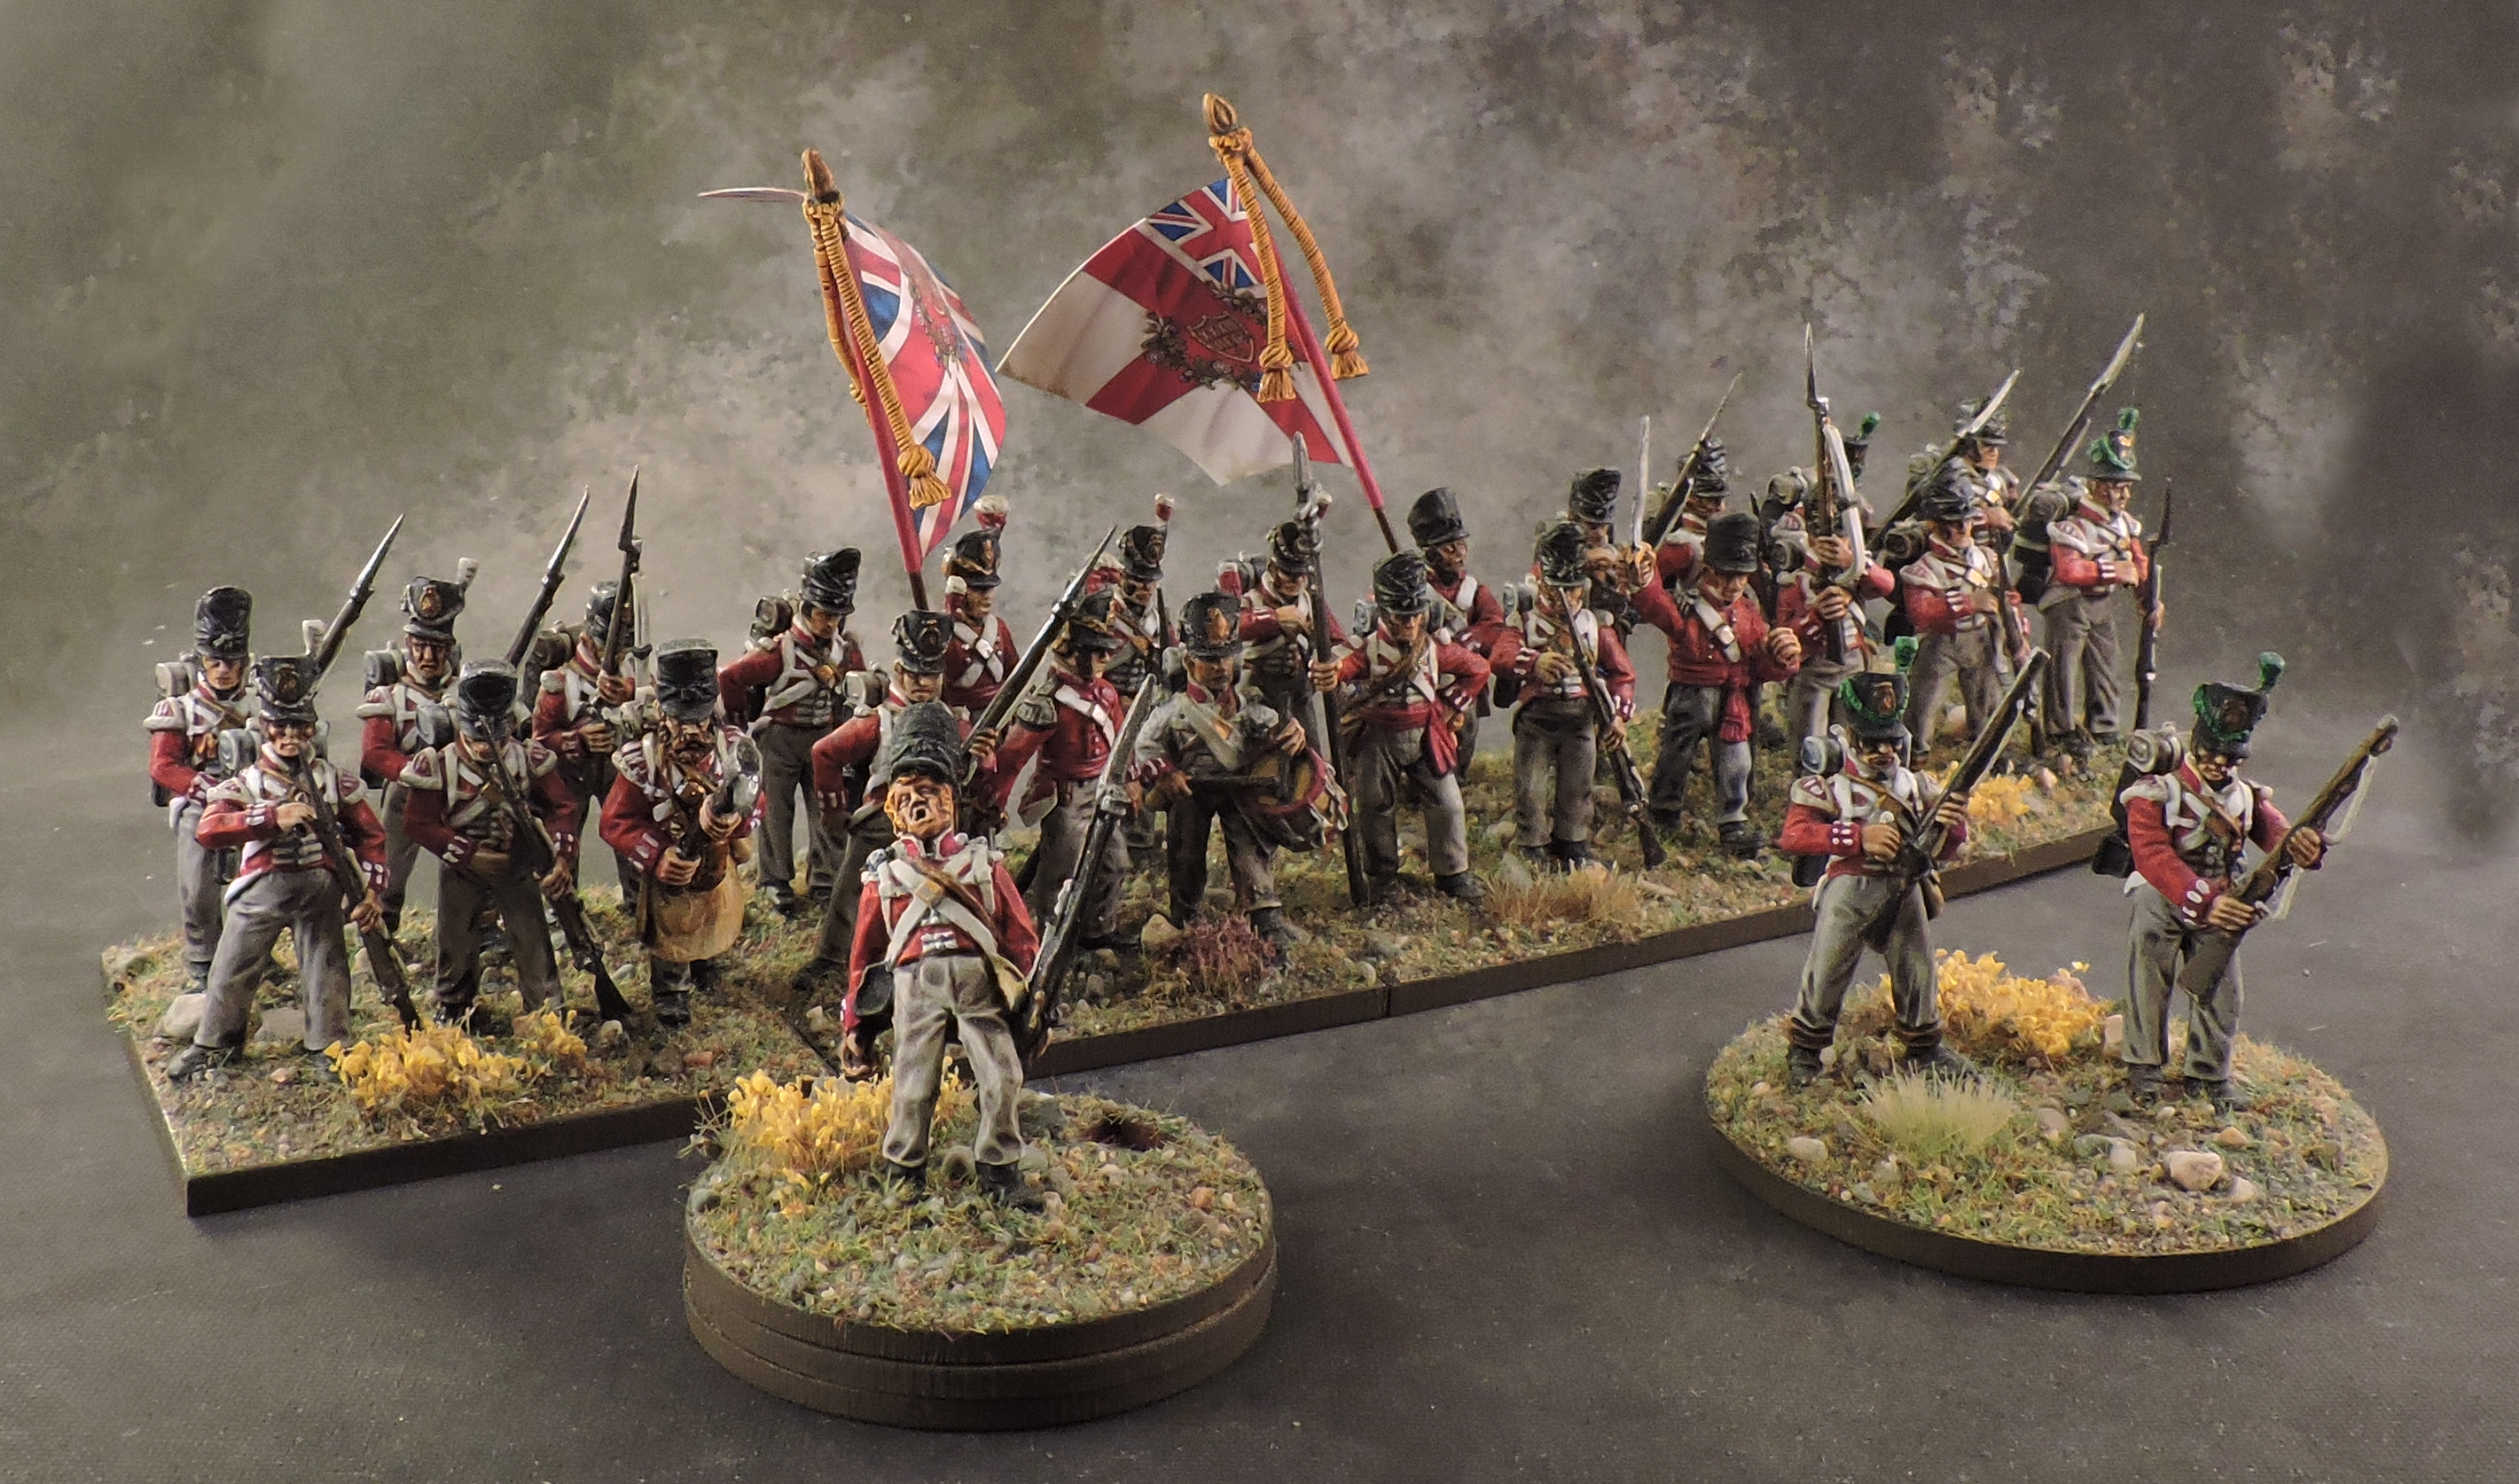
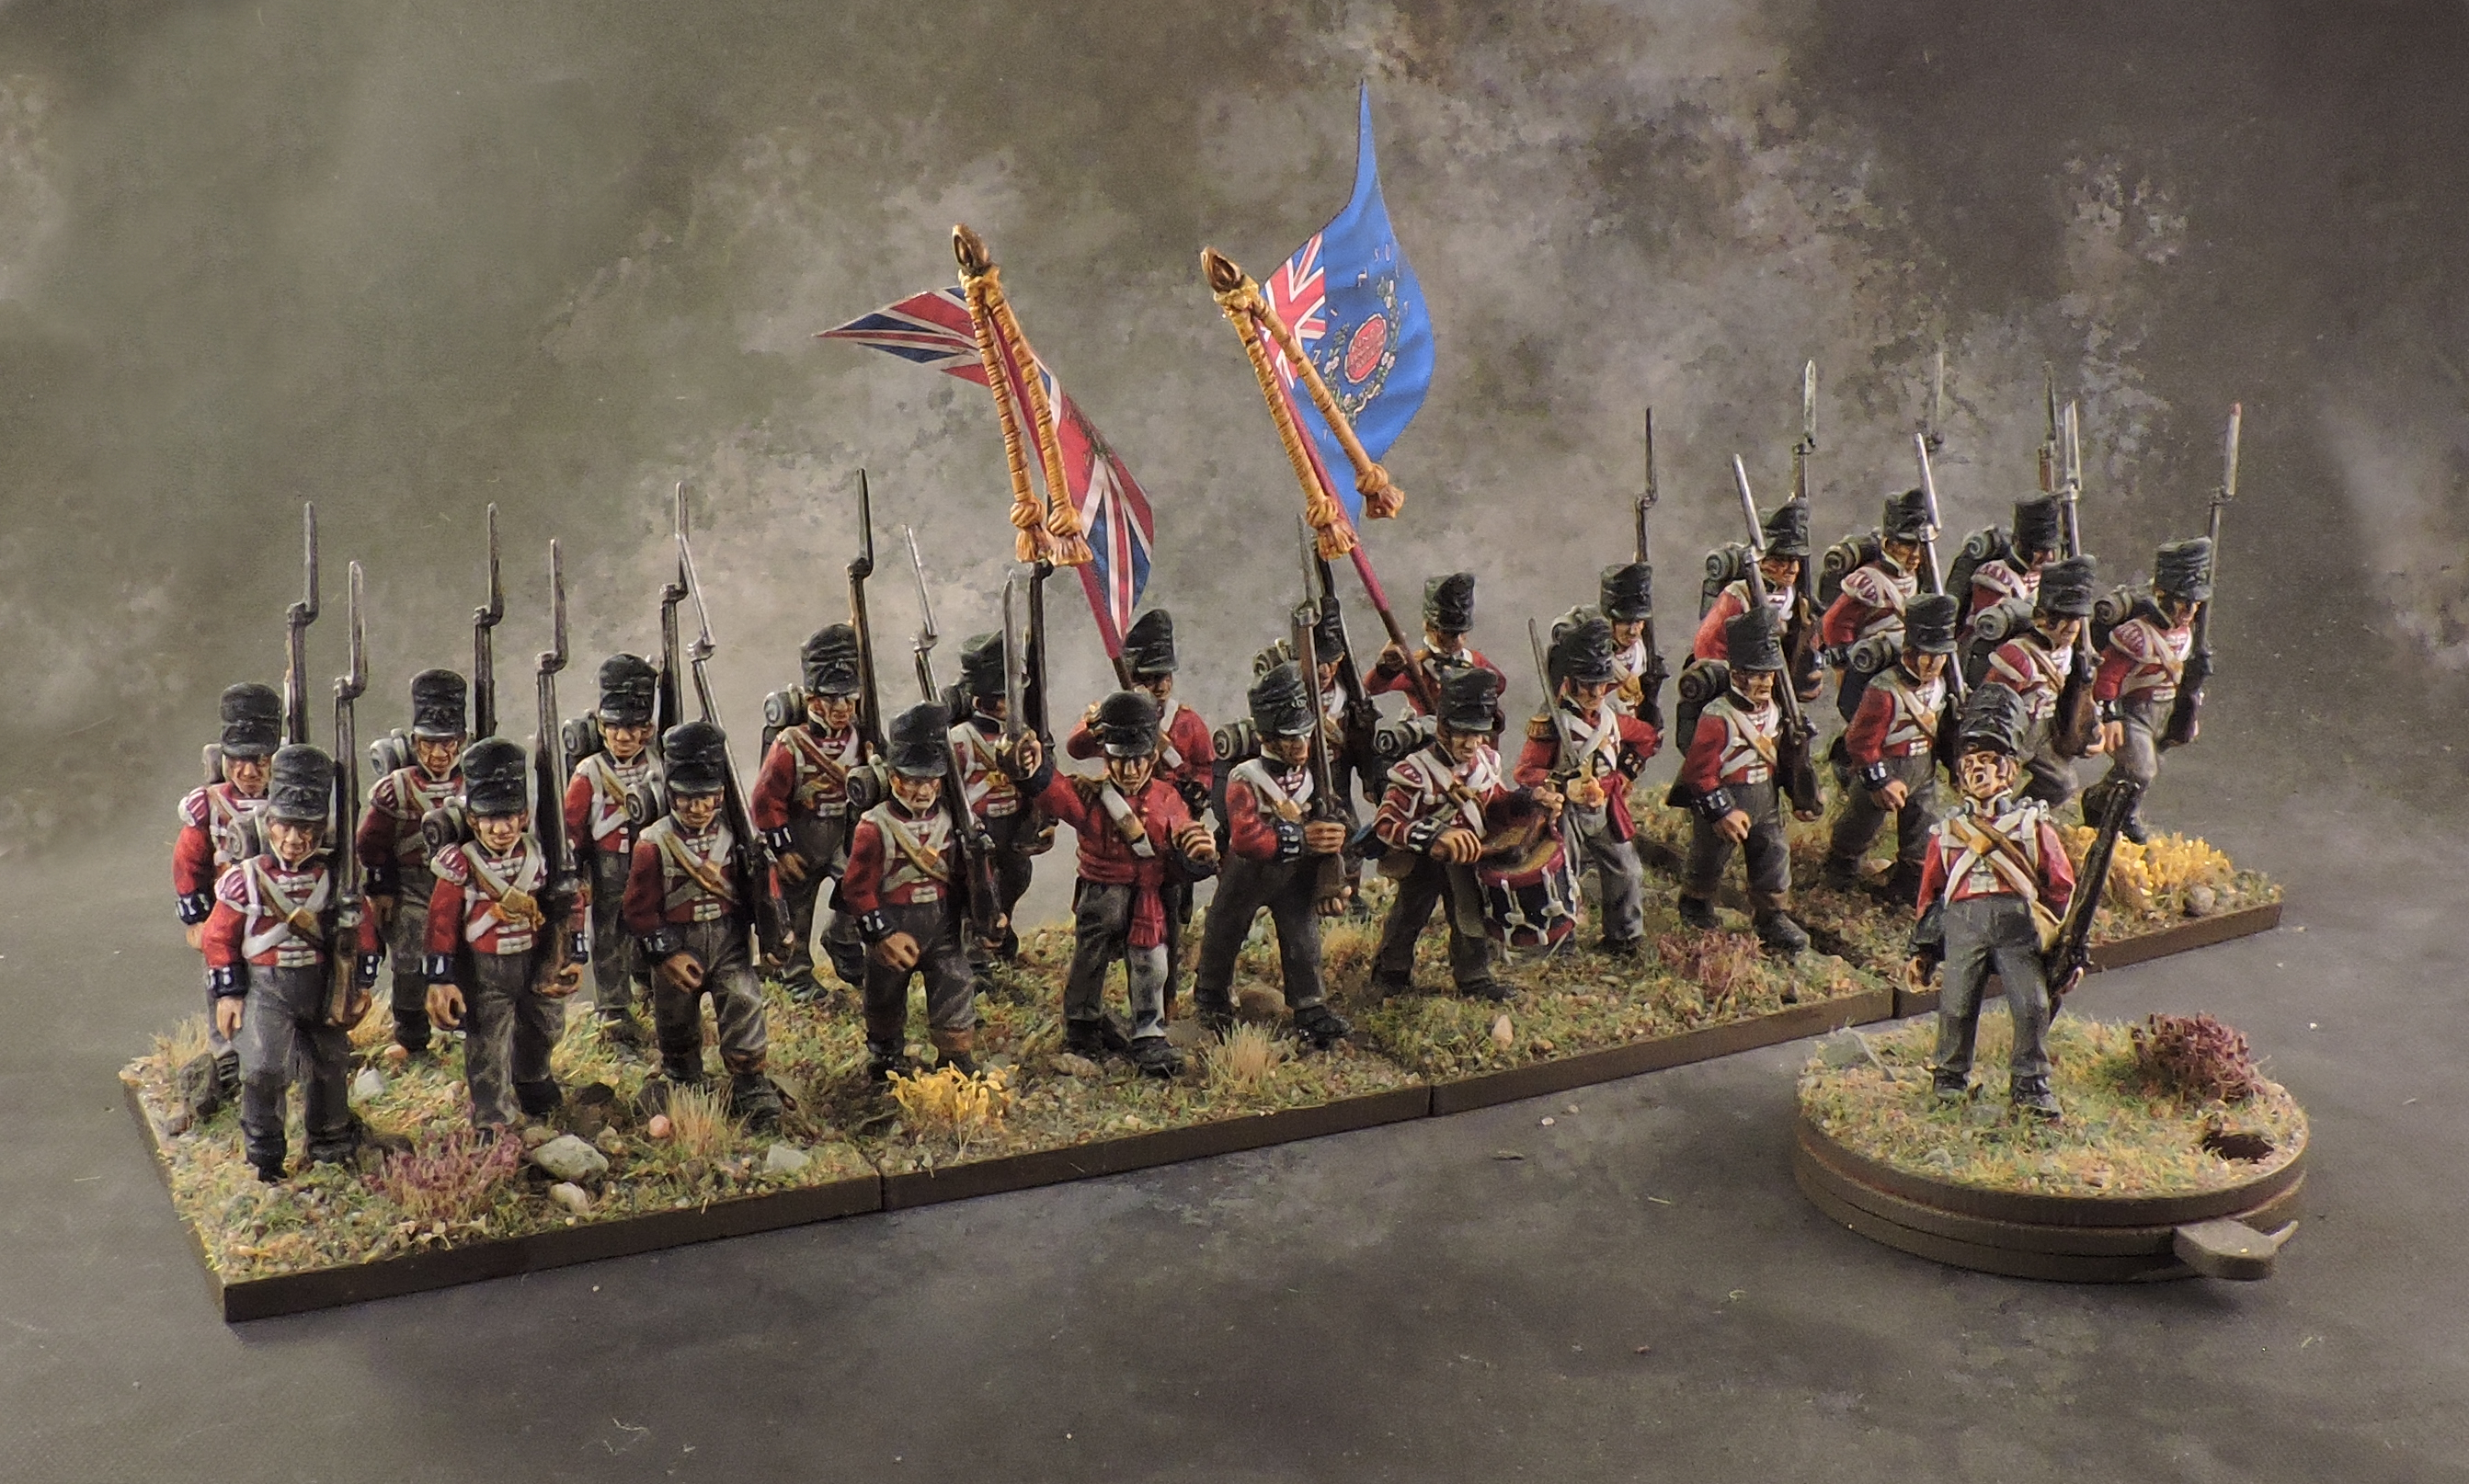
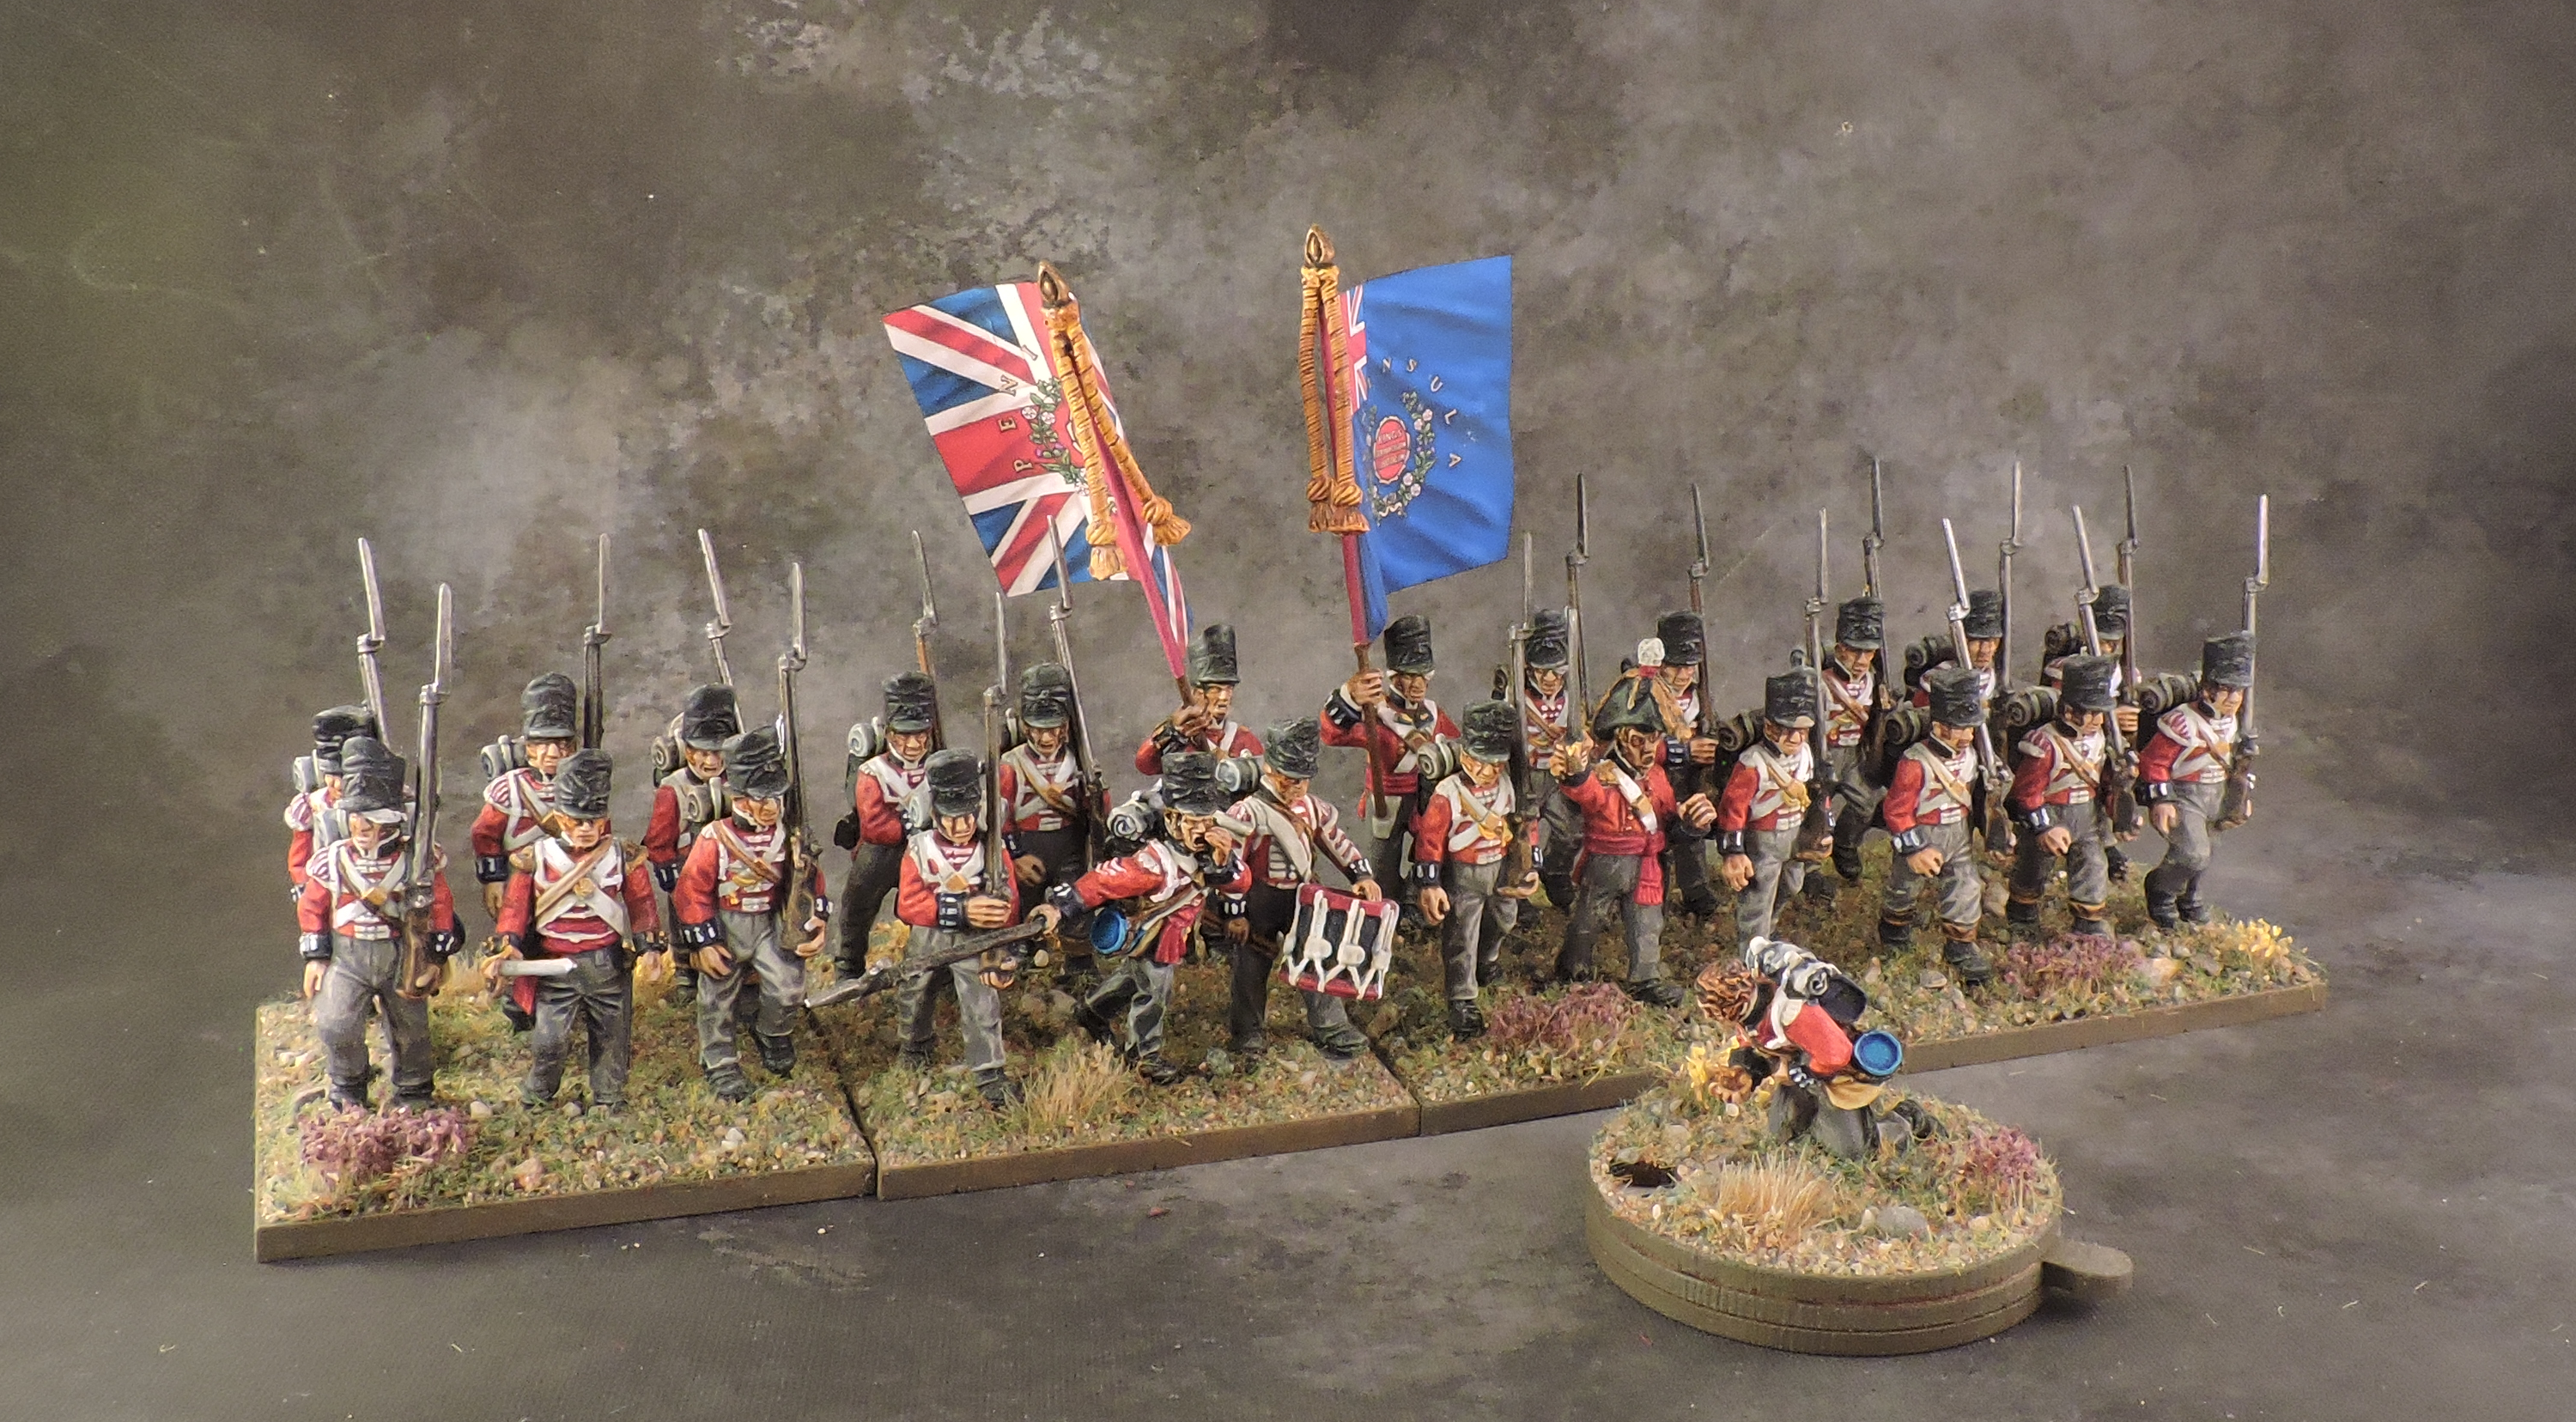
3rd British Division – 5th British Infantry Brigade
Led by Major General C. Halkett, the 5th Brigade was the first Napoleonic formation that I painted. All four battalions are standard size with figures from the Perry plastic kit and some metal command figures from various manufacturers. The variety of the Perry kit allows for very dynamic units reflecting the character of Wellington’s beloved rogues.


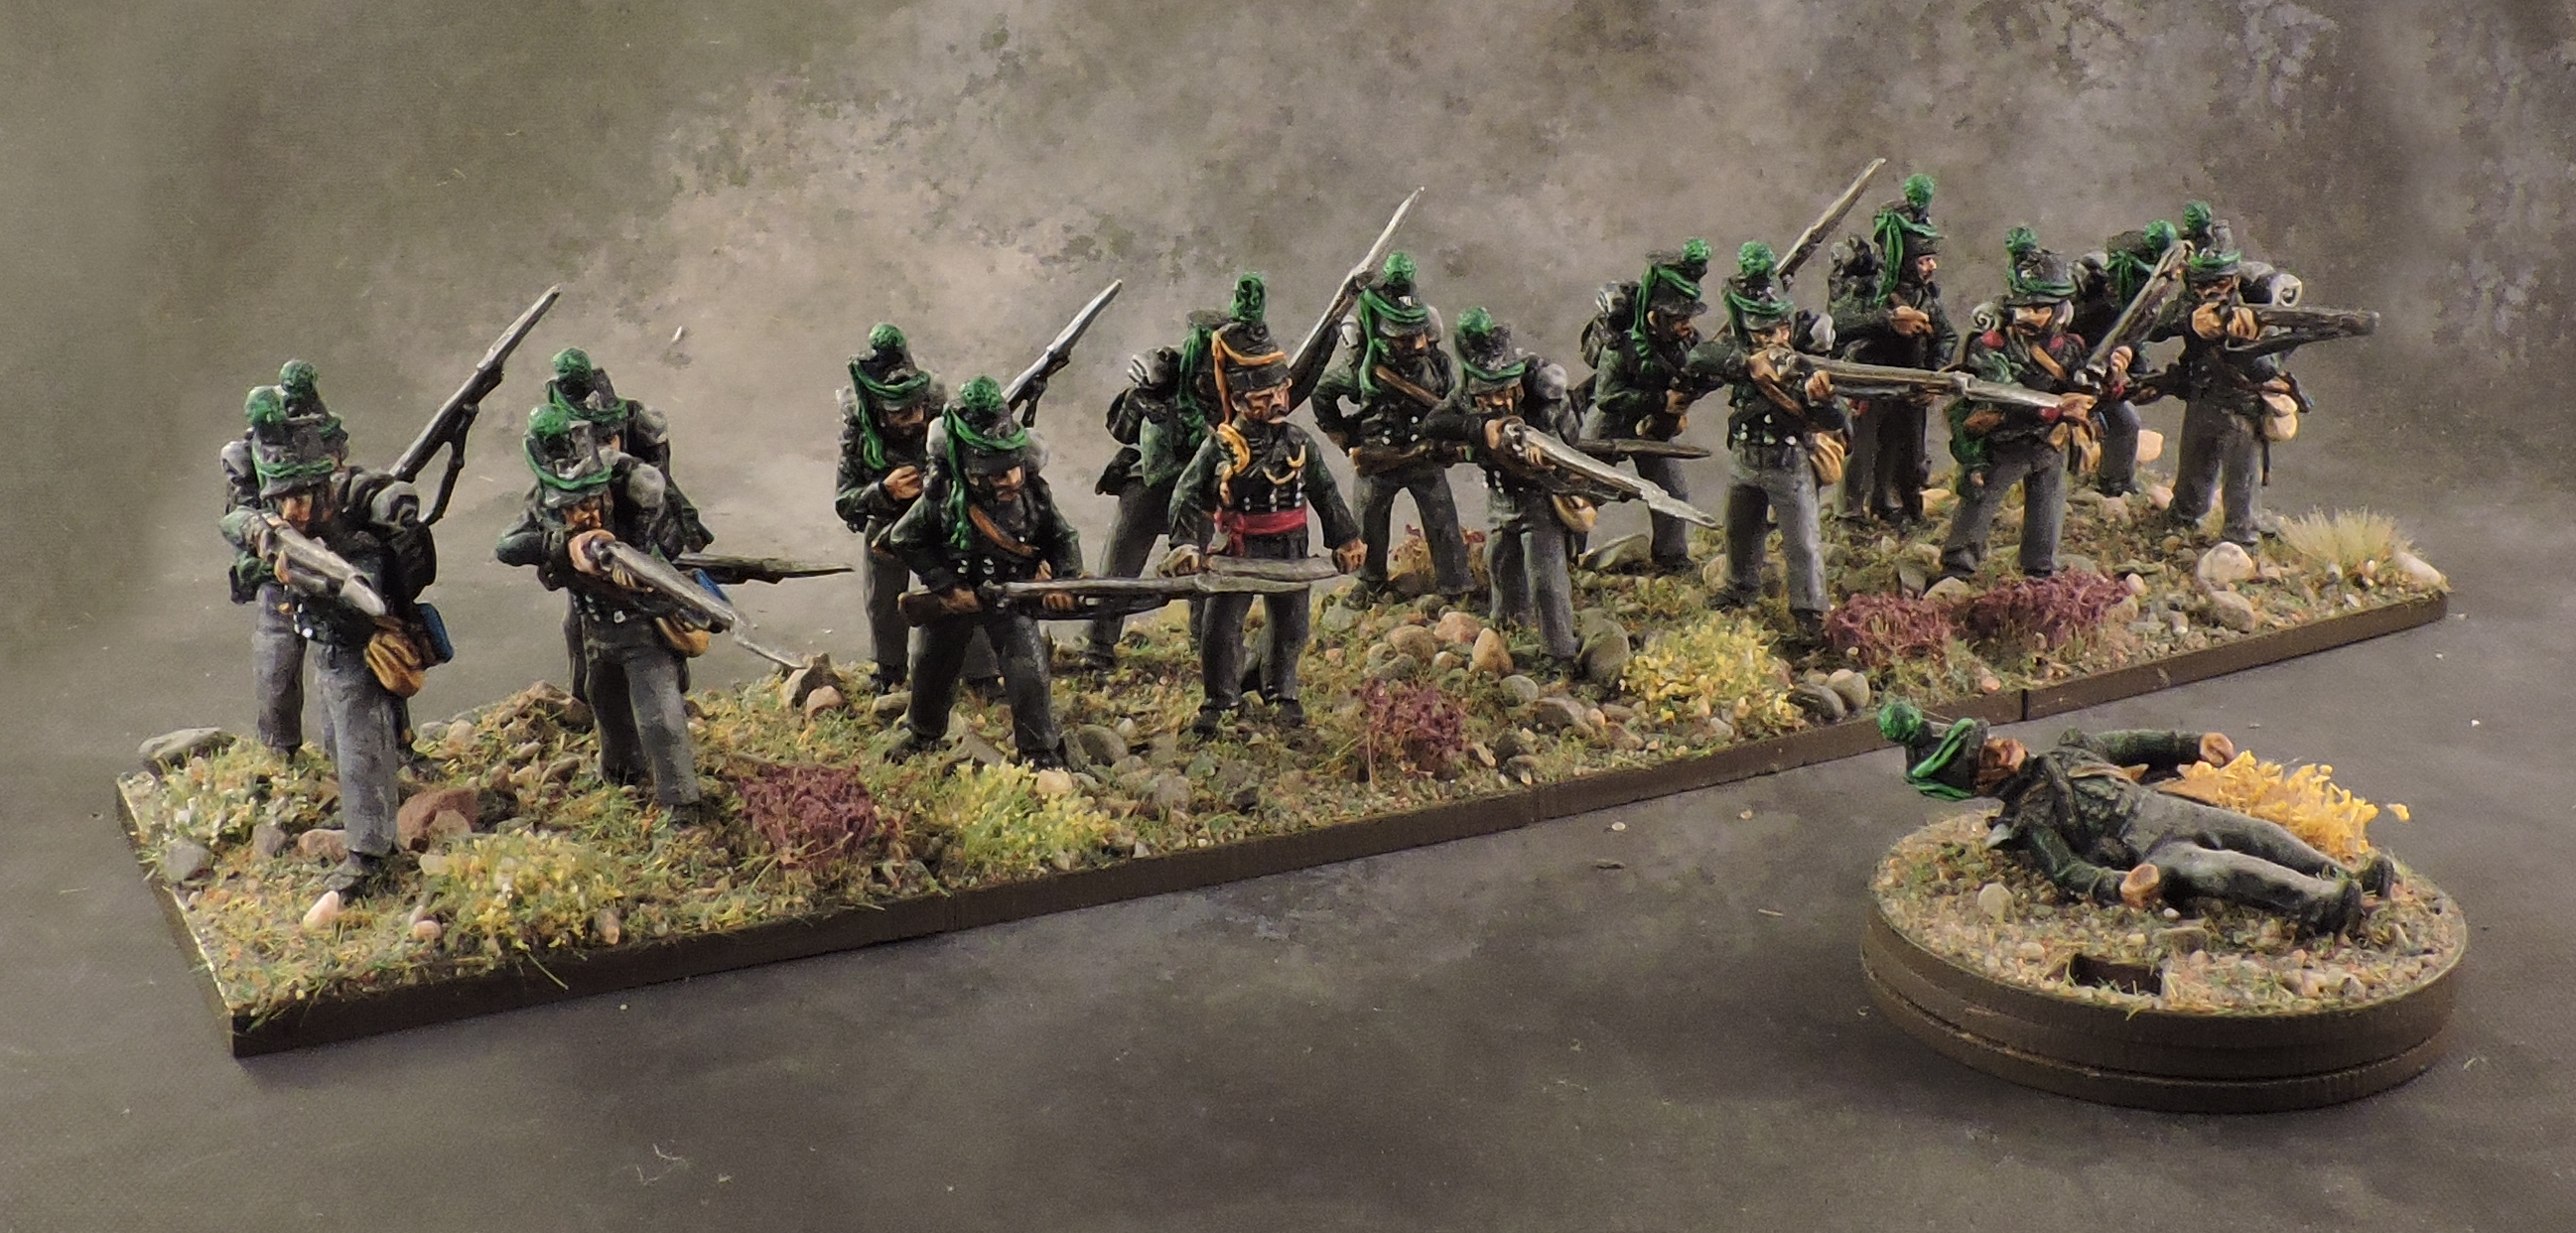
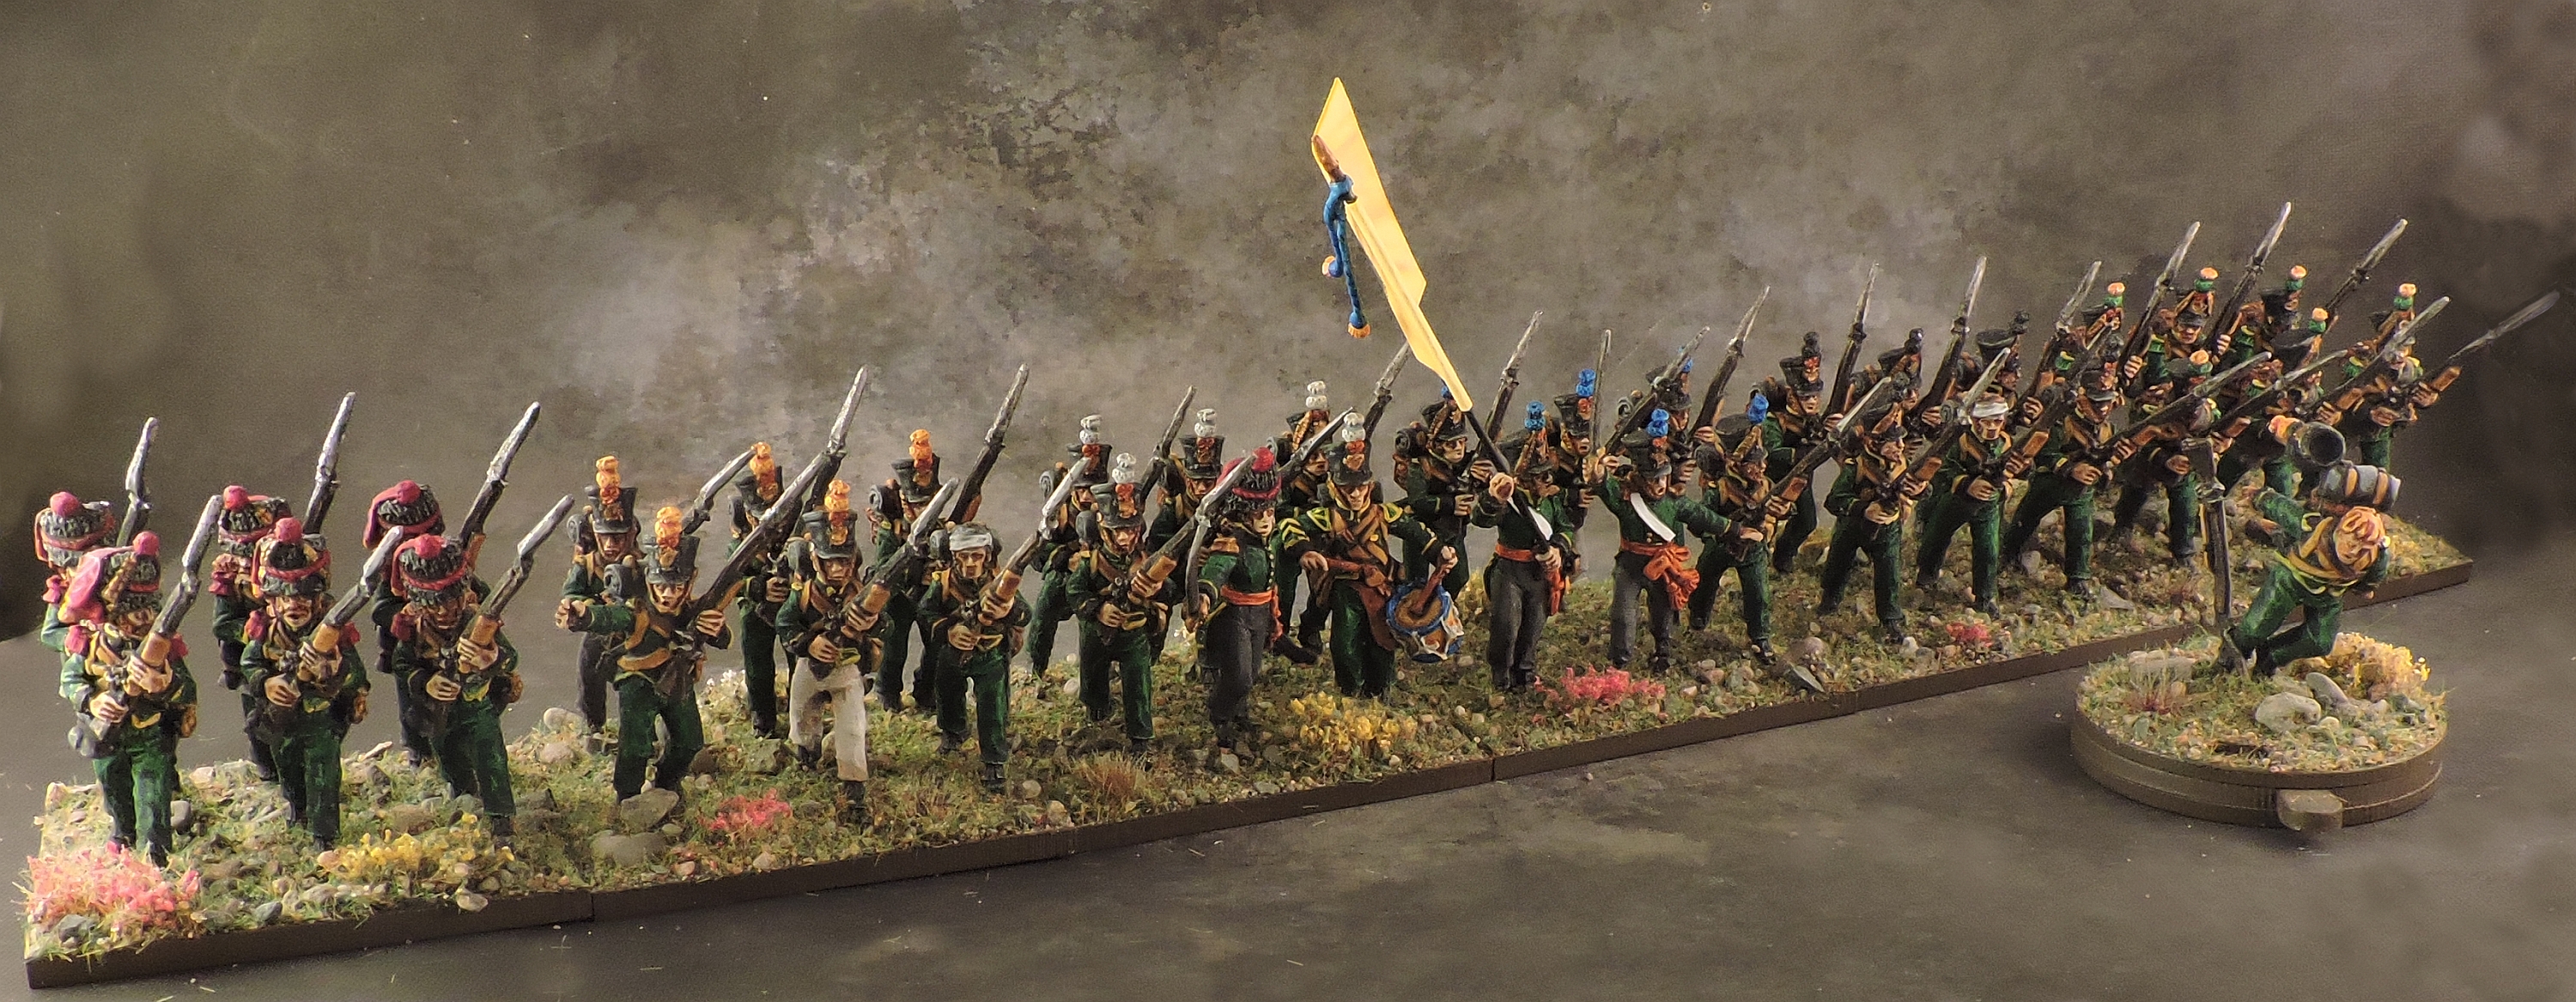
3rd British Division – 2nd KGL Infantry Brigade
Colonel Baron Ompteda commands this crack formation of the King’s German Legion (KGL) which saw active service across the entire Napoleonic era.

The first light battalion was converted from metal 95th Rifles Portuguese Cacadores from Warlord as their uniform matches well once you remove the extra buttons (and the Portuguese feature impressive moustaches are appropriate for the KGL). The shoulder rolls are made from Green Stuff.

The second light battalion uses metal figures from Perry to accurately capture their unique uniform. This includes some figures equipped with muskets as well per the historical record. The second battalion can also be fielded in skirmish order if needed. The shako cords are likely too bright, but black-green cords on black shakos with dark green uniforms was just too visually unappealing. History be damned!

The V and VIII KGL Line battalions use Warlord plastic figurels as I thought that the mono-pose style would fit well with the famously disciplined German soldiers in the KGL. Command groups are a mix of metals and plastic from Warlord, Perry and Victrix.

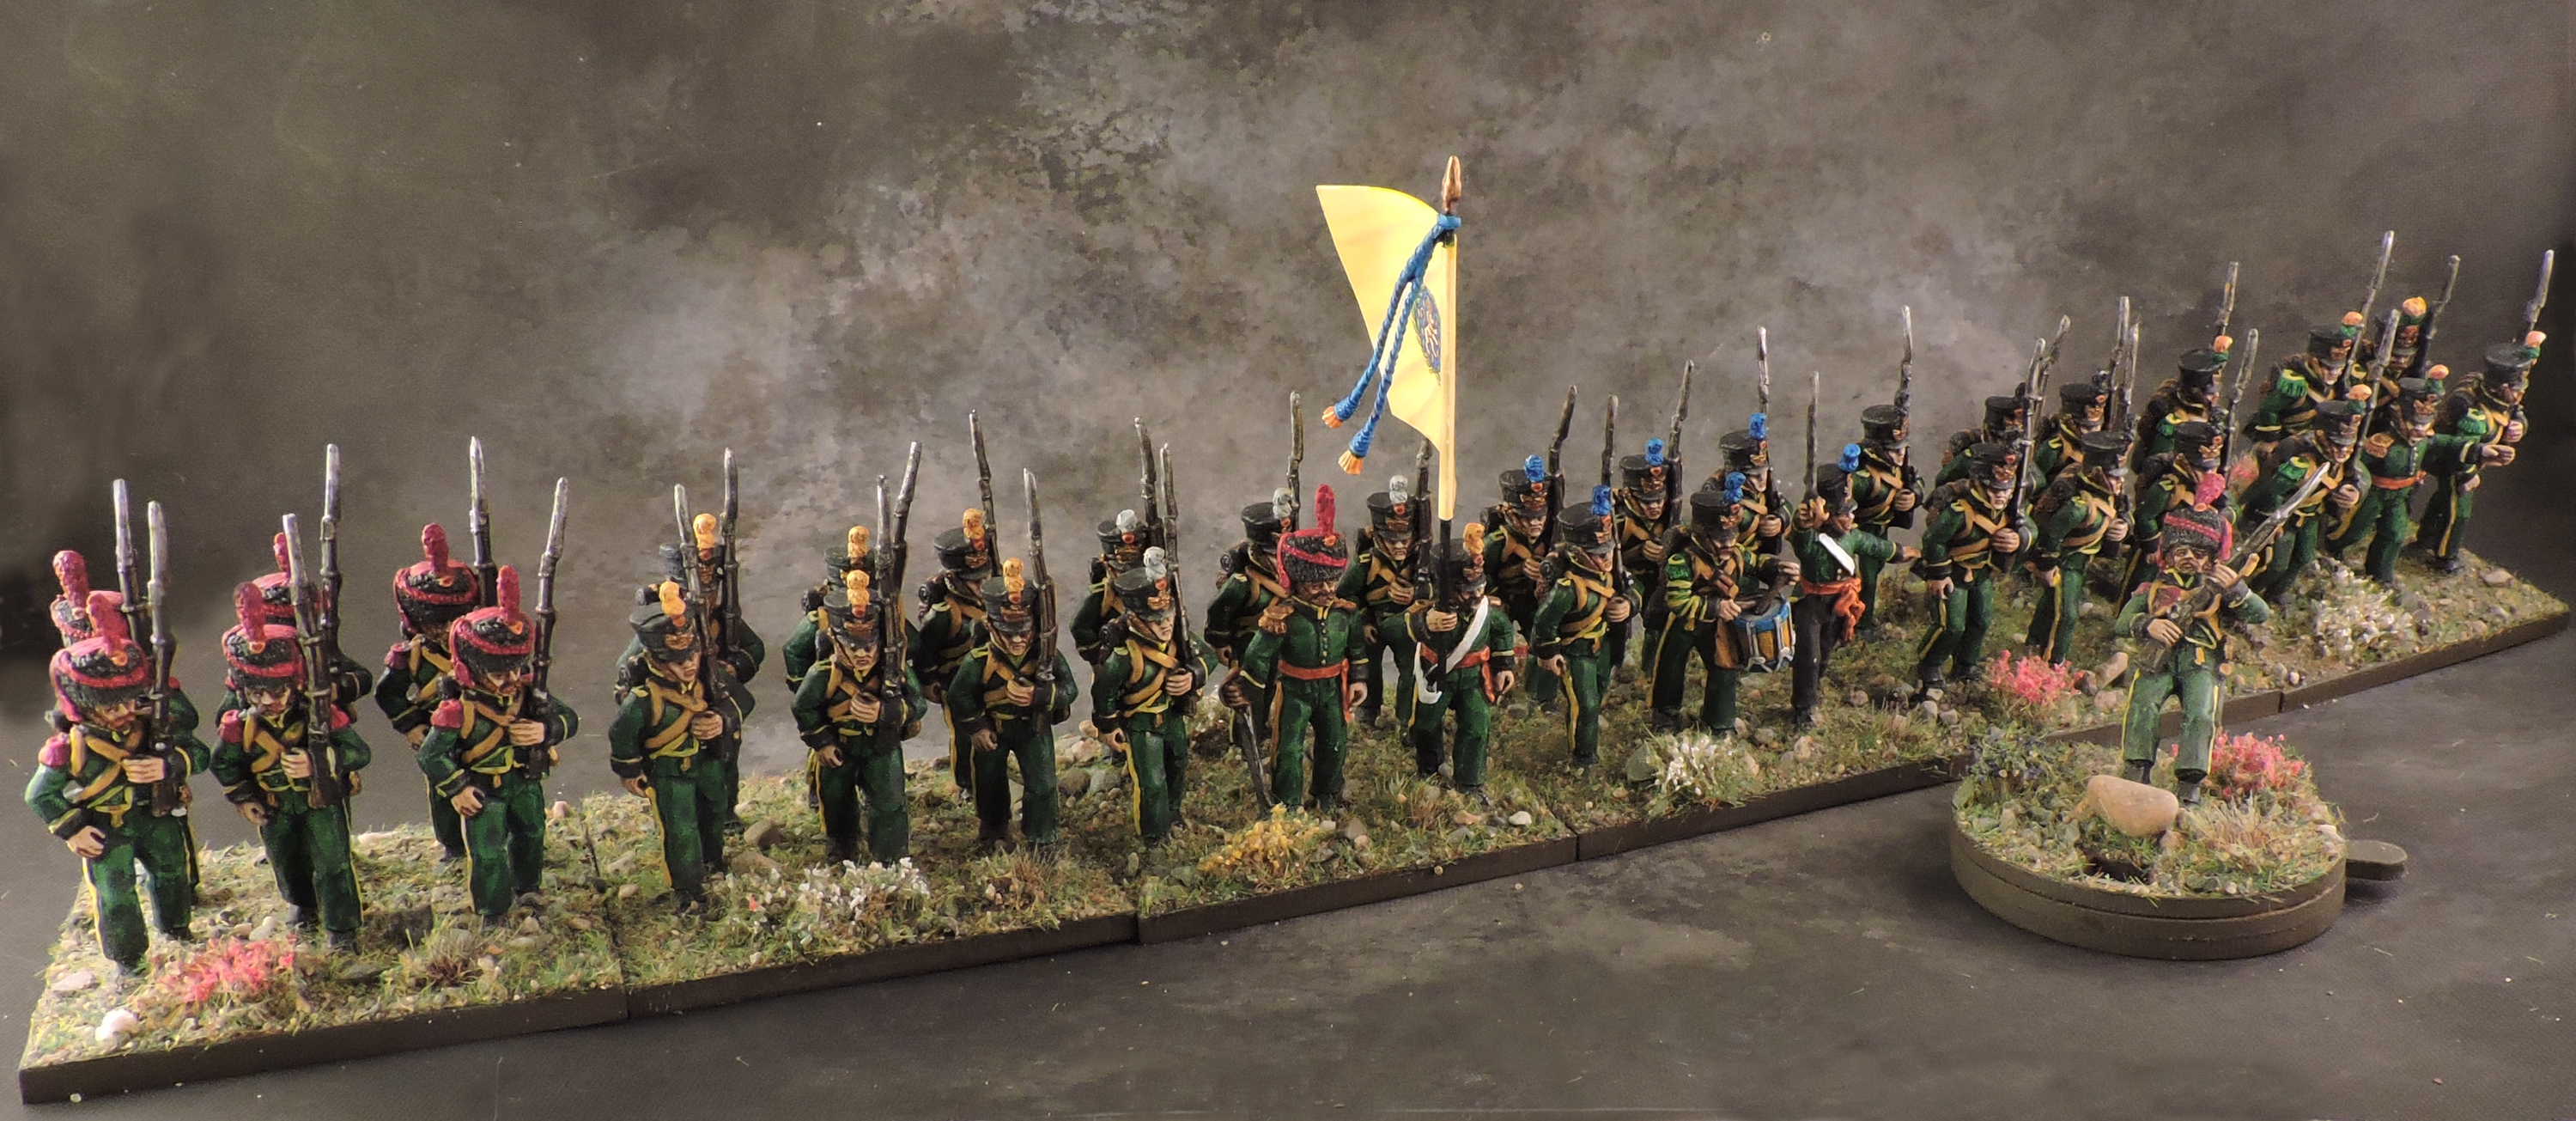
3rd British Division – 1st Hannover Infantry Brigade
Beyond the King’s German Legion, the royal domain of Hannover provided quite a few units to the allied army. Many of these served in the backfield or reserves, but the 1st Brigade under Major General Graf von Kielmansegg was right in the middle of the action at Waterloo. The brigade was in the process of being refitted into British uniforms around the time of the battle so historical sources disagree on their equipment choice. I chose to follow the information provided at the incredibly helpful Cent Jours site for this – and all other – units in this army.

The two light battalions are metal figures from the Perry range specifically for this purpose. Note that, while light battalions, both units appear to have fought in ranked formation.

The field battalions wear an odd mix of uniforms due to the transition process. I mostly used Warlord plastics as the base with some conversion to remove lace for the old green uniforms where needed. And before anybody corrects the spelling of bataillon versus battalion, the former is what Germans from Hannover would have used!


3rd British Division – Divisional Artillery
A company of the 10th Battalion Royal Foot and the 1st KGL Foot Artillery support the division. Both use 9pdr guns and 5.5″ Howitzers.

2nd Netherlands Division
Led by Lieutenant-General Baron de Perponcher-Sedlnitzky, this is the main Dutch-Belgian infantry force on the field as the 1st Netherlands Division was in reserve at Hal and the 3rd Netherlands Division was held back until the very end of the battle.

2nd Netherlands Division – 1st Brigade
The 1st Brigade under Generaal-Majoor Willem Frederik van Bijlandt (often spelled Bylandt as well) centres on the 7th Belgian Line Battalion supported by Dutch Jagers and militia, including the 5th Militia Battalion which was heavily depleted at Quatre Bras.
A note on spelling: Light infantry in the continental forces were “Hunters” and were often actual hunters drafted in the army. Belgians spoke French so these become Chasseurs. It’s a bit more confusing for the Dutch and Germans (Nassau, Brunswick, Hannover). In German, the term is Jäger which is often spelled Jaeger if the “ä” letter isn’t available. The German plural is the same word so one Jäger, two Jäger. In Dutch, a single hunter would be Jager and the plural would be multiple Jagers. The word Jägers doesn’t exist in either language even if often mistakenly used in English documents.


2nd Netherlands Division – 2nd Brigade
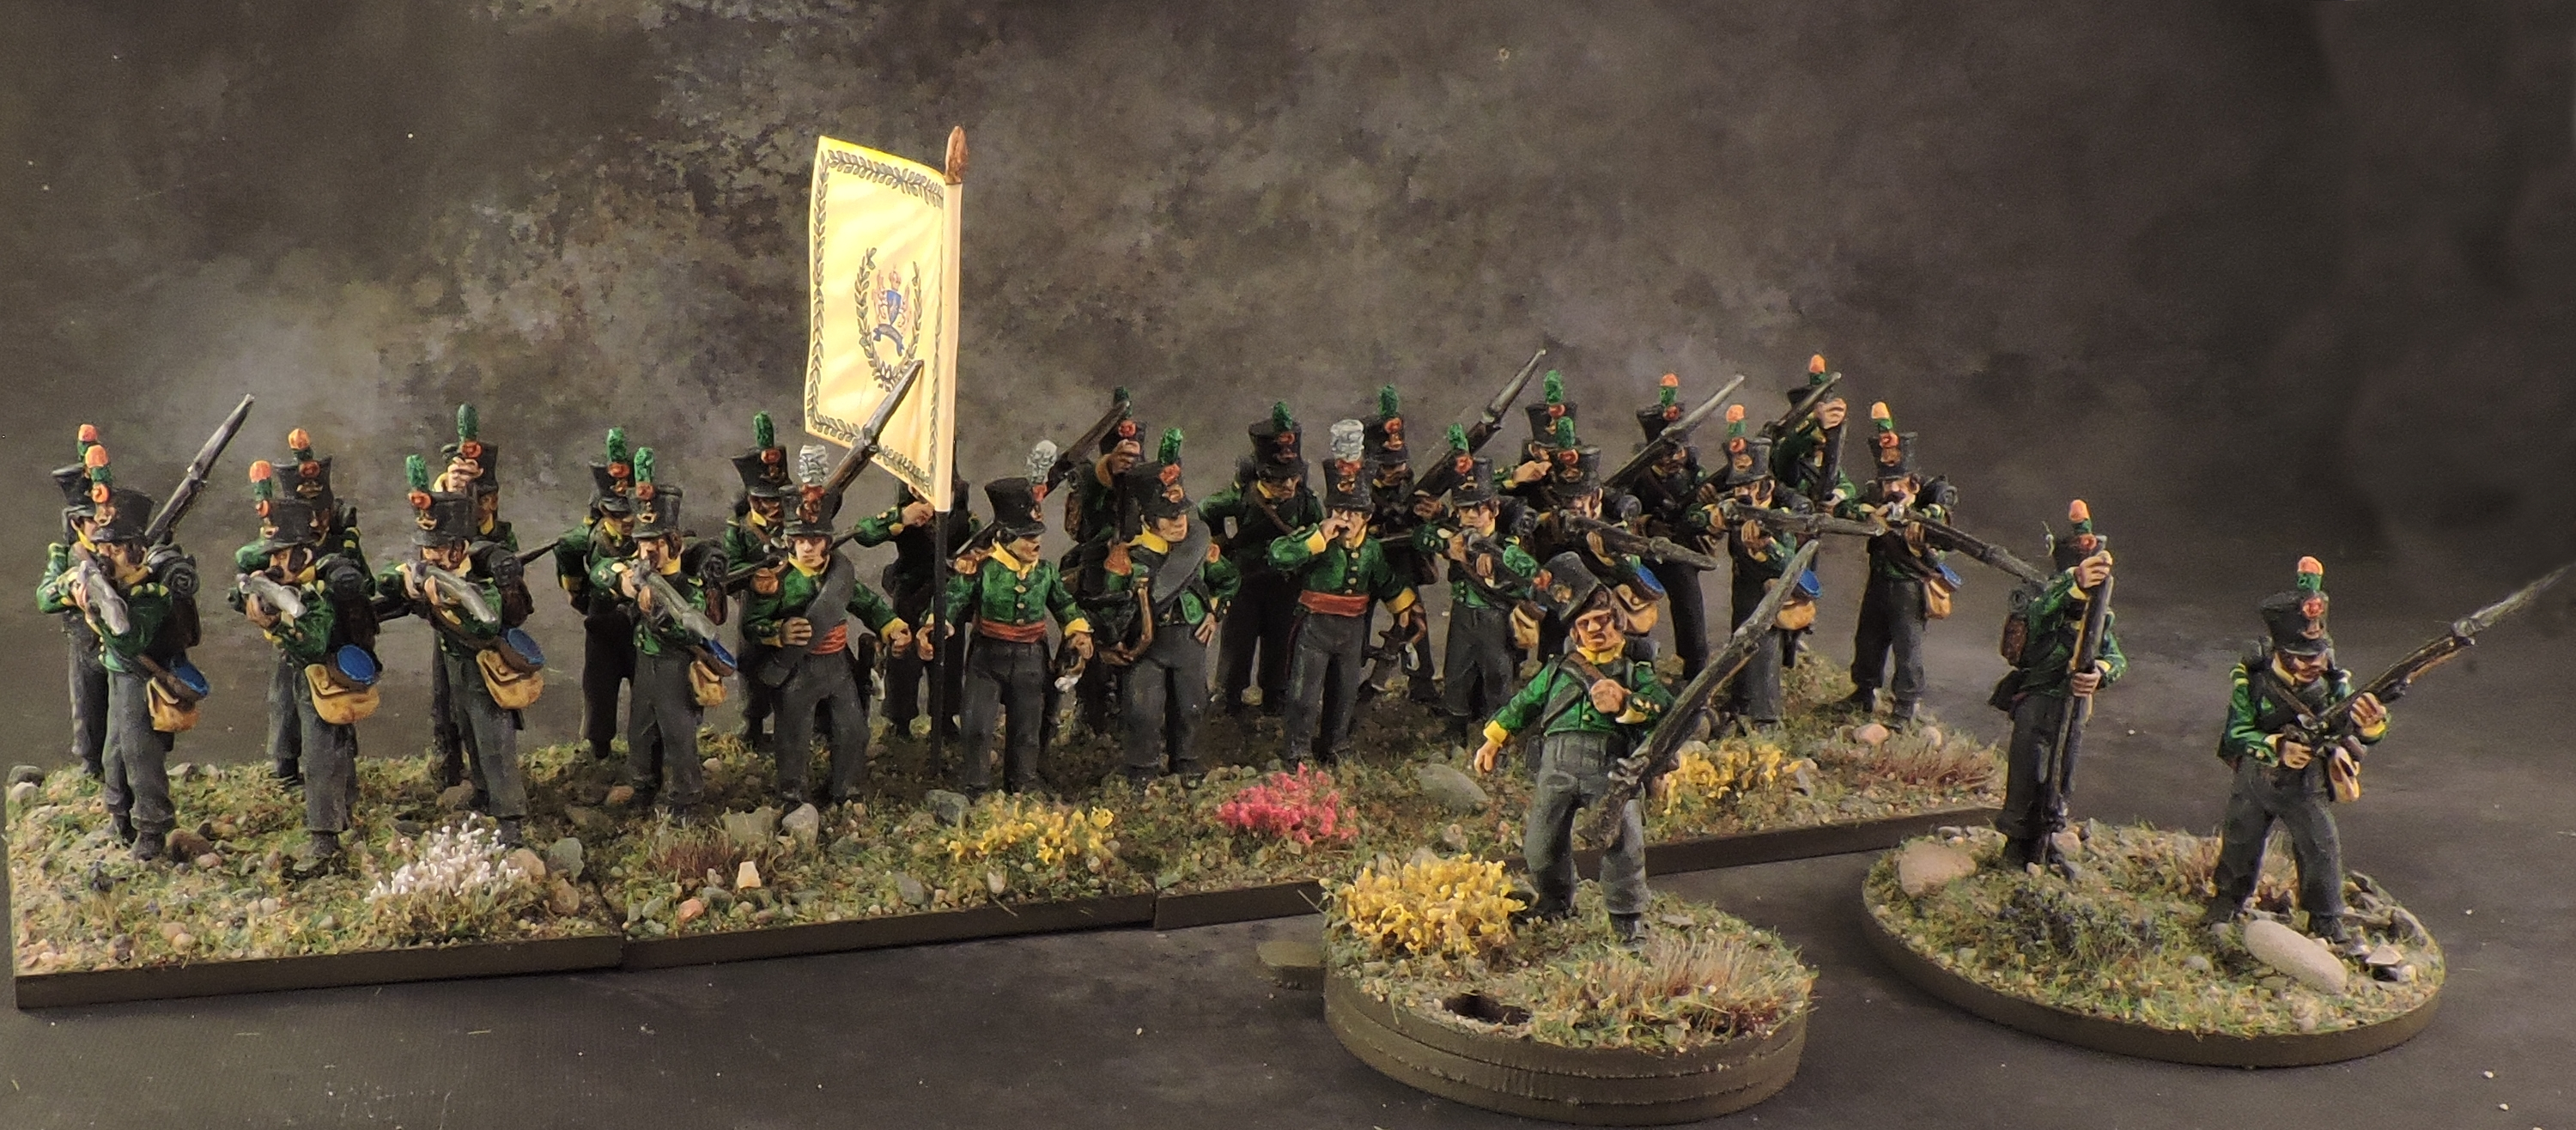
The 2nd Brigade, led on the day by Prinz Bernard von Saxe-Weimar, is the primary Nassau contingent composed of the 2nd and 28th Line as well as some Volunteer-Jägers. The first battalion of the 2nd and both 28th Nassau battalions use metal miniatures from Perry. Rapier Miniatures provided the other two battalions of the 2nd regiment. I added a regimental command base for the 2nd Regiment from spare figures.


2nd Netherlands Division – Divisional Artillery
Two batteries support the division though the Foot Artillery was grievously mauled at the battle of Quatre Bras and has only one gun section.


3rd Netherlands Division
This division was held in reserve on the far Western wing to guard against a wide flanking move by Napoleon which never came. Its commander, Luitenant-Generaal Baron David Hendrik Chassé, the division finally advanced to assist in repulsing the final assault of the French Garde Imperial.

3rd Netherlands Division – 1st Brigade
Kolonel Hendrik Detmers commands 1st Brigade which is structured the same as the 1st Brigade of 2nd Netherlands Divisions with one Chasseur, one Line and four Militia battalions. I have skipped three of the Militia formations as they don’t appear to have made contact during the battle (or at least not sustained casualties).


I omitted the 4th, 6th, 17th and 19th Dutch National Militia battalions which remained in the rear as far as I can tell.
3rd Netherlands Division – 2nd Brigade
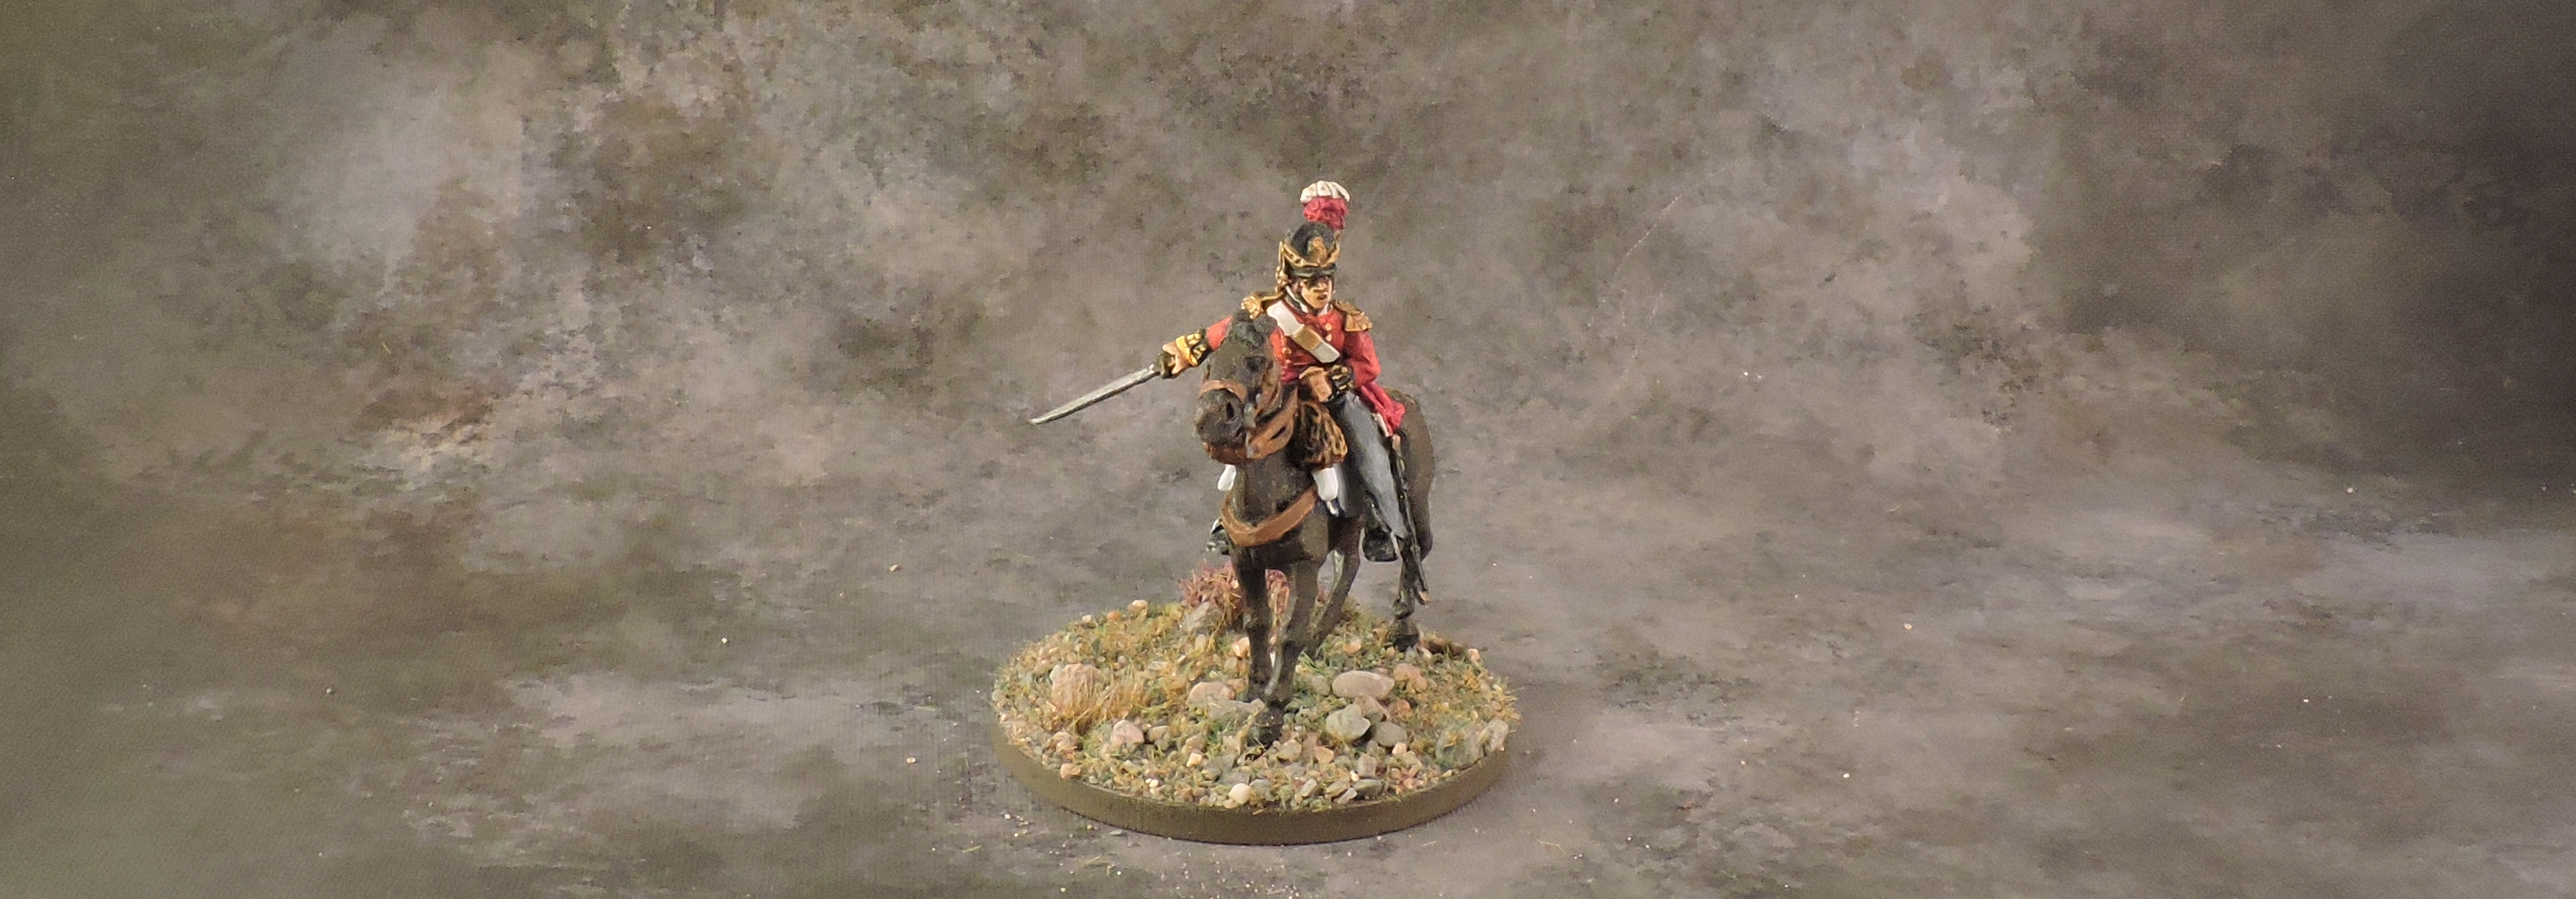
Generaal-Majoor Alexander d’Aubremé leads this brigade which features the bulk of the Netherlands Line battalions at Waterloo.

Generaal-Majoor Alexander d’Aubremé, commanding 2nd Brigade.


I skipped 10th National Militia which formed the remainder of the brigade.
3rd Netherlands Division – Divisional Artillery
The division was supported by two batteries, though I am not sure if they were meaningfully engaged.

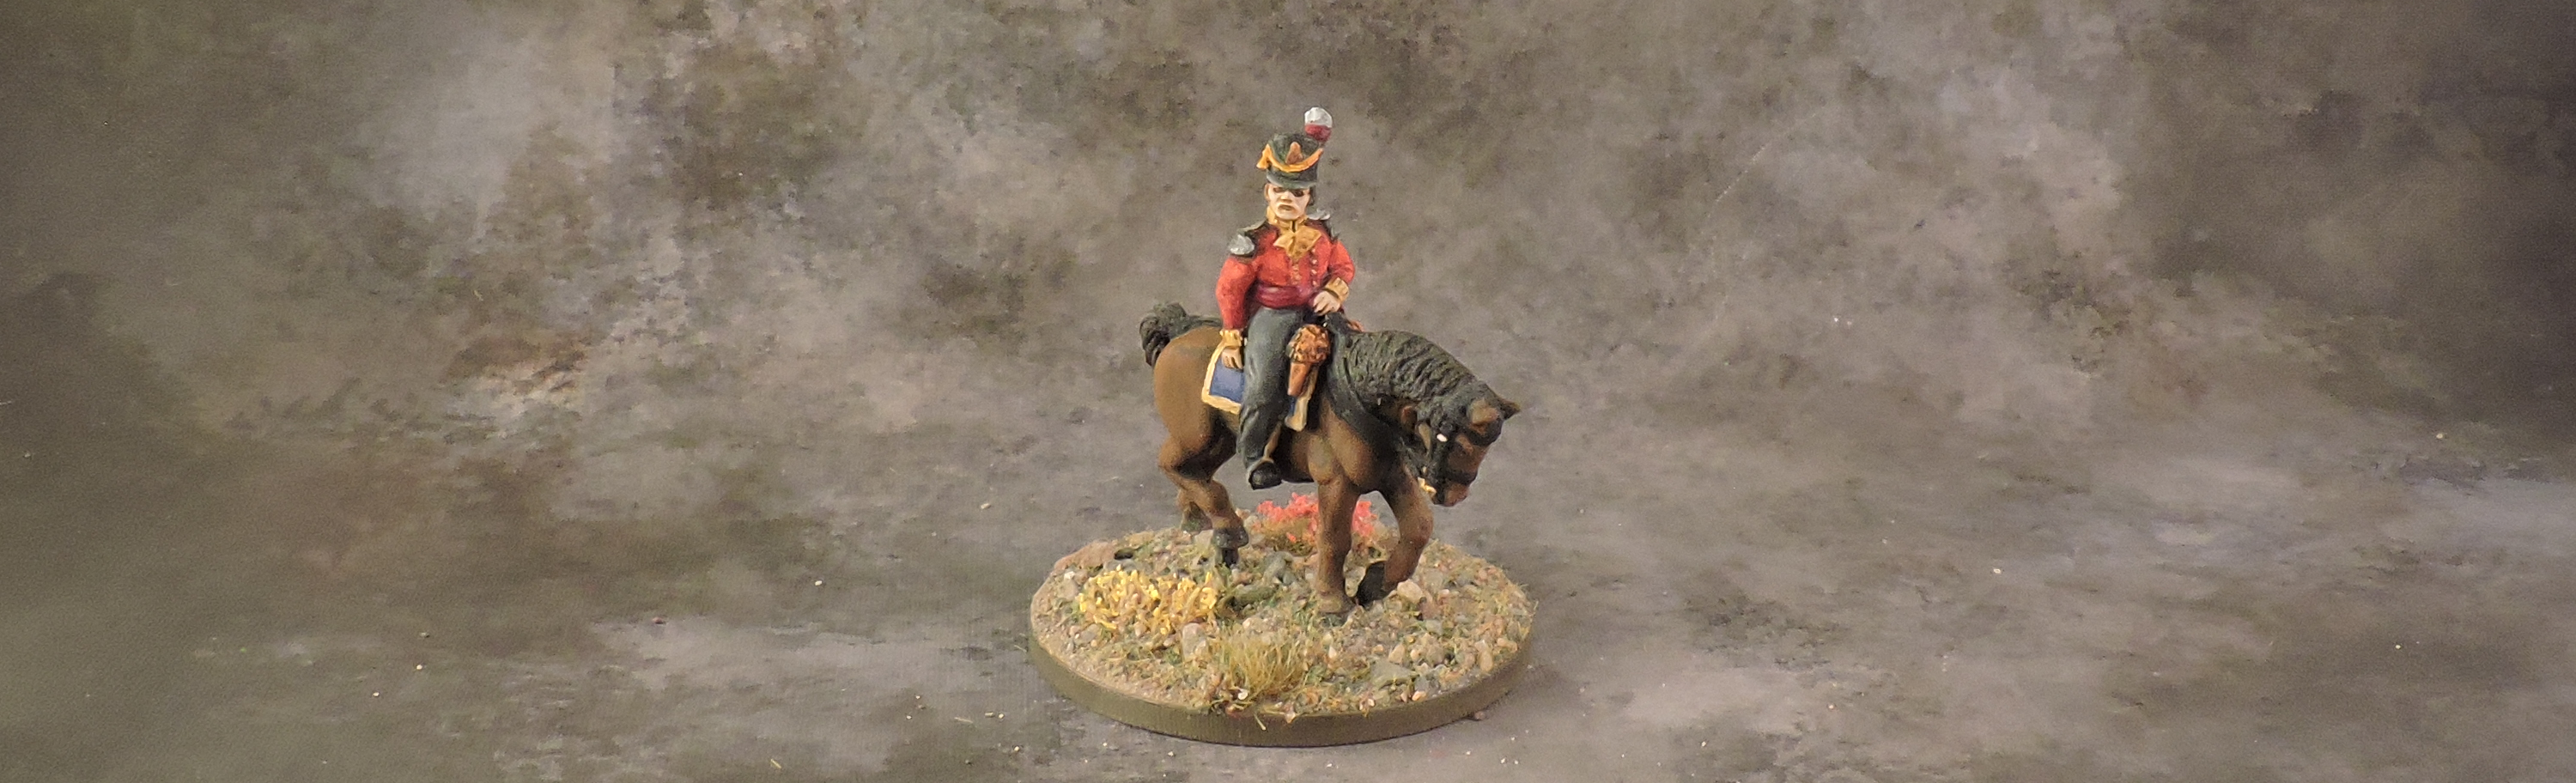
II Corps
Lord Rowland Hill commands the II Corps and, unlike I Corps, his units are tightly concentrated on the Western flank of the battle. His ADC is a Major of the 52nd Foot (Light).

The primary fighting formation of II Corps is the 2nd British Infantry Division commanded by Lieutenant General Clinton (another Danish figure from Perry with some tweaks). ADC is a Captain of the 95th Rifles. The rest of II Corps was in reserve or rear-guard duty at Hal to cover the Allied far right flank where Wellington feared a French attack.

2nd British Division – 3rd British Infantry Brigade
This brigade, Major General Frederick Adams commanding, groups the light battalions of the famous Light Division from the peninsula campaign.

The large light battalions are Perry plastic with flank company arms from Victrix. The heads of the 52nd Foot are a metal upgrade kit from Brigade Games (originally designed by Victrix).

For the 71st Foot, I added some Scottish figures as a nod to their origin. The unique shakos are converted plastic heads from the Perry Rifles sprue (yes, I bought 20+ of those sprues just to get the heads only to then cut them to pieces and add the pompom with Green Stuff…).
The Rifles are a mix from Perry, Warlord, Wargames Atlantic, Brigade Games and various other metal figures that I could find. The Rifles fought in different-sized company formations so I have fully formed battalions as well as skirmish screens for each formation. Of course, I couldn’t resist sprinkling the members of Sharpe’s Rifles into the 95th Rifles.


2nd British Division – 1st KGL Brigade
Led by Colonel du Plat, the 1st Brigade of the King’s German Legion was one of the most disciplined formations of the allied army. All four KGL Line battalions, I-IV, are using Warlord plastic figures with assorted command in keeping with my “stiff Germans” theme from the 2nd Brigade.


2nd British Division – 3rd Hannover Brigade
Commanded by Colonel H. Halkett – brother of MG C. Halkett – this brigade was held in reserve with only Landwehr Bataillon Osnabrück ordered forward at the end of the battle to repulse the Imperial Guard. The figures are yet more Warlord plastics with a generic flag so they can also do duty as any other Hannoverian Landwehr formation (most of which remained in reserve).

2nd British Division – Divisional Artillery
A company of 3rd Battalion Royal Foot Artillery and the 1st KGL Horse Artillery forms the divisional artillery support.


4th British Division
Under the command of Lieutenant-General Sir Charles Colville, the bulk of this division was posted to Hal and not present at Waterloo. This includes the Dutch-Inndonesian Brigade which would have made an interesting diversion otherwise.
4th British Division – 4th British Infantry Brigade
Lieutenant-Colonel Mitchell led the 4th British Brigade, the only component of 4th Division present at Waterloo though also with a detached battalions.


Reserves
The reserves were composed of two divisions under direct command of Wellington.
5th British Division
Lieutenant-General Picton commands the 5th British Division composed of the two highland brigades and some Hannover Landwehr.

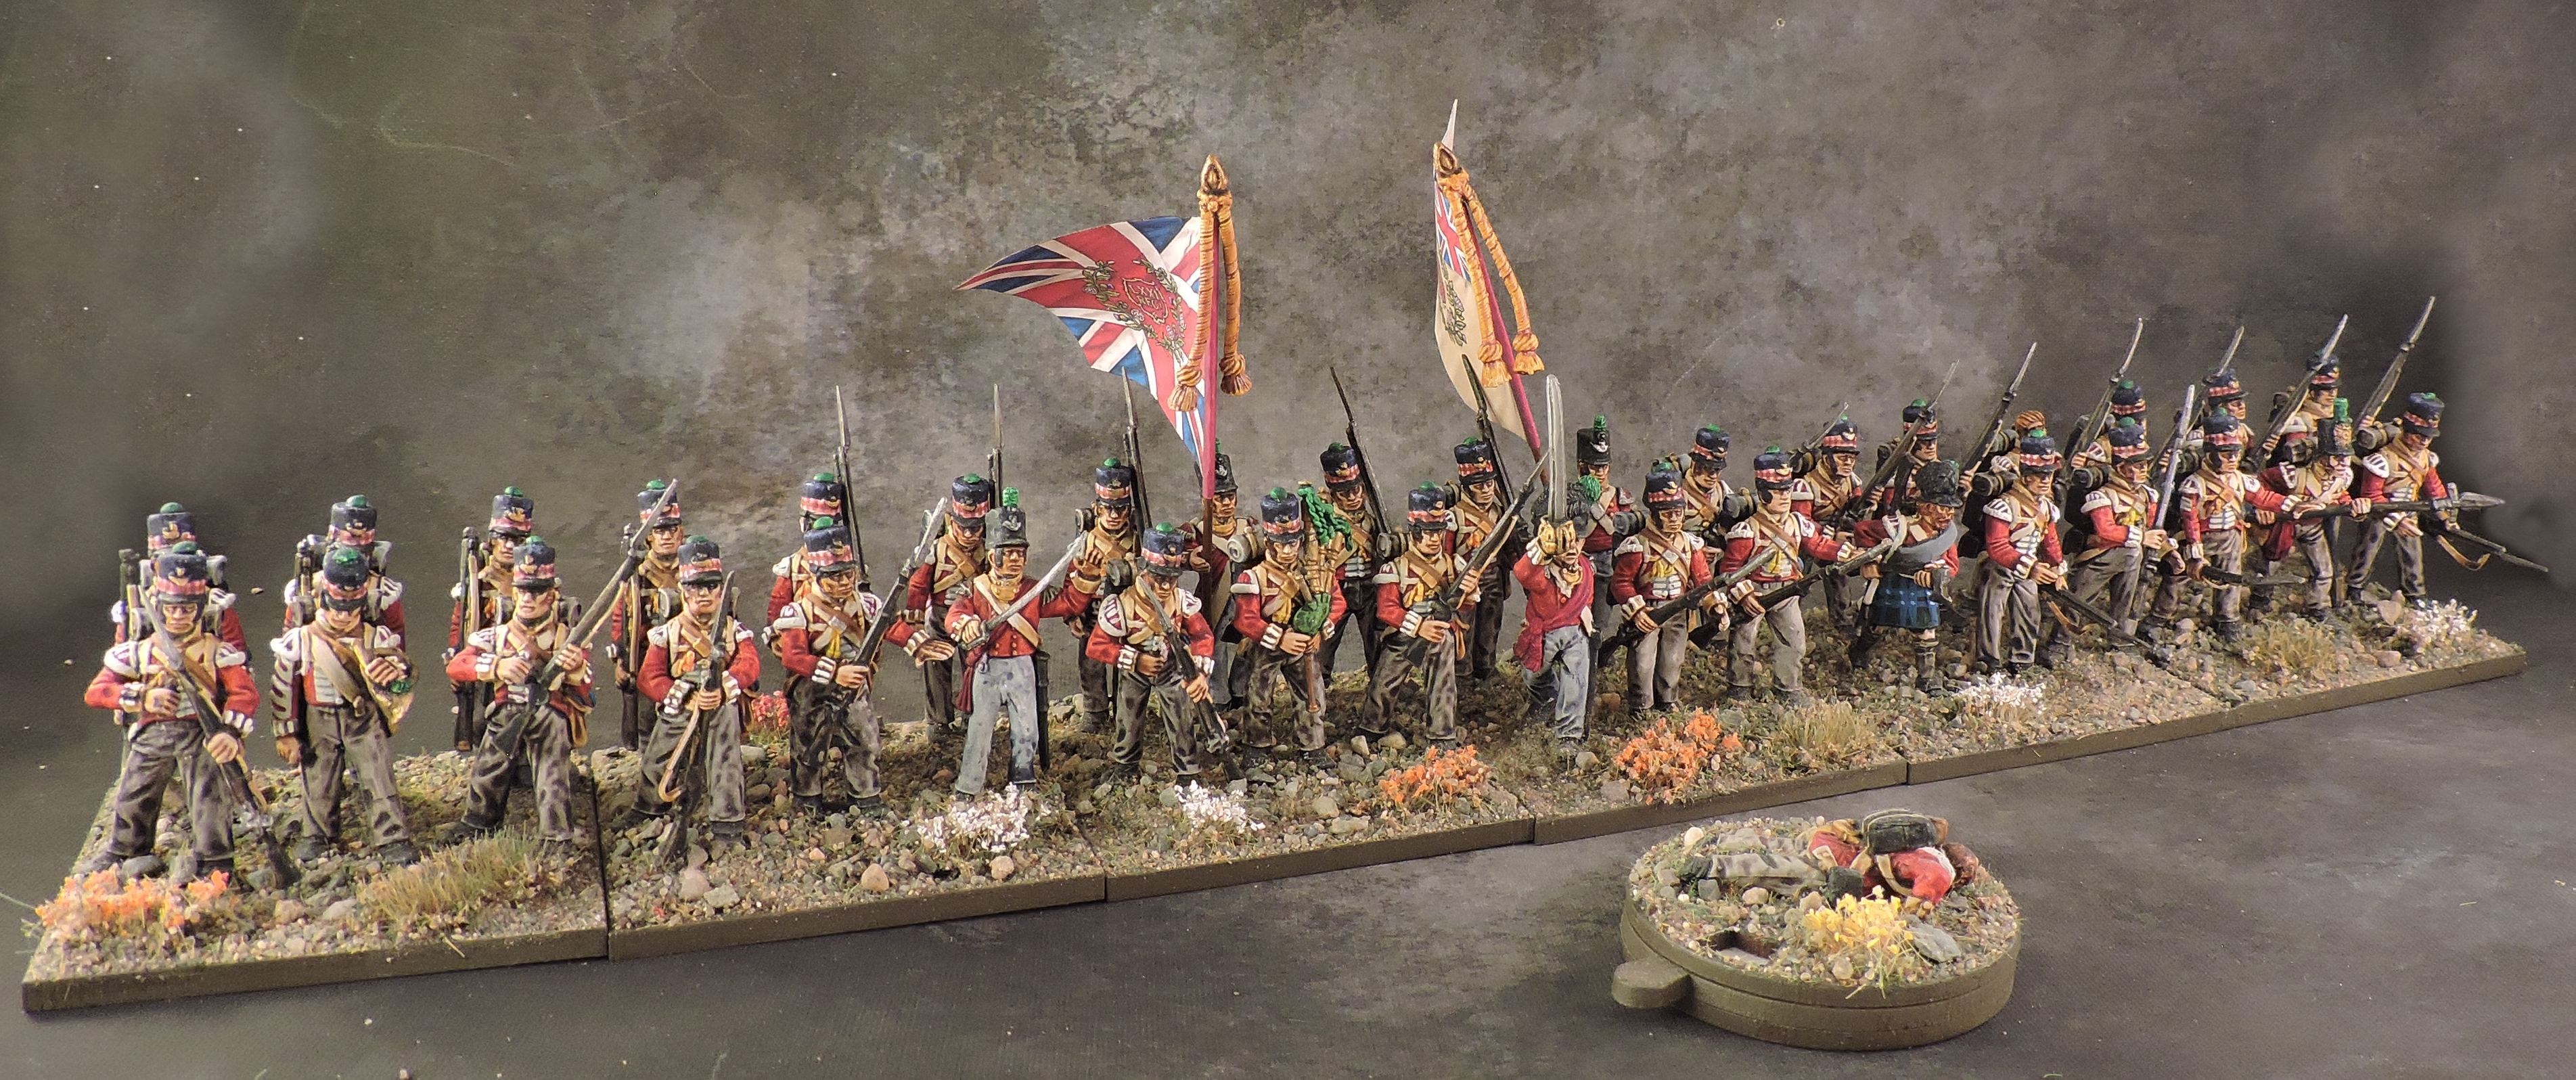
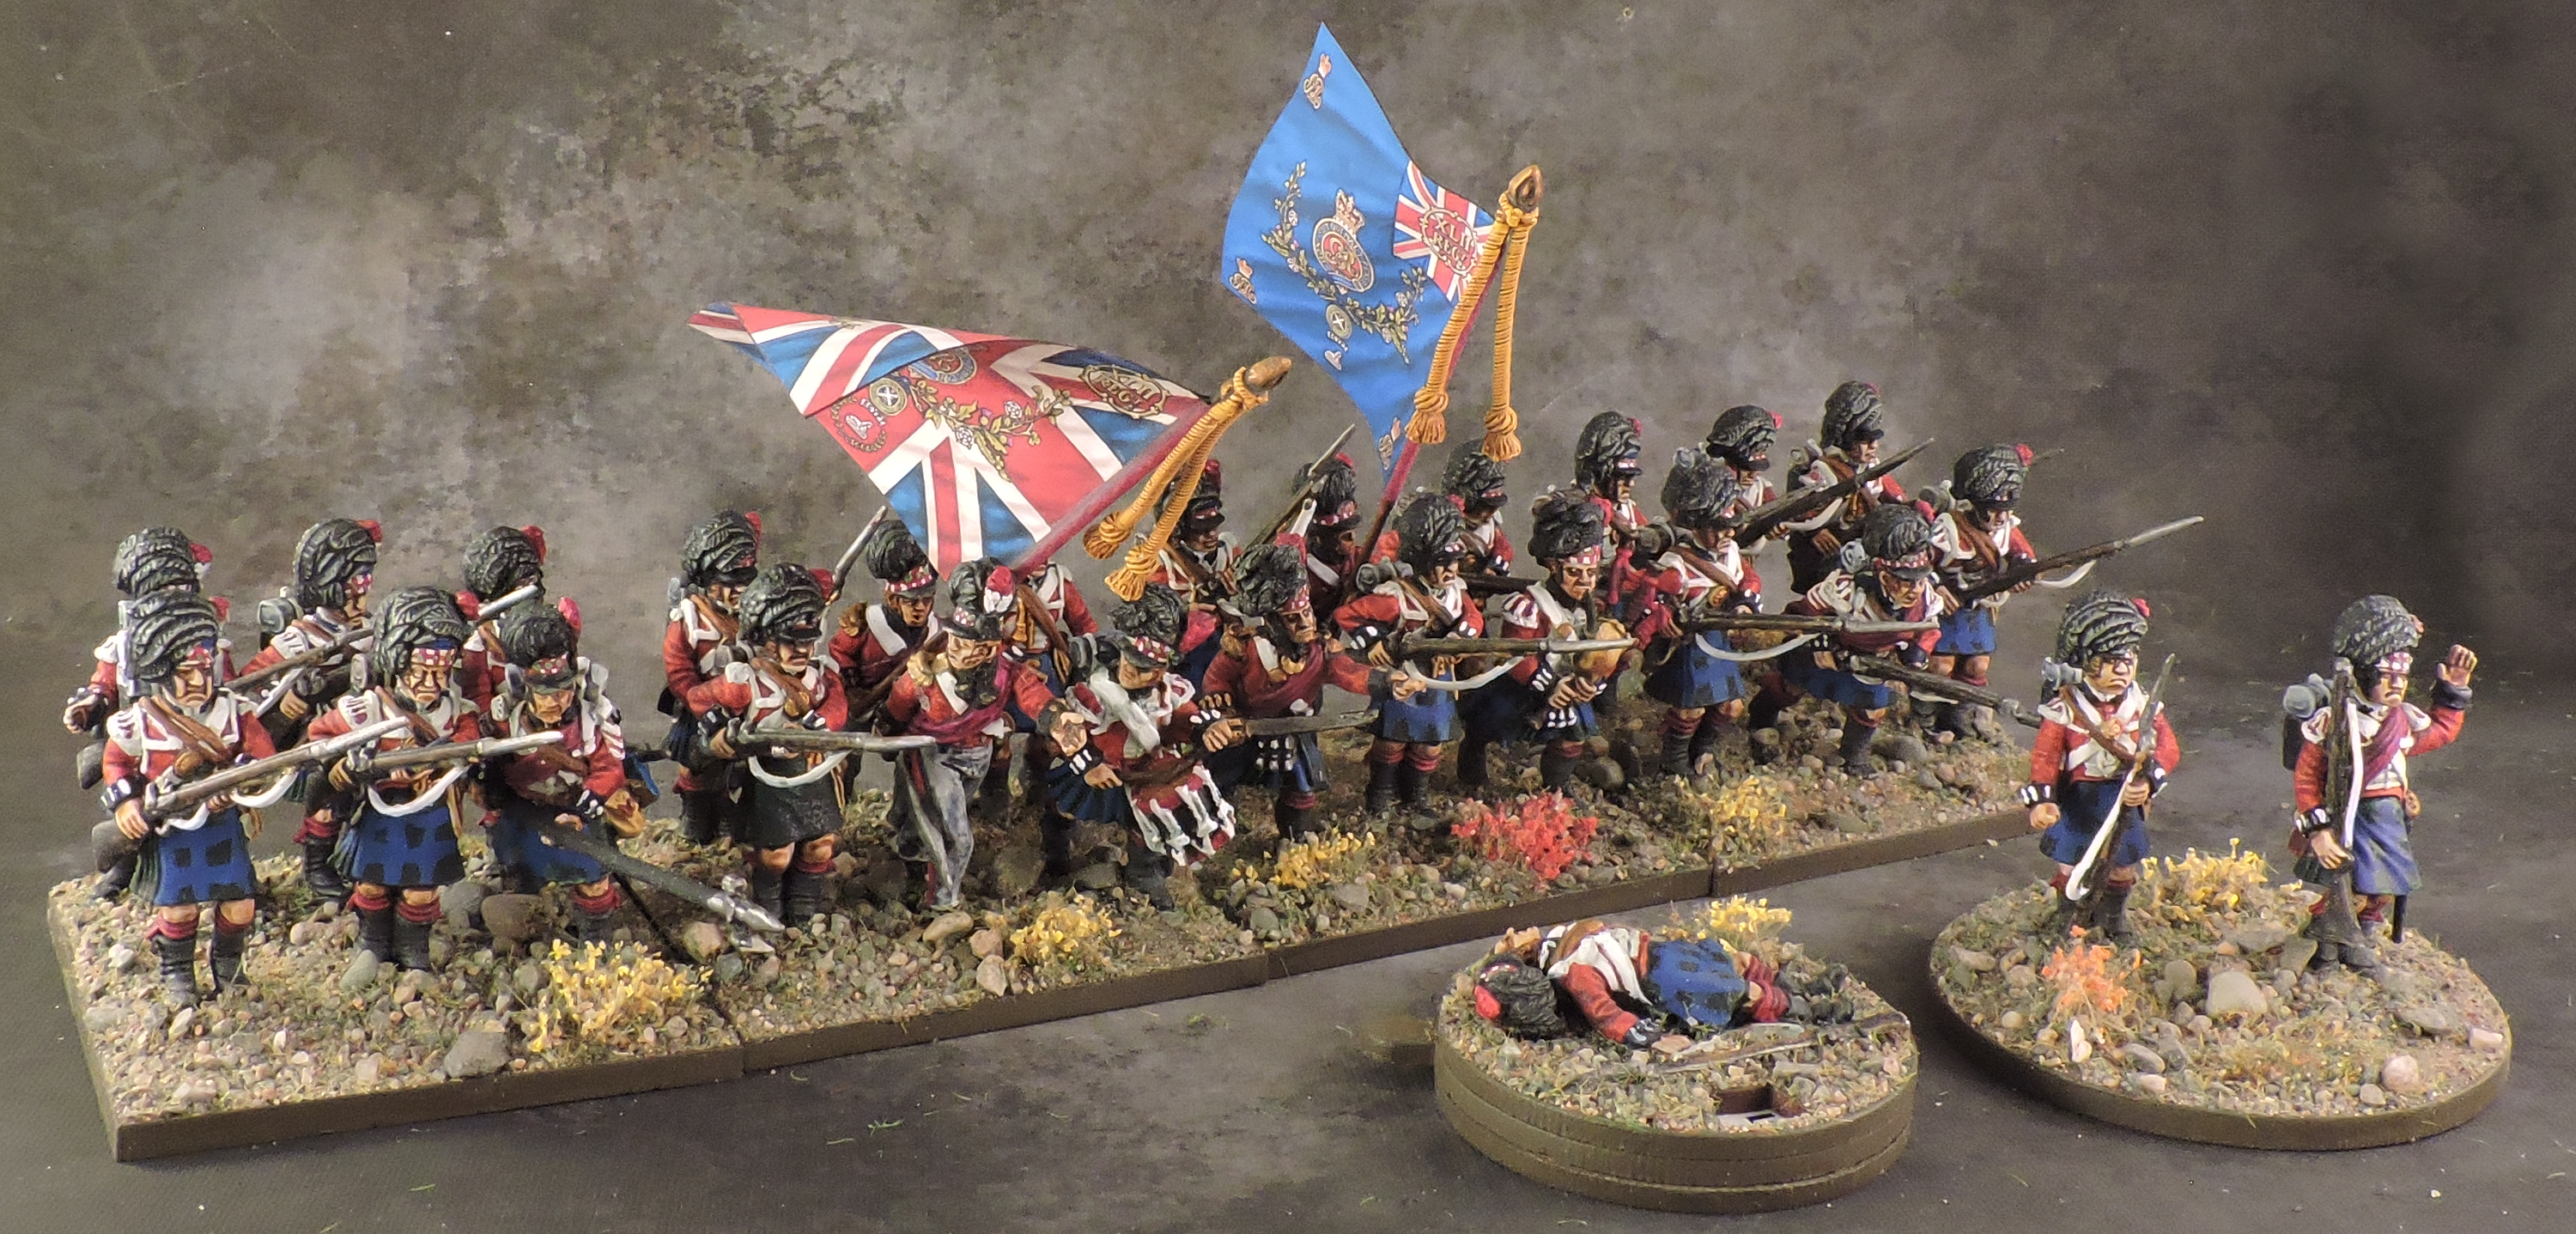
5th British Division – 8th British Infantry Brigade
Commanded by Major General Sir Kempt, the 8th Brigade is a mix of line battalions (Perry plastic), highlanders in kilts (Victrix plastics) and the first battalion of the 95th Rifles. A colourful brigade showing all the variety of the British infantry.


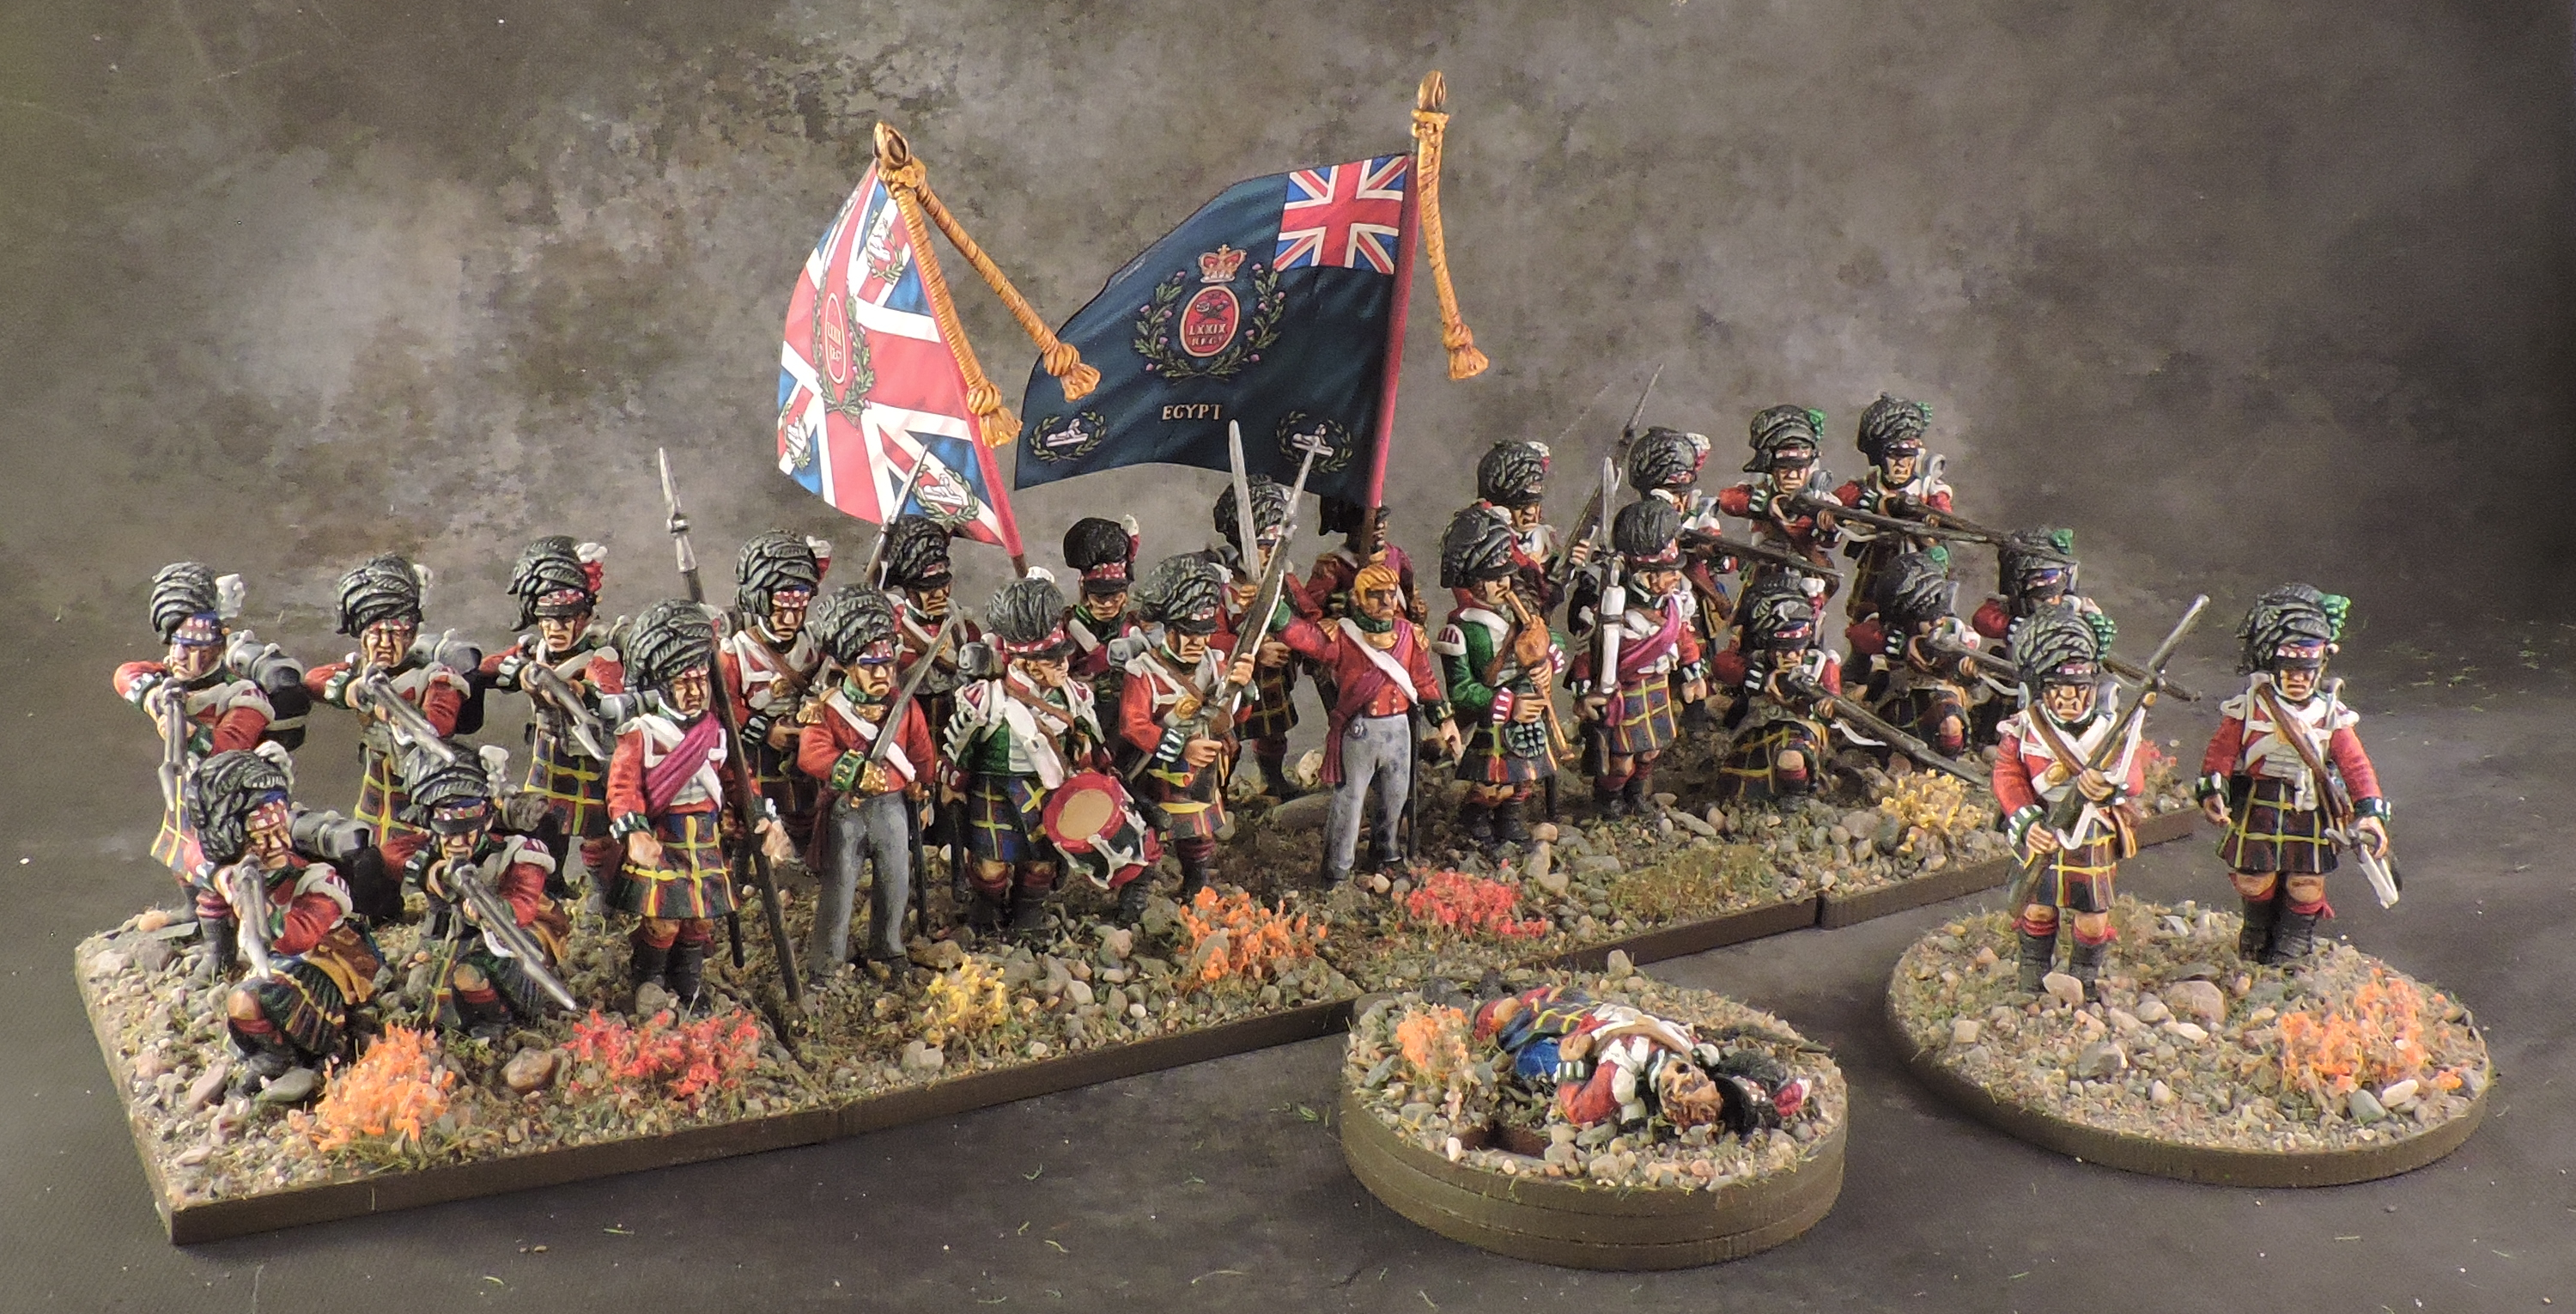

5th British Division – 9th British Infantry Brigade
Major General Sir Pack commands the second of the highland brigade. The two regular units use Perry plastics while the kilted Scots are based on Victrix plastics with metal command.


5th British Division – 5th Hannover Brigade
Colonel von Vincke led this brigade of Hannover Landwehr which remained essentially unengaged on the far left flank of the allied line.


5th British Division – Divisional Artillery
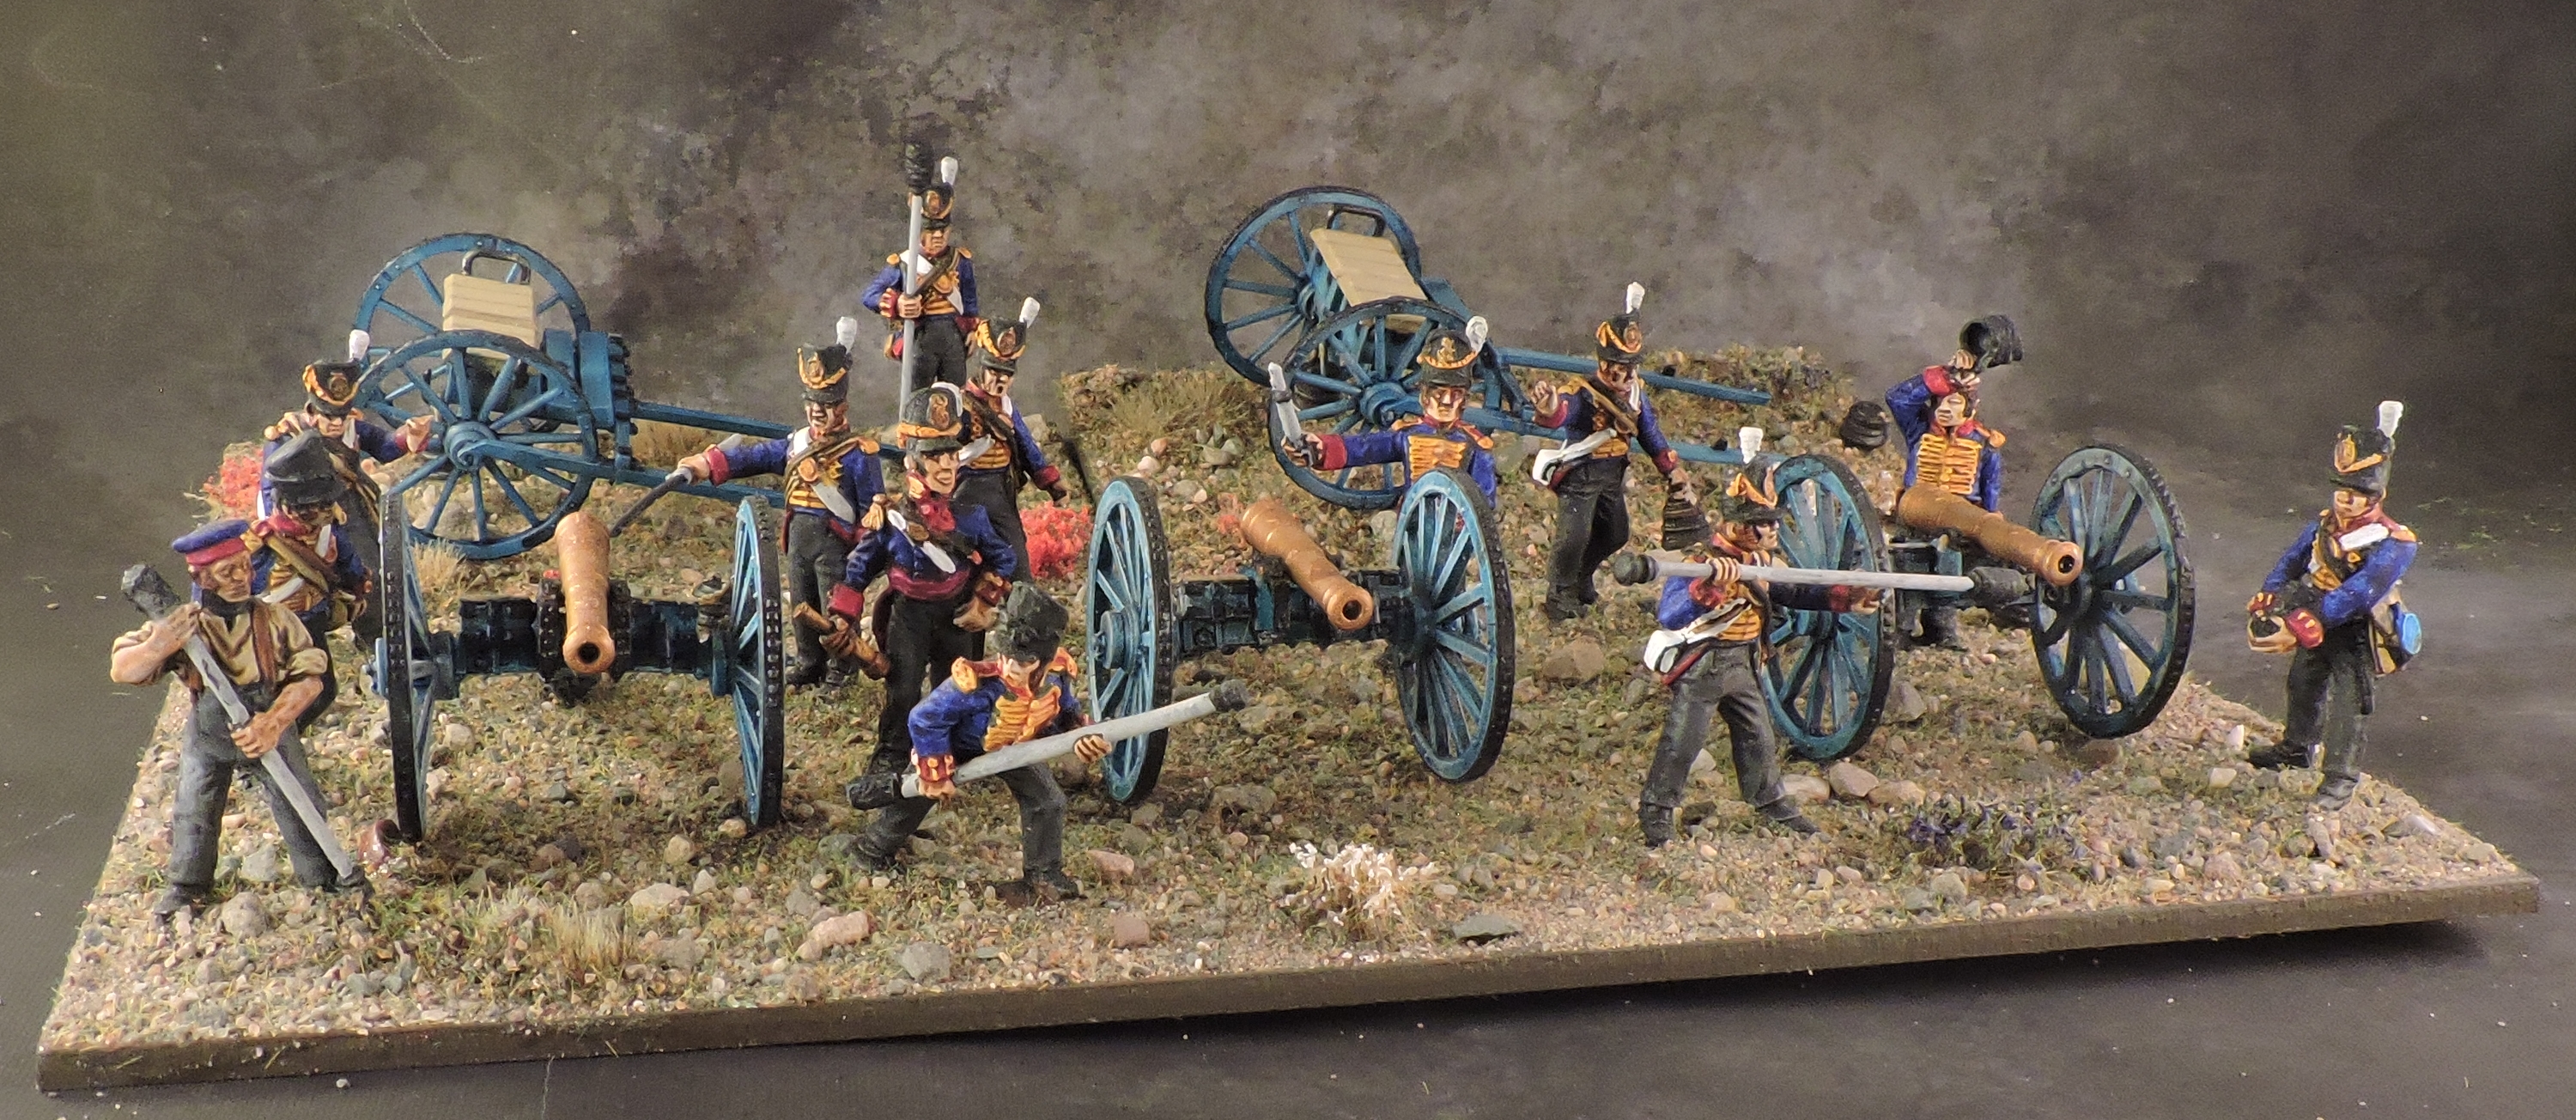
A company of 3rd Battalion Royal Foot Artillery equipped with 9pdr guns and Braun’s Hannover Battery with 6pdr guns form the divisional artillery support. In an ocean of grey artillery, the light blue of Hannover carriages offer just a bit of variety. I also used slightly different figures for the 6pdr from Avant Post to differentiate them further (mostly in my mind though…).
6th British Division
Major General Sir Lambert served as acting commander of 6th Division in the absence of Lieutenant General Sir Lowry Cole.
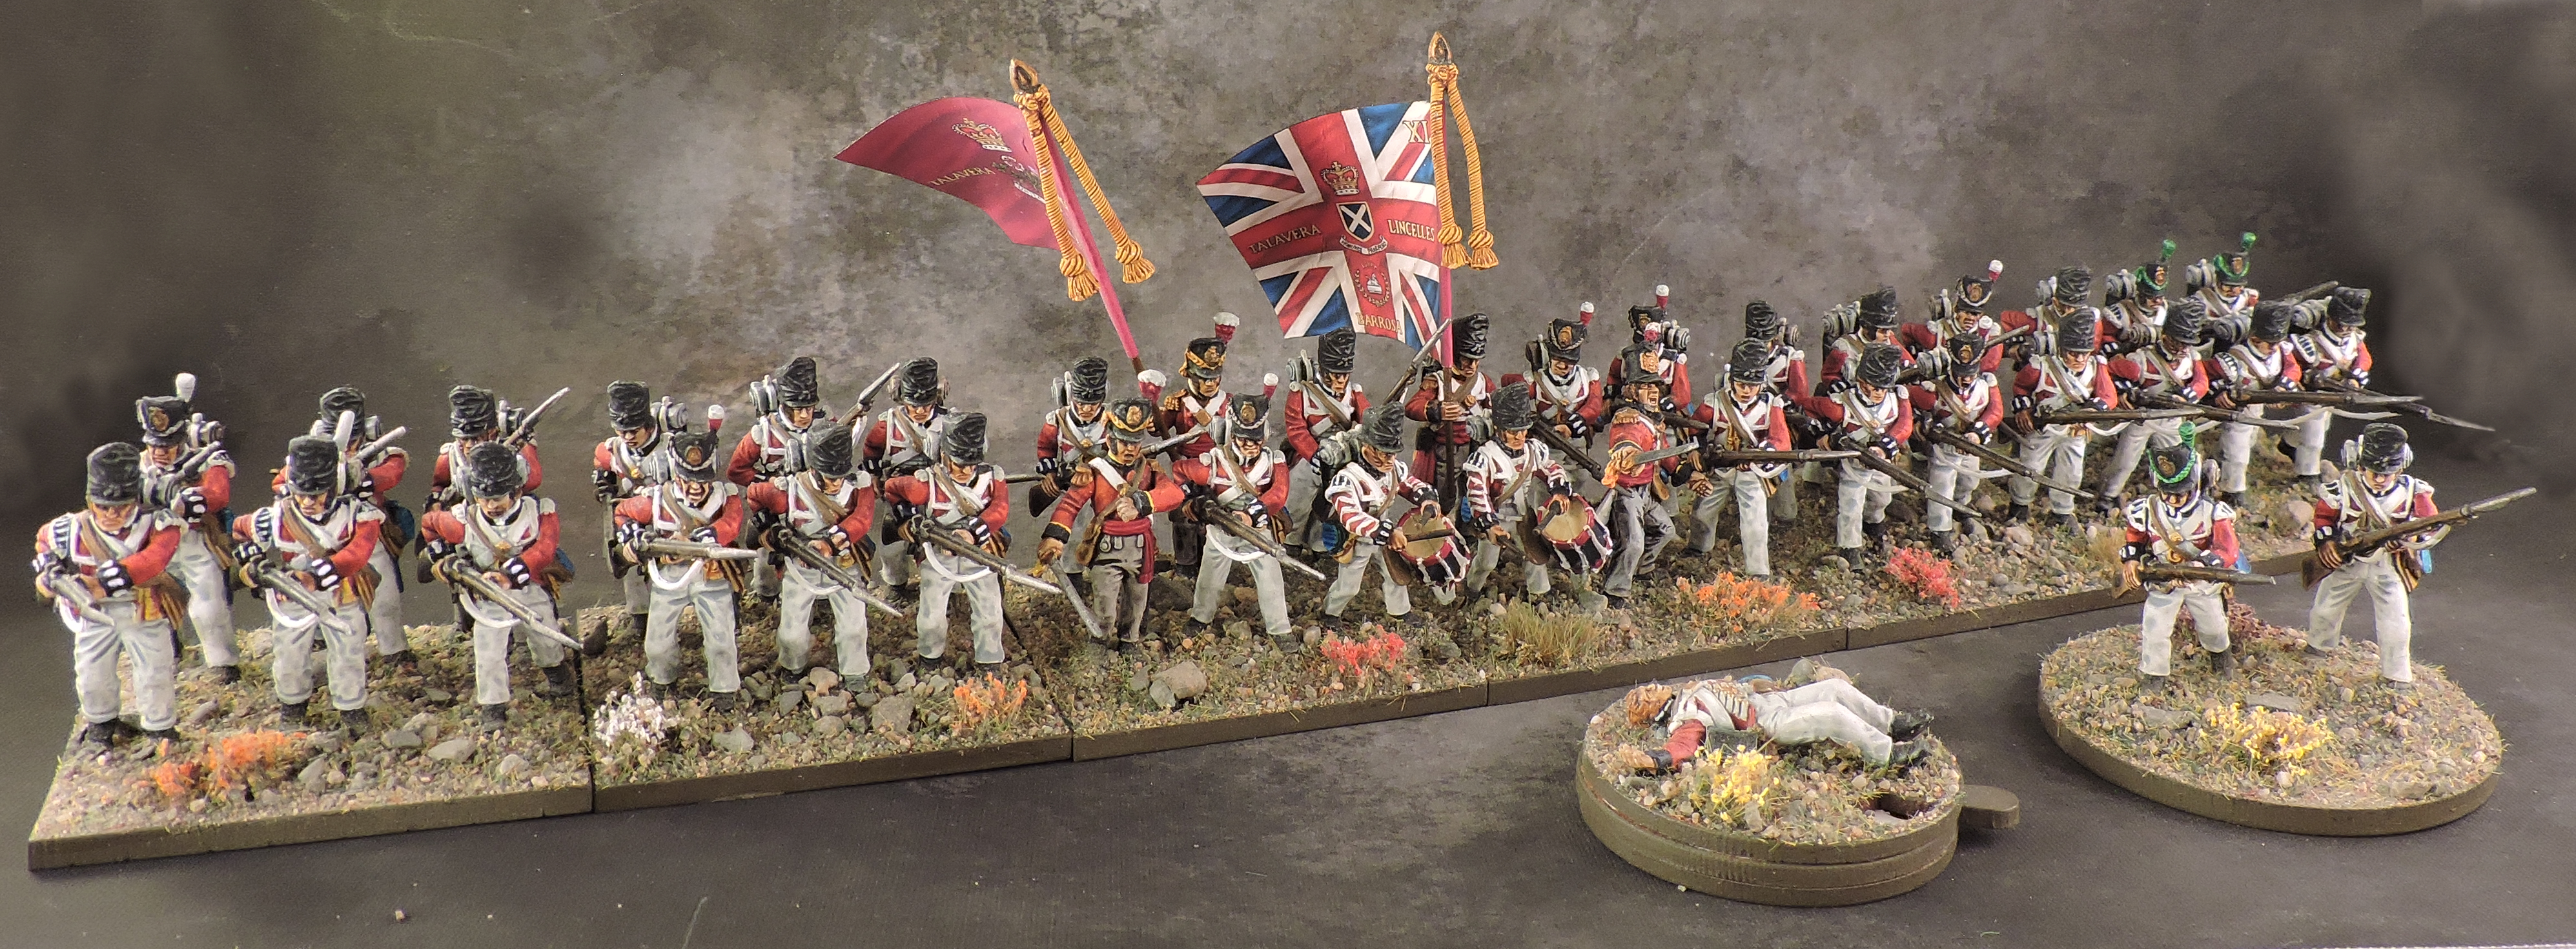
6th British Division – 10th British Infantry Brigade
Since Major General Sir Lambert acted as the division commander, I used Lieutenant-Colonel Brooke of the 4th Foot as the brigade commander as he would have been the senior officer in the field after Sir Lambert. The brigade saw limited combat during the day but was brought forward on the right allied flank to repel Ney’s assault. The I/40th was significantly larger than the typical British battalions so I made them a Large formation. The fourth battalion of the brigade, the II/81st Foot was detached to Hal and is thus not included.


6th British Division – 4th Hannover Infantry Brigade
The 4th Hannover Brigade under the command of Colonel Best was another supporting Landwehr formation. There are two unique metal unis from Perry Miniatures representing the unique uniforms of the Osterode Landwehr as well as Verden Landwehr at trail. The other two are my standard Warlord plastics.


6th British Division – Divisional Artillery
A single battery of 9pdr from 3rd Royal Foot Battalion supports the Division. The other battery was detached and not present at Waterloo.

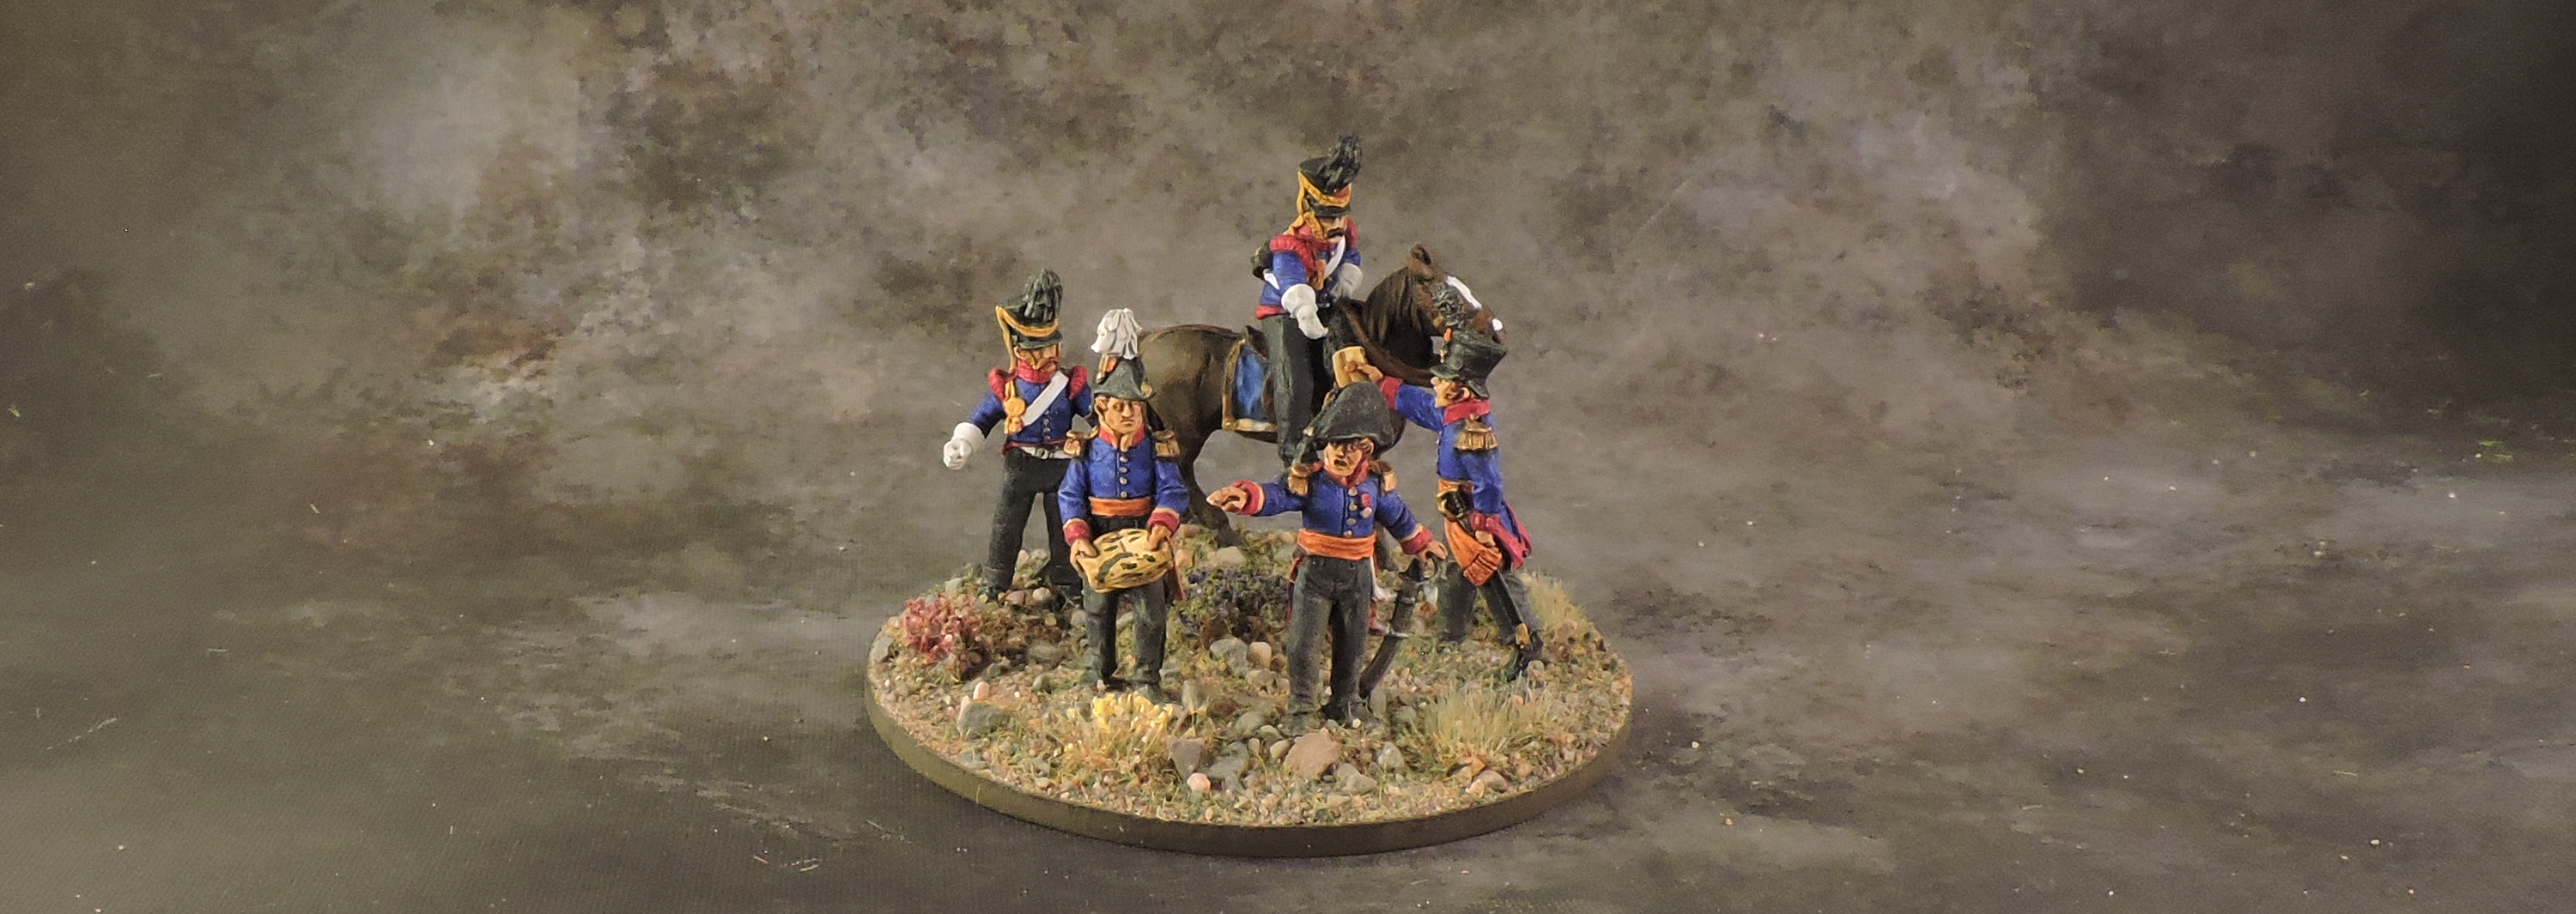
Reserve Artillery
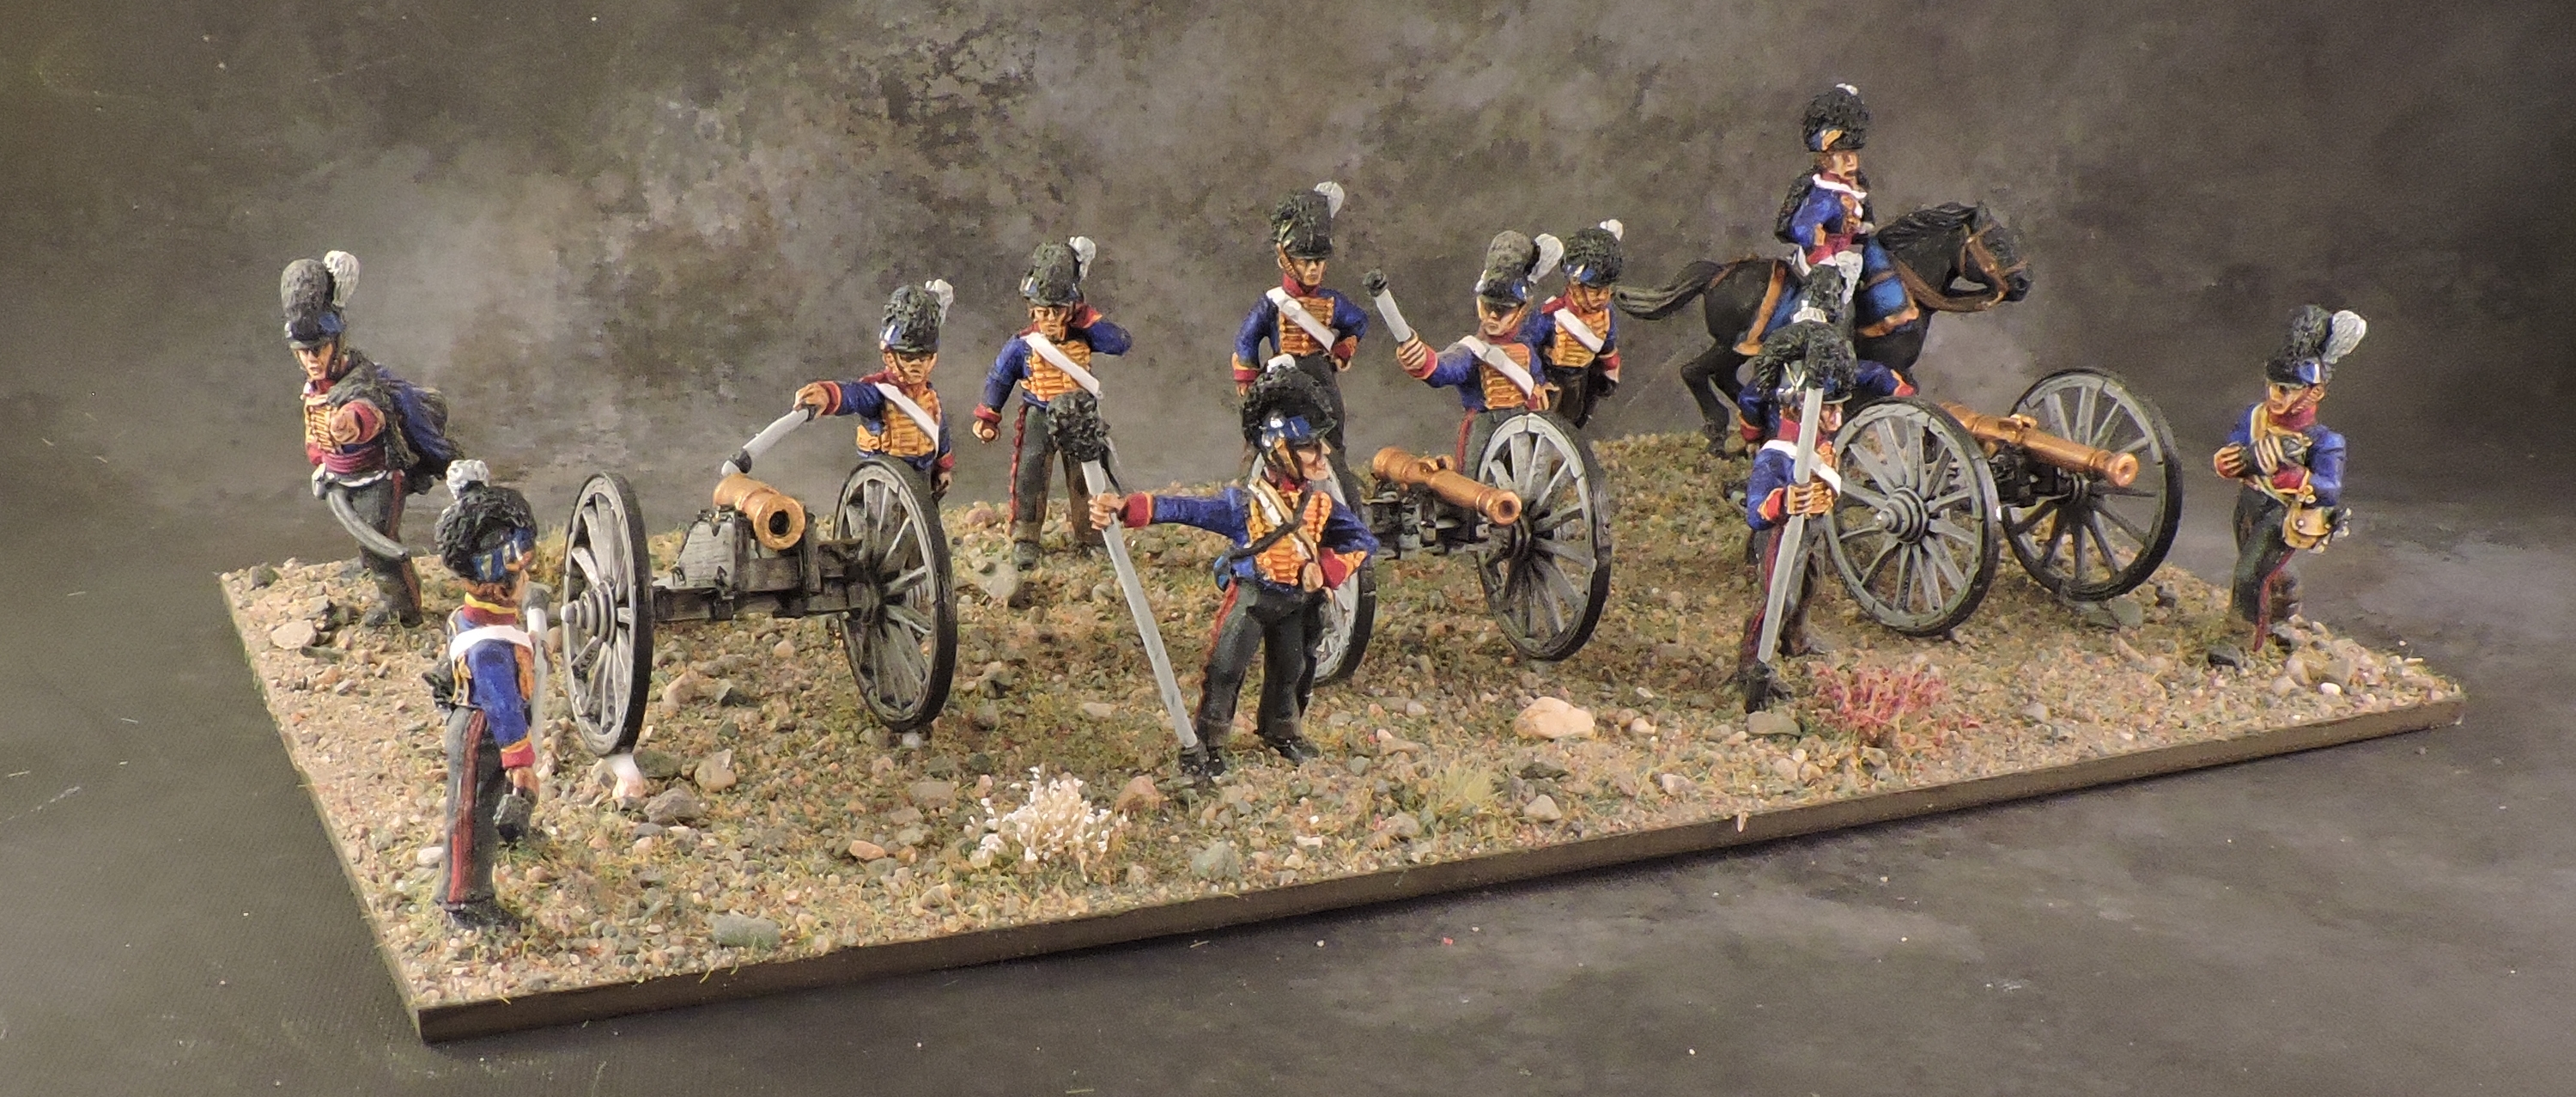
Two troops of Royal Horse Artillery were detached to the army reserve. As with all Royal Horse Artillery, the guns are metal Perry figures while the crew are a mix of metals from many manufacturers for variety with the symbolic rider to denote their “horse” status.
Independent Contingents
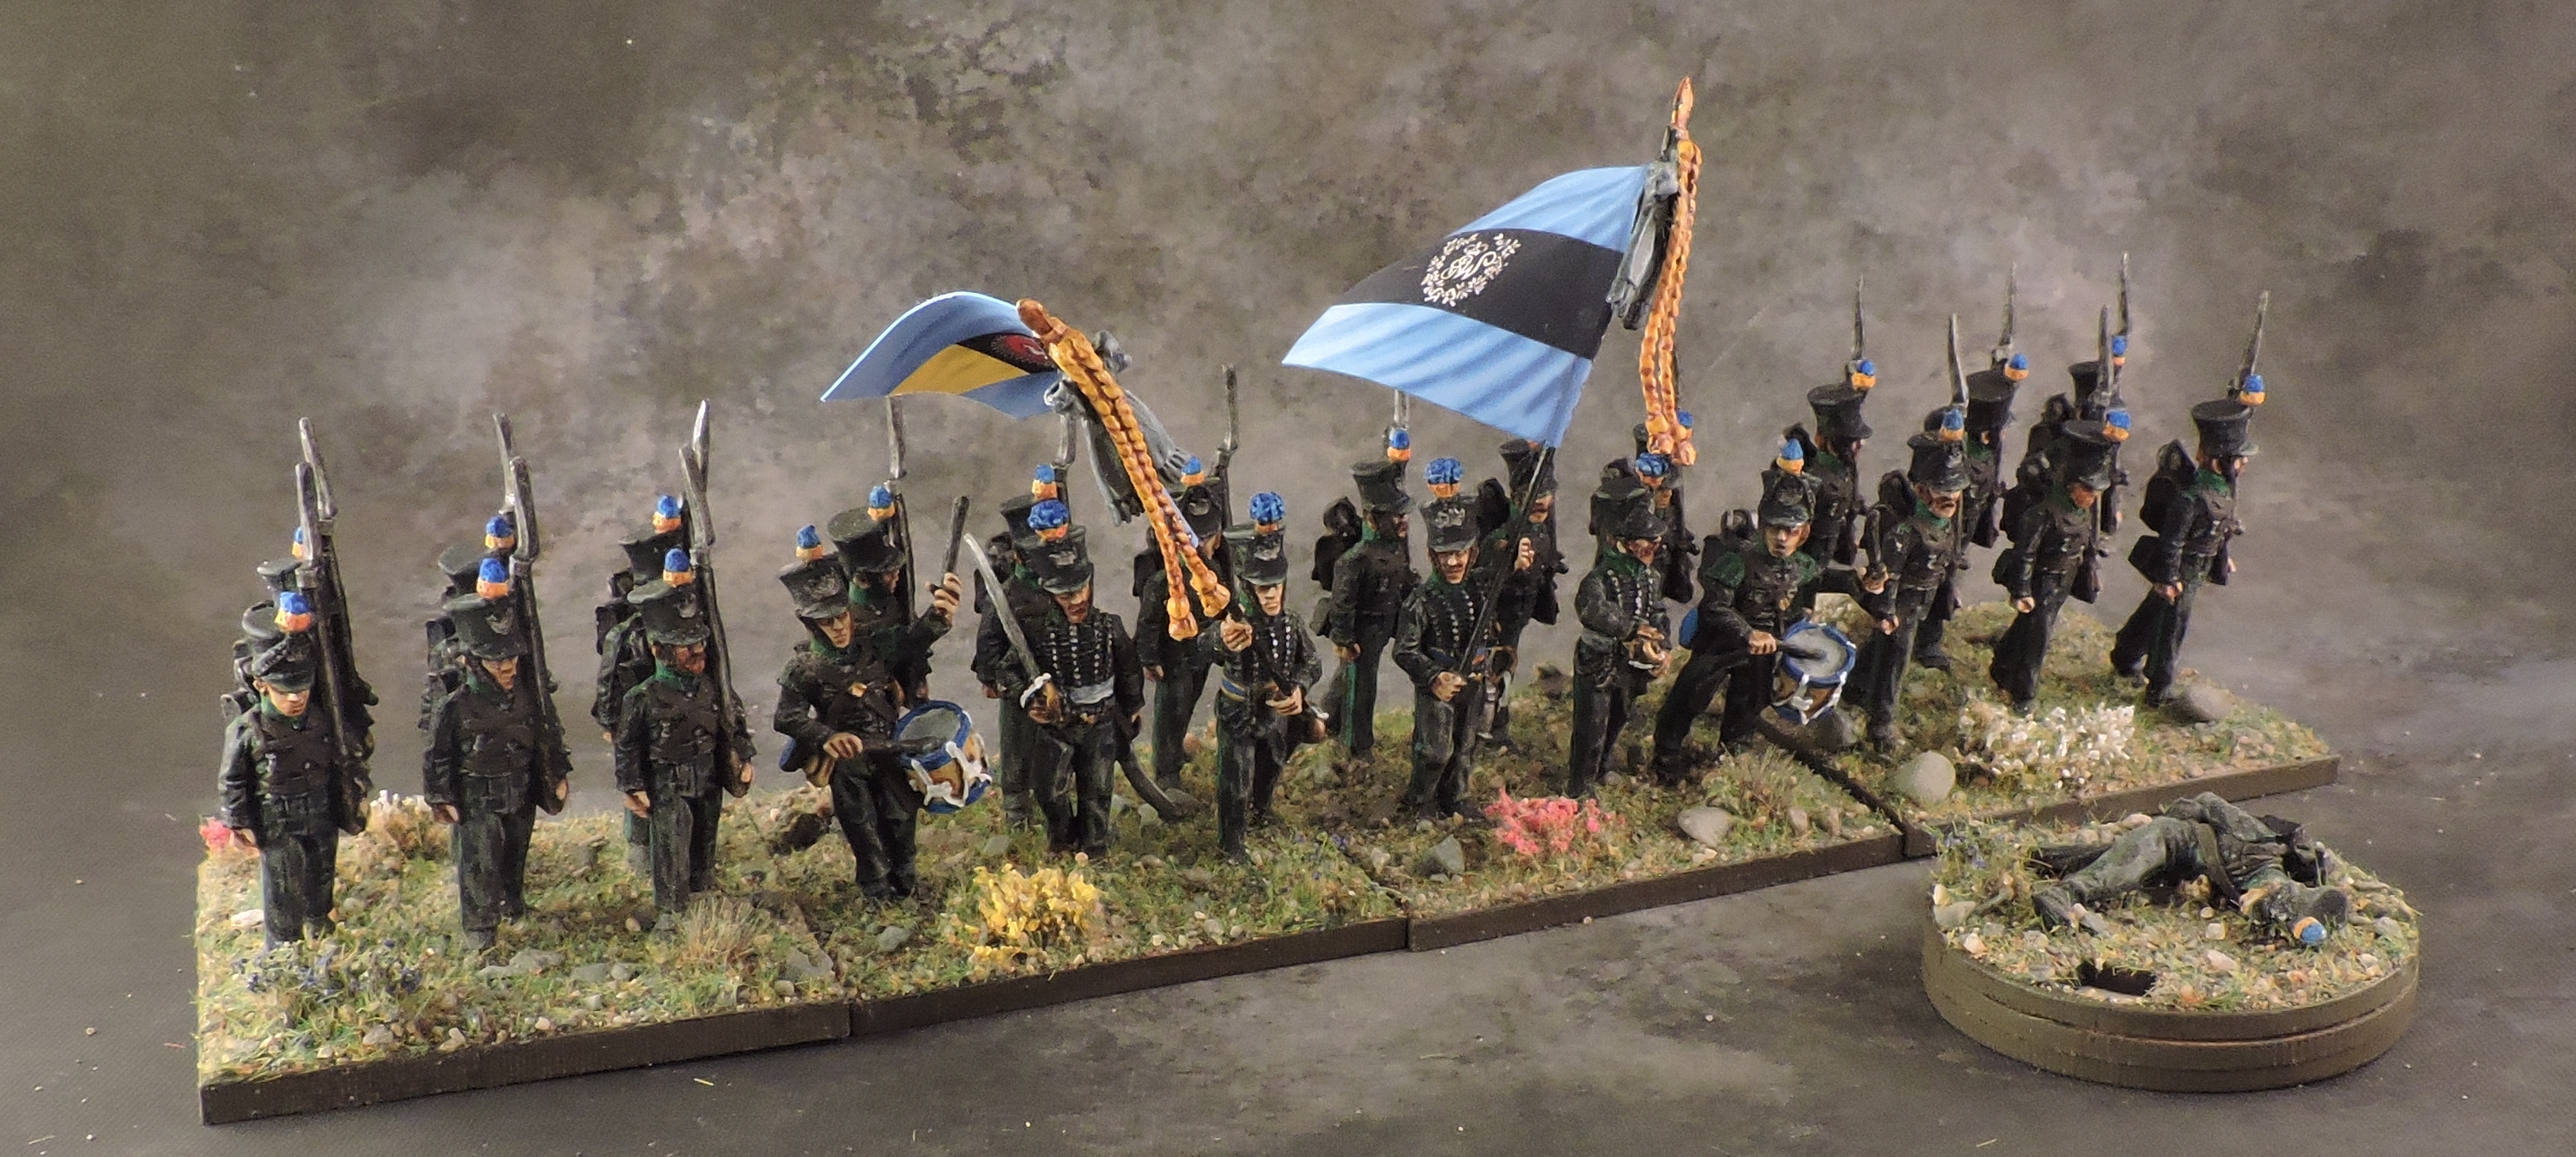
Brunswick Division
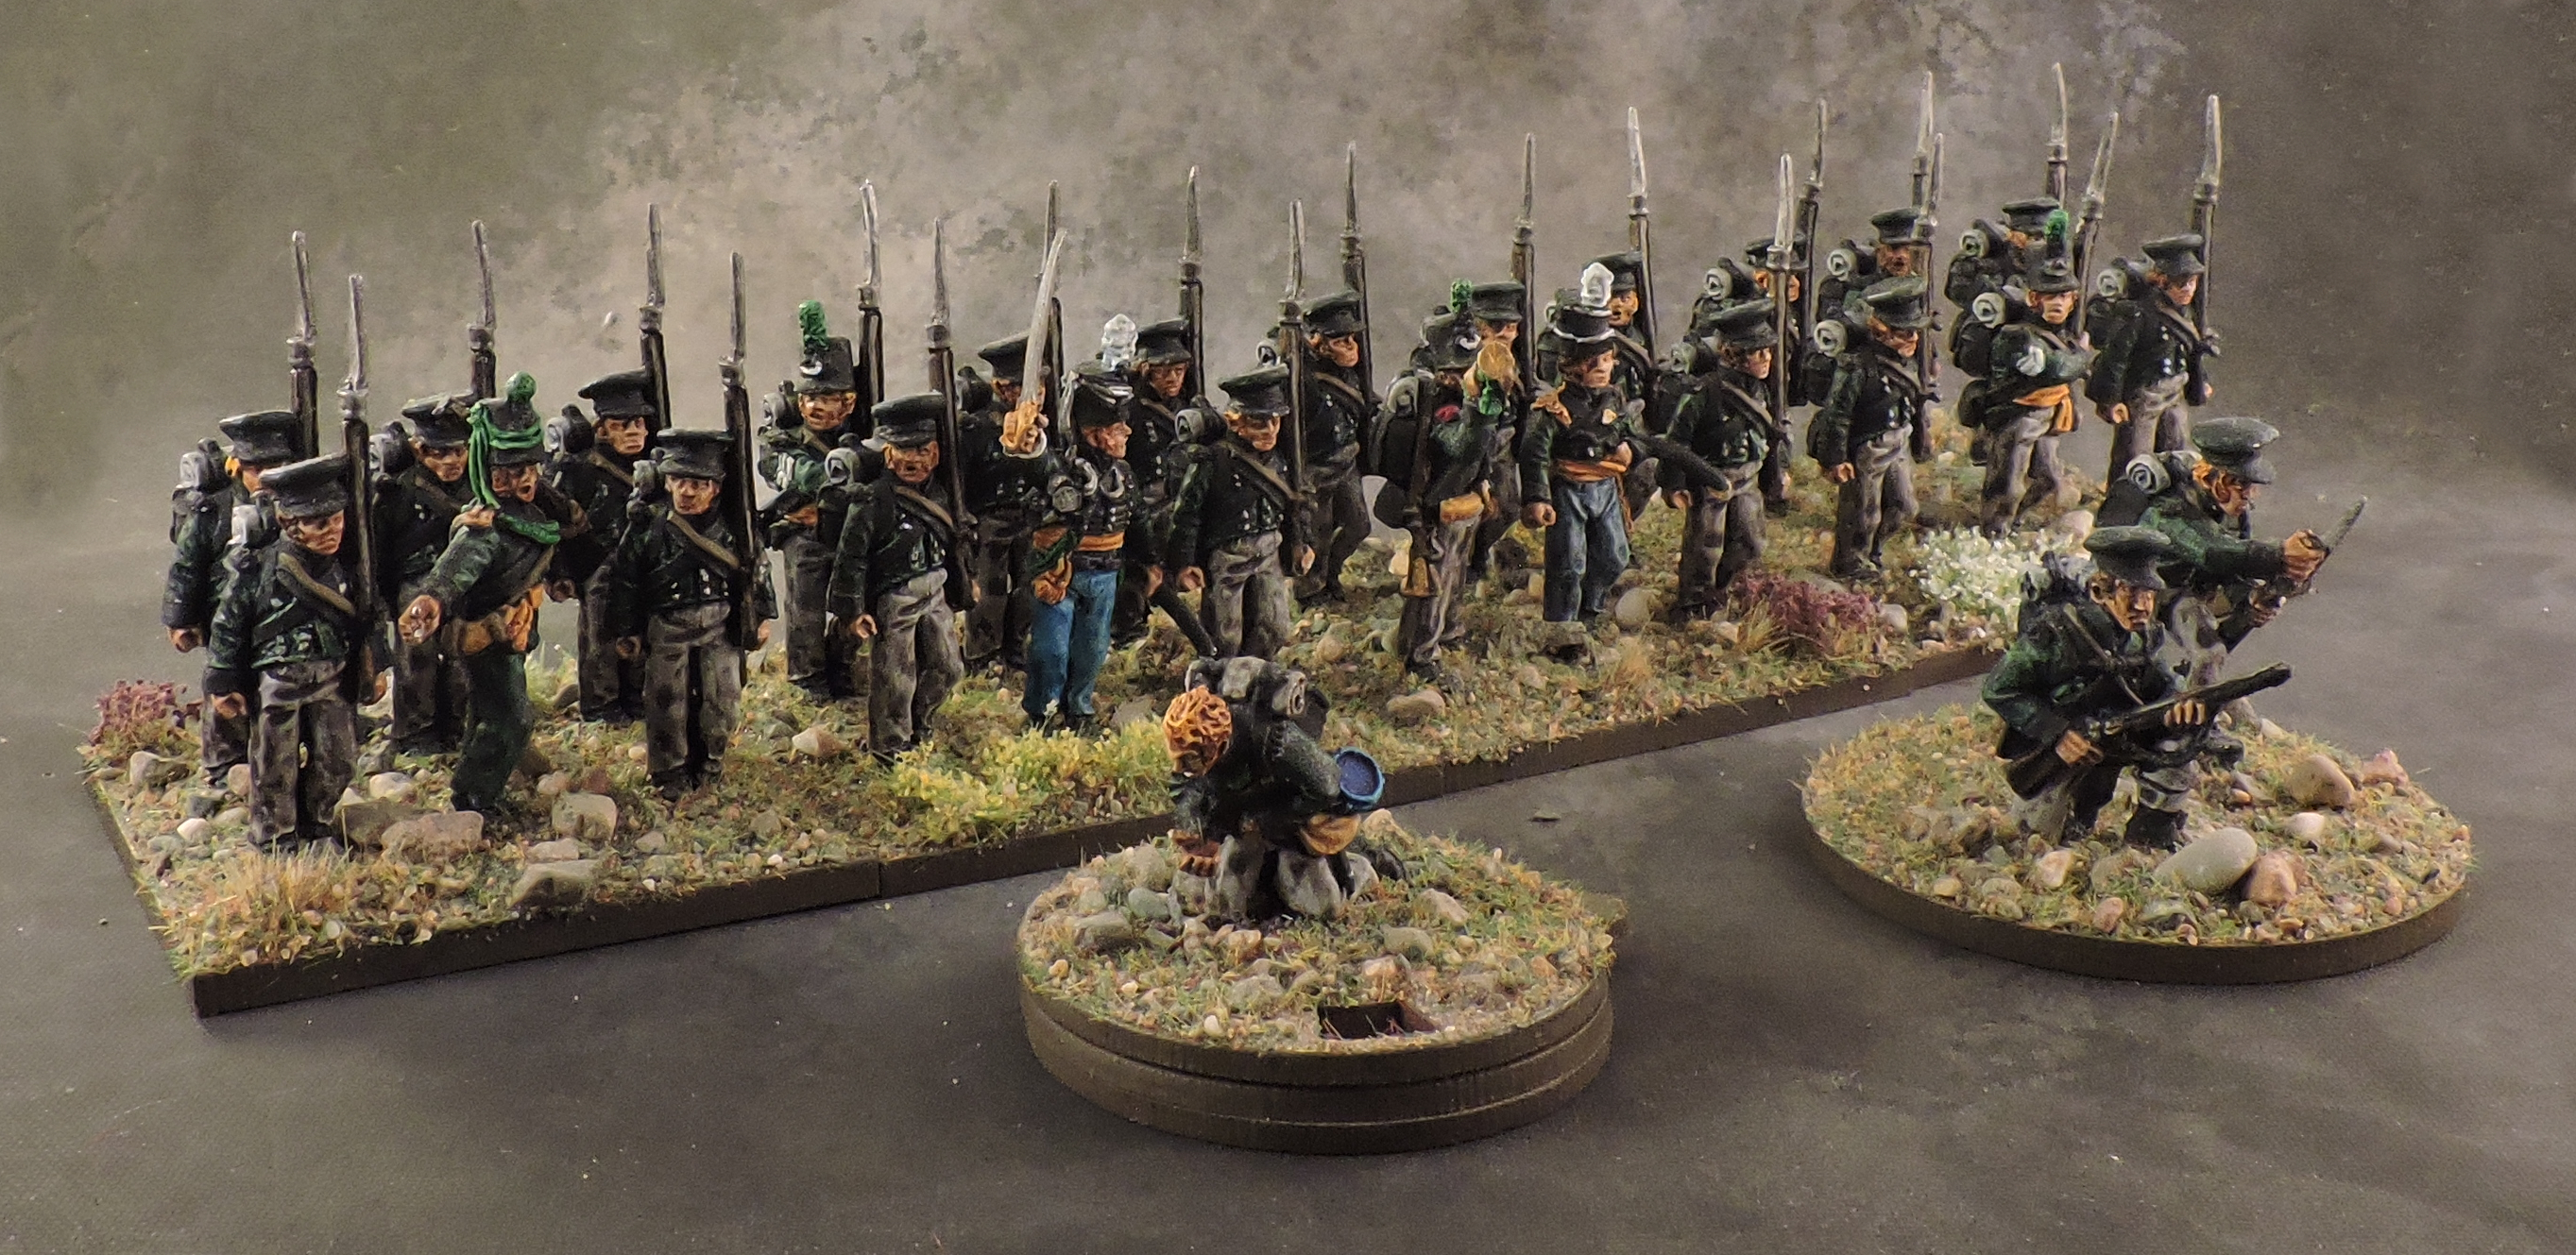
Led by the Duke of Brunswick, this semi-autonomous formation offers a blend of units in the distinctive black colours of Brunswick. The Brunswick force fought at Quatra Bras which led to many adjustments of command due to fatalities and desertion. A poster on the Lead Adventures Forum by the handle Baron von Wreckedoften kindly offered some insights into these command shuffles which are captured below.
The figures are Perry and Rapier metals which are rather small. I put that down to the malnourished state of the Brunswickers after almost two decades of struggle against Napoleon…

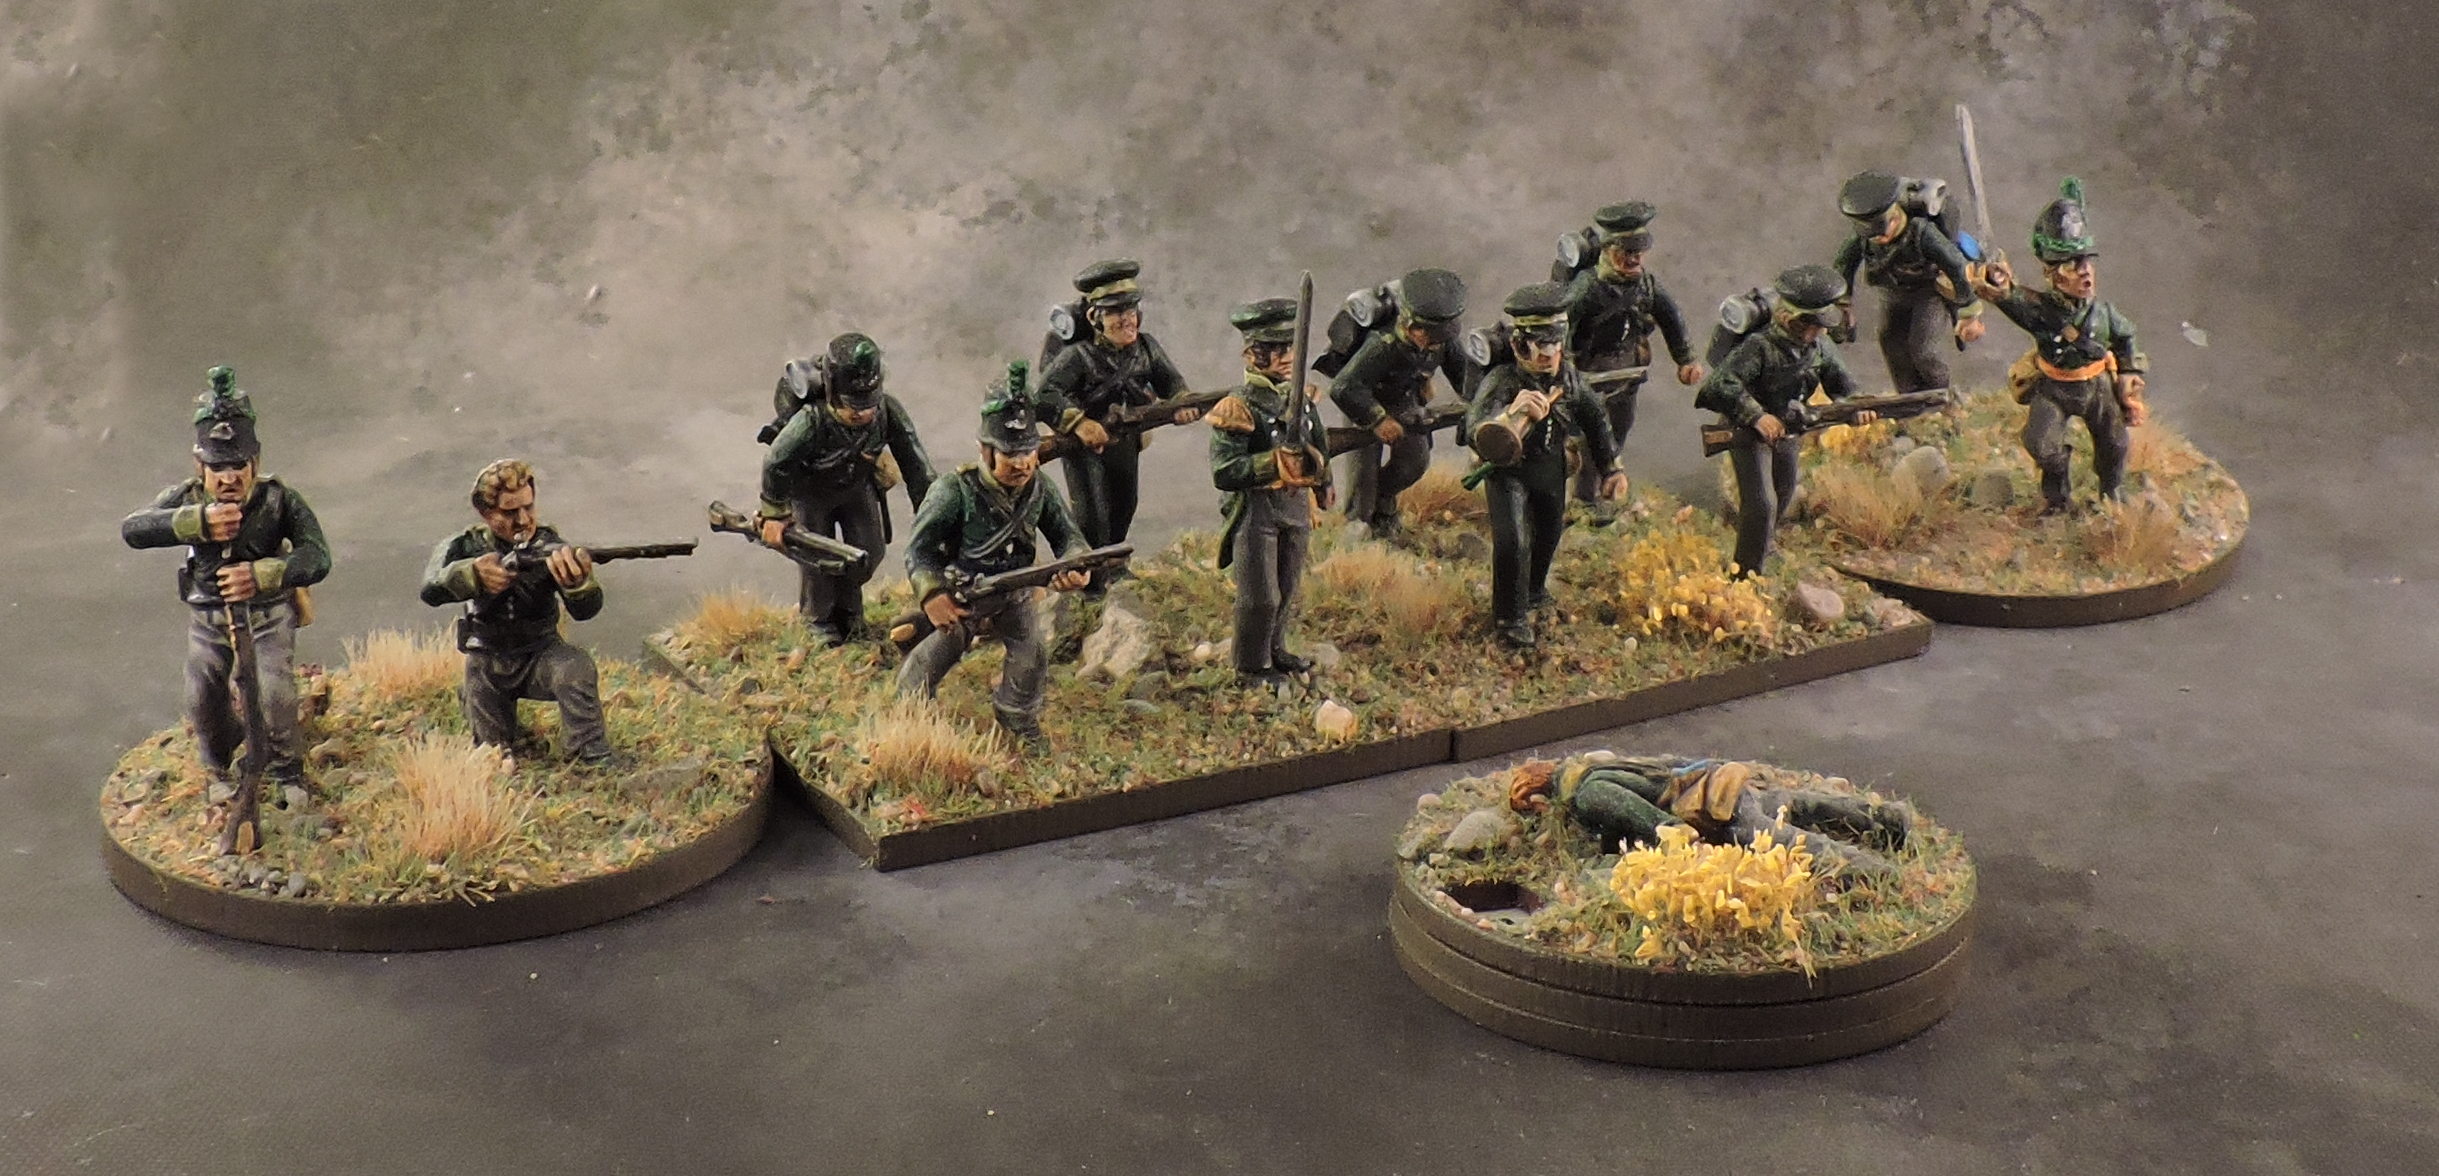
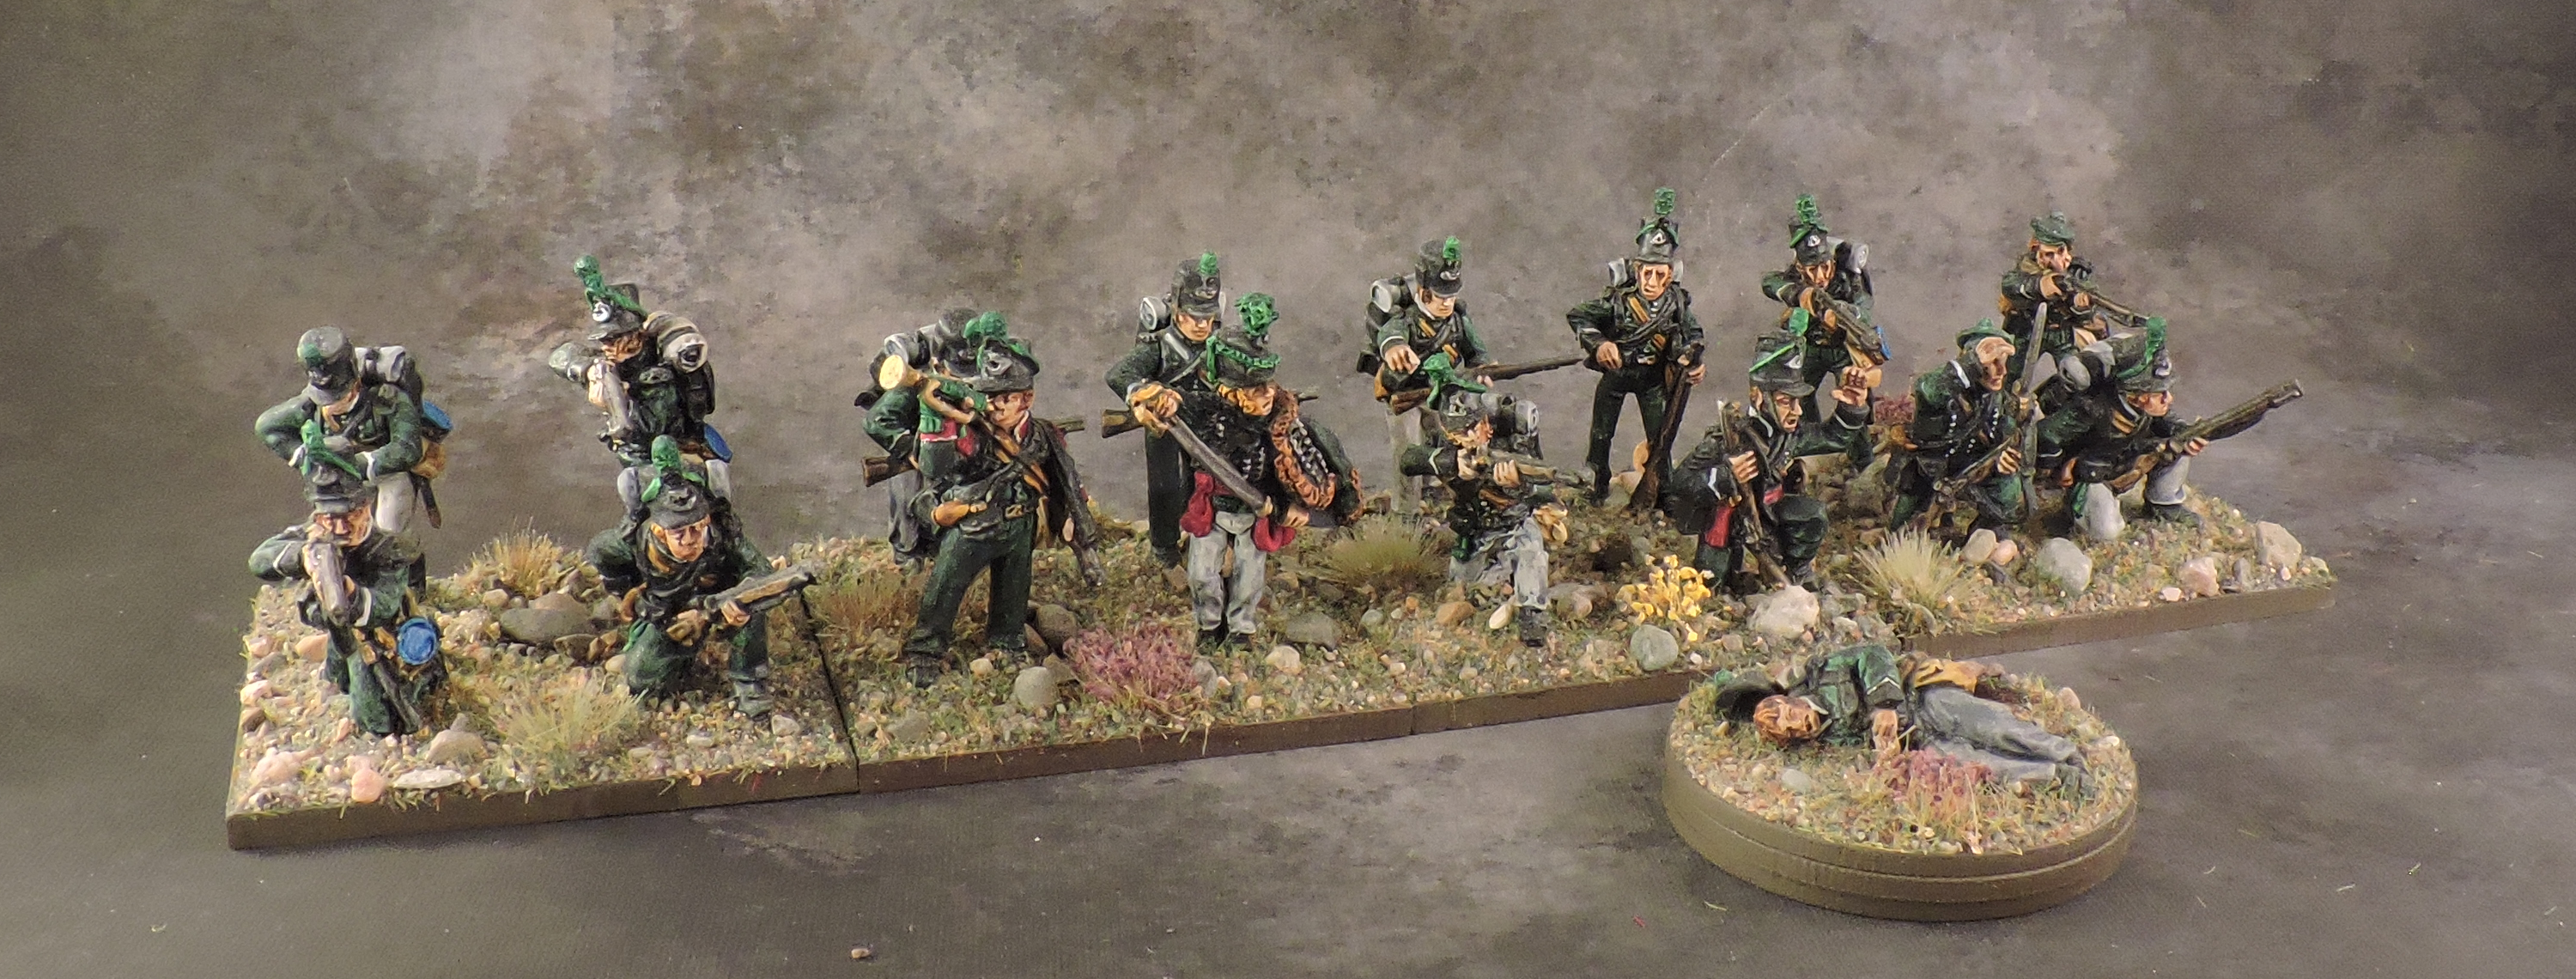
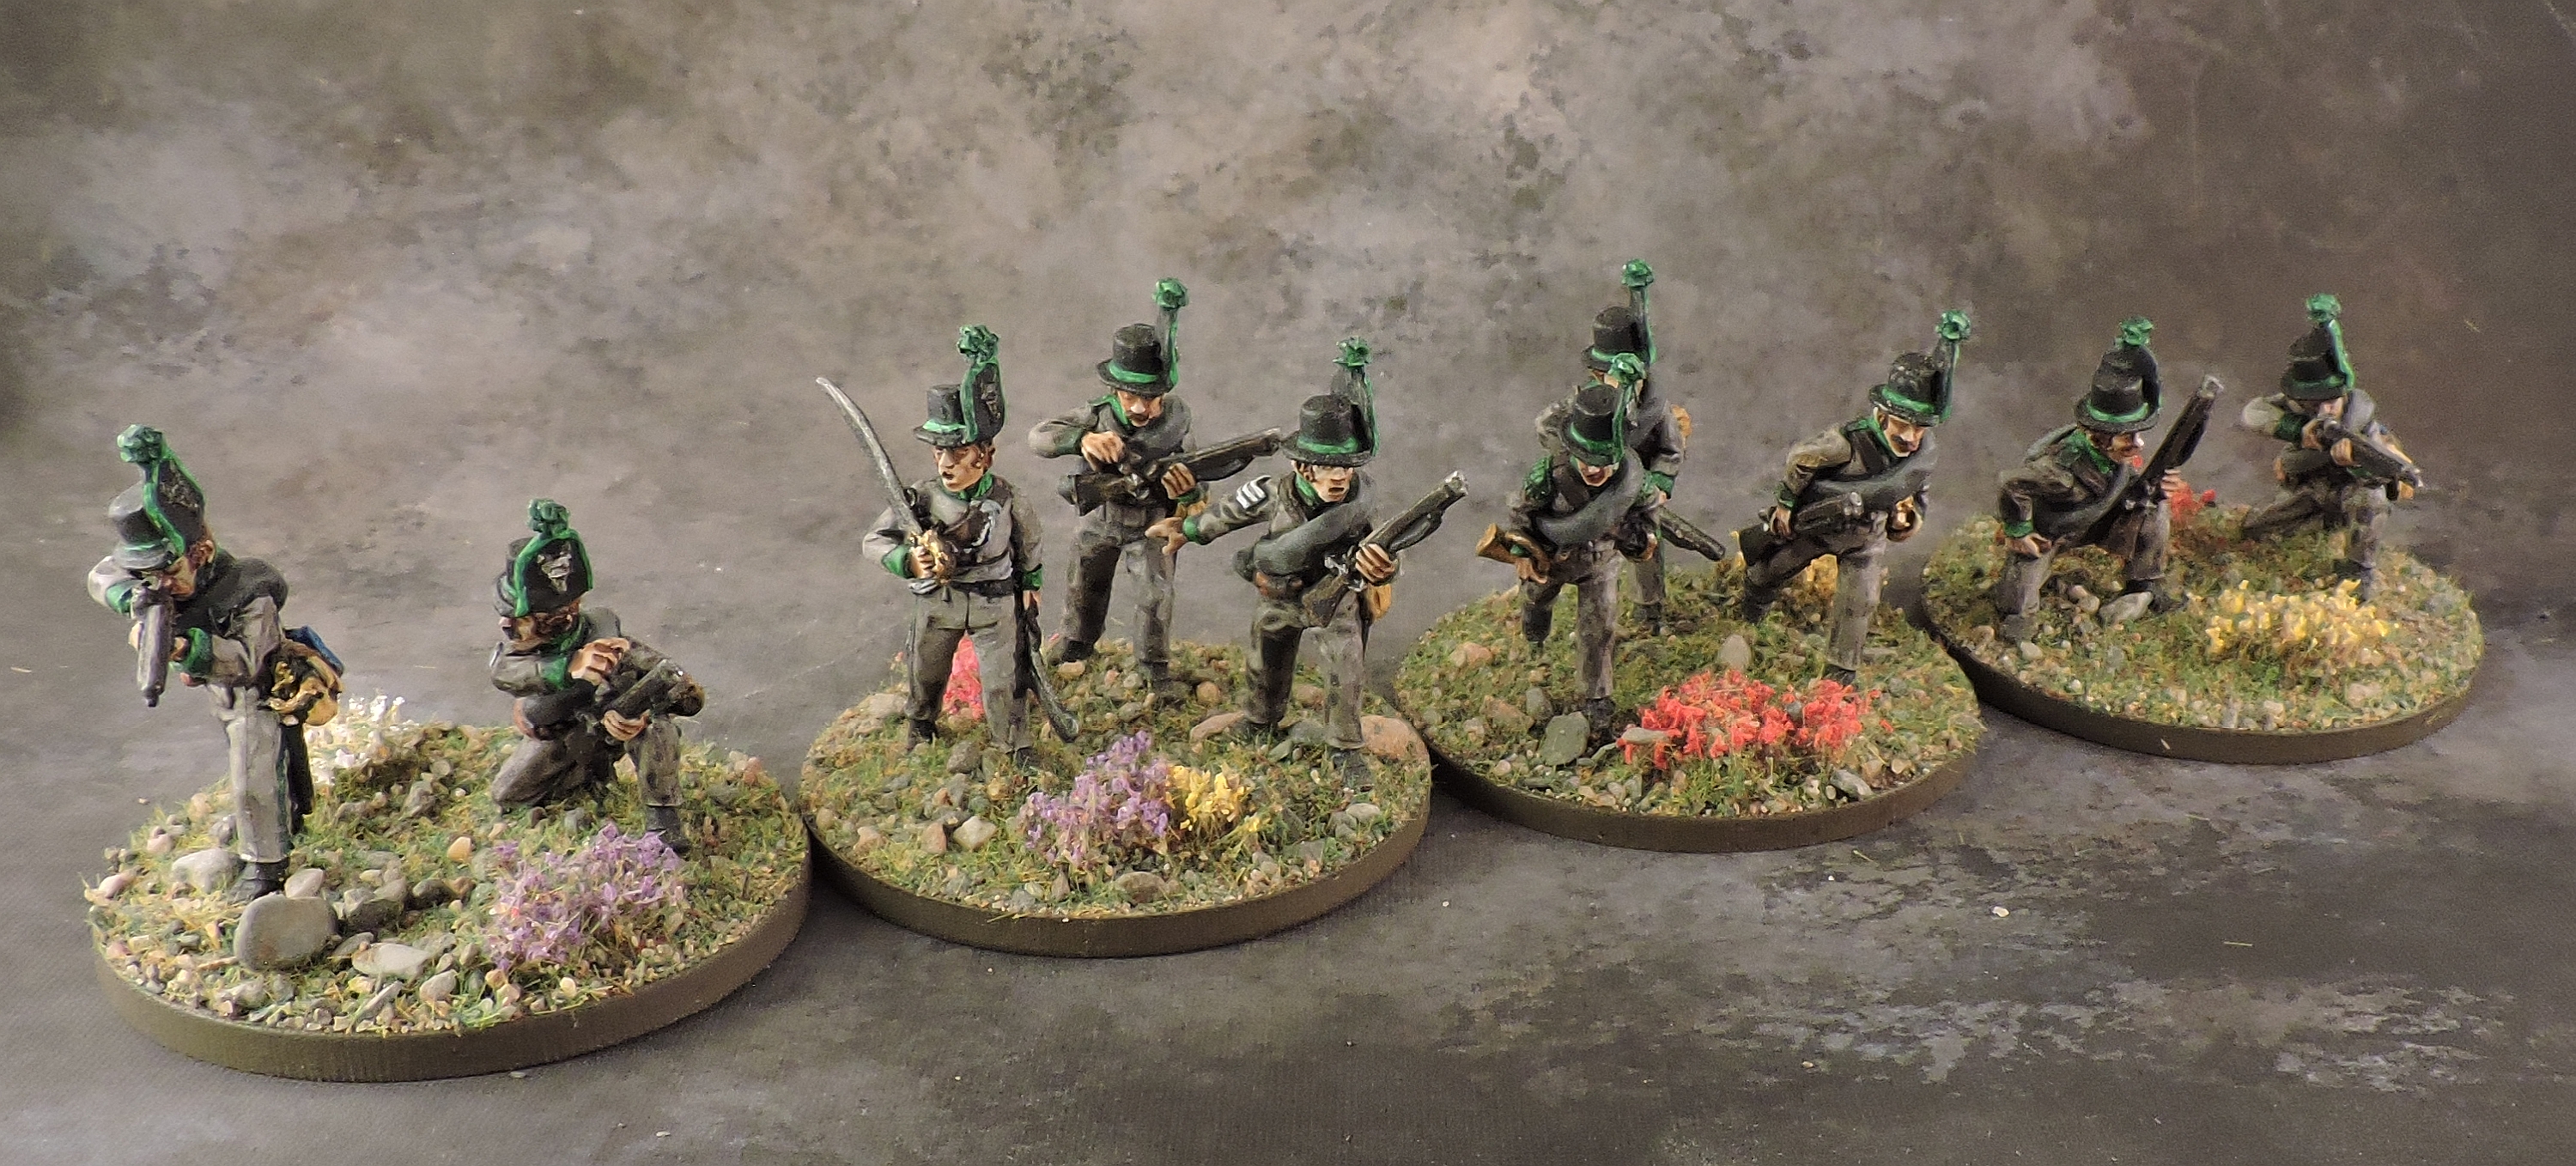
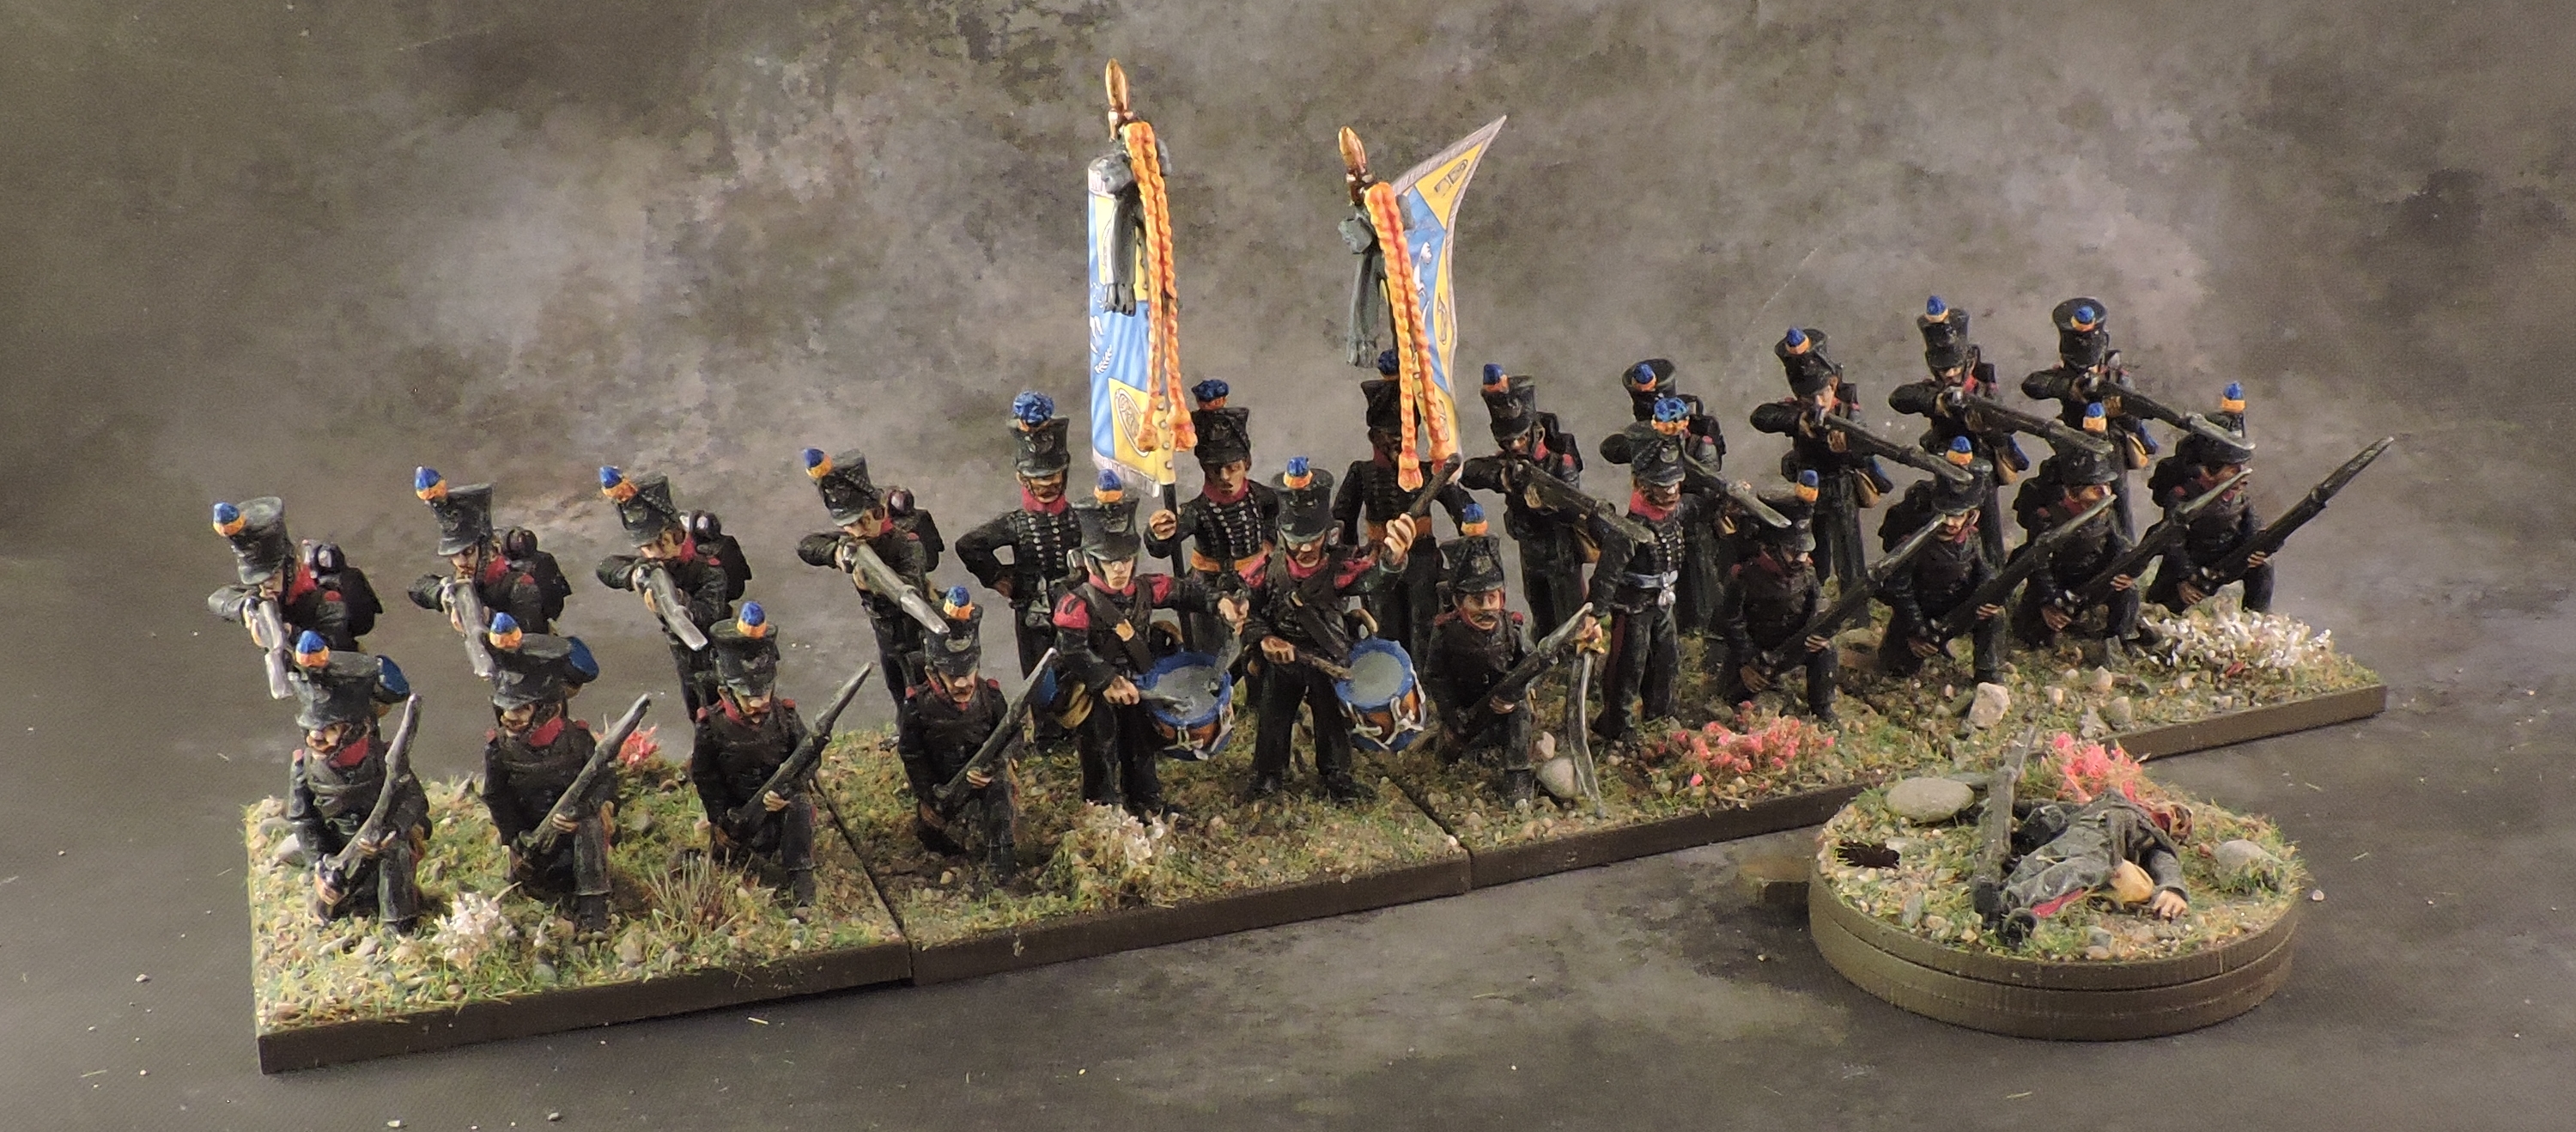
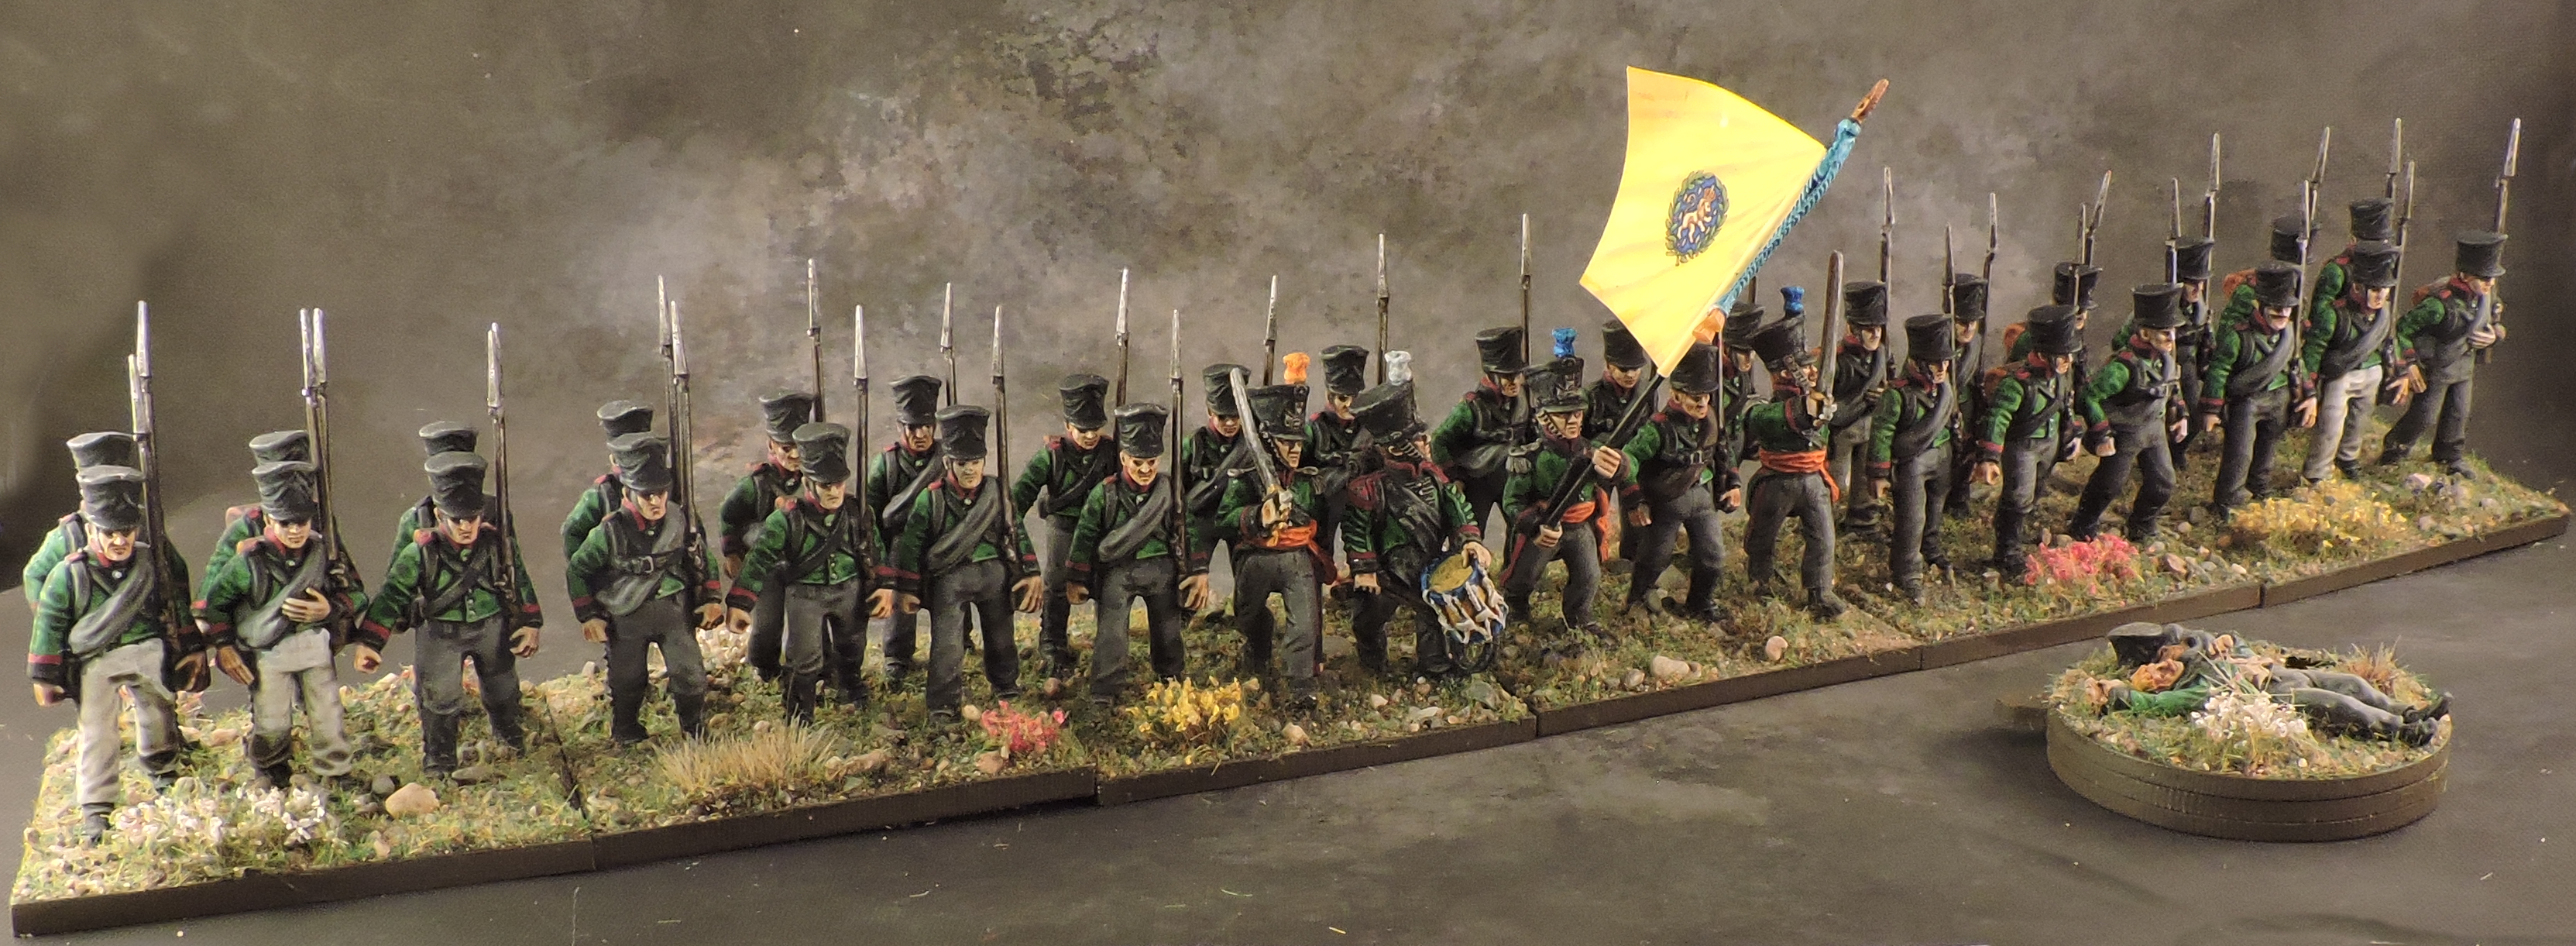
Brunswick Division – Advance Guard
The Advance Guard is formed of two companies of Jäger and two companies of Gelernte Jäger in grey uniforms (literally “Skilled” or “Trained” Hunters). I modelled the former as a closed order light infantry with the latter as a skirmish screen similar to the Rifles.

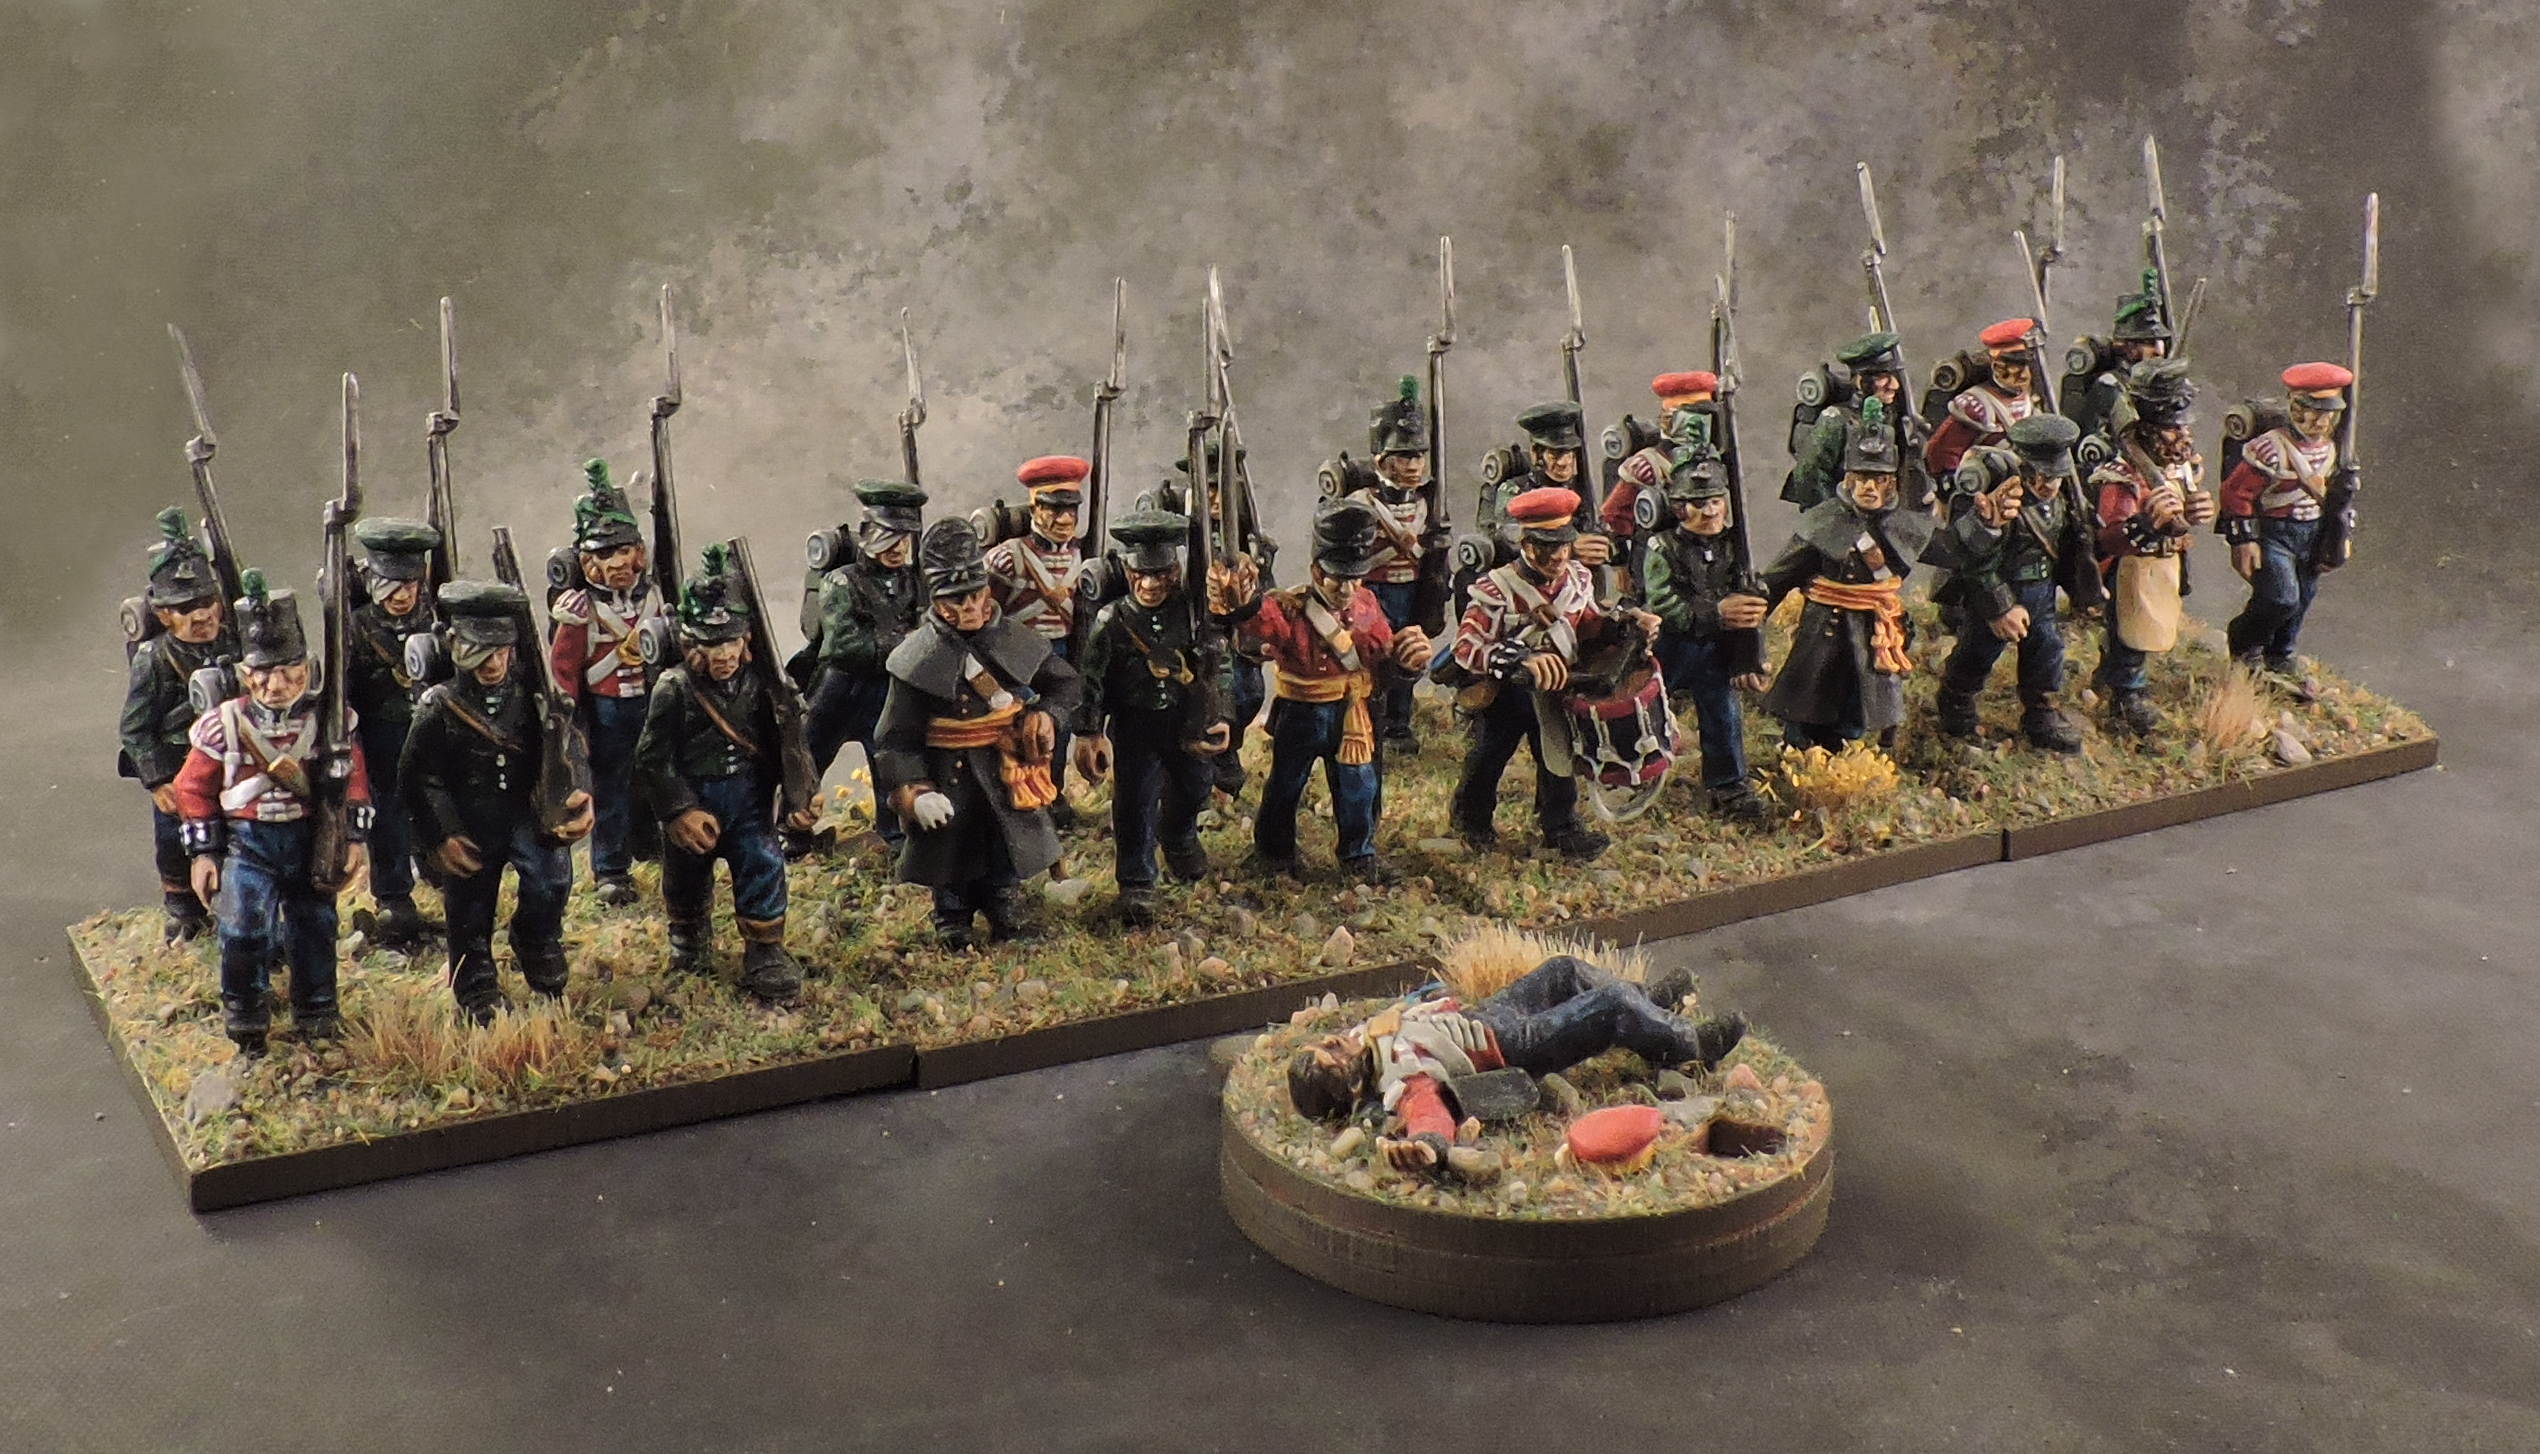
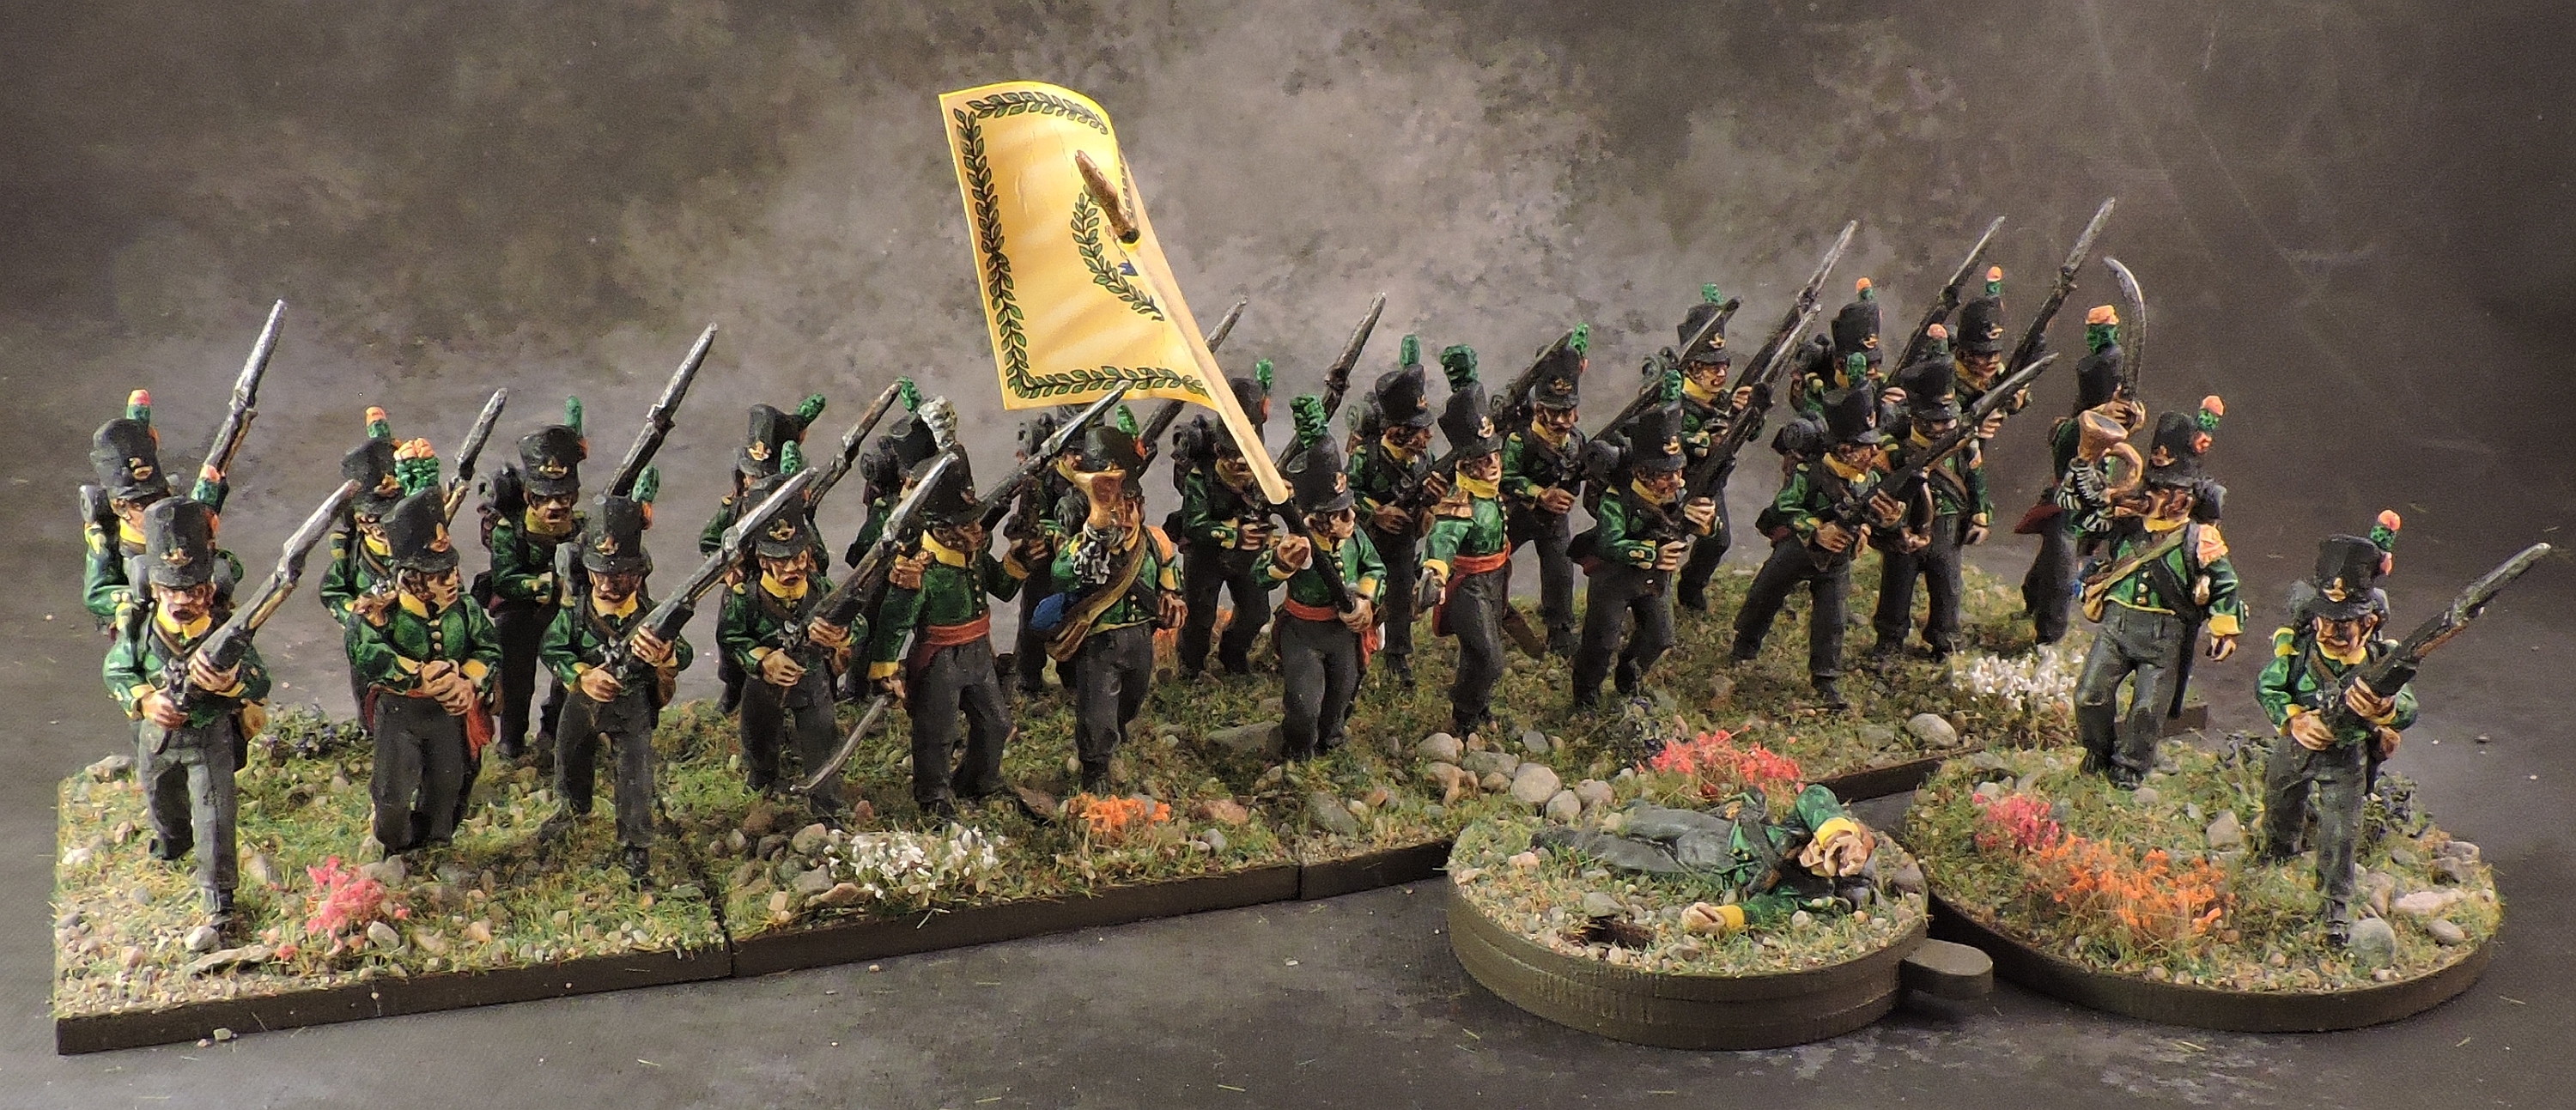
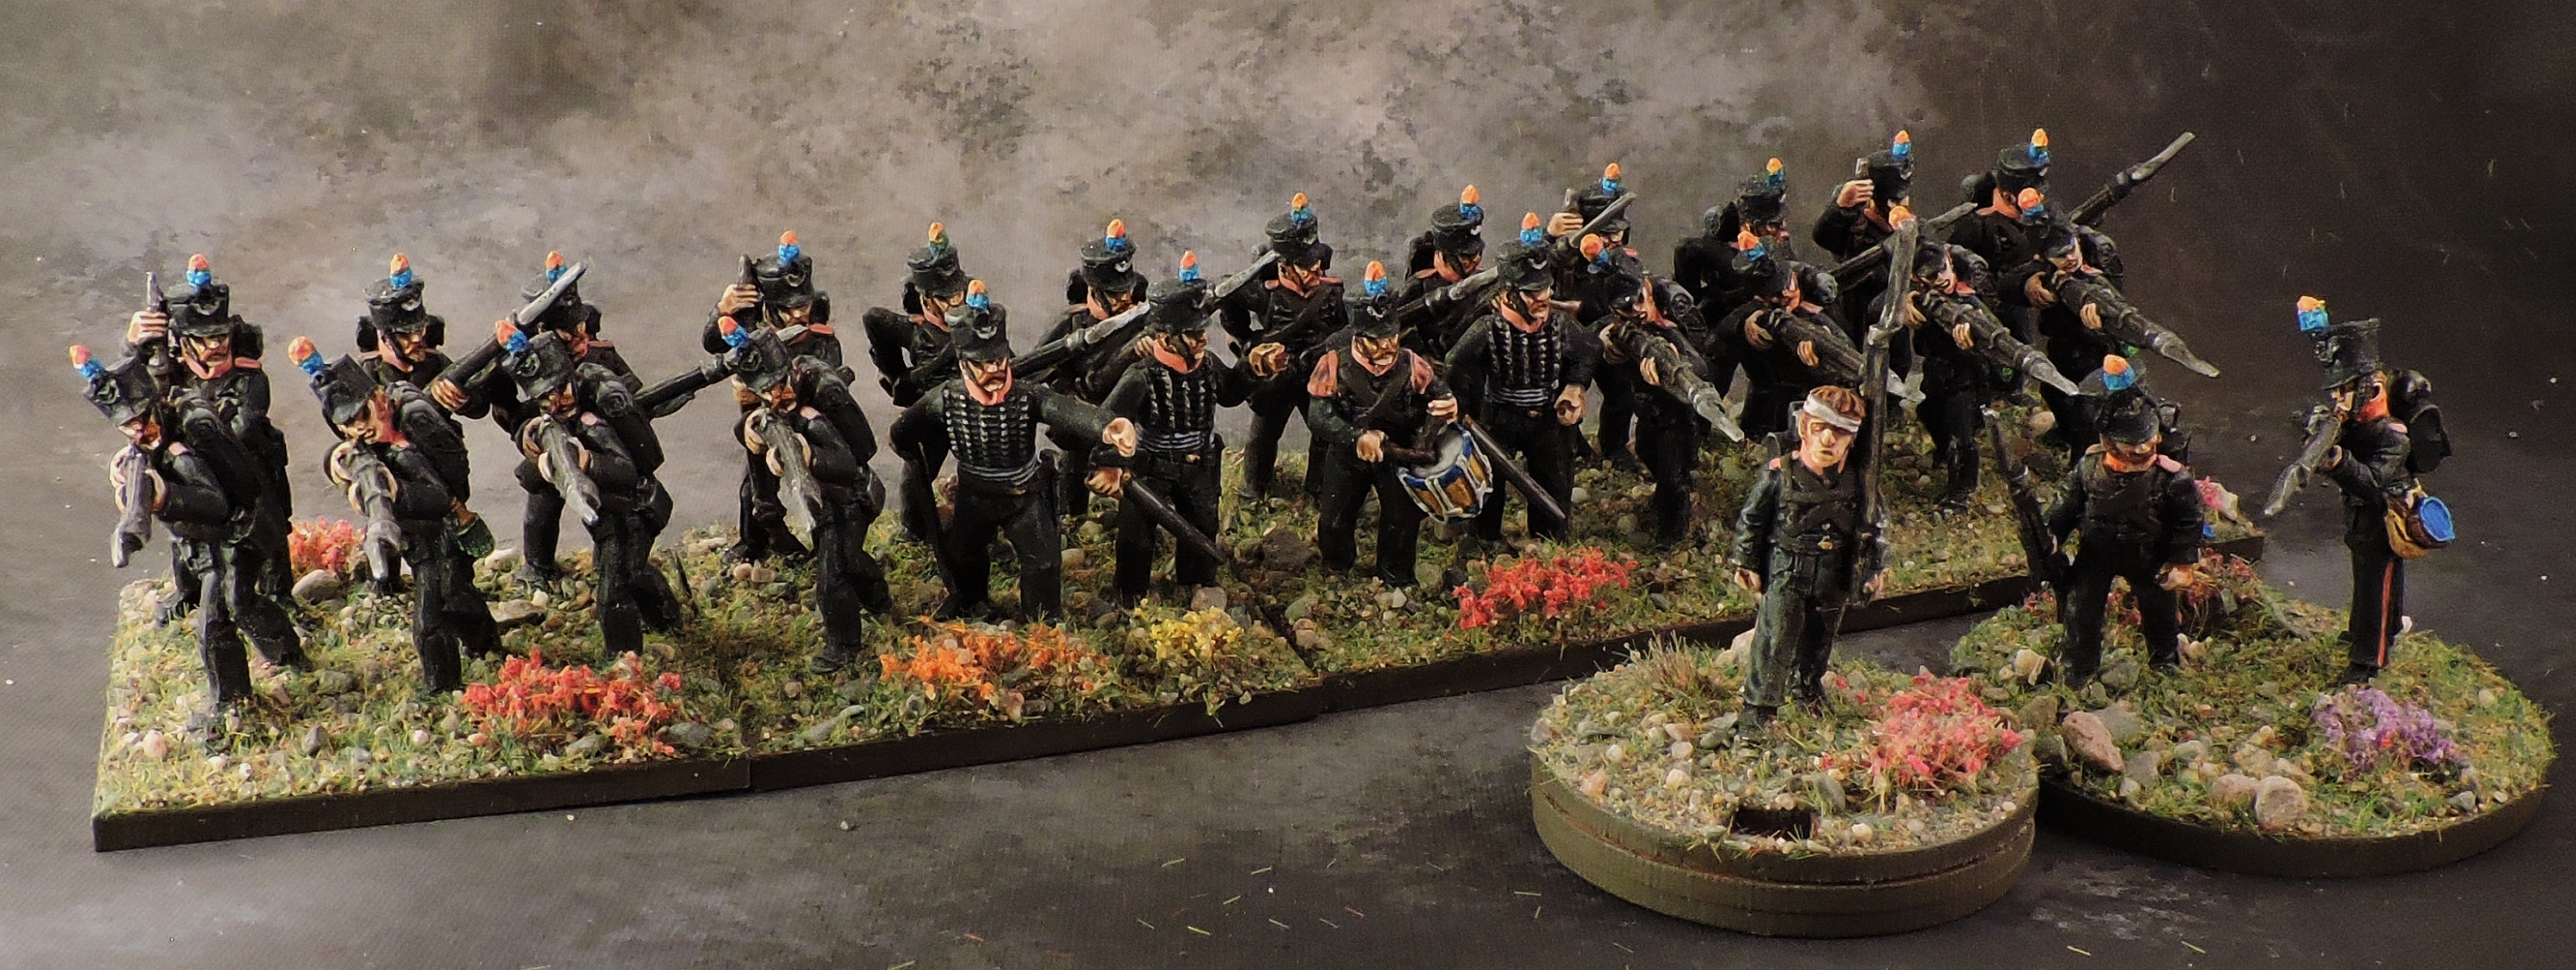
Brunswick Division – Light Brigade
The Light Brigade is commanded by Lieutenant-Colonel von Buttlar and composed of four light battalions including the Leib Bataillon.


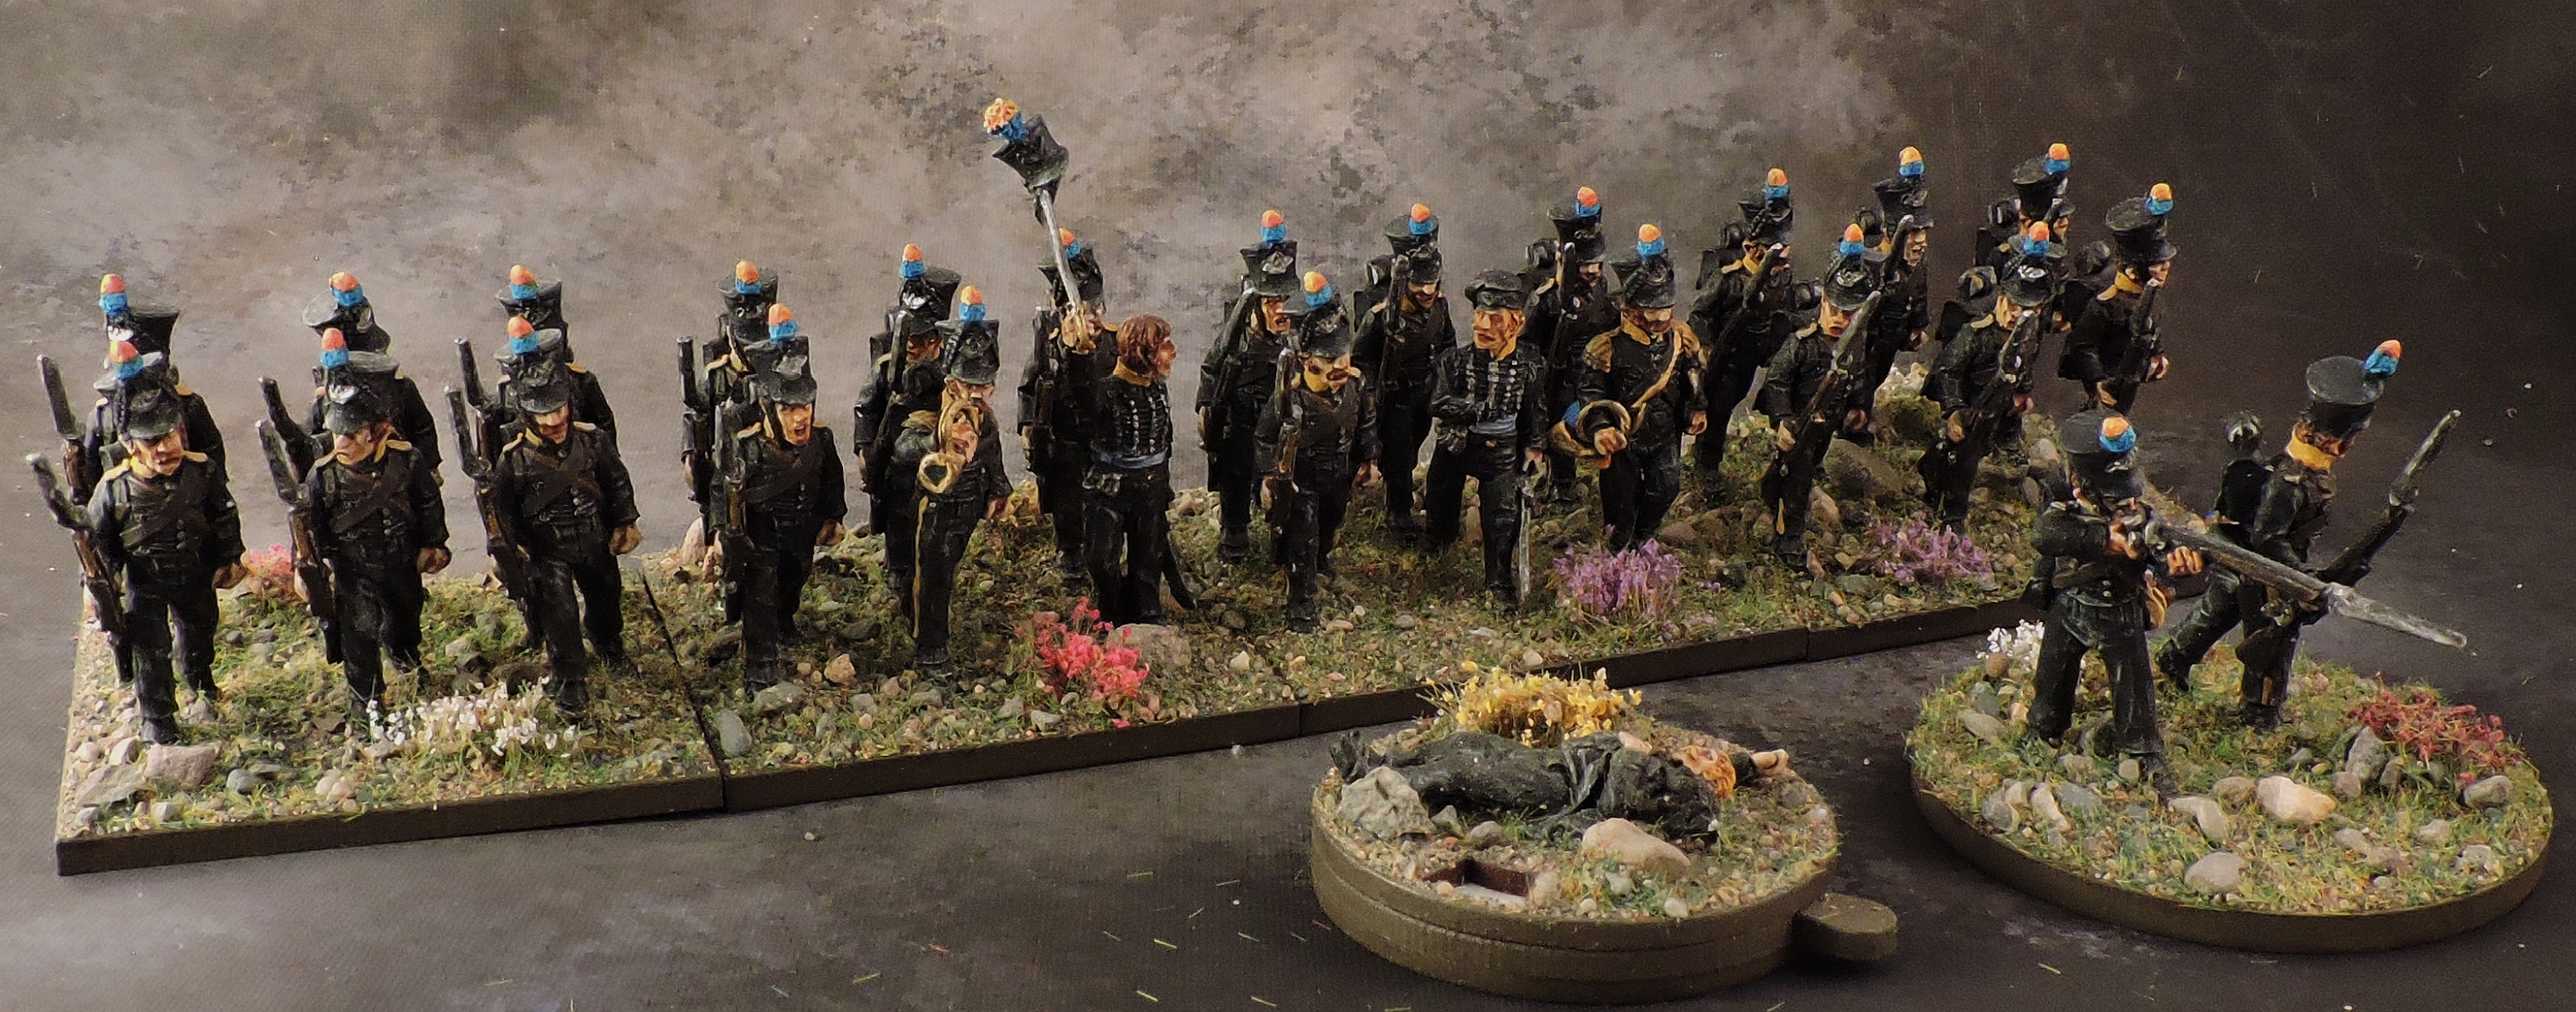

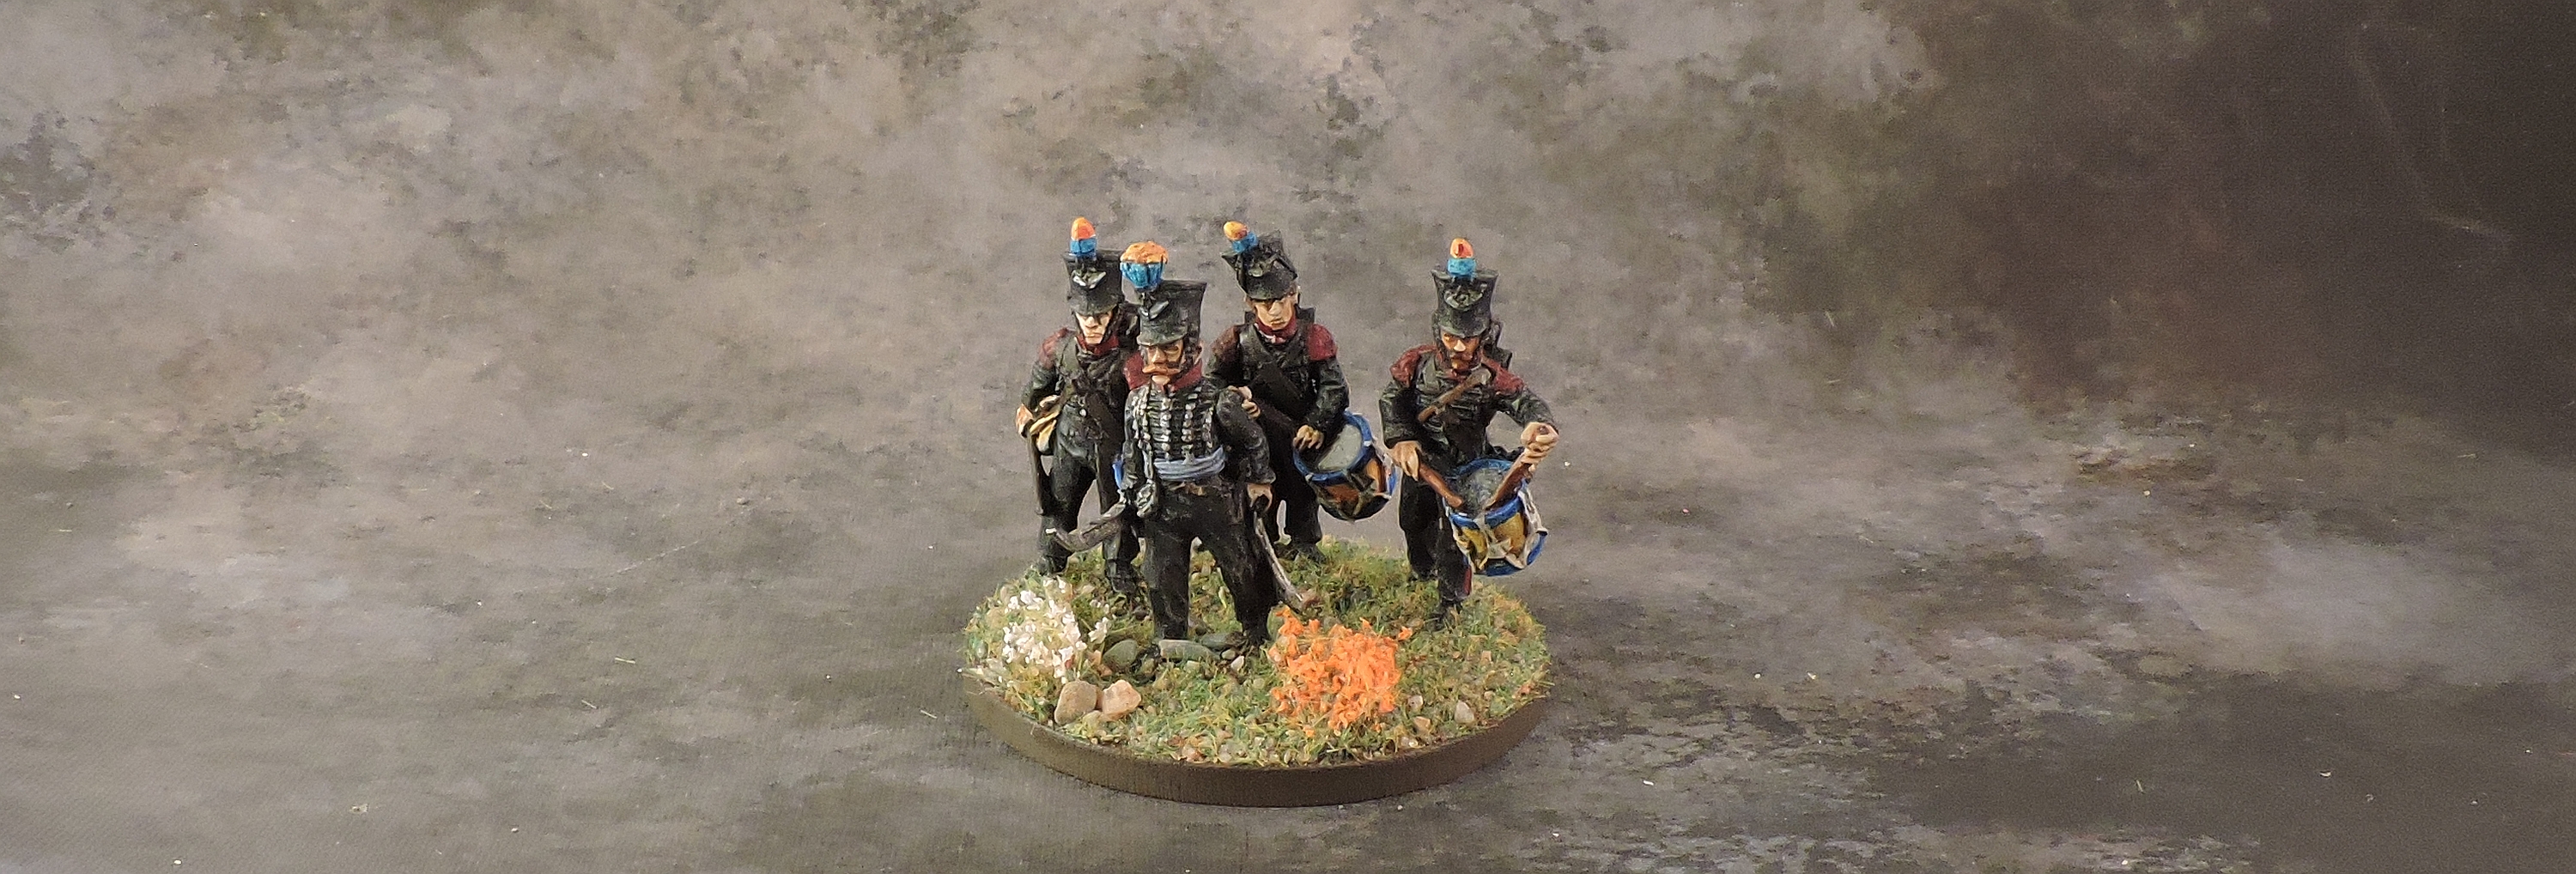
Brunswick Division – Line Brigade
Lieutenant-Colonel von Specht leads the Line Brigade with its three battalions and brigade drum corps. All Perry Miniatures except the third battalion from Eagle Miniatures.


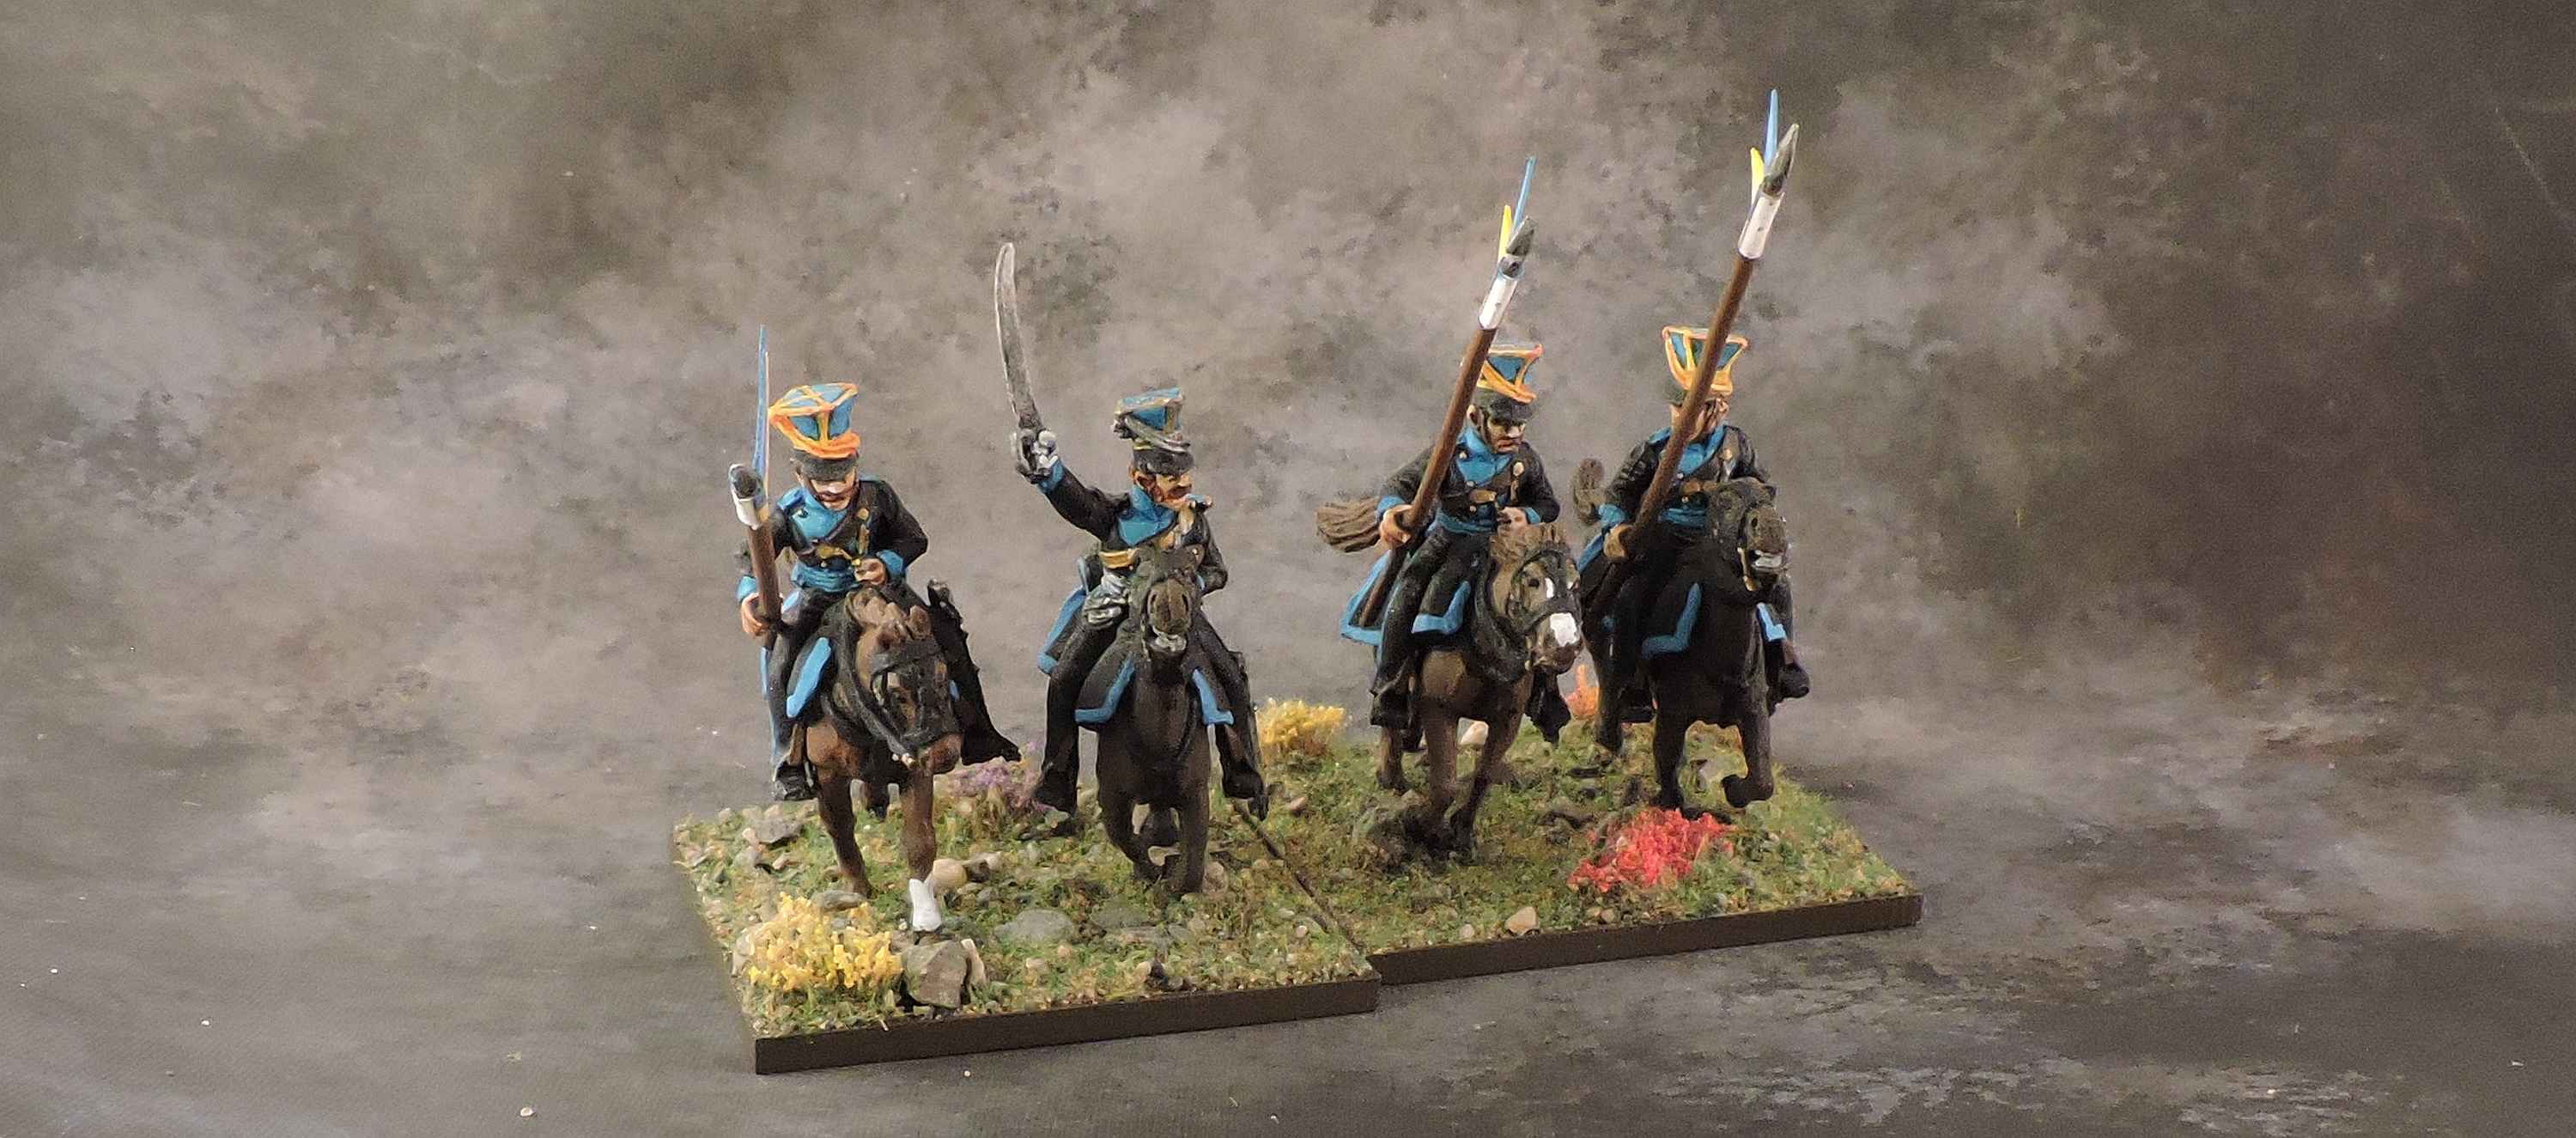
Brunswick Division – Cavalry
Separate from the infantry, the Brunswick contingent also included the Brunswick cavalry brigade featuring two different unit types: a large contingent of Hussars and a single small squadron of Uhlans.

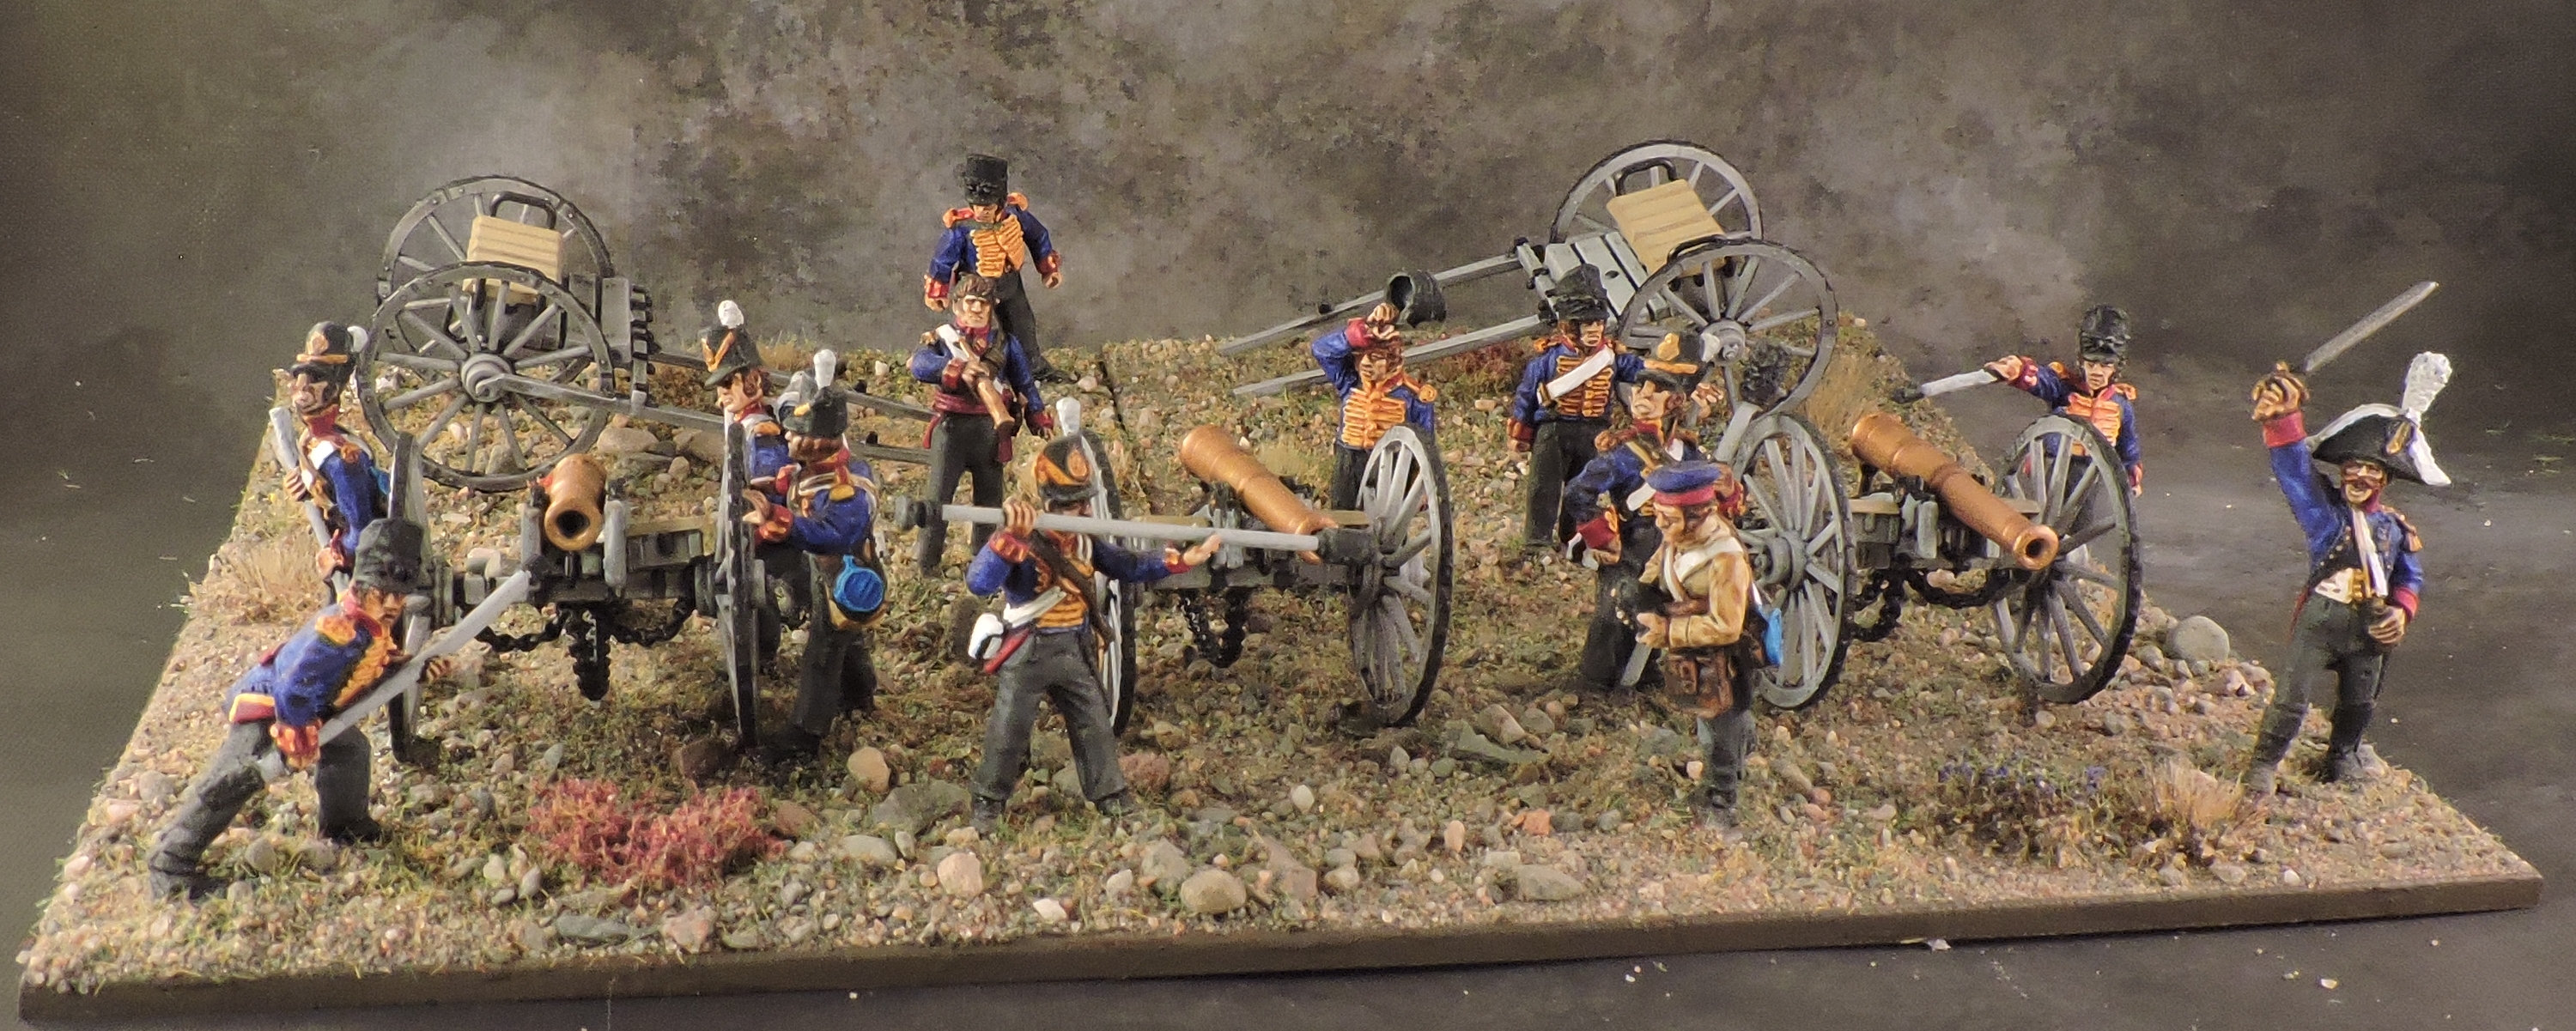
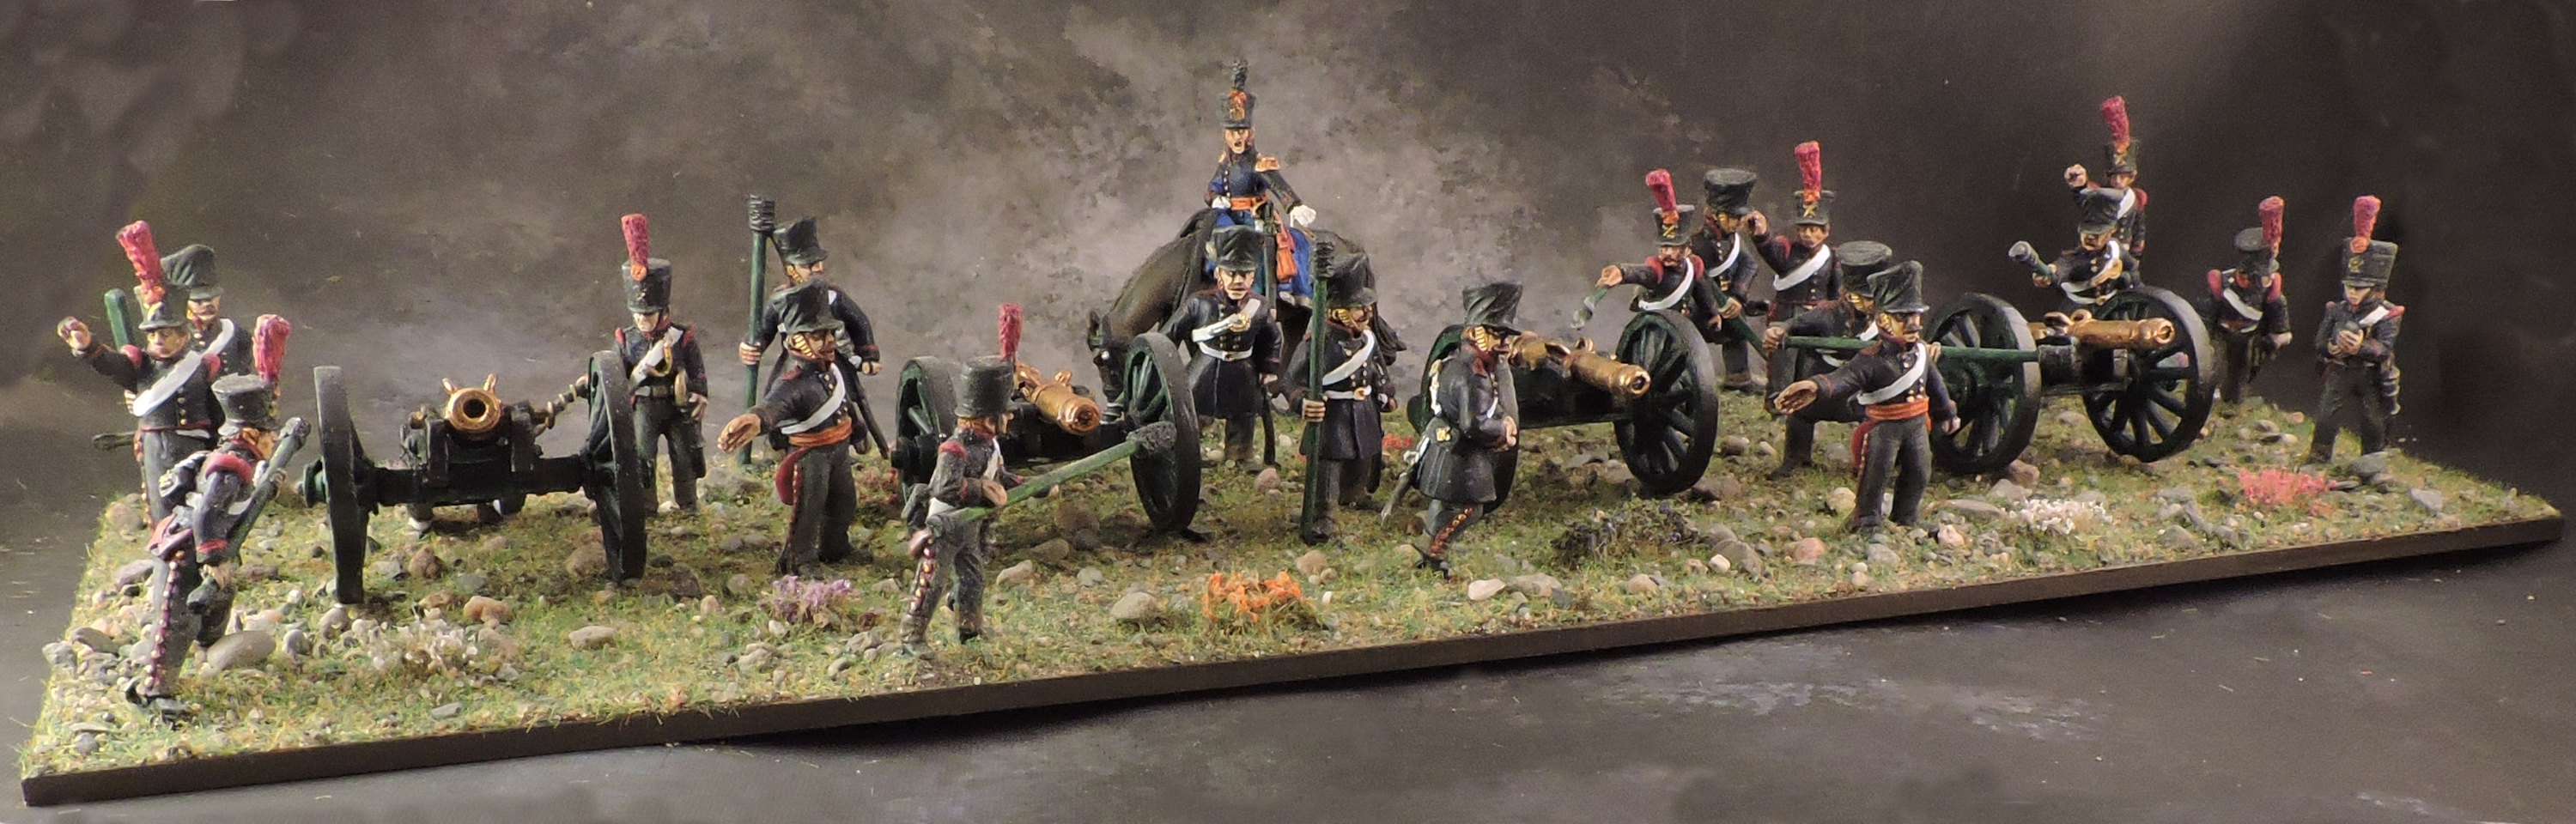
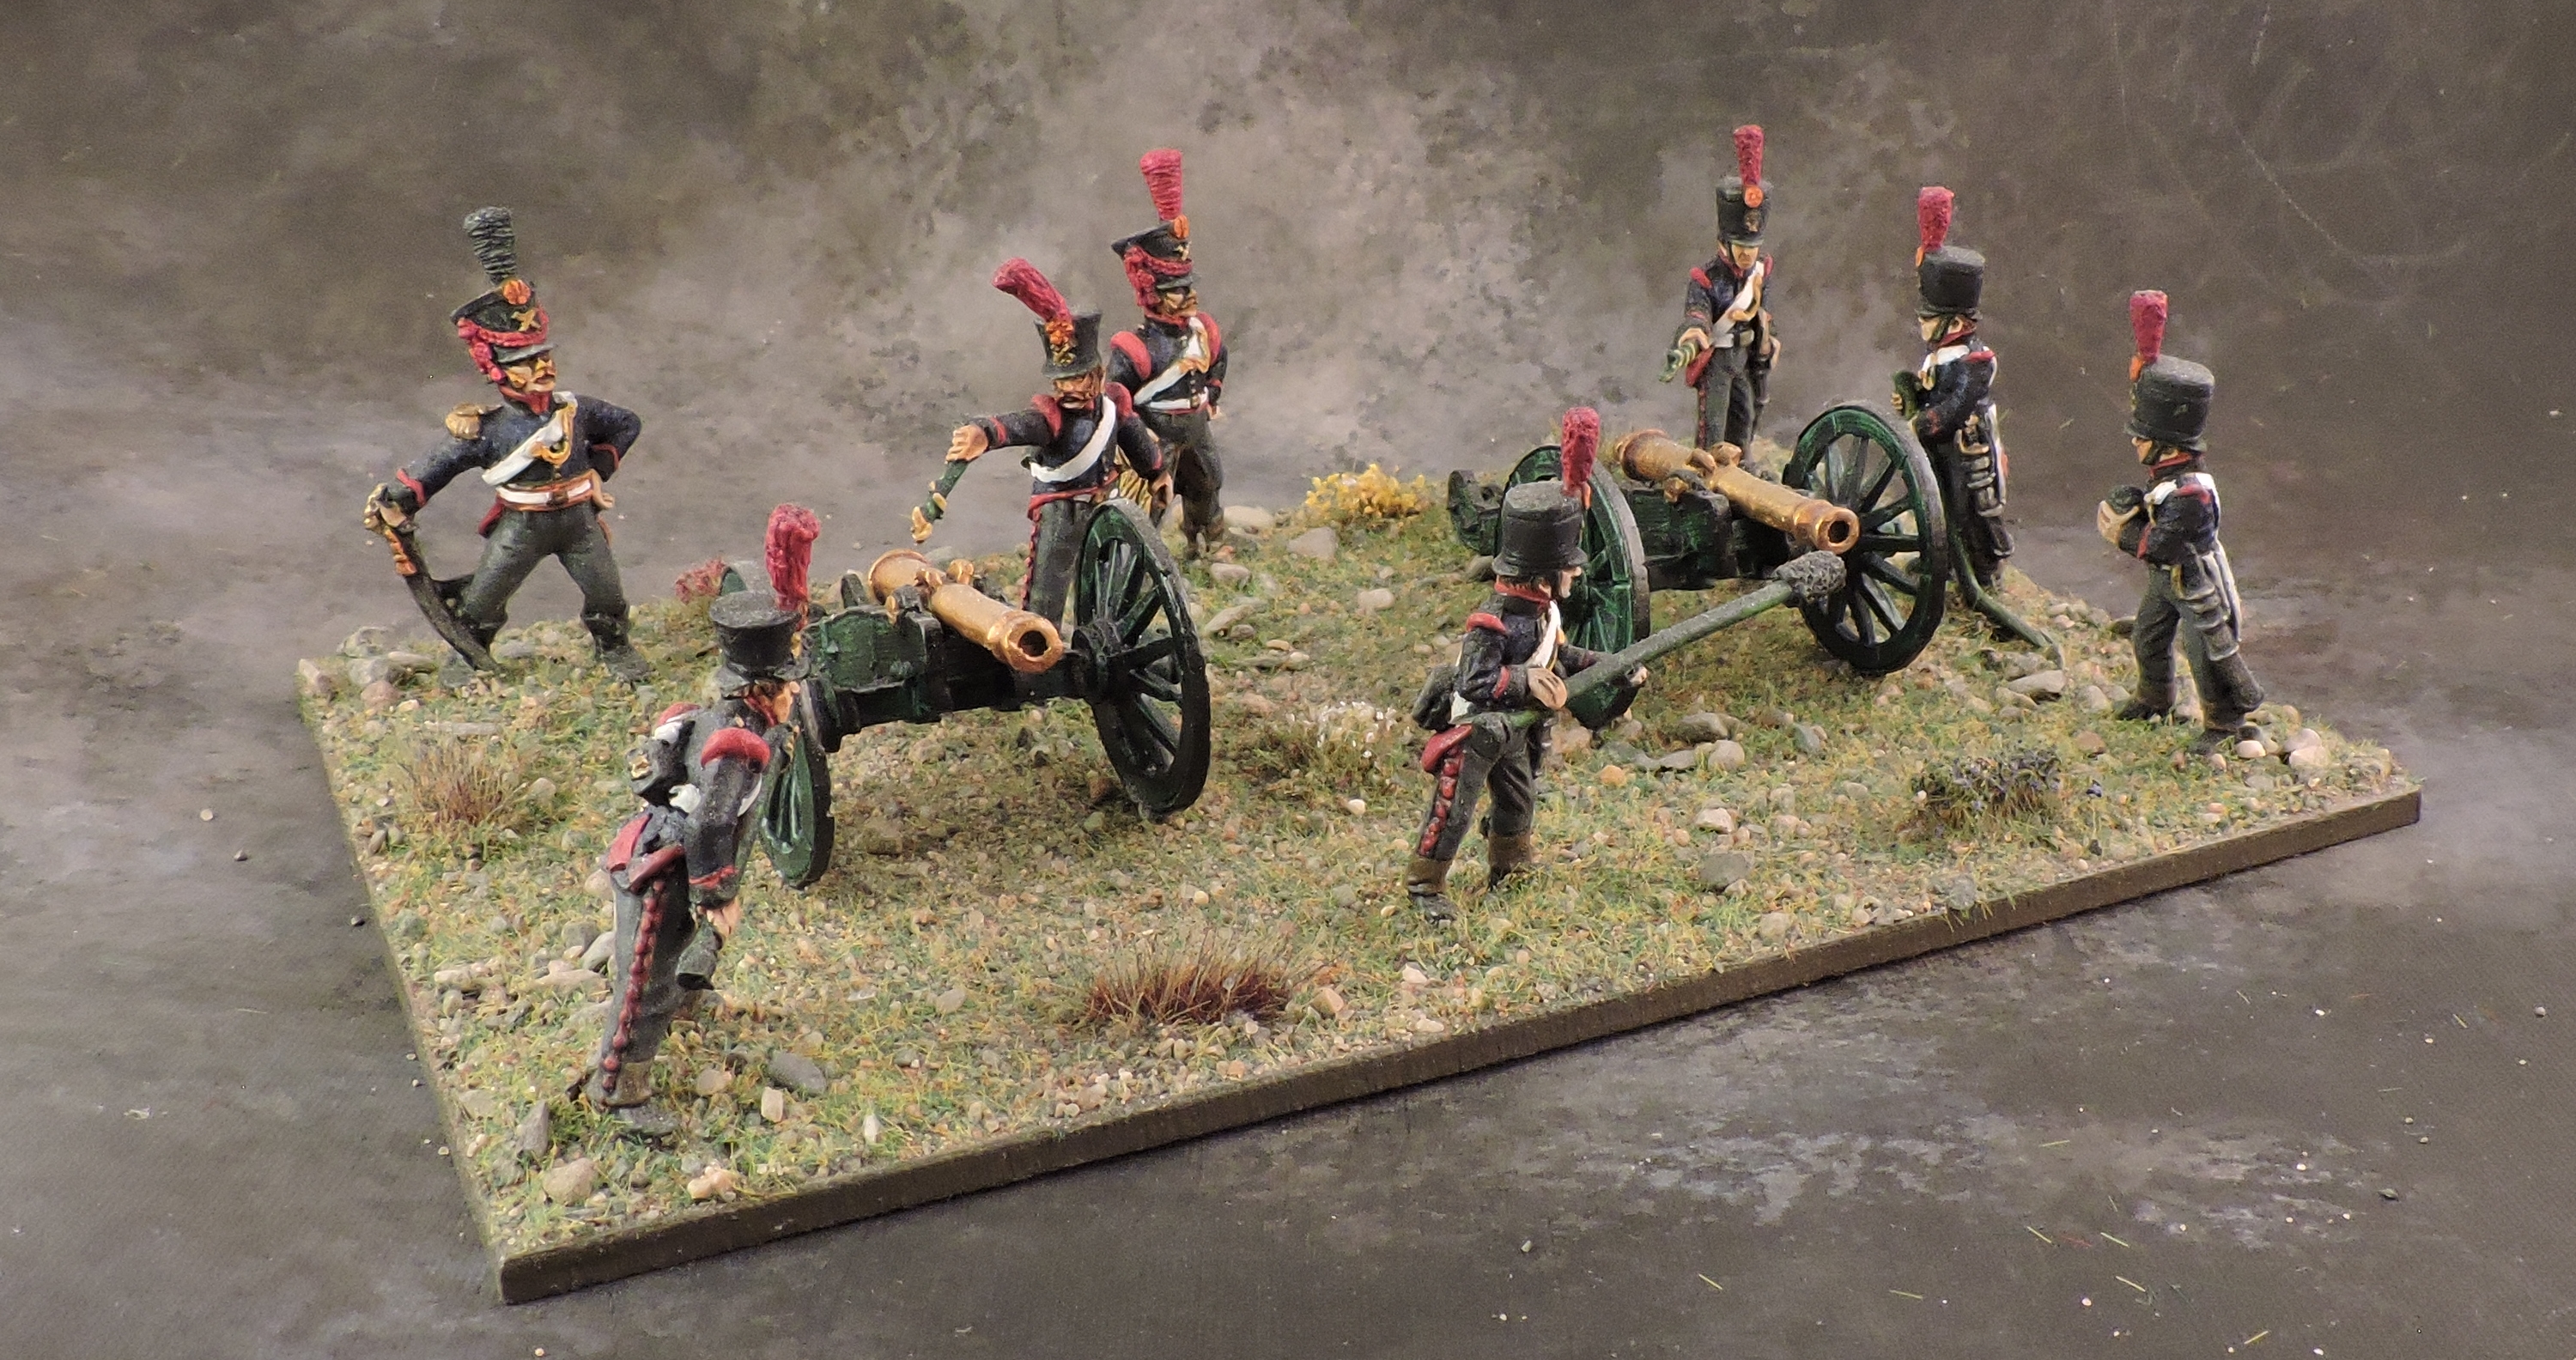
Brunswick Division – Artillery
The division is supported by a Horse Battery and Foot Battery, each with four sections of 6pdr guns.


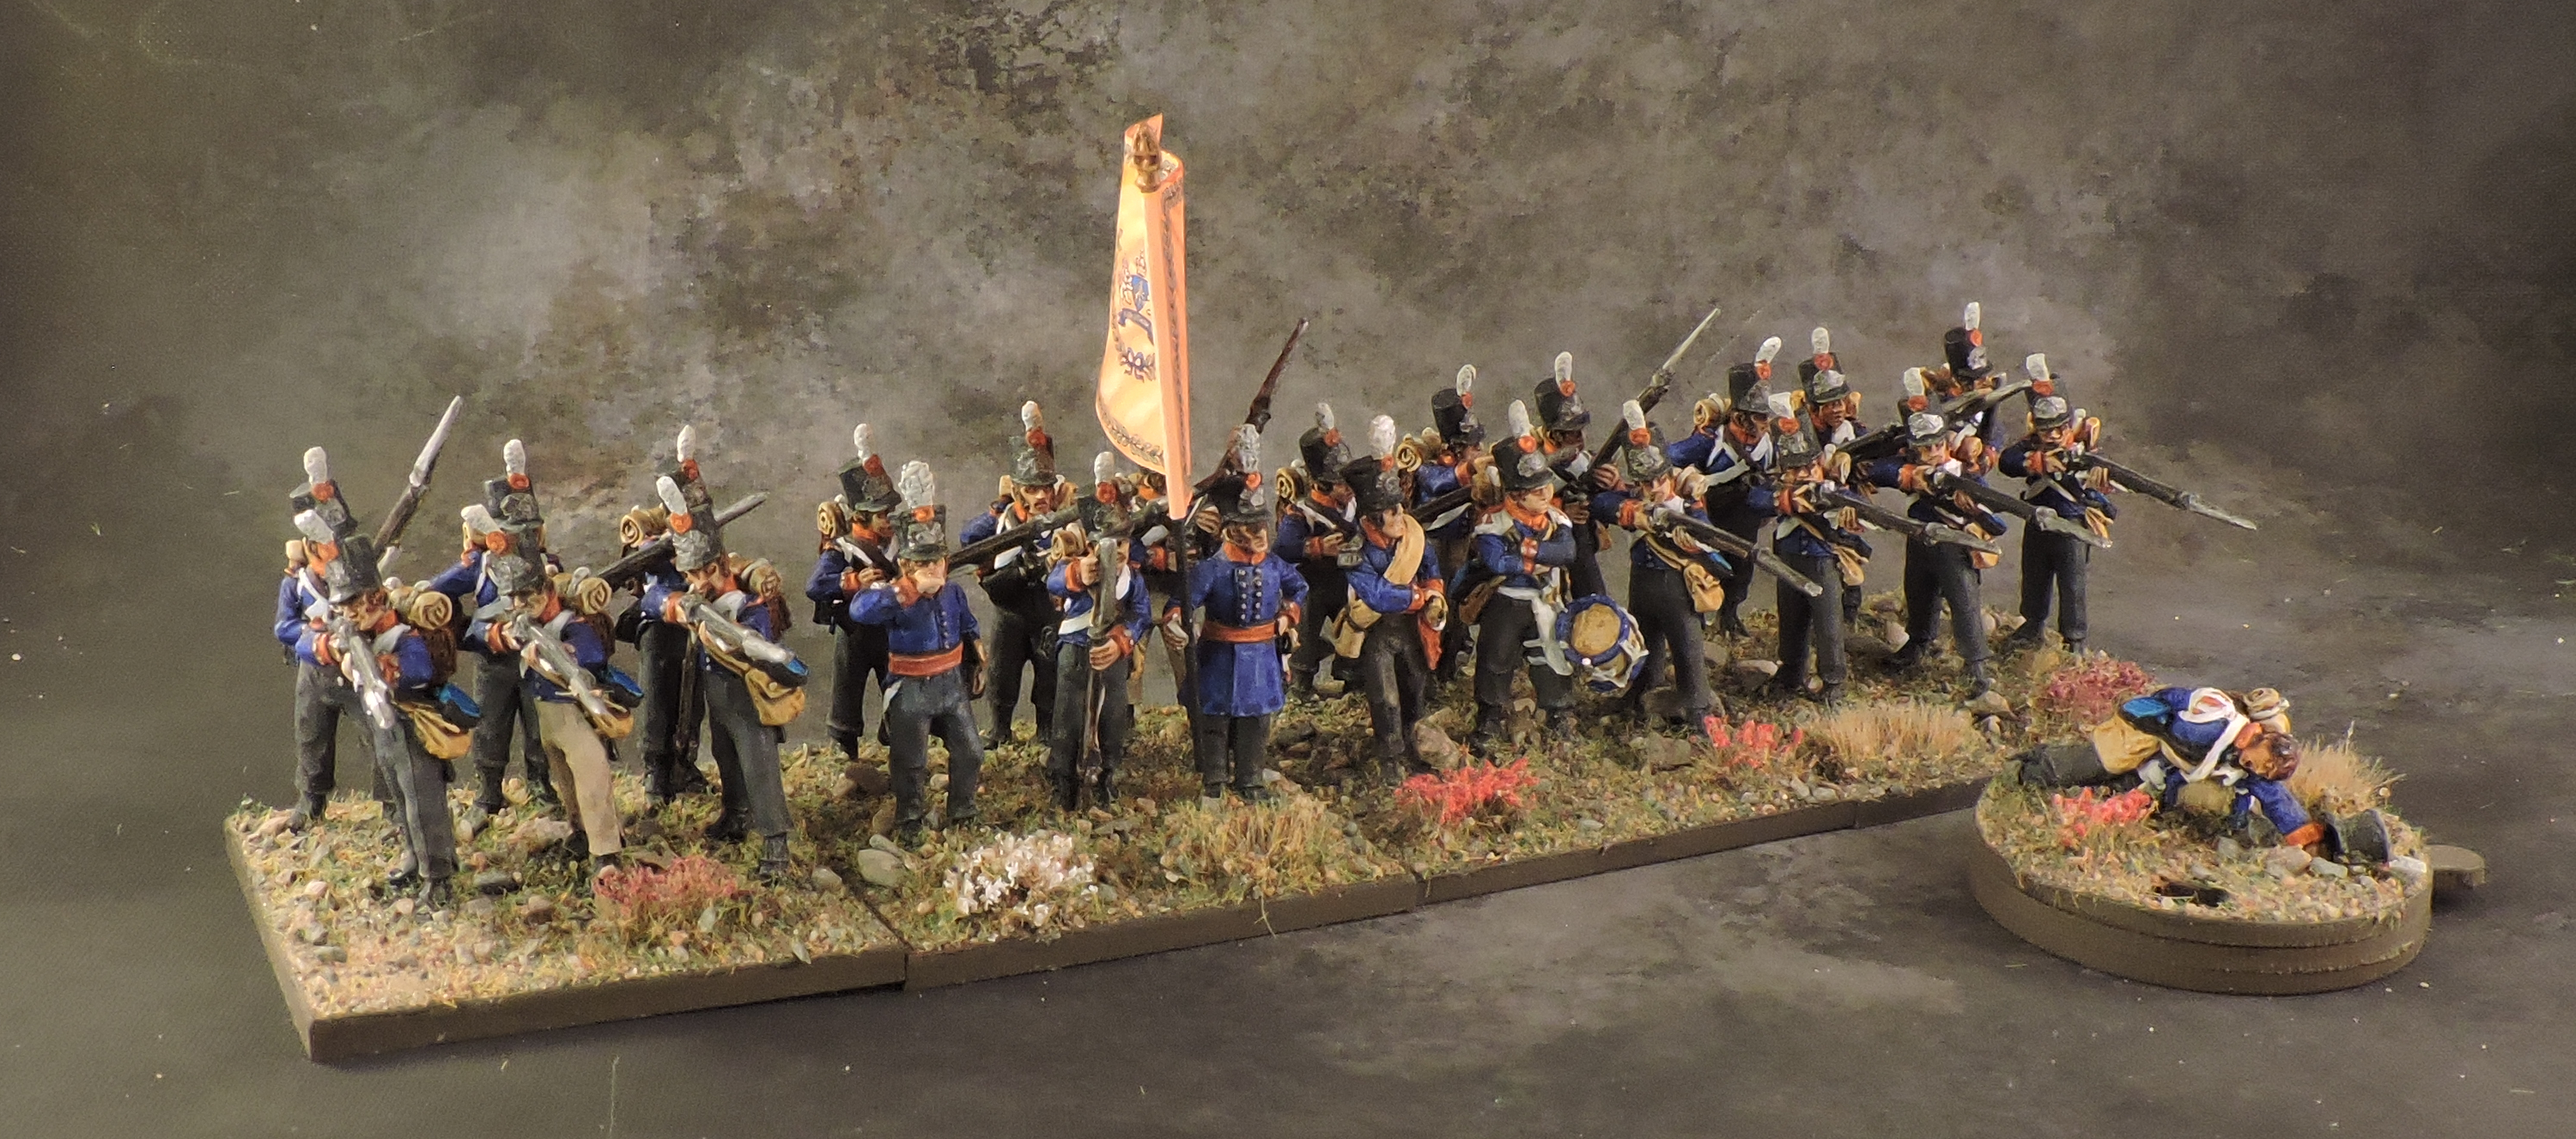
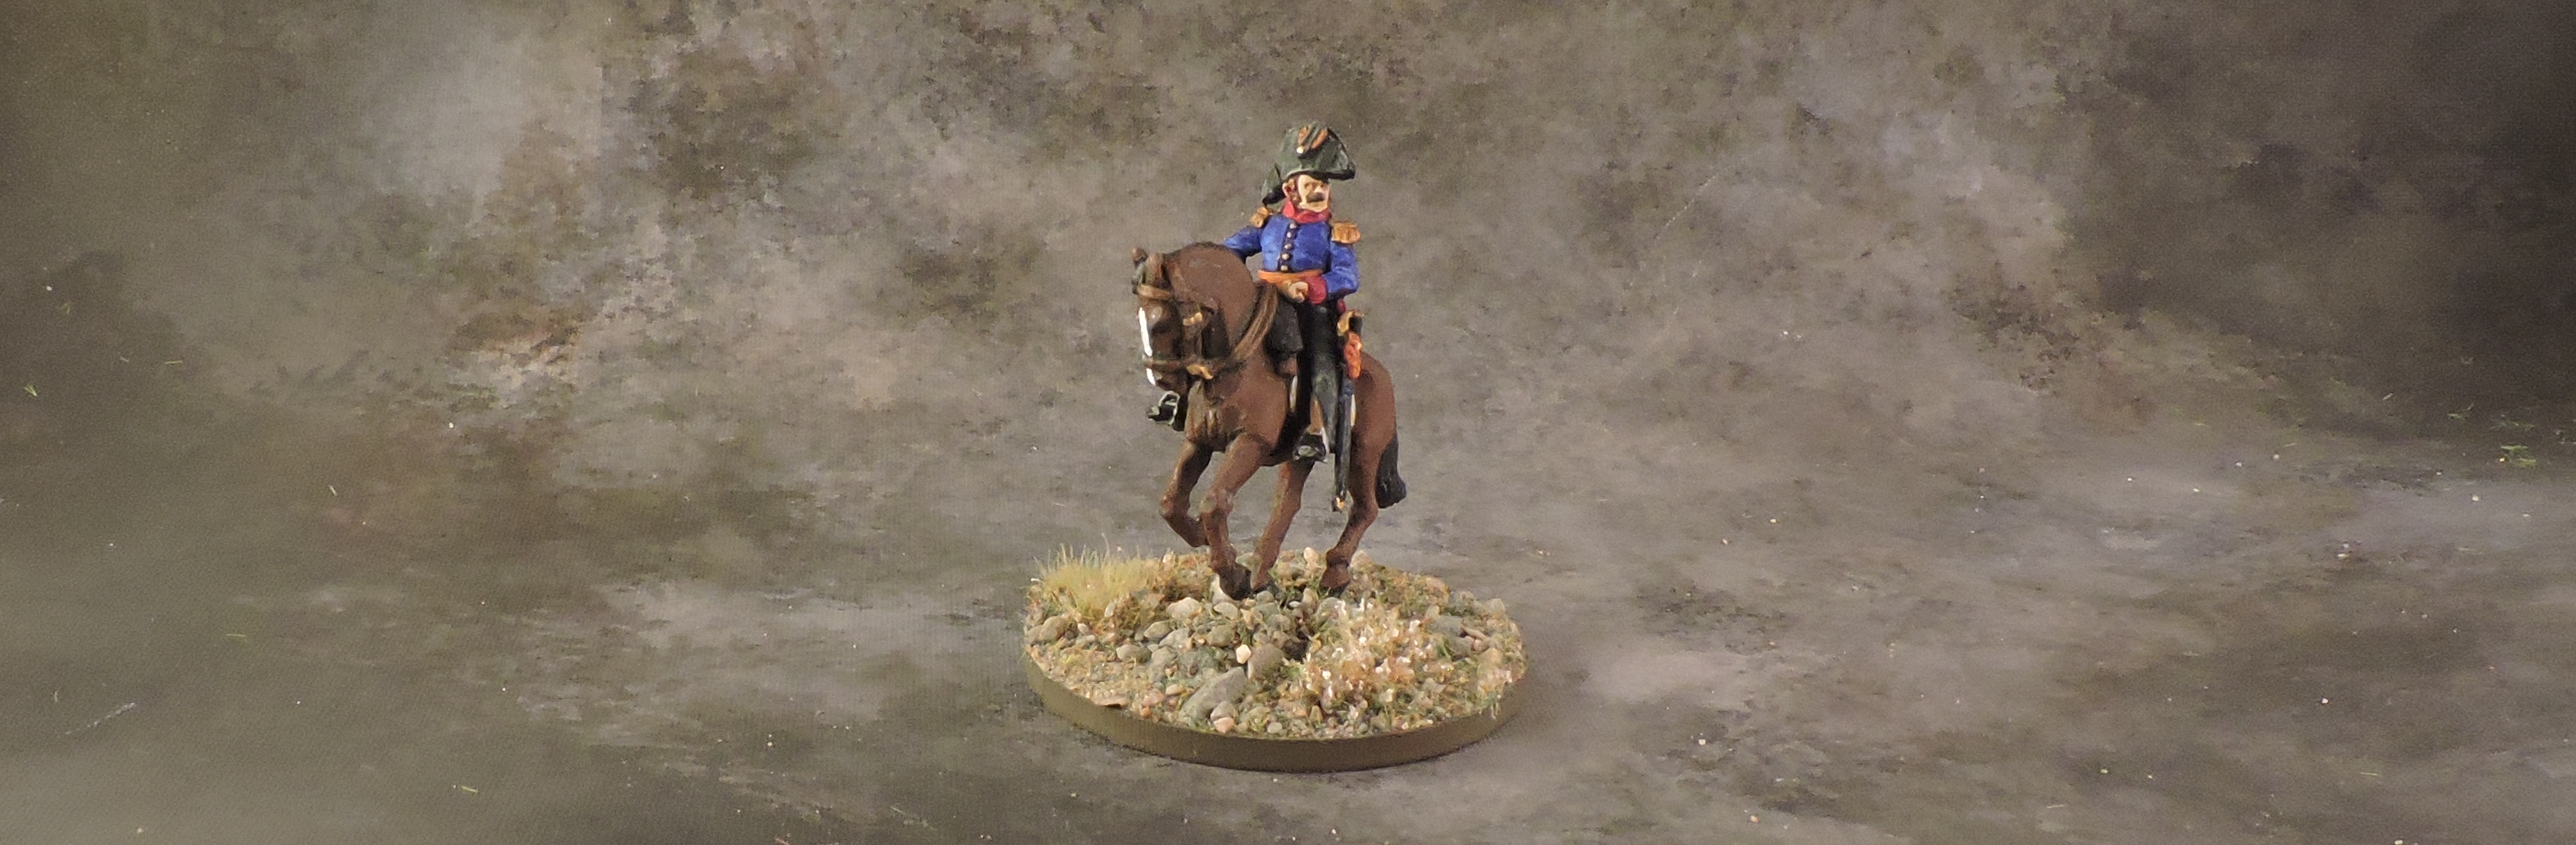
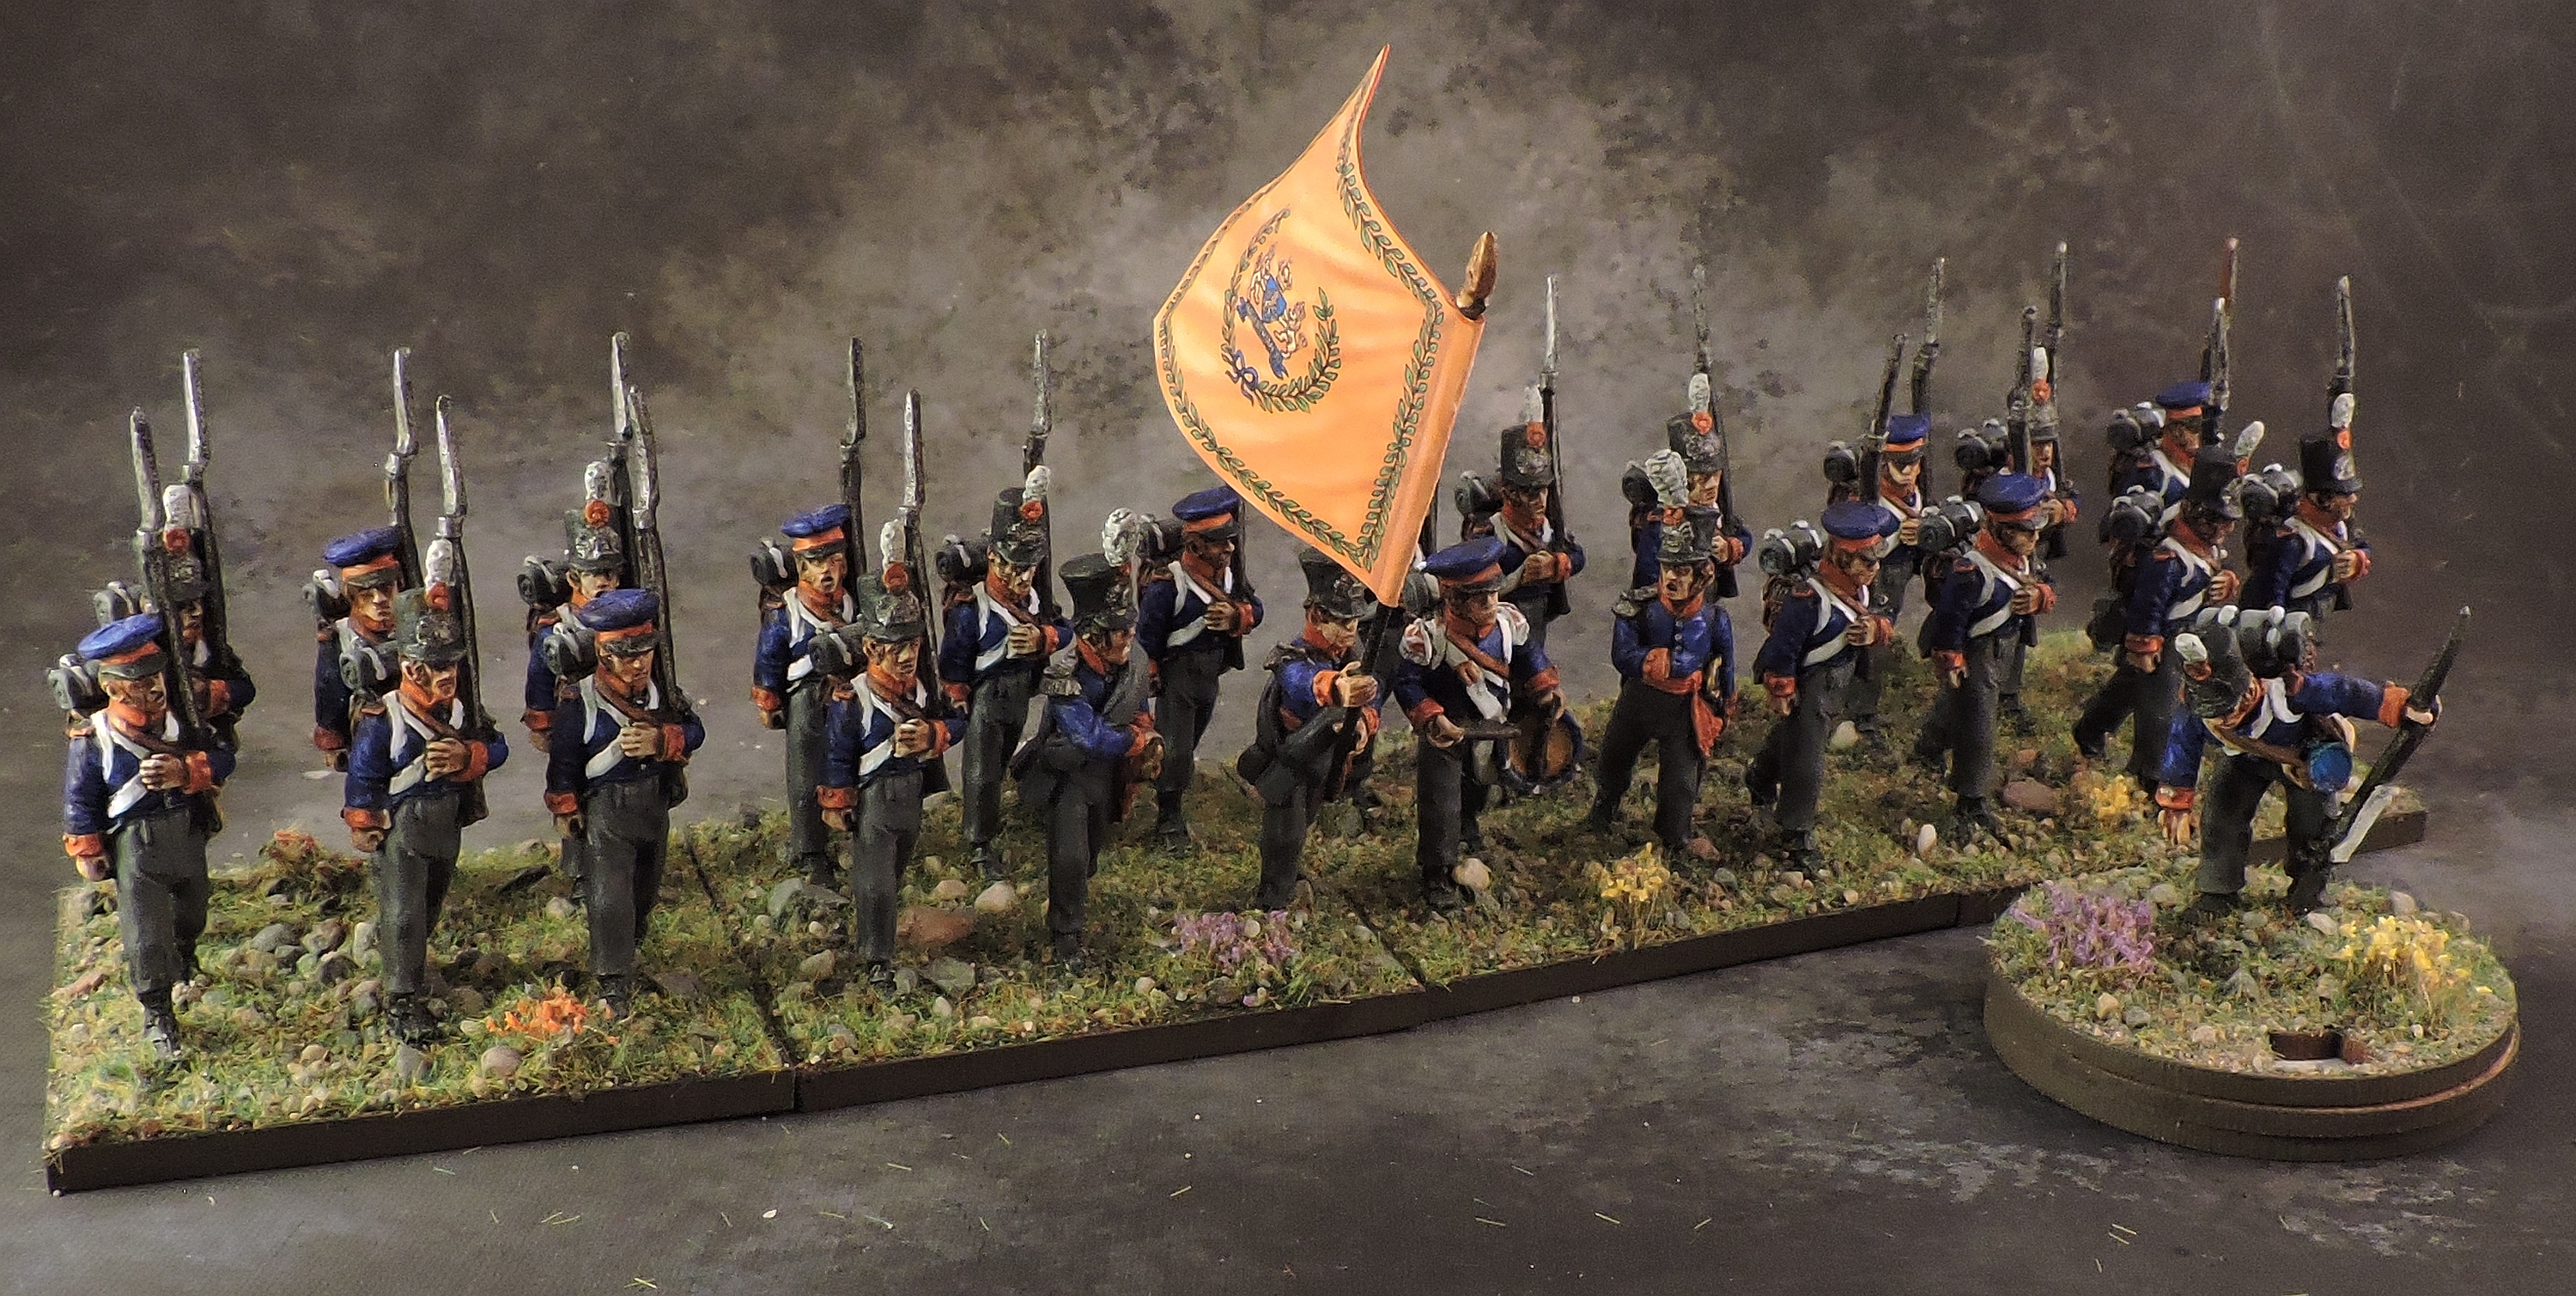
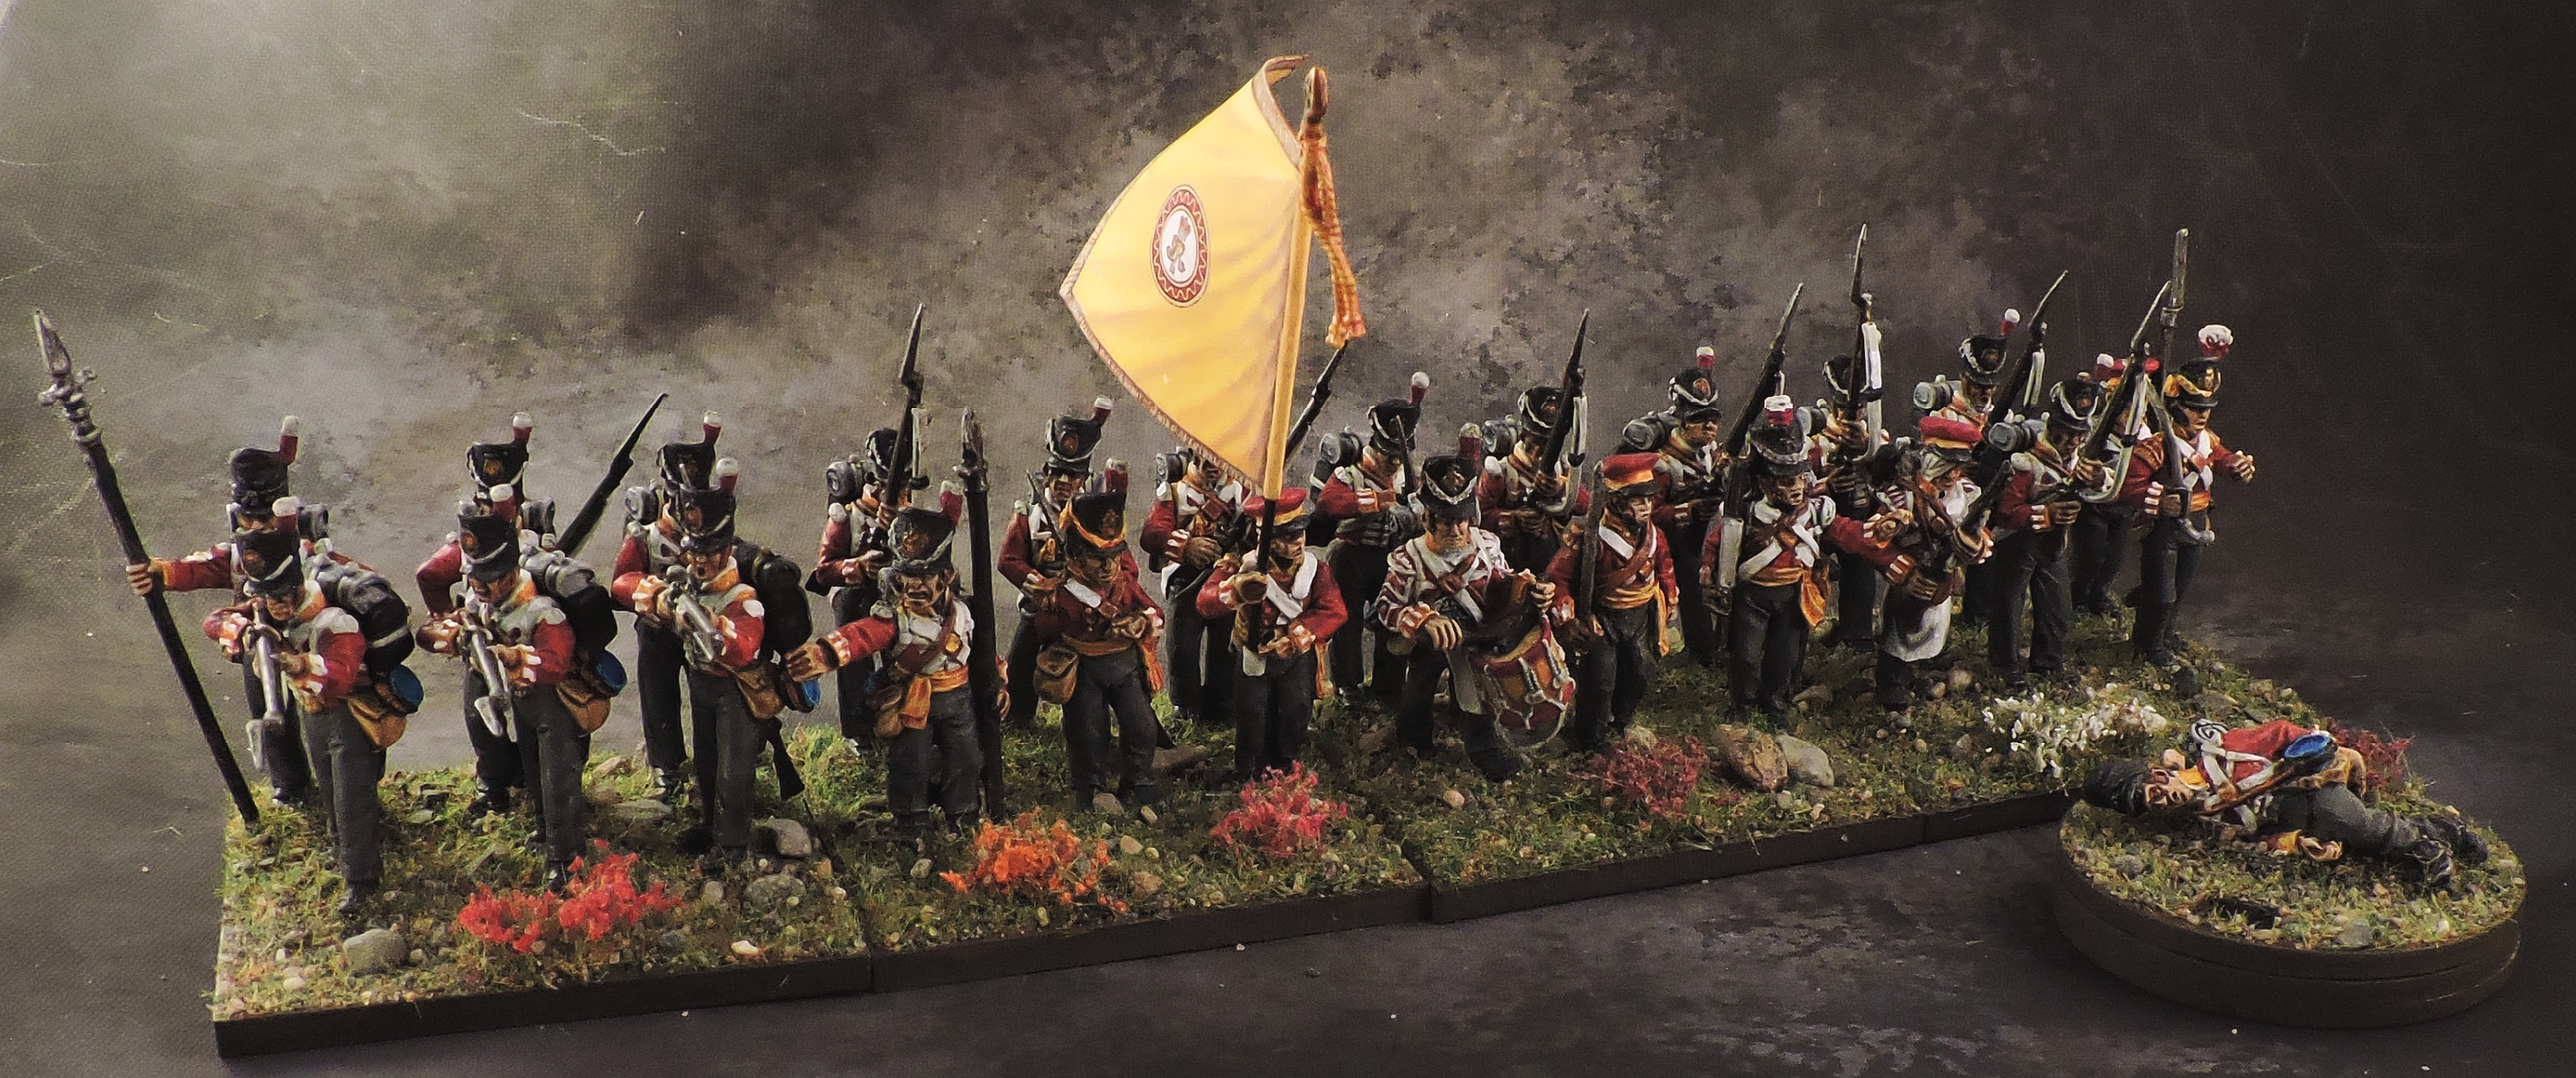
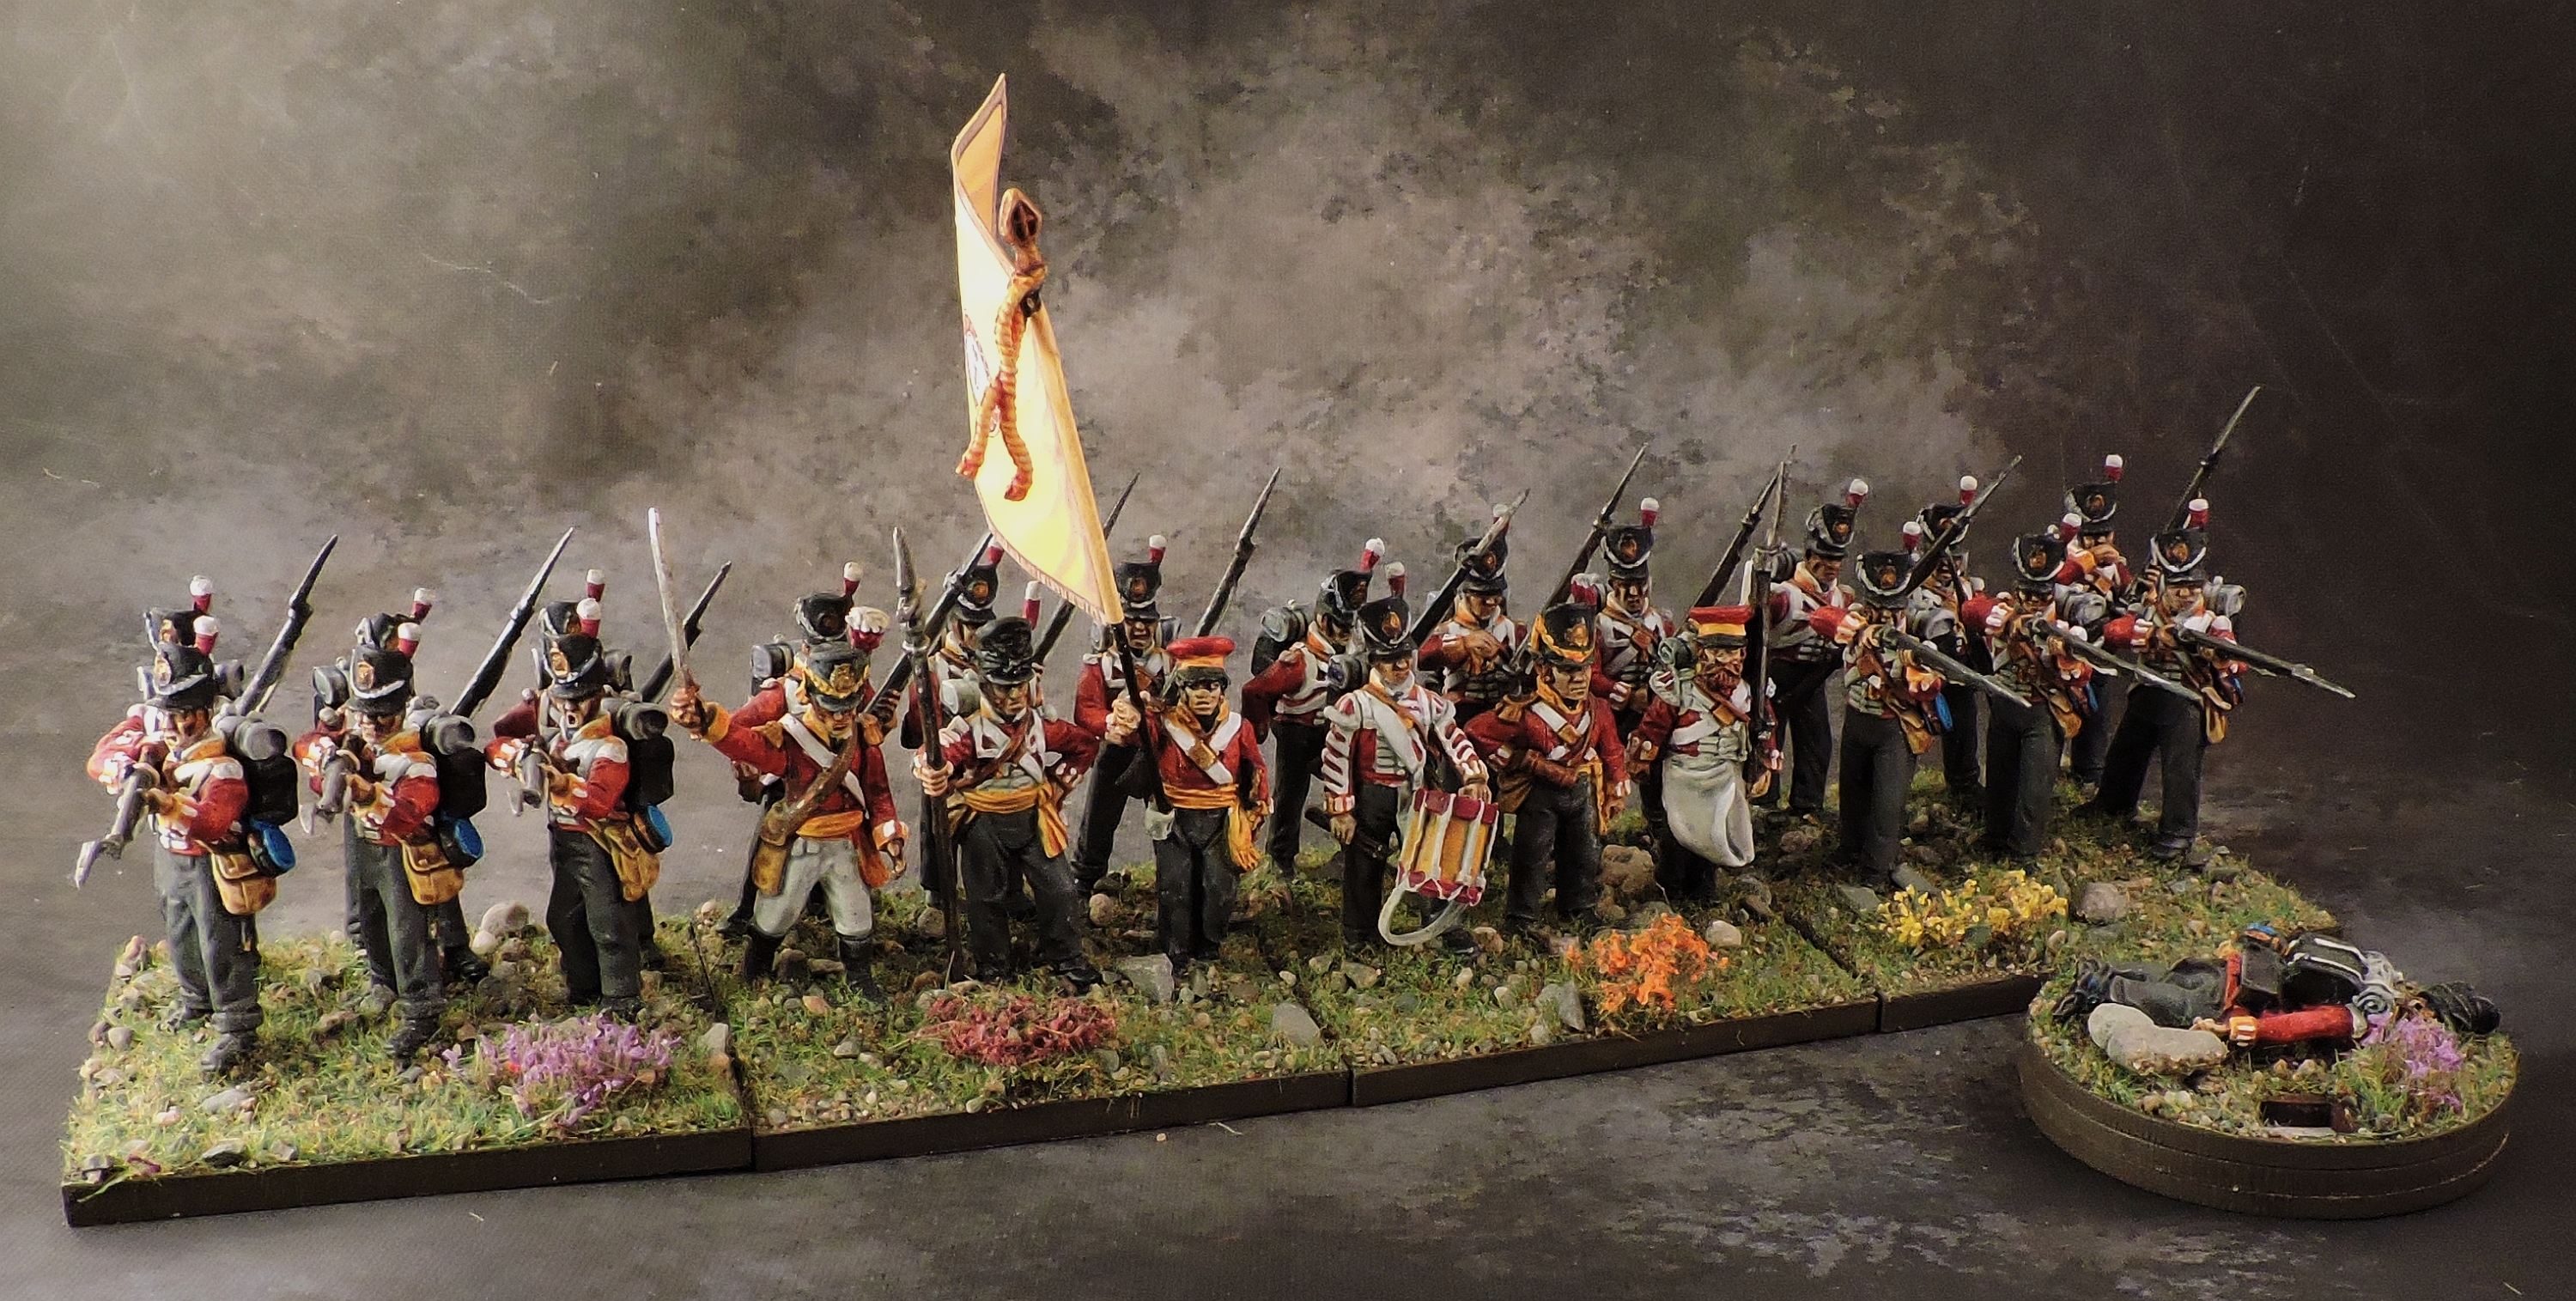
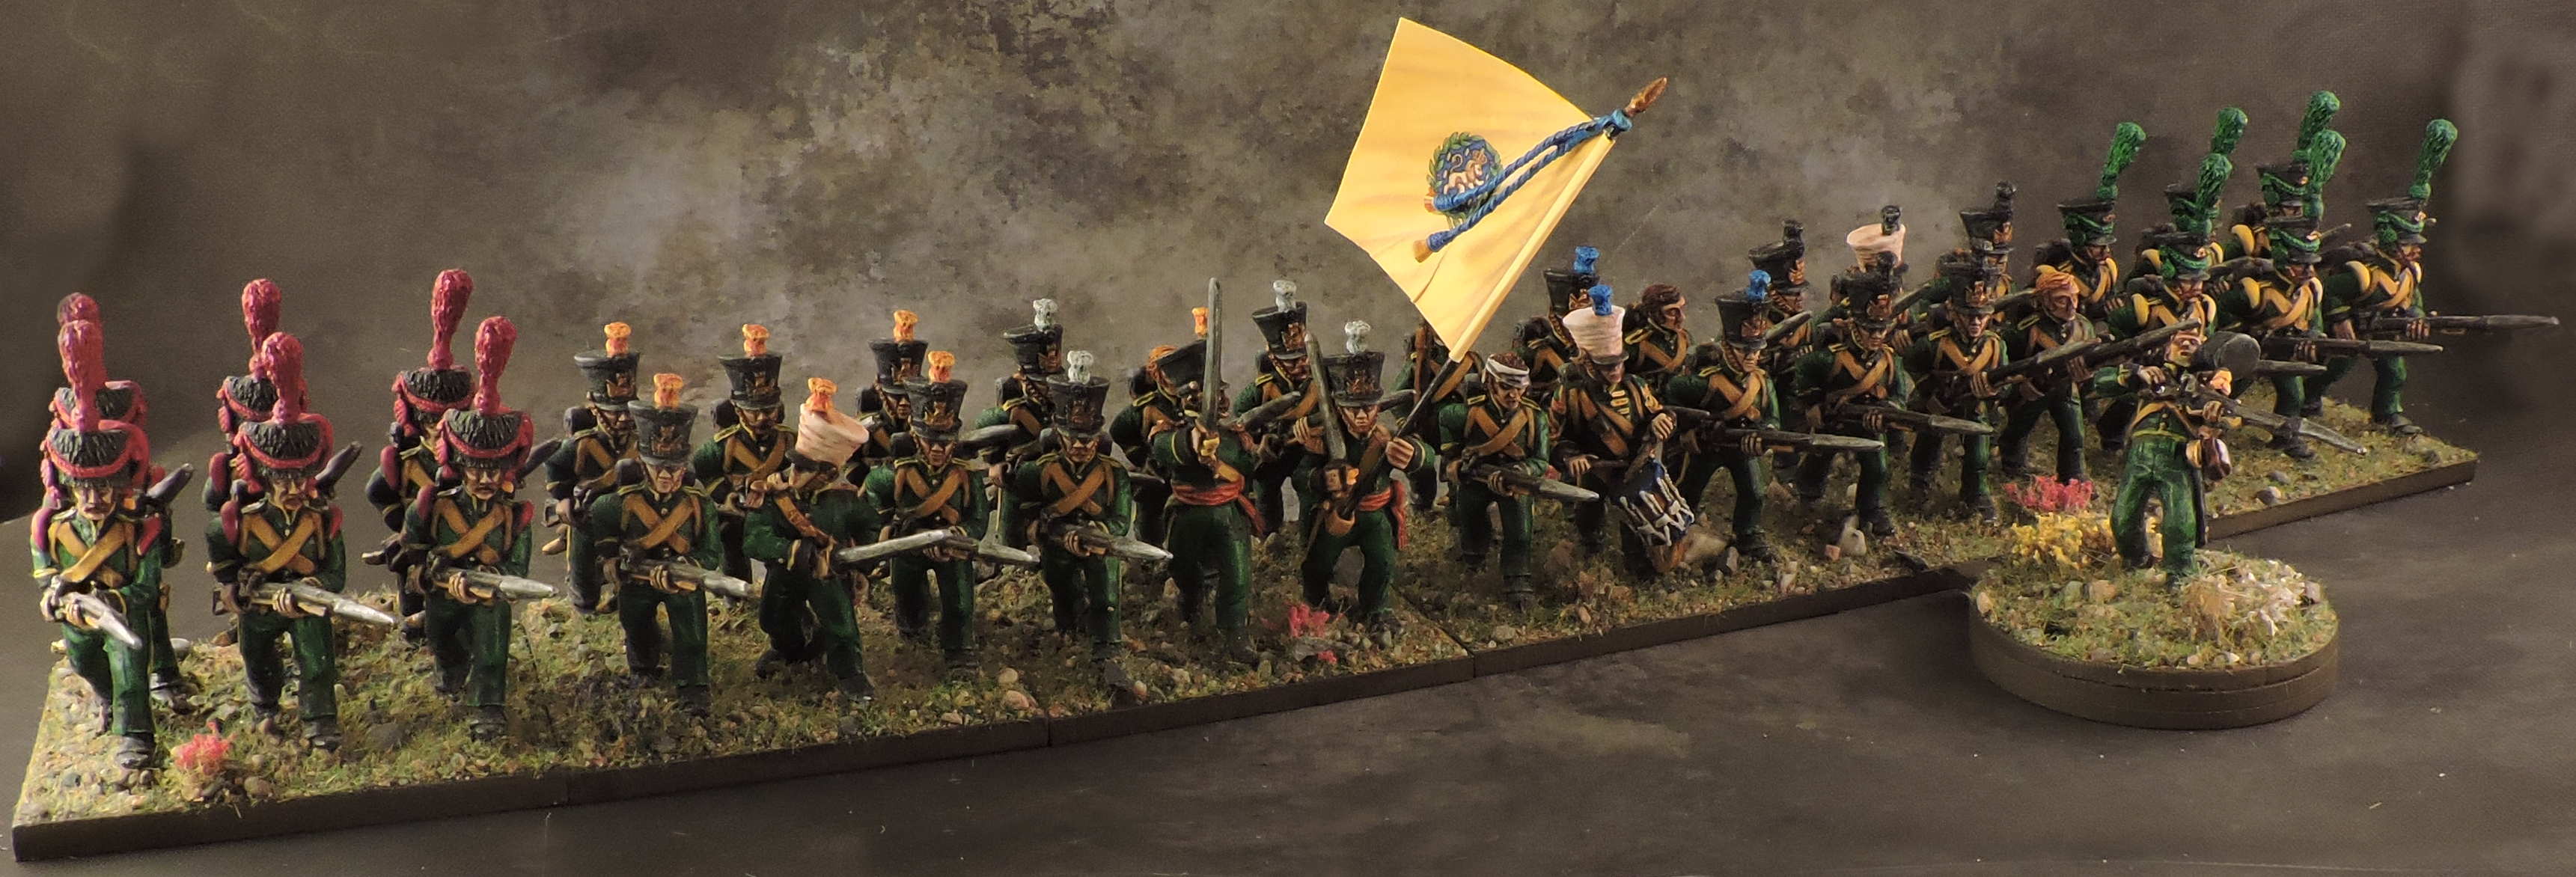
Nassau Infantry Brigade
In addition to the troops integrated into the Dutch-Belgian command, Nassau fielded an autonomous brigade led by General-Major August von Kruse. Unlike the 2nd Regiment, the 1st Regiment wore the 1815-16 uniform with shoulder rolls for the flank companies. The regiment has black rosettes on their shakos (if uncovered) and historically appears not to have worn sashes for the officers. But every manufacturer I could find has sashes on their sculpts so I went with the same orange as the 2nd Nassau regiment in Dutch service. Unlike other elements of the Allied Army where each battalion operated independently, the Nassau Brigade is really just a single Regiment with three battalions. I therefore added a regimental command staff on a separate base. I had some more spare figures so there is a drummer corps base as well.


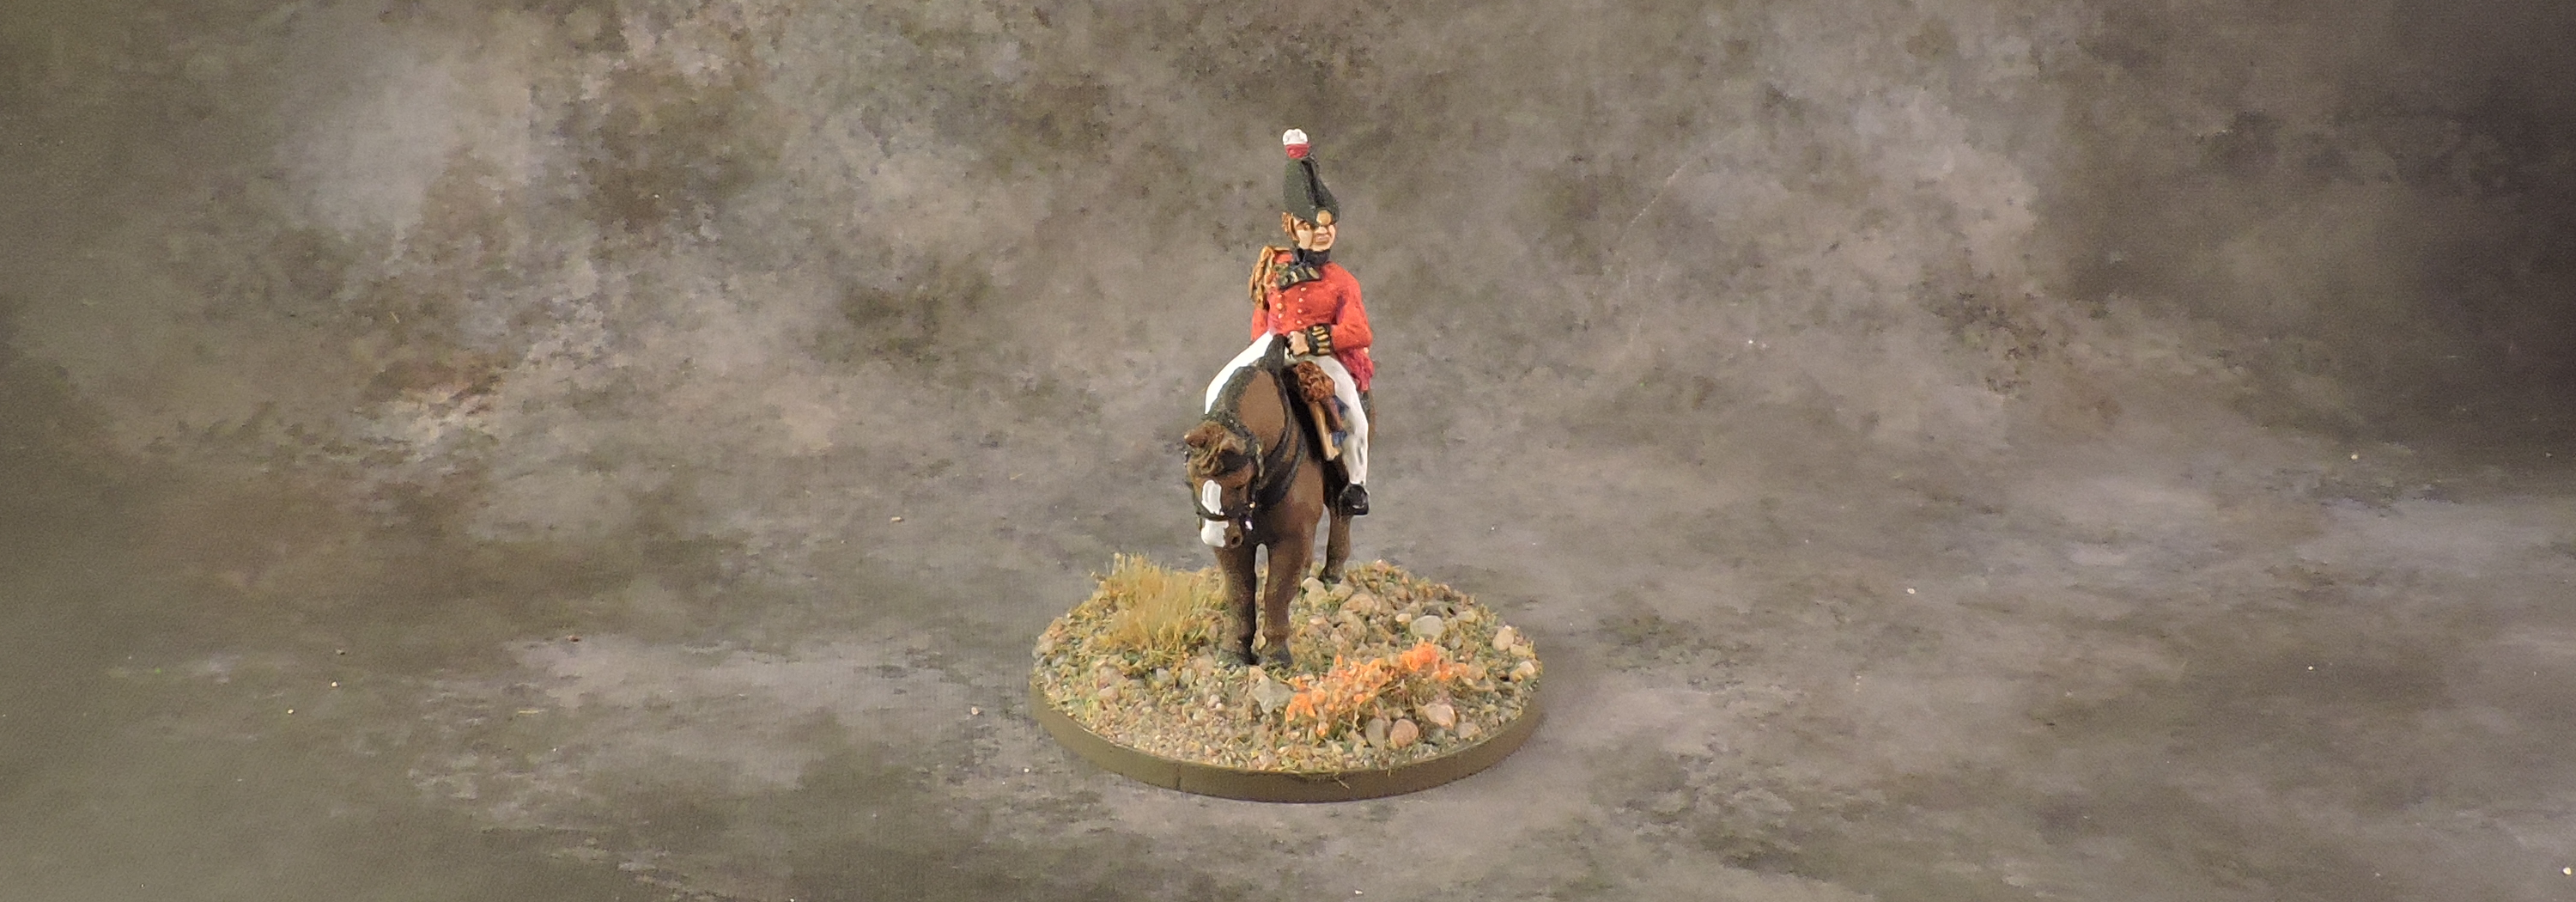
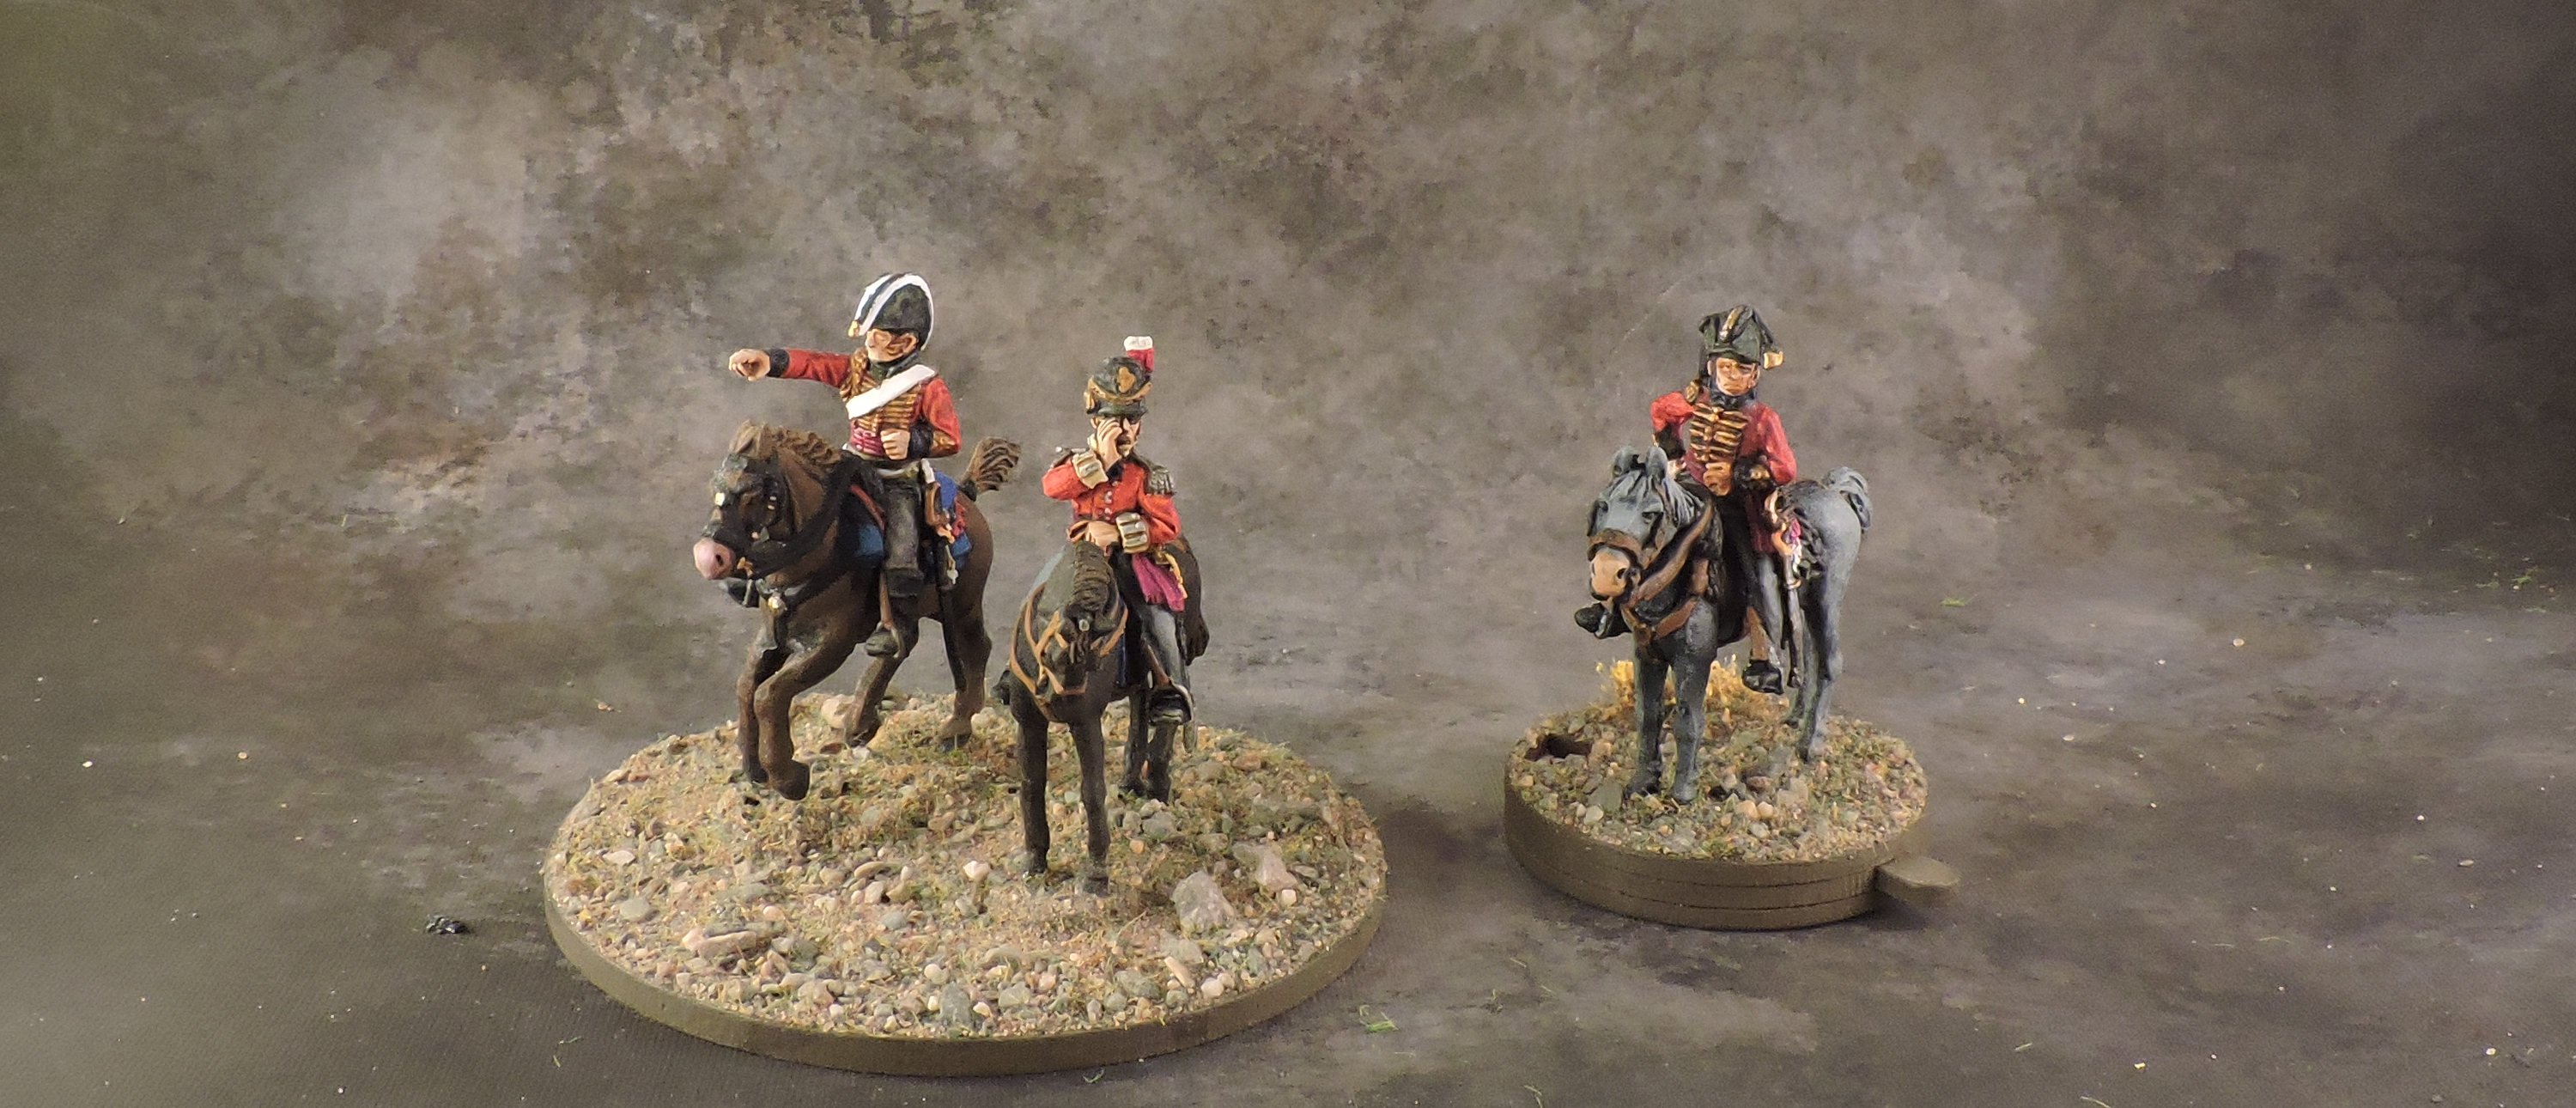
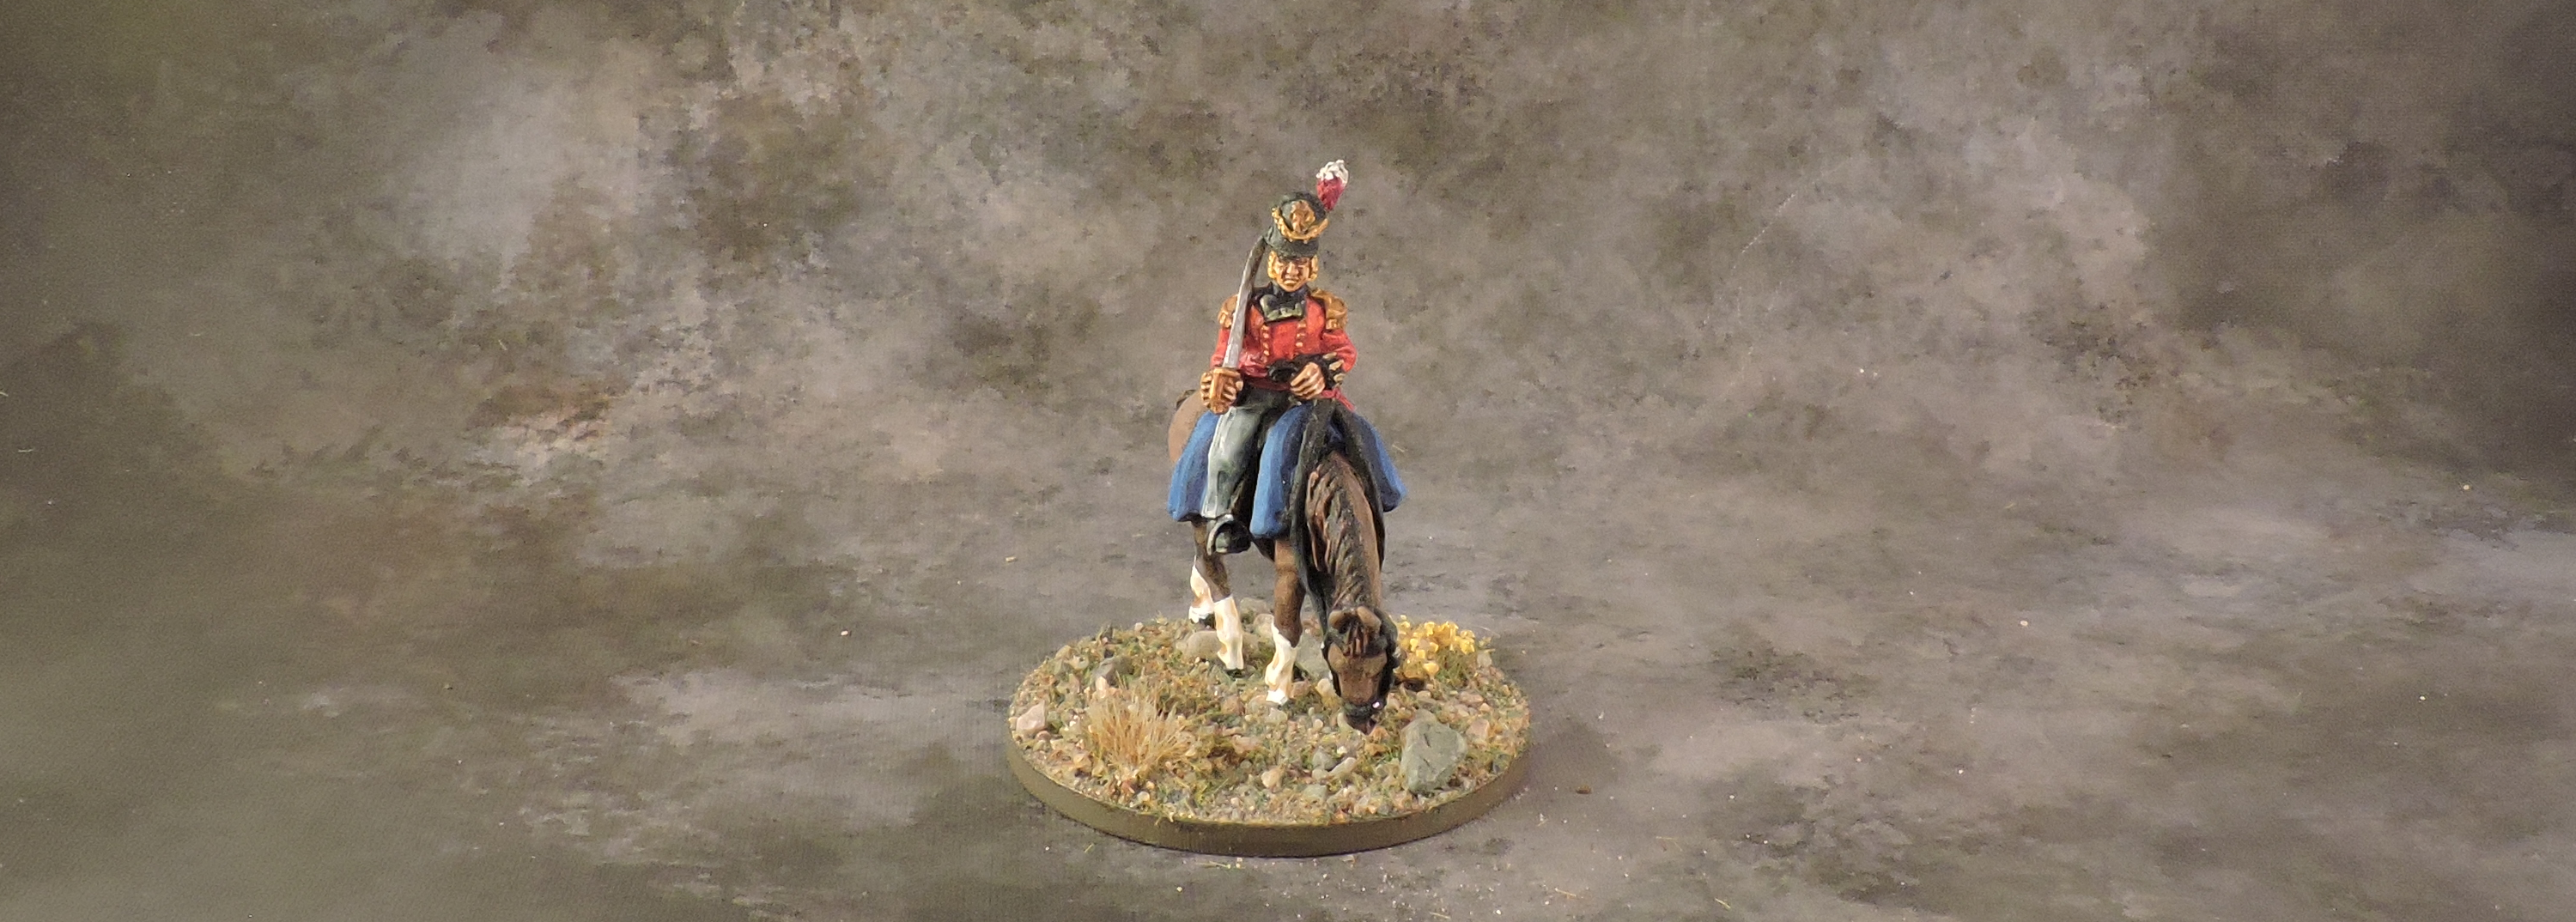
Cavalry
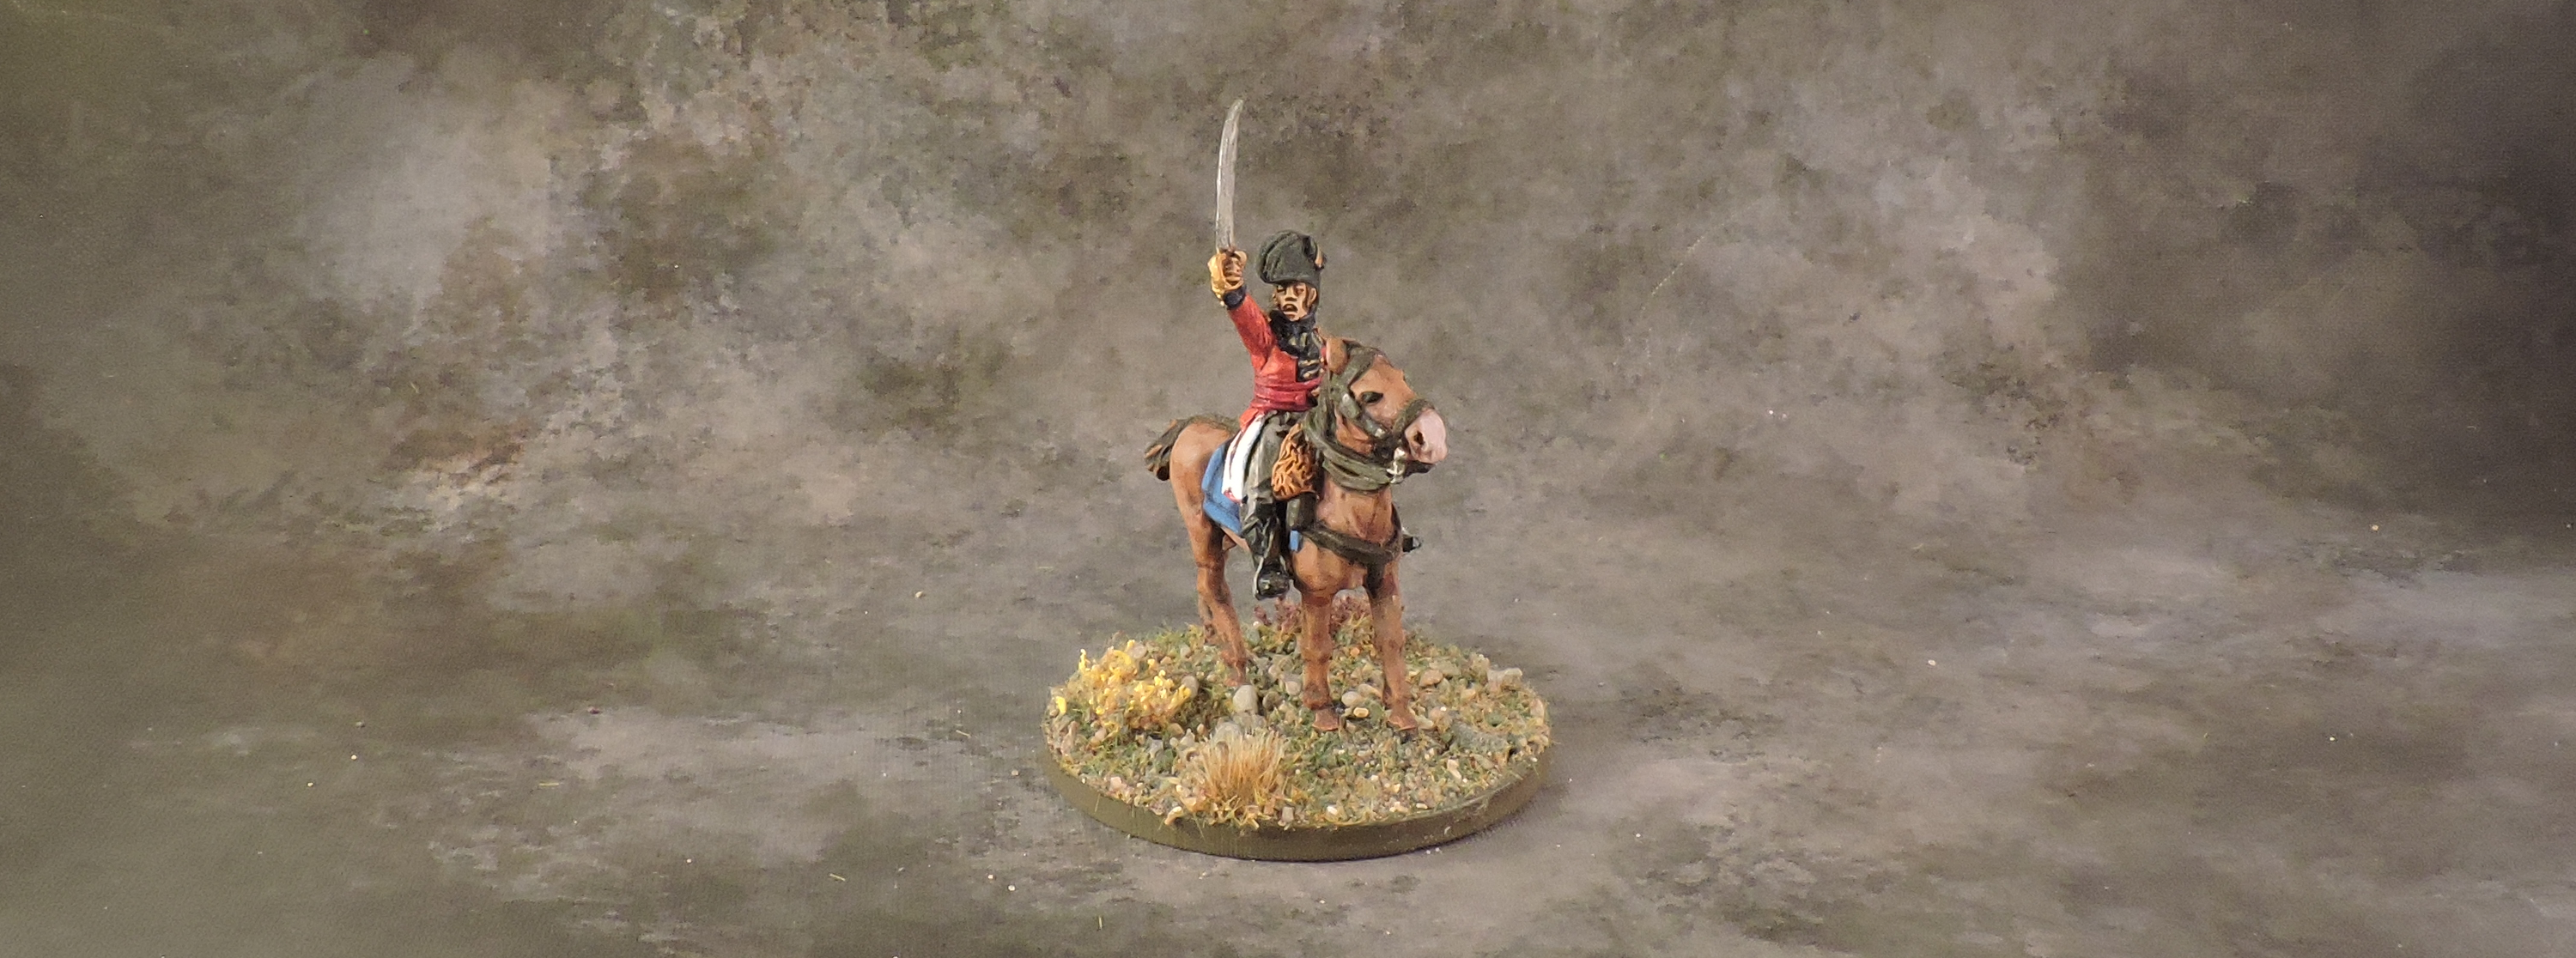
The allied cavalry was grouped under the command of Sir Henry Paget, 2nd Earl of Uxbridge and effectively functioned as the fourth Corps group of the Allied army. He is supported by the Staff Corp of Cavalry – a combination of military police and orderlies – in their distinct red light dragoon uniforms.

1st “Household” Cavalry Brigade
Leg by Major General Sommerset, the “Household” brigade represents the premier heavy cavalry formations of the allied army. The two Life Guards regiments and Royal Horse Guards were notionally three squadrons each, but likely amalgamated on the battlefield given their small size (about 250 soldiers in each regiment only). Similarly, the 1st Guard Dragoons fielded notionally 4 squadrons but with a smaller headcount than even the smallest three squadron light cavalry regiment. Most of the figures are Warlord Games plastics with some Perry metals for variety. The new Victrix spastics were only announced after I had bought all everything from Warlord already, so I switched over and used the surplus Warlord figure to fill up the regiments to notional size.


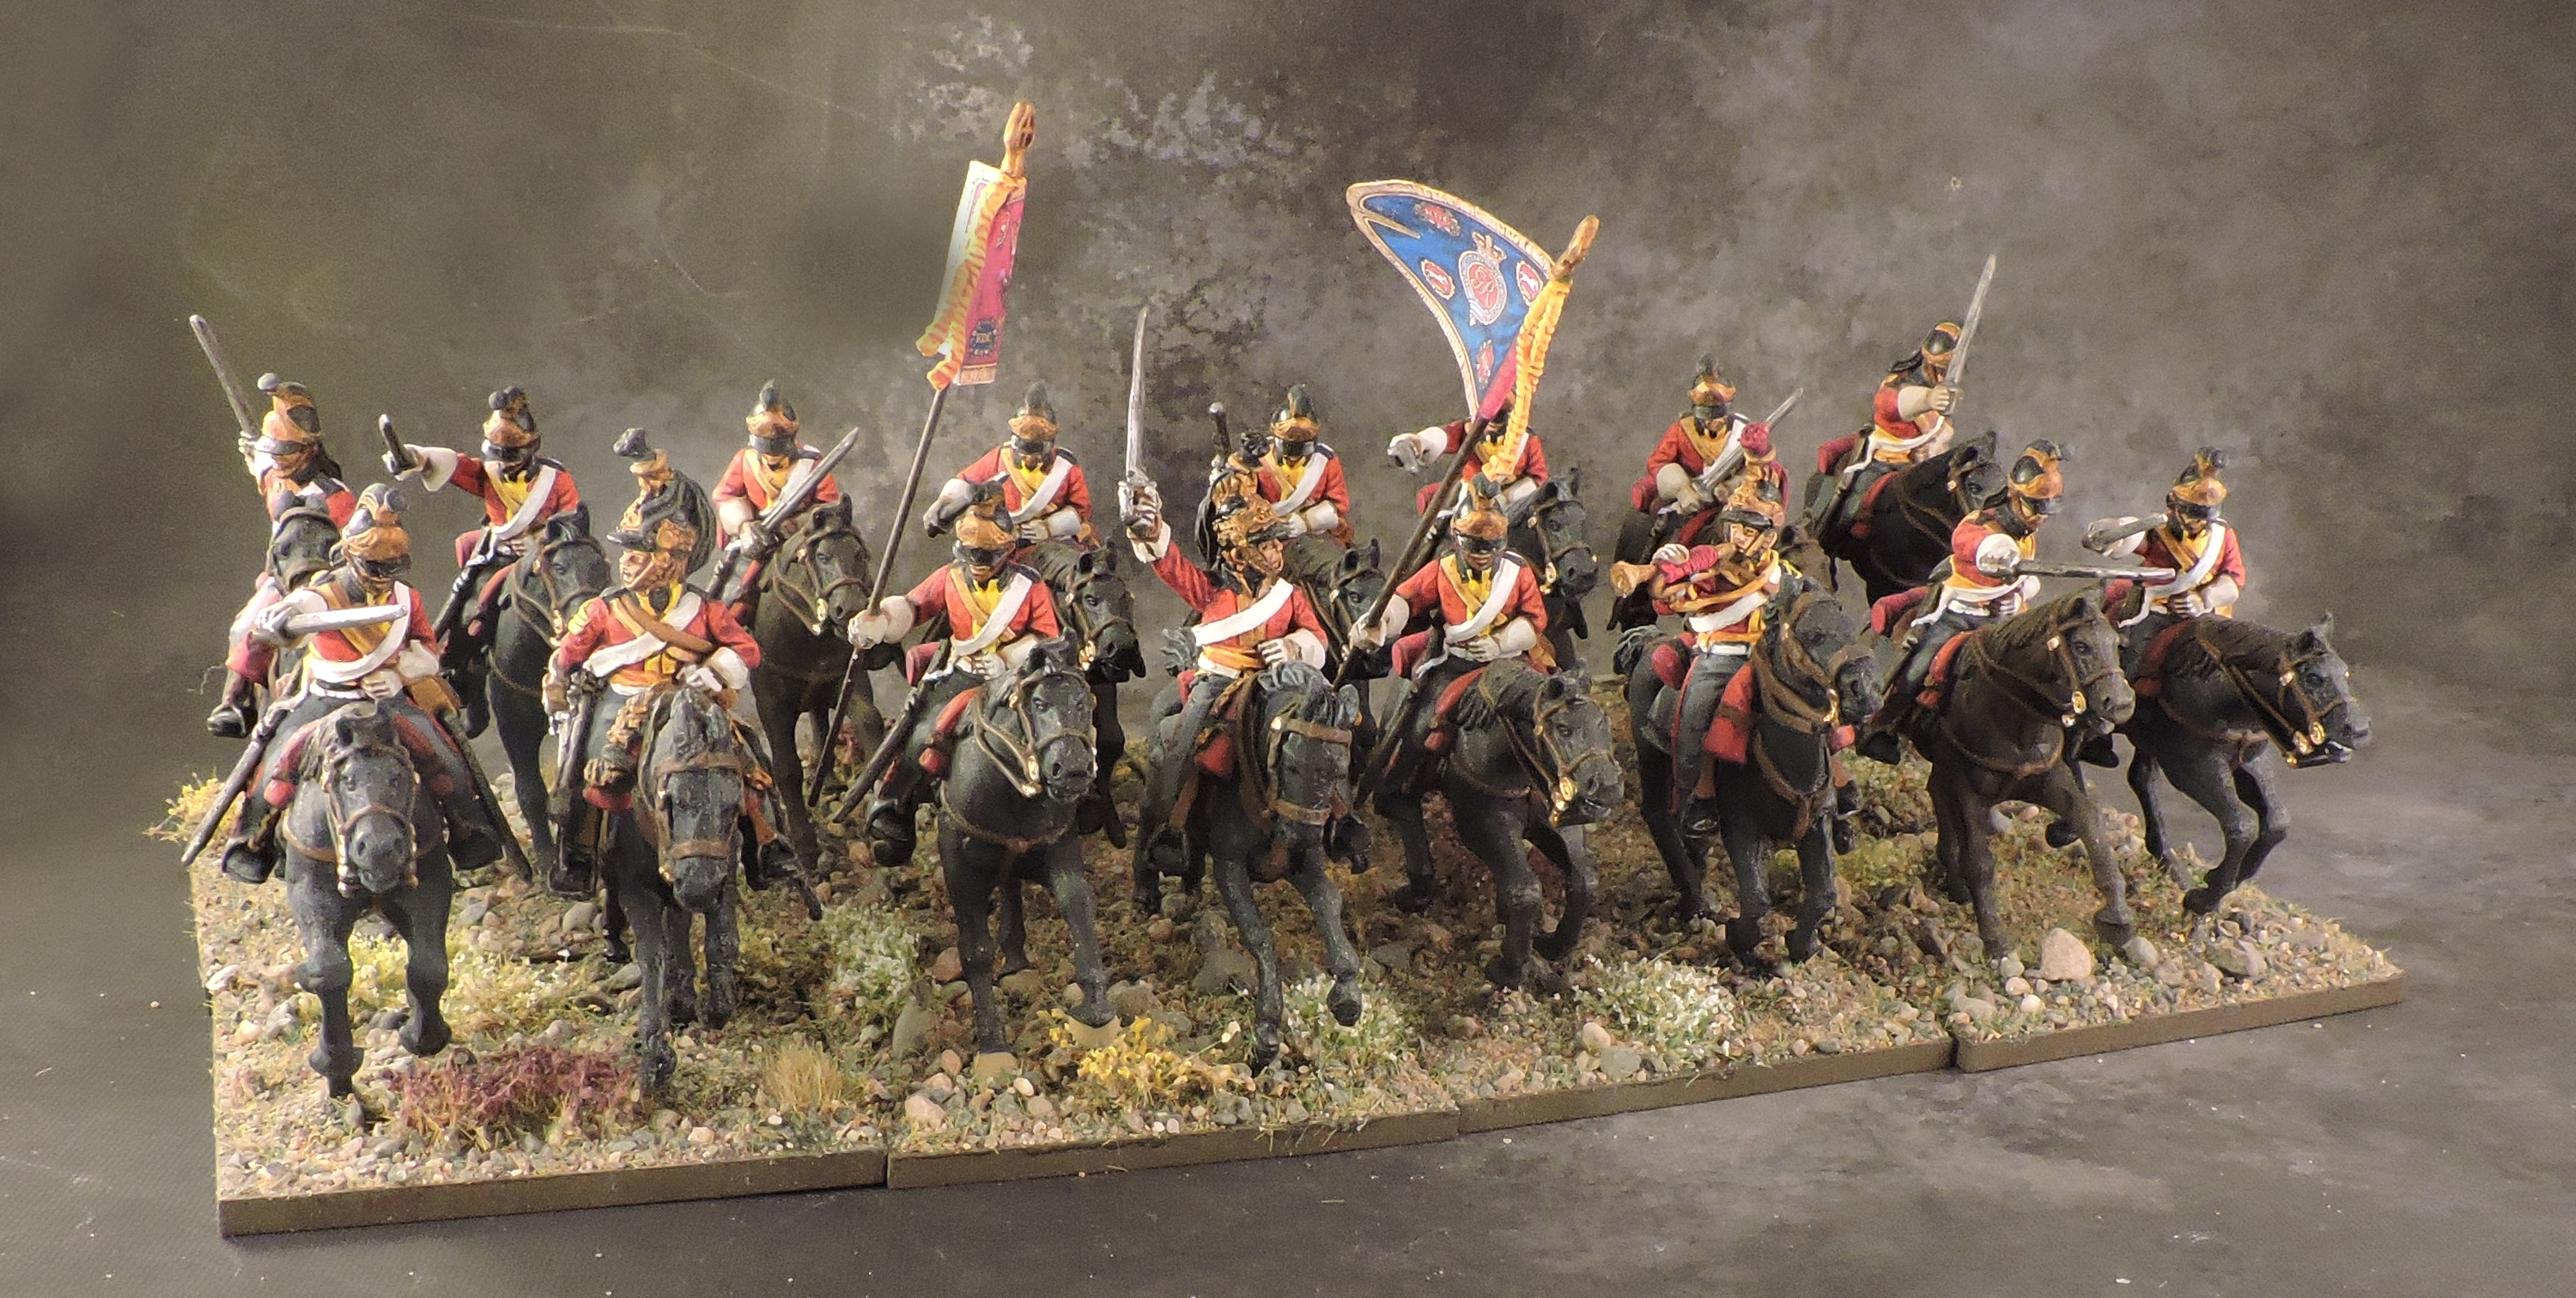
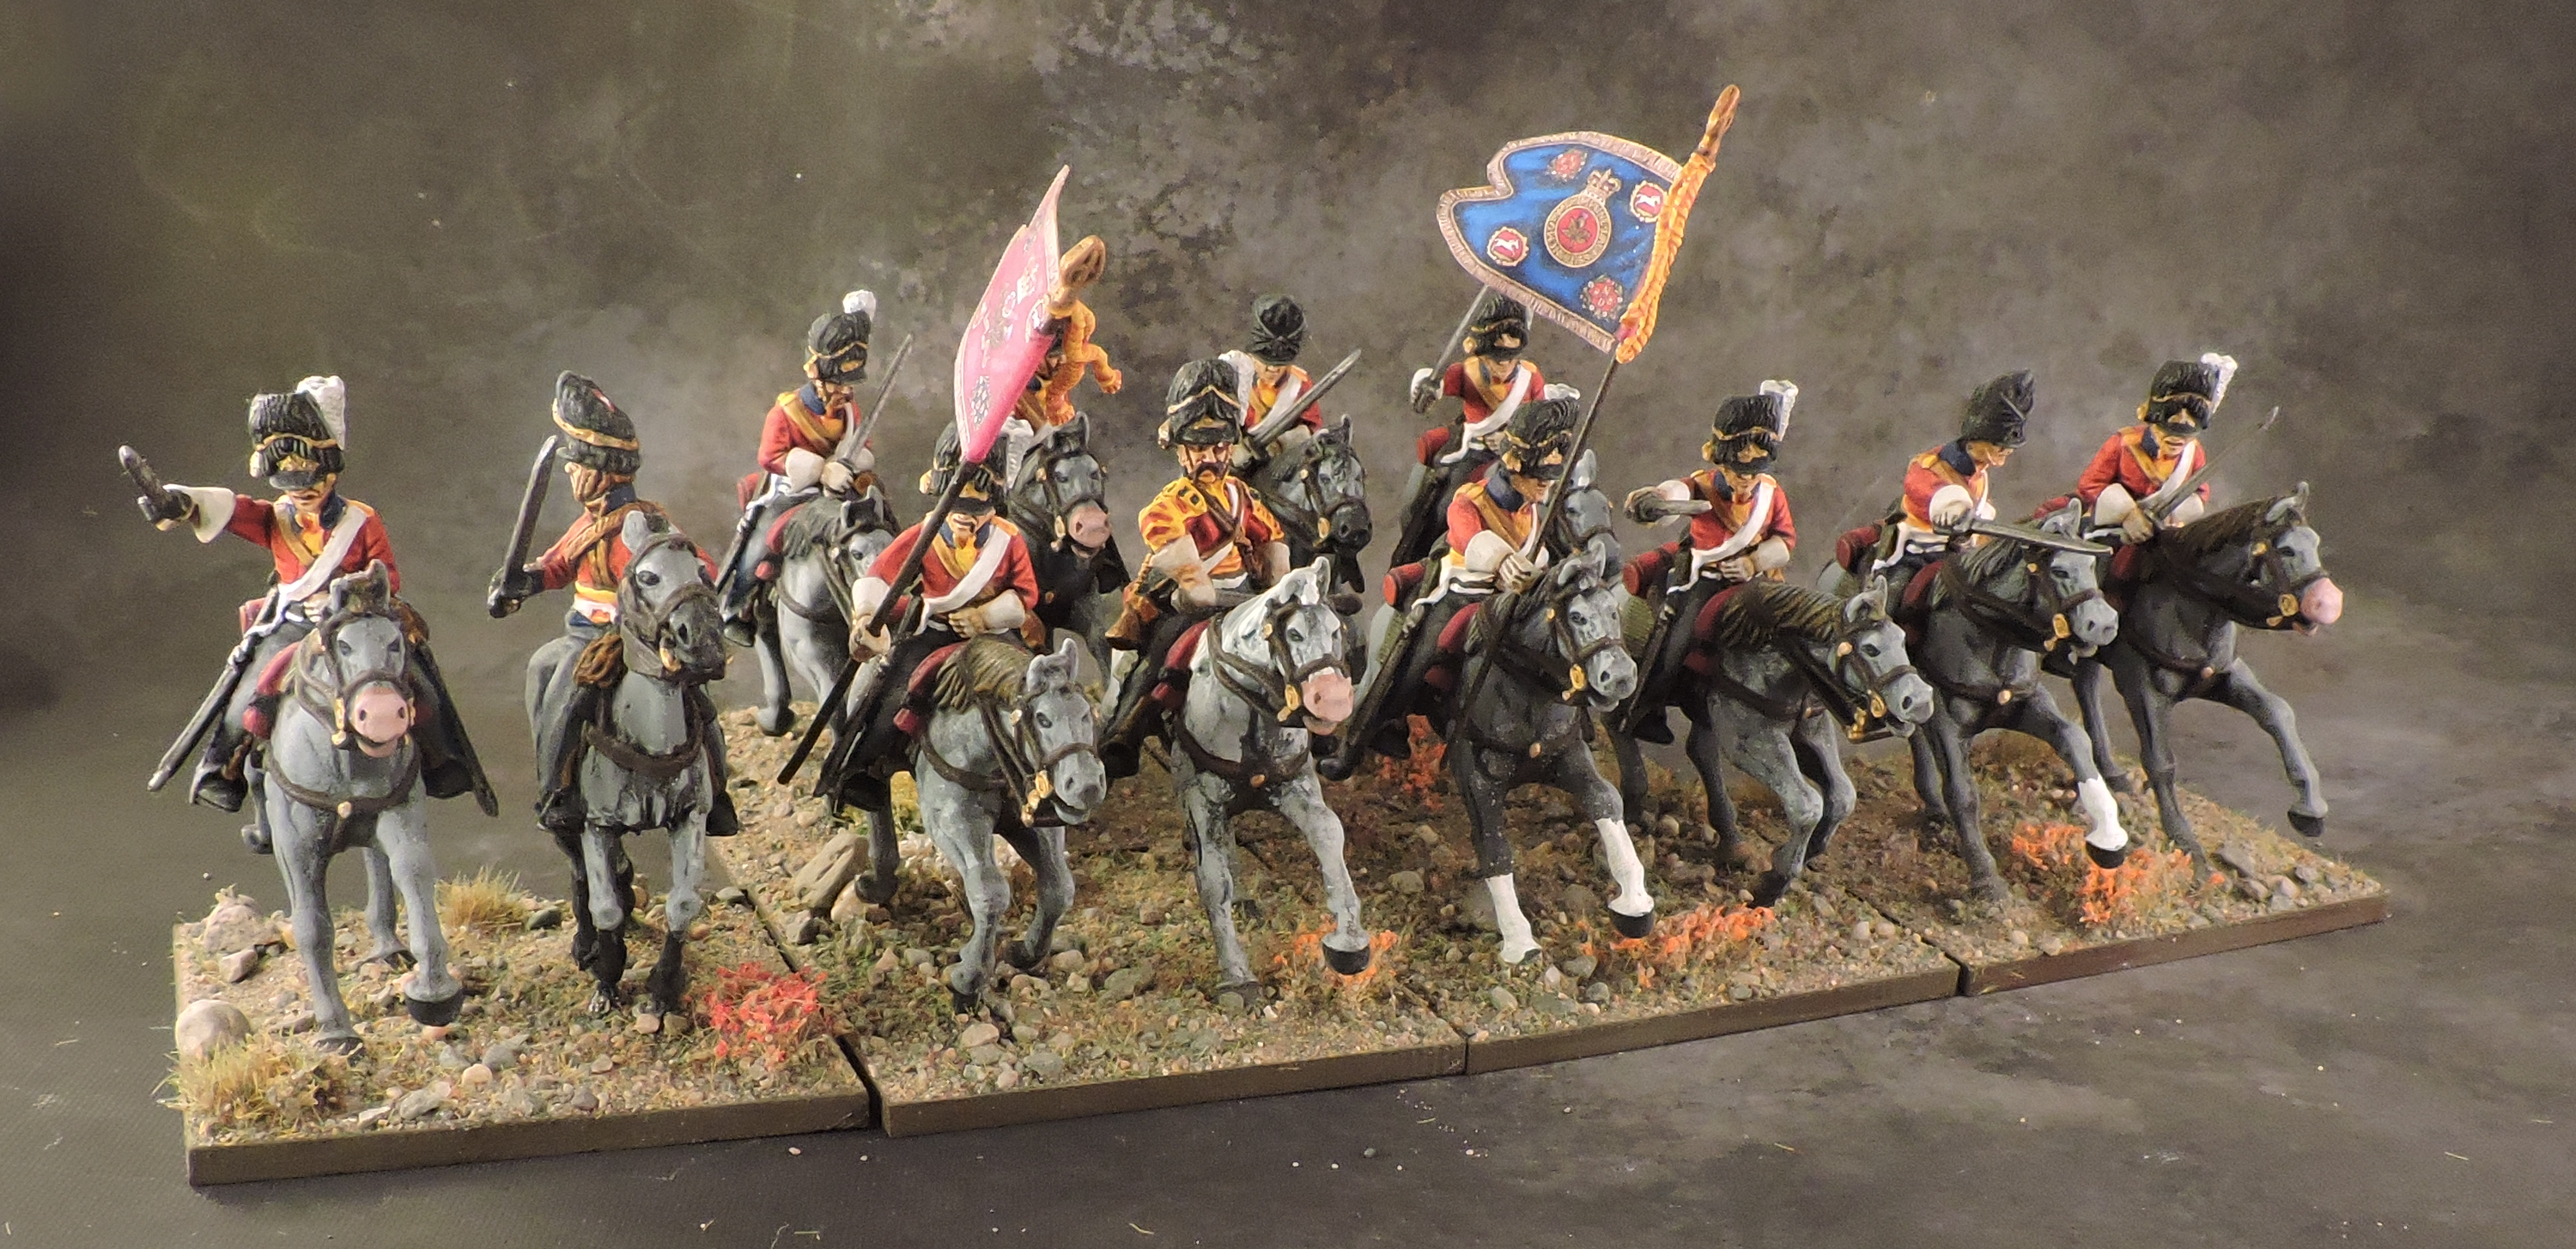
2nd “Union” Cavalry Brigade
Major General Sir Ponsonby commands the “Union” brigade, so-called due to the mix of English, Scottish and Irish troops. The 1st Dragoons are Victrix figures while the others are Warlord with a few Perry metal command figures for variety.


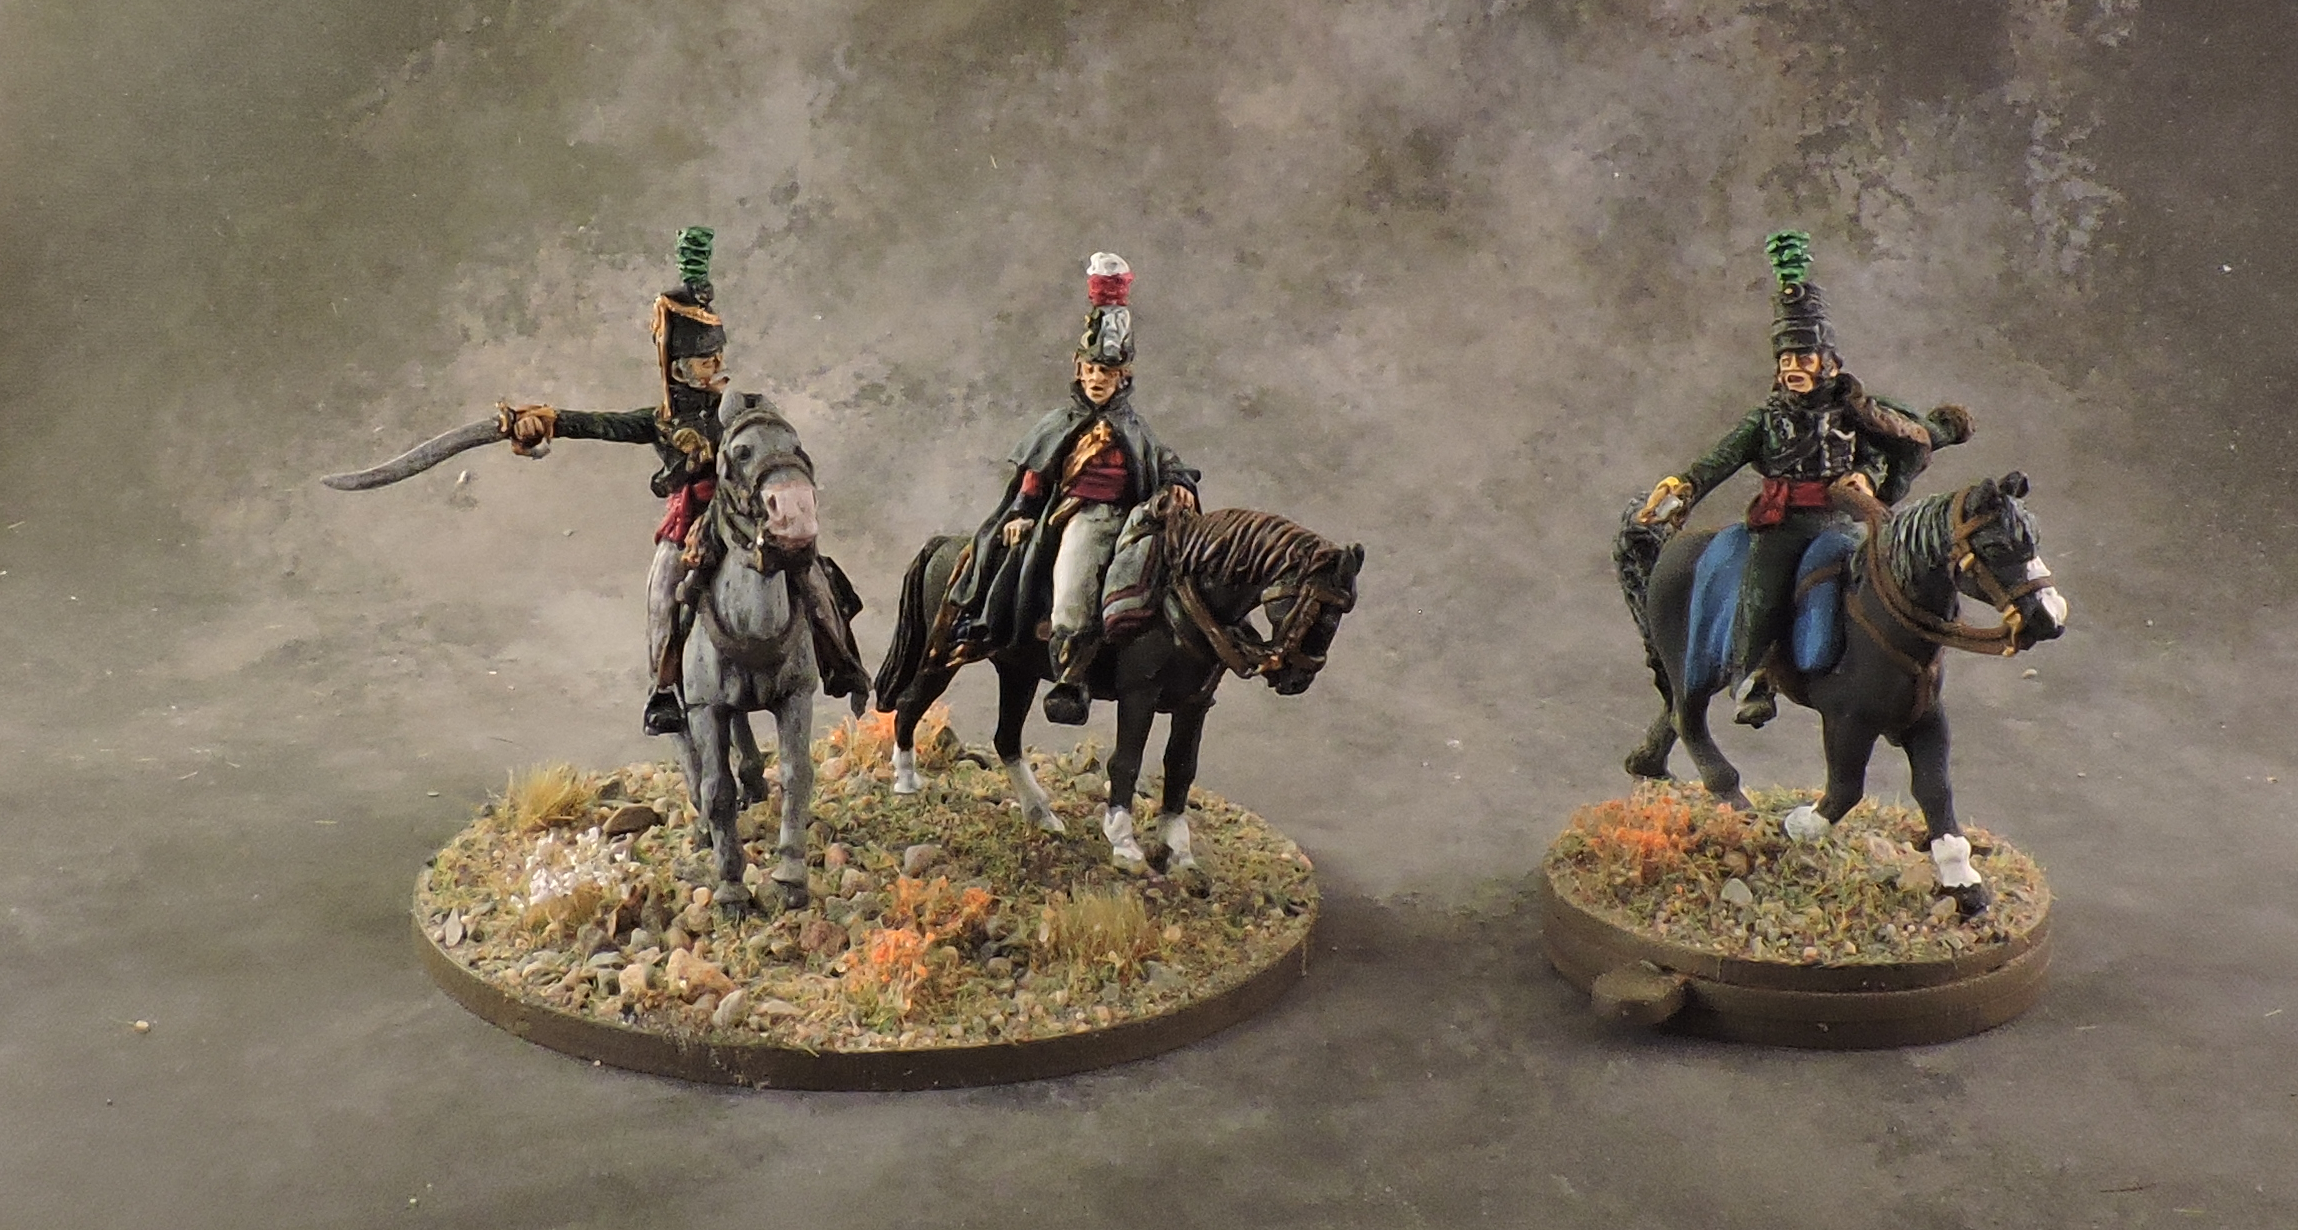
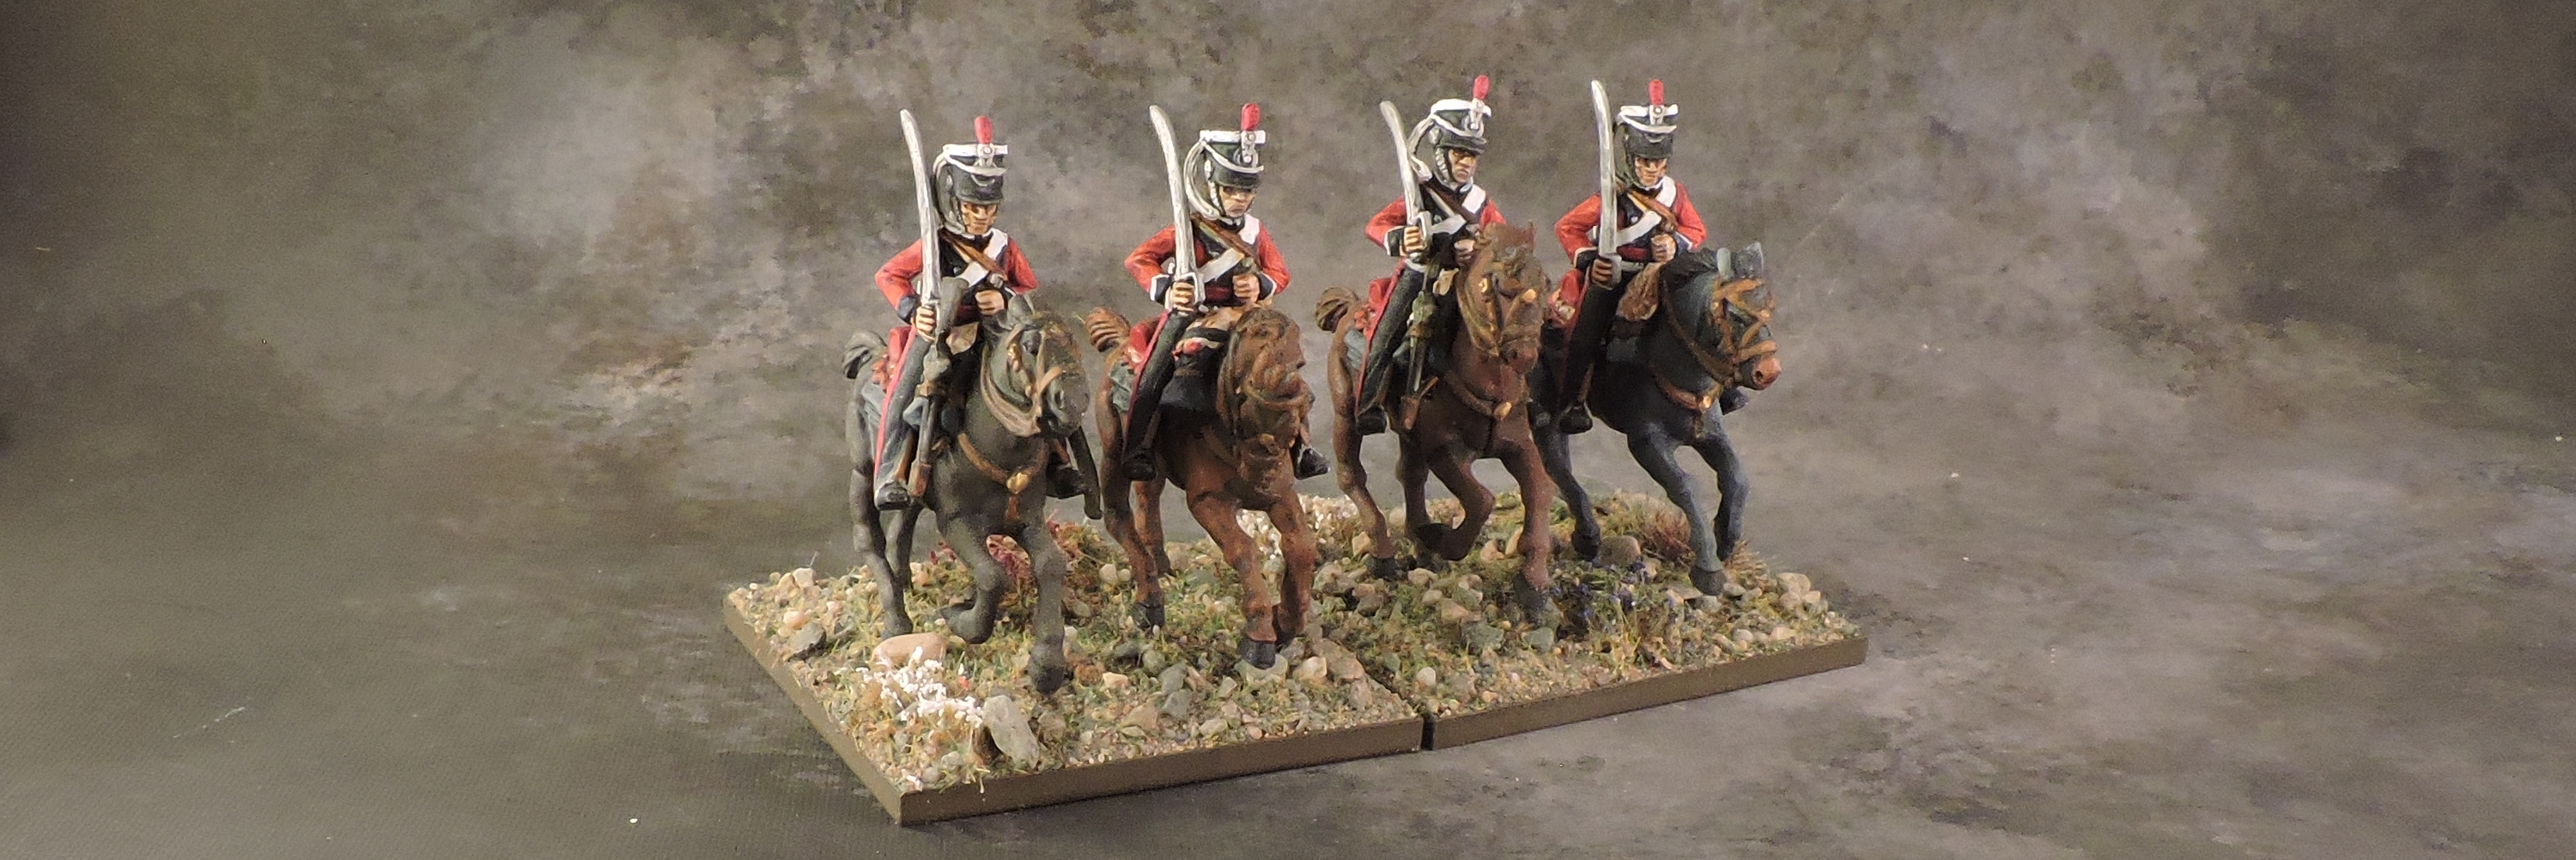
3rd Cavalry Brigade
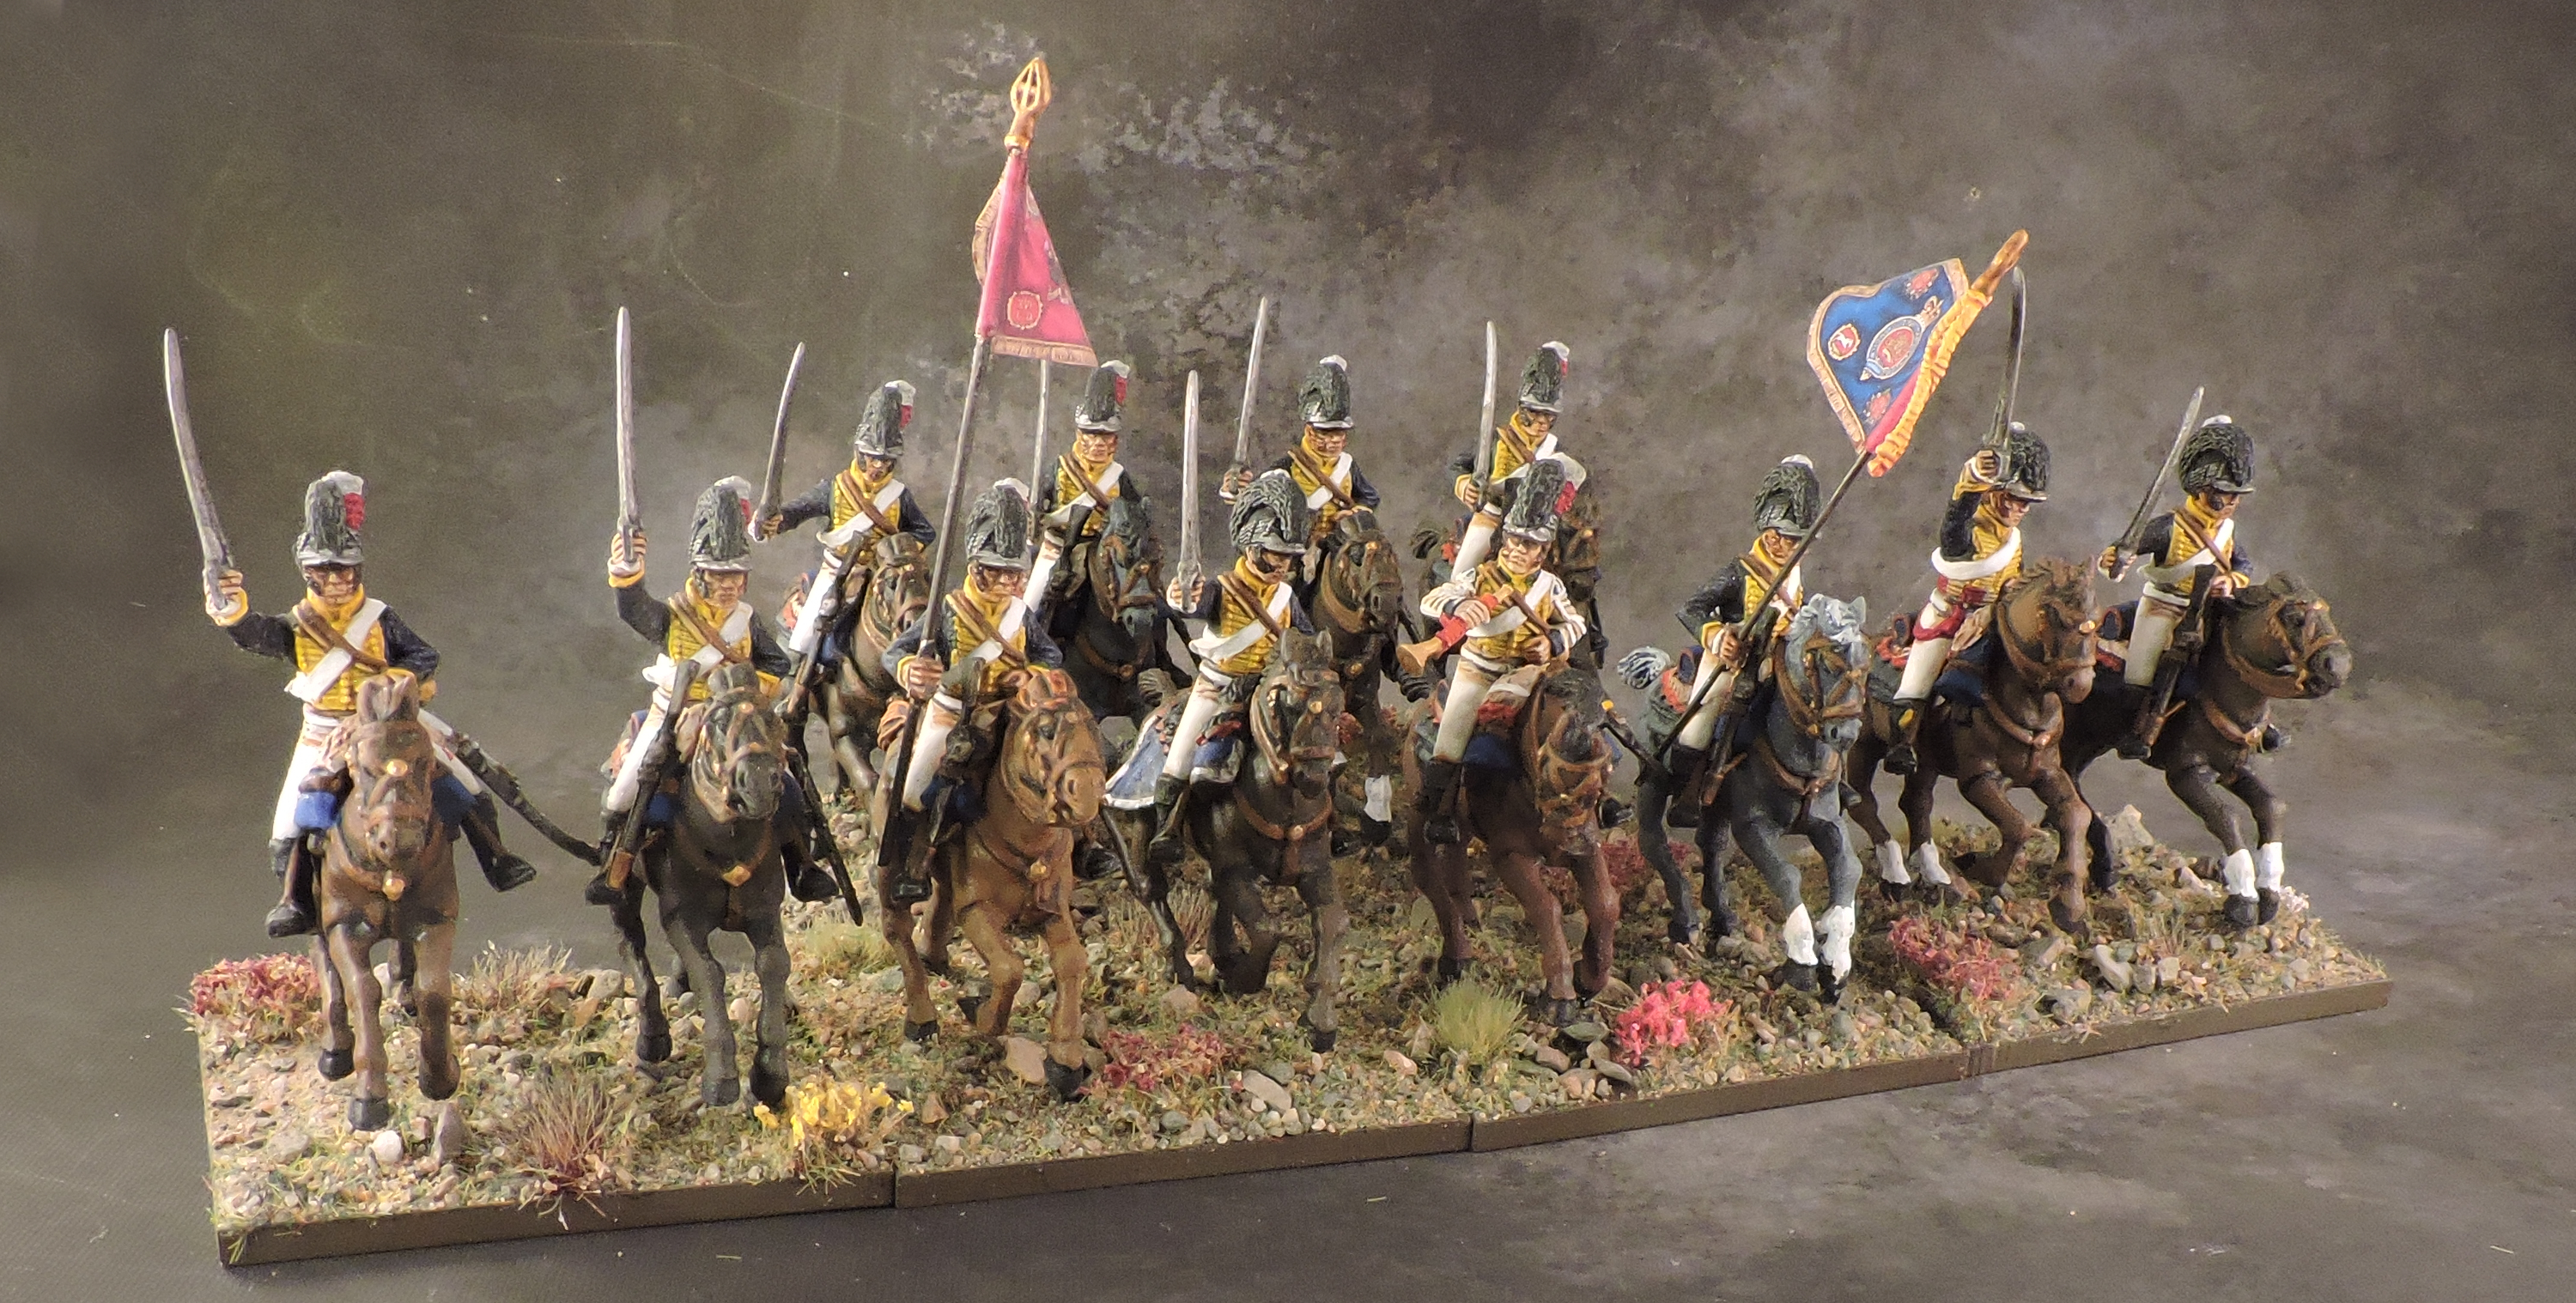
The British fielded 7 Light Dragoon Regiments split between the 3rd, 4th and 7th Cavalry Brigades. Major General Sir Dörnberg commands the 3rd Cavalry Brigade with the two large elite KGL Light Dragoon regiments.


4th Cavalry Brigade
Major General Sir Vandeleur leads the 4th Cavalry Brigade composed of three light dragoon regiments. The figure is a special variant from Perry as part of a bundle of purchasing 3+ plastic boxes.


5th Cavalry Brigade
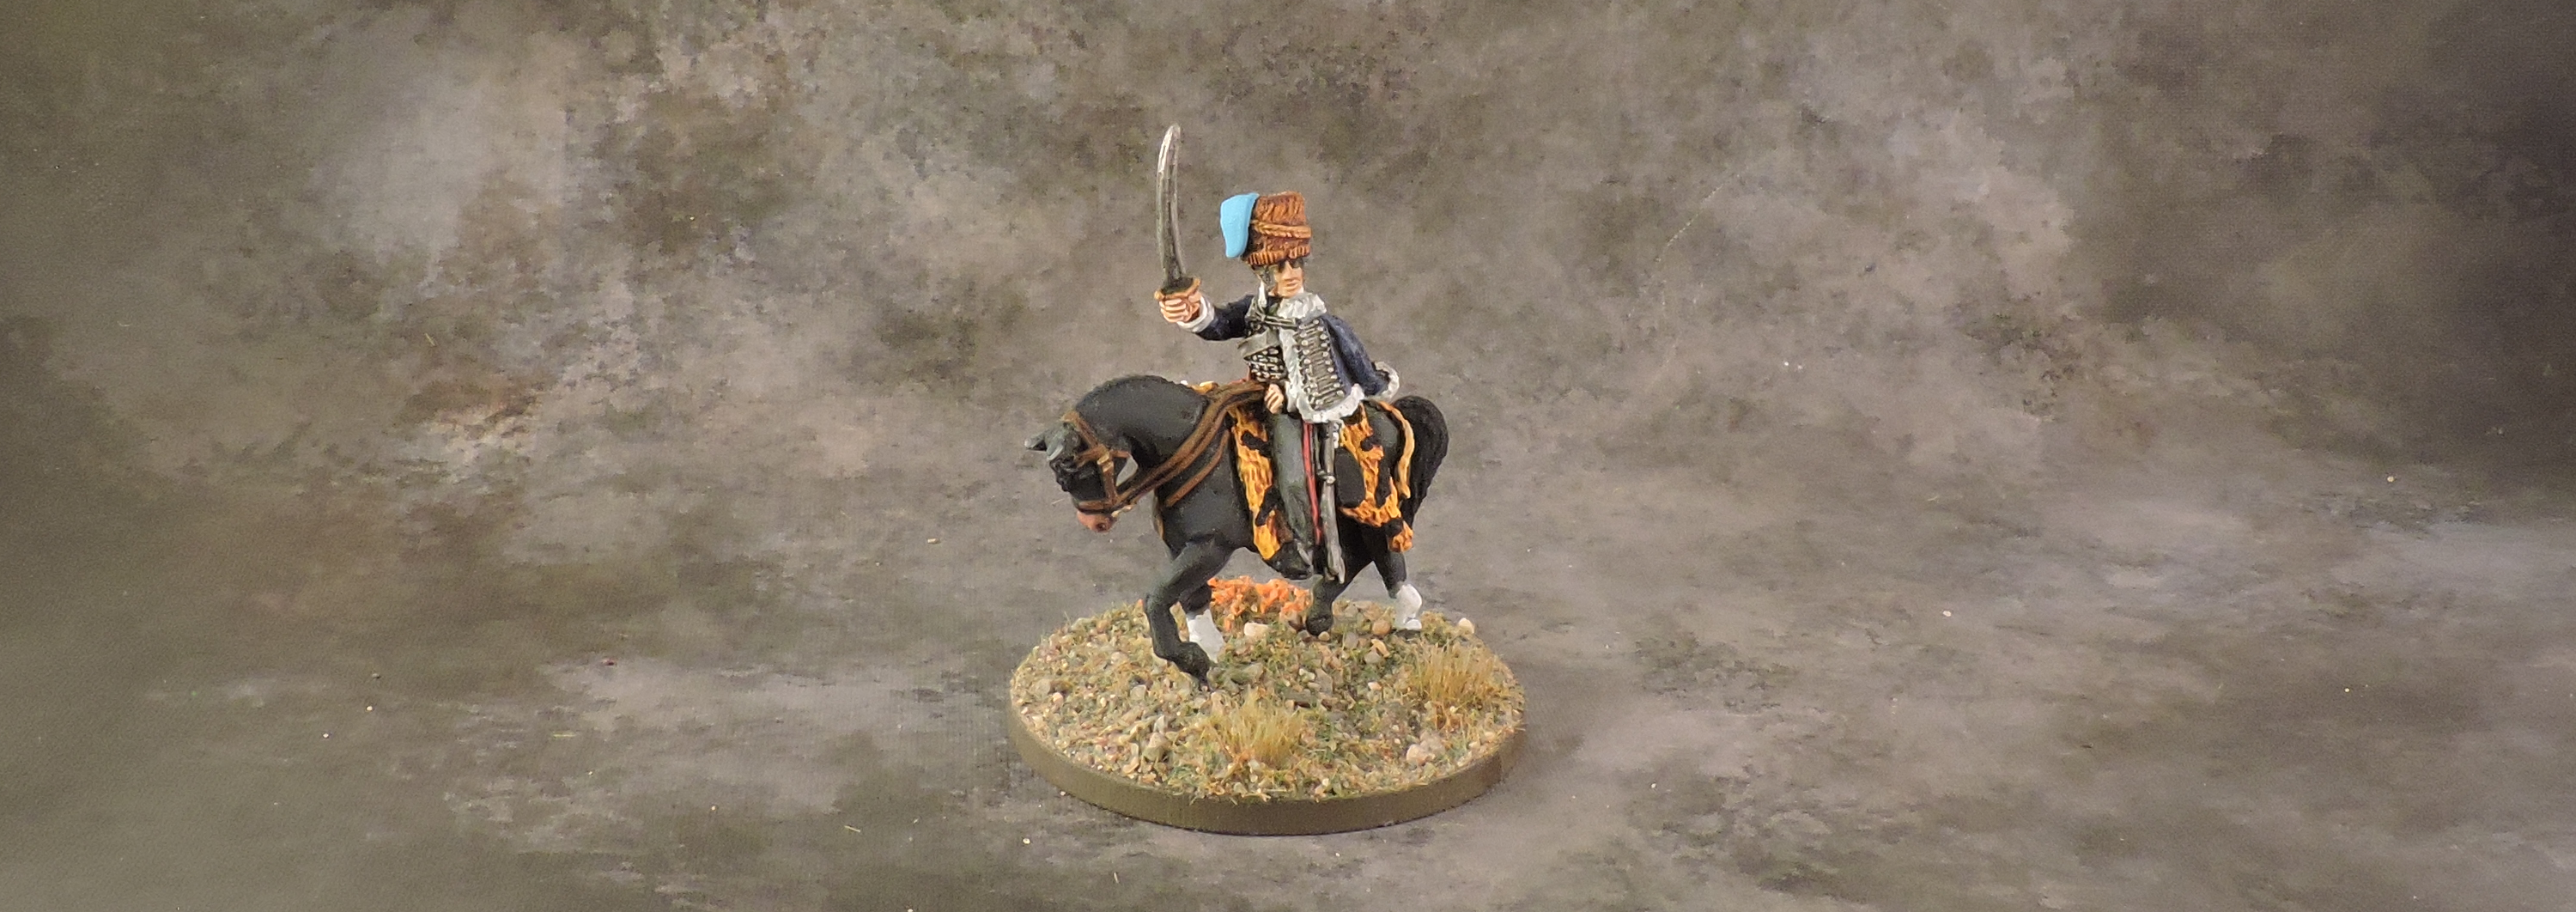
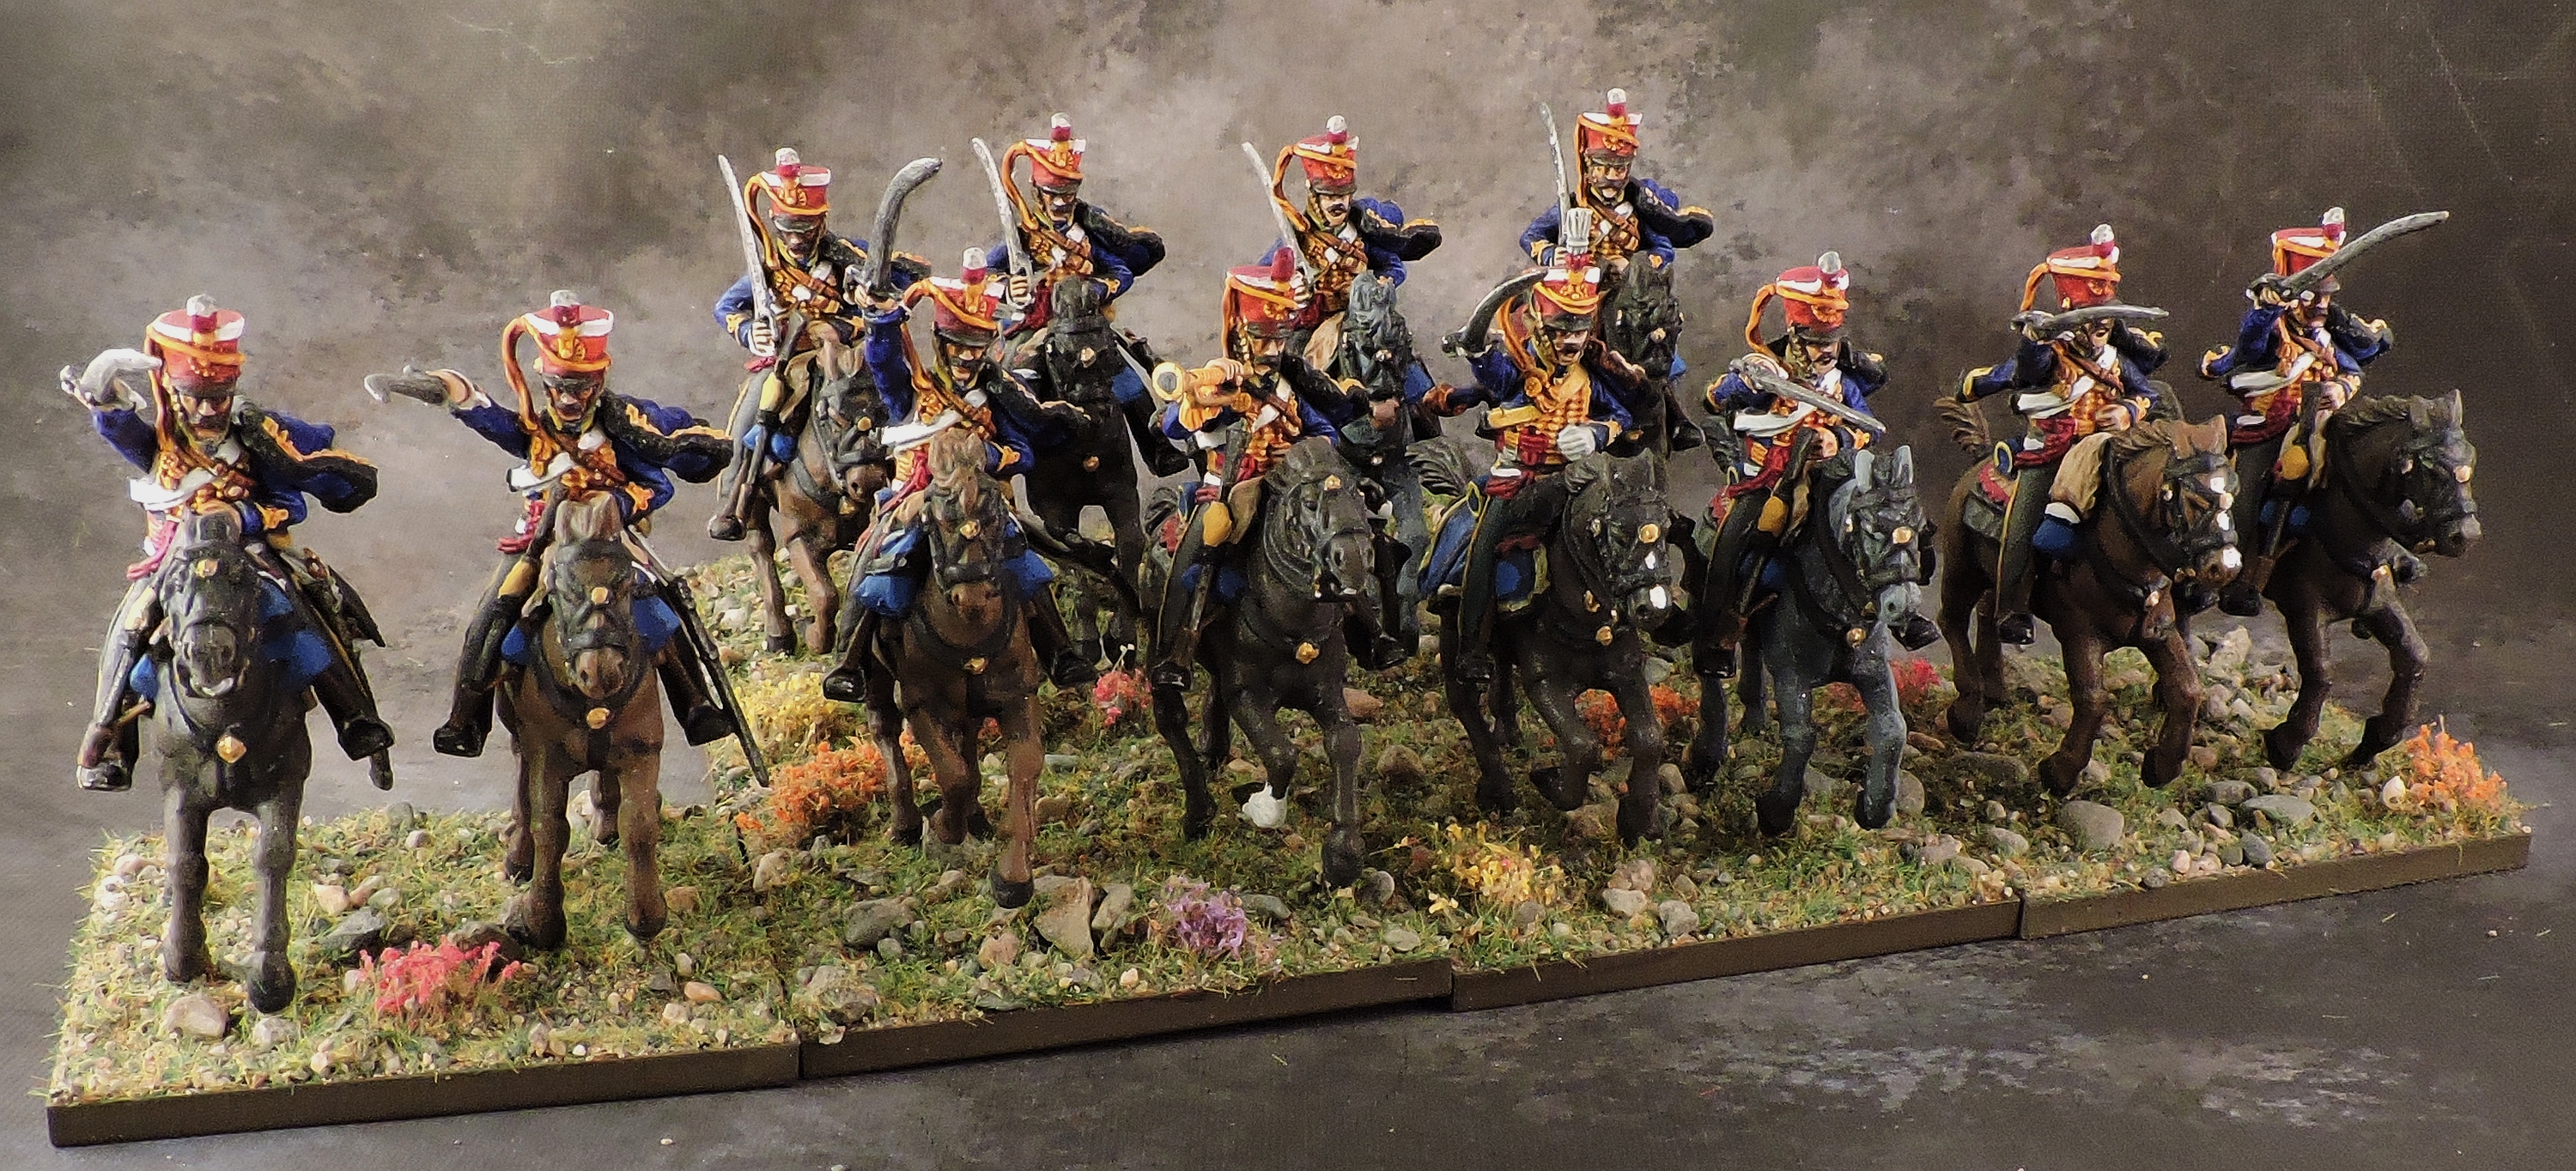
Major General Sir Grant commands the 5th Cavalry Brigade with its two Hussar regiments. The third regiment of the brigade, the 2nd KGL Hussars, were not present at Waterloo. Instead, the 13th Light Dragoons of 7th Cavalry Brigade were attached. MG Sir Grant achieved rank in the Hussars so he wears the uniform of the 18th Hussars (which were also in the field but in the 6th Brigade).


6th Cavalry Brigade
Another Hussar officer, Major General Sir Vivian leads the 6th Cavalry Brigade, including the large 1st KGL Hussars.


7th Cavalry Brigade
Colonel Sir Arentschildt leads the 3rd KGL Hussars which nominally form the 7th Cavalry Brigade with other units detached.

Hannover Cavalry Brigade
The infamous Duke of Cumberland Hussaren of the Hannover Cavalry Brigade retreated on first sight of the enemy. Still, they offer some variety. The other two regiments of the brigade were detached to Hal. While the Perry Hussar kit offers lots of different headgear, I still had to convert the tuffs on the Hannoverian shakos with a bit of Green Stuff.

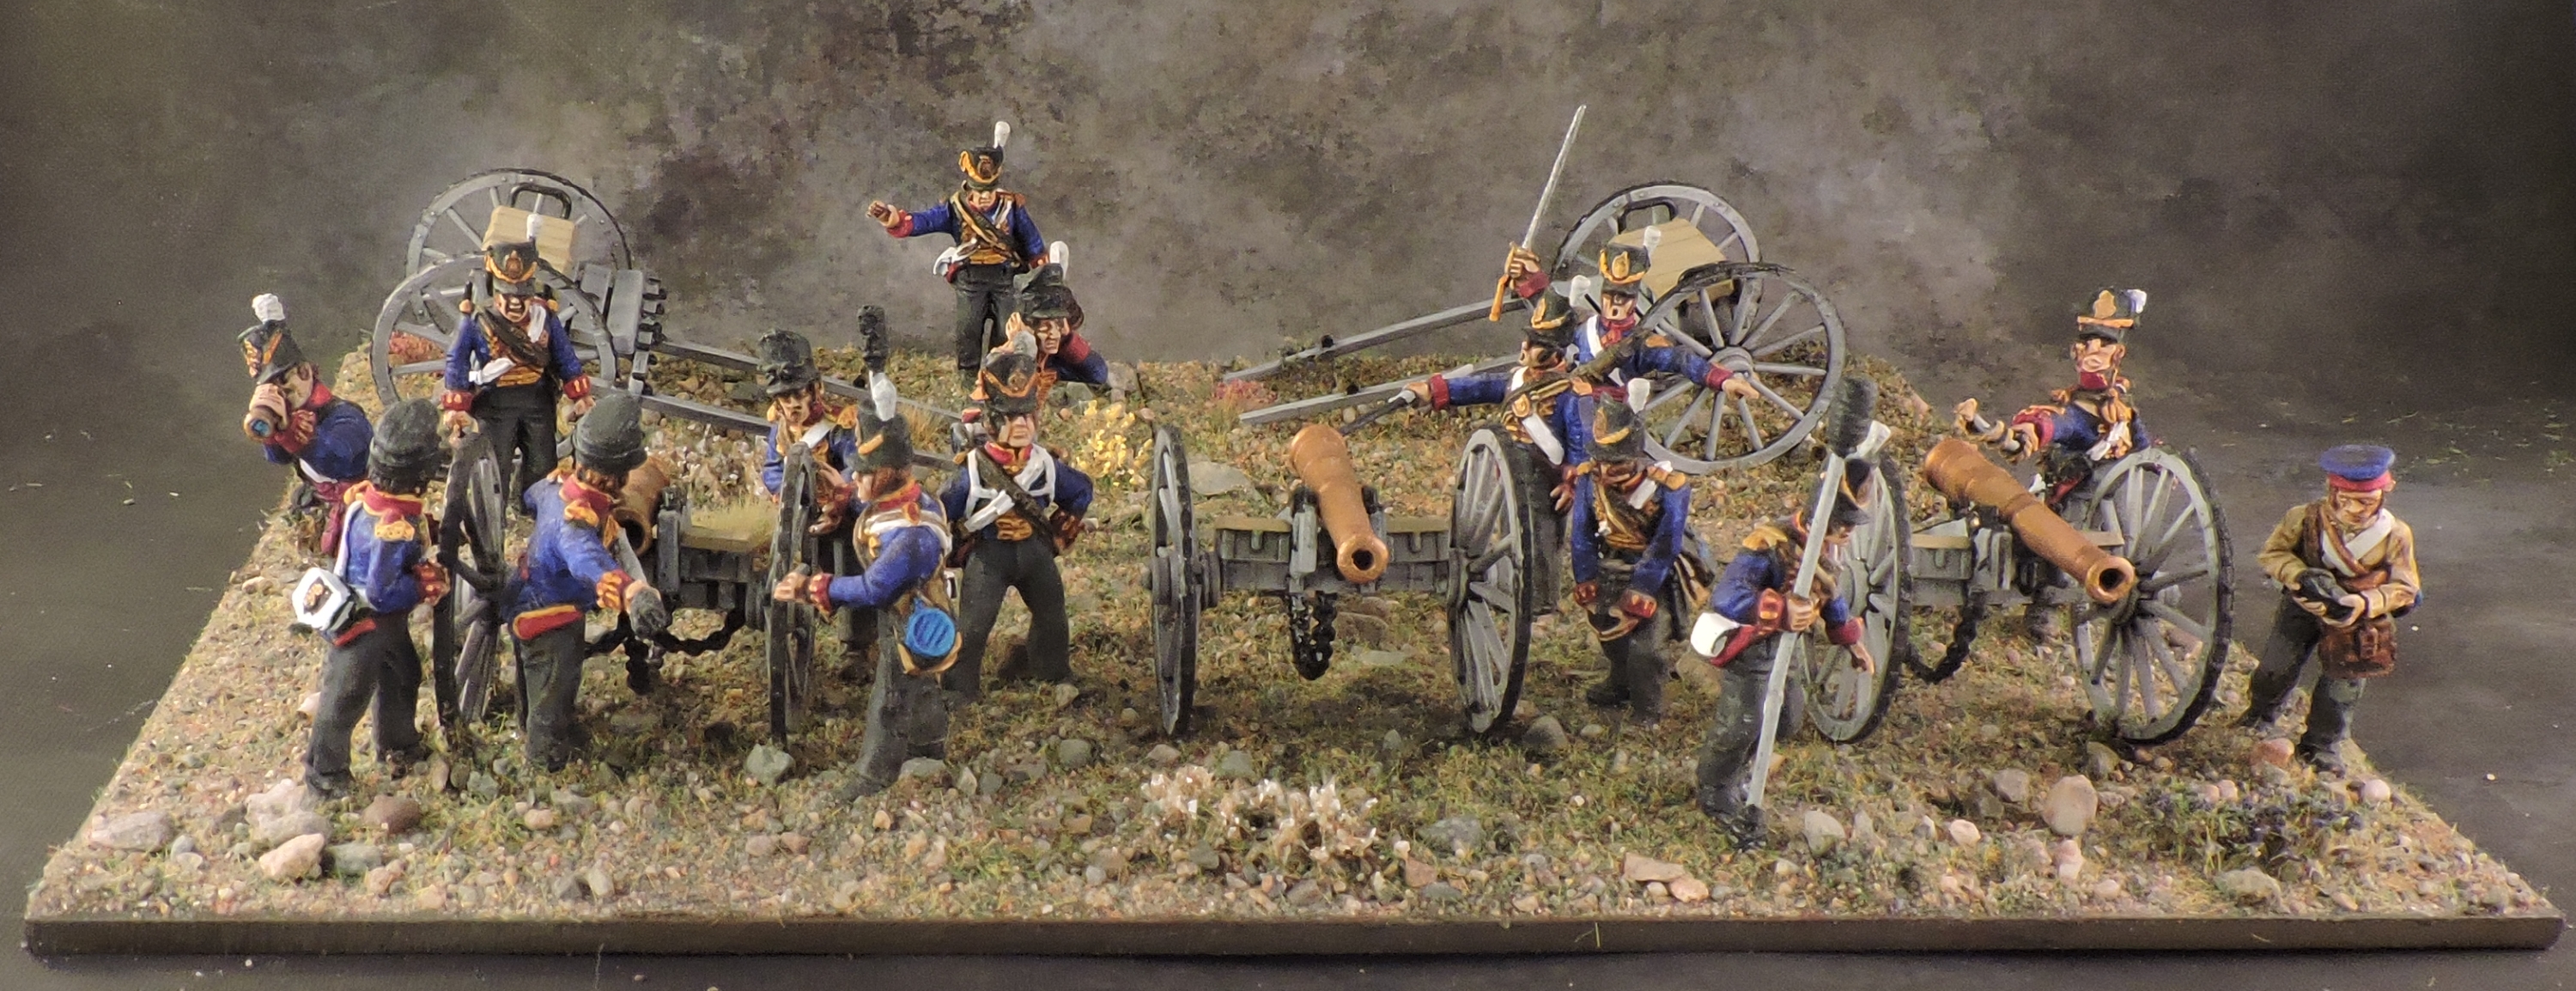
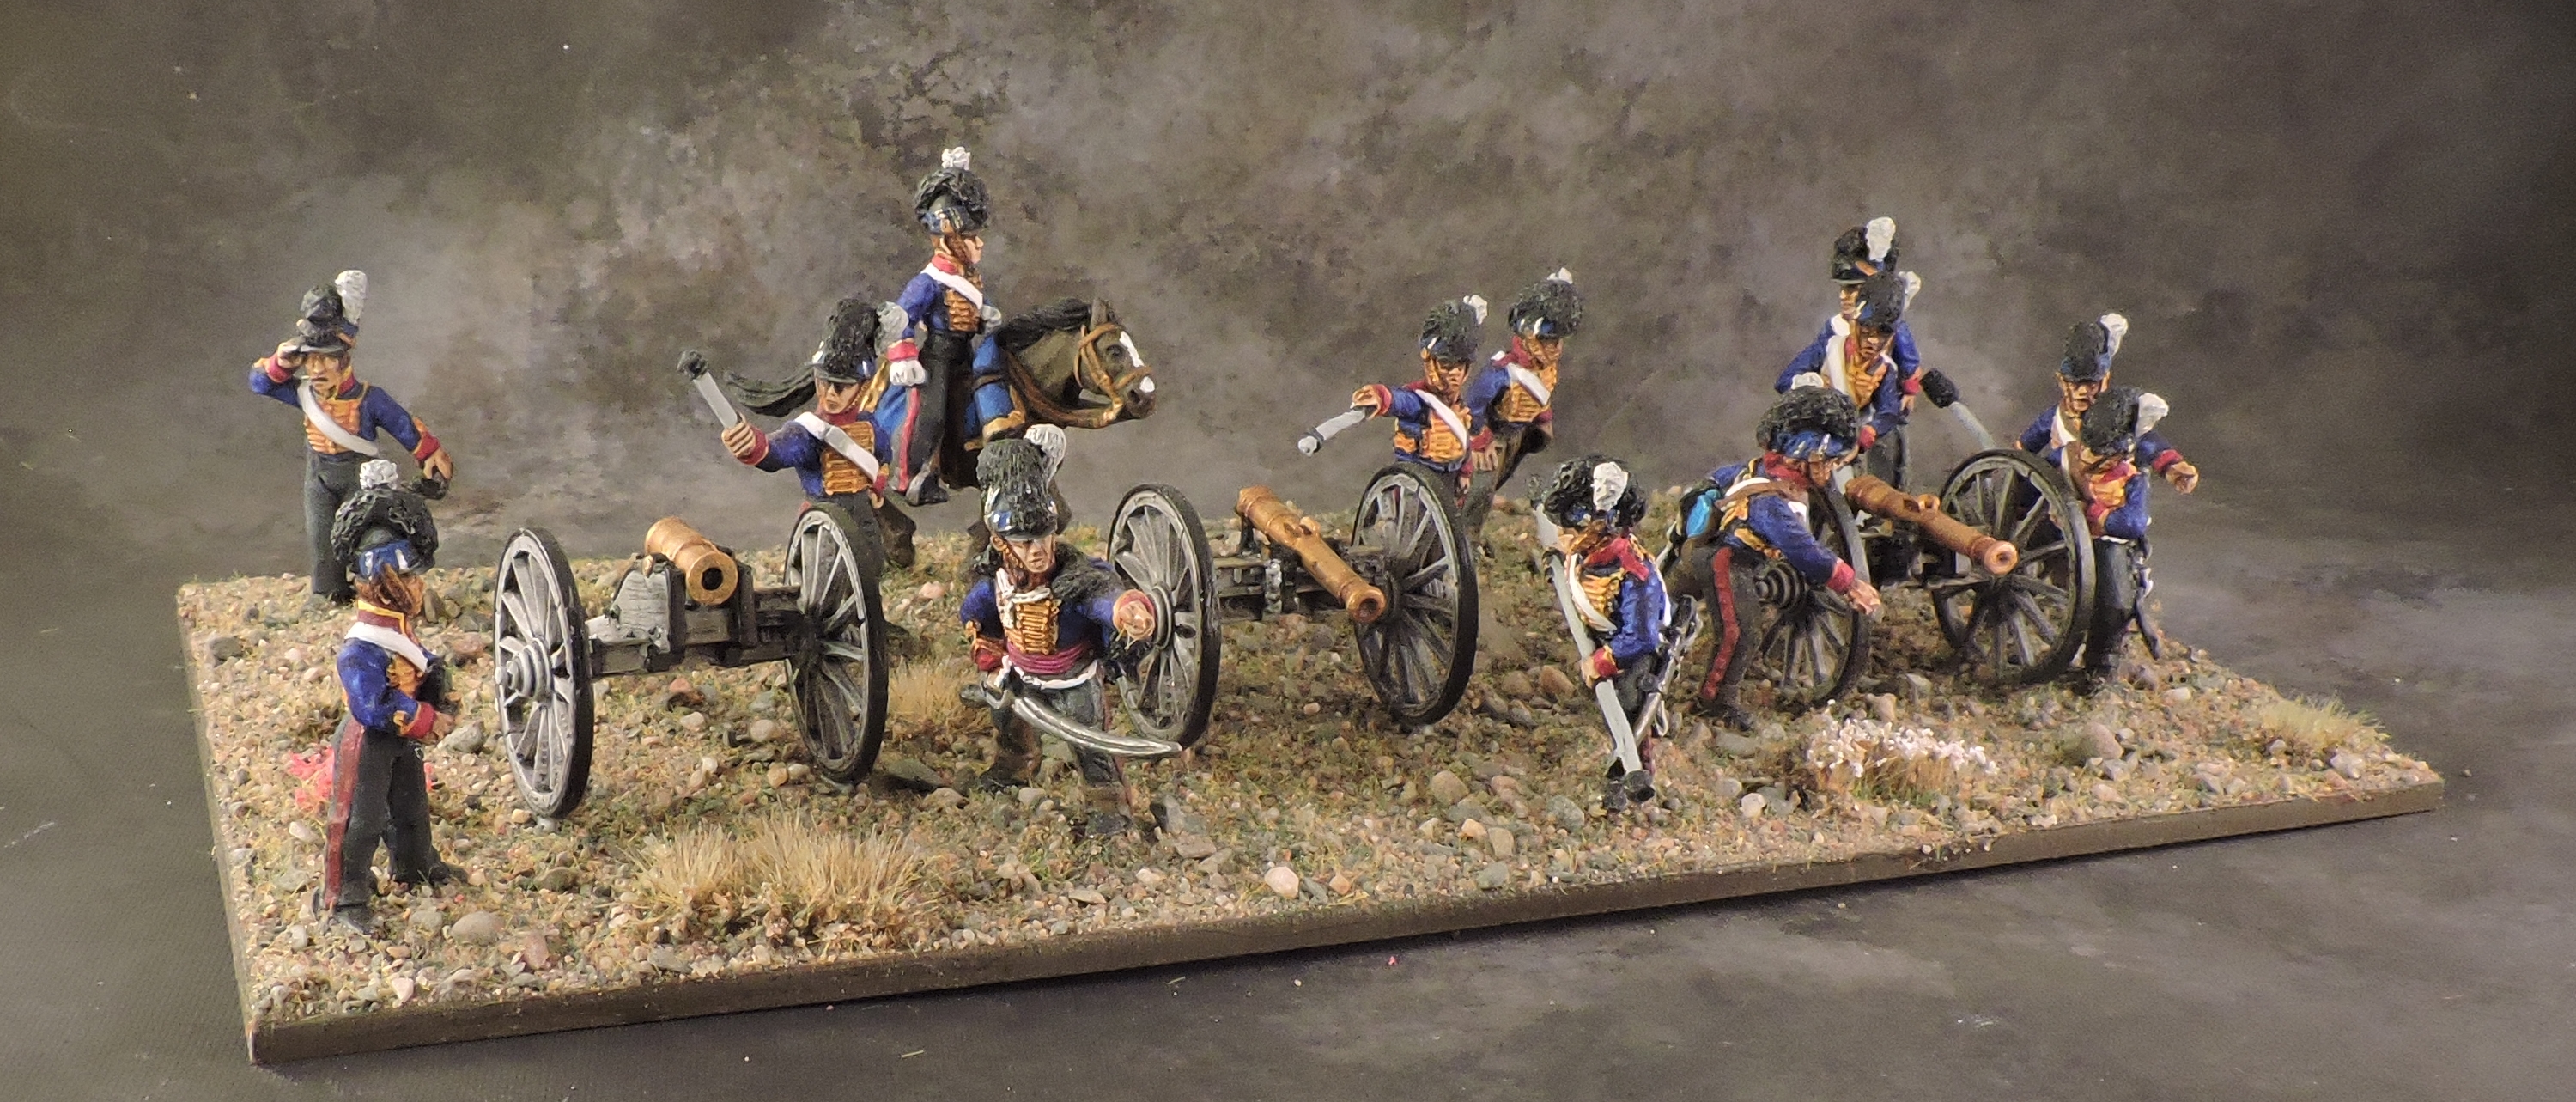
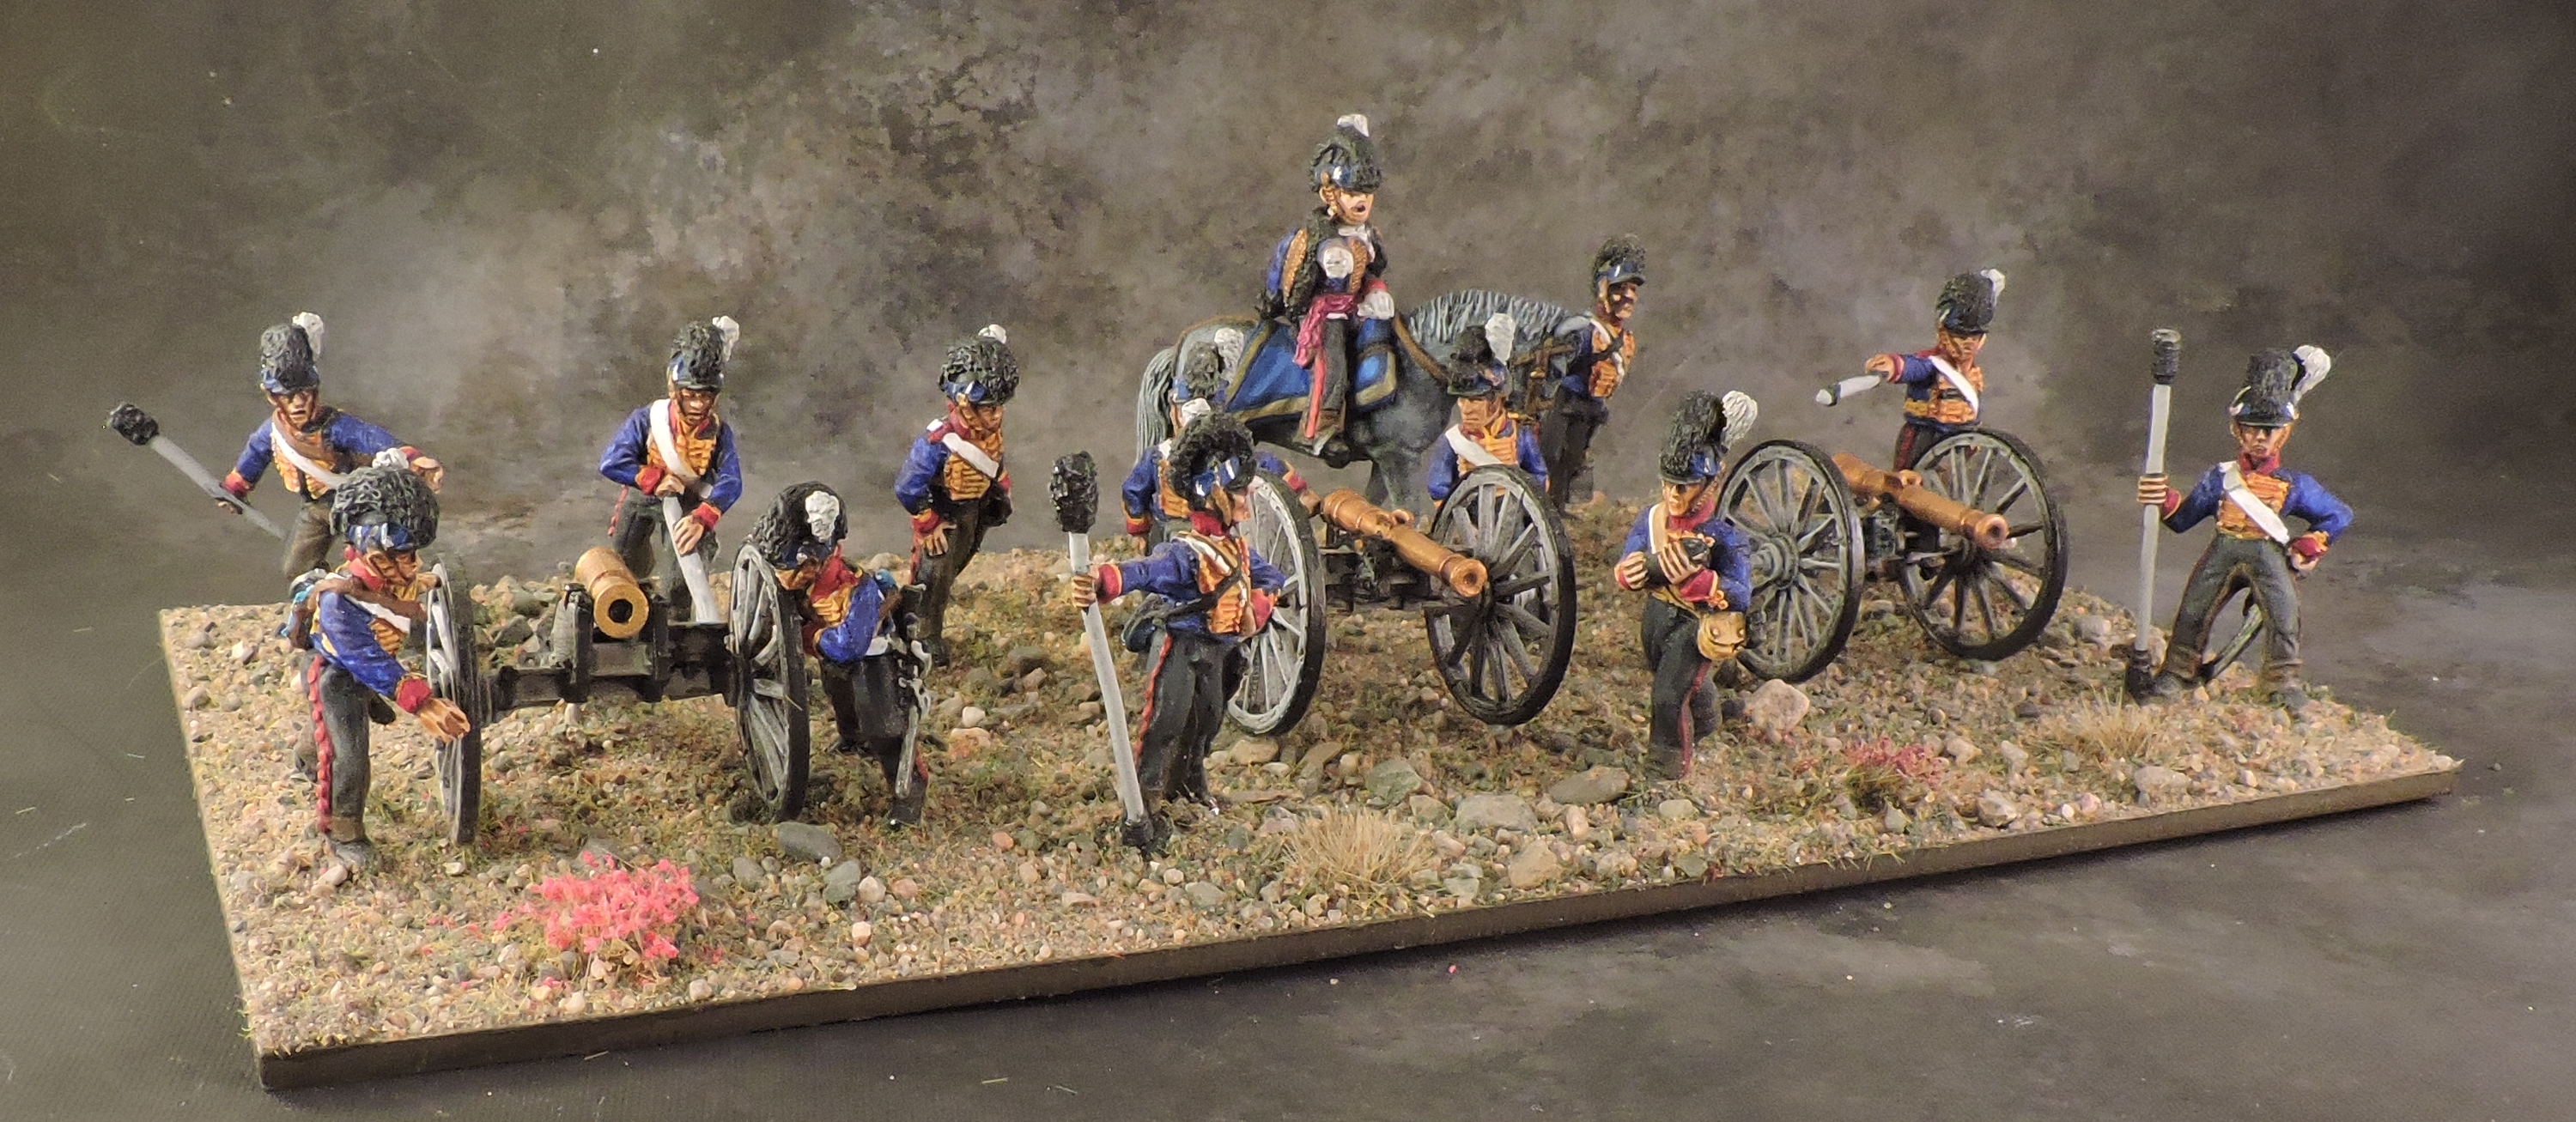
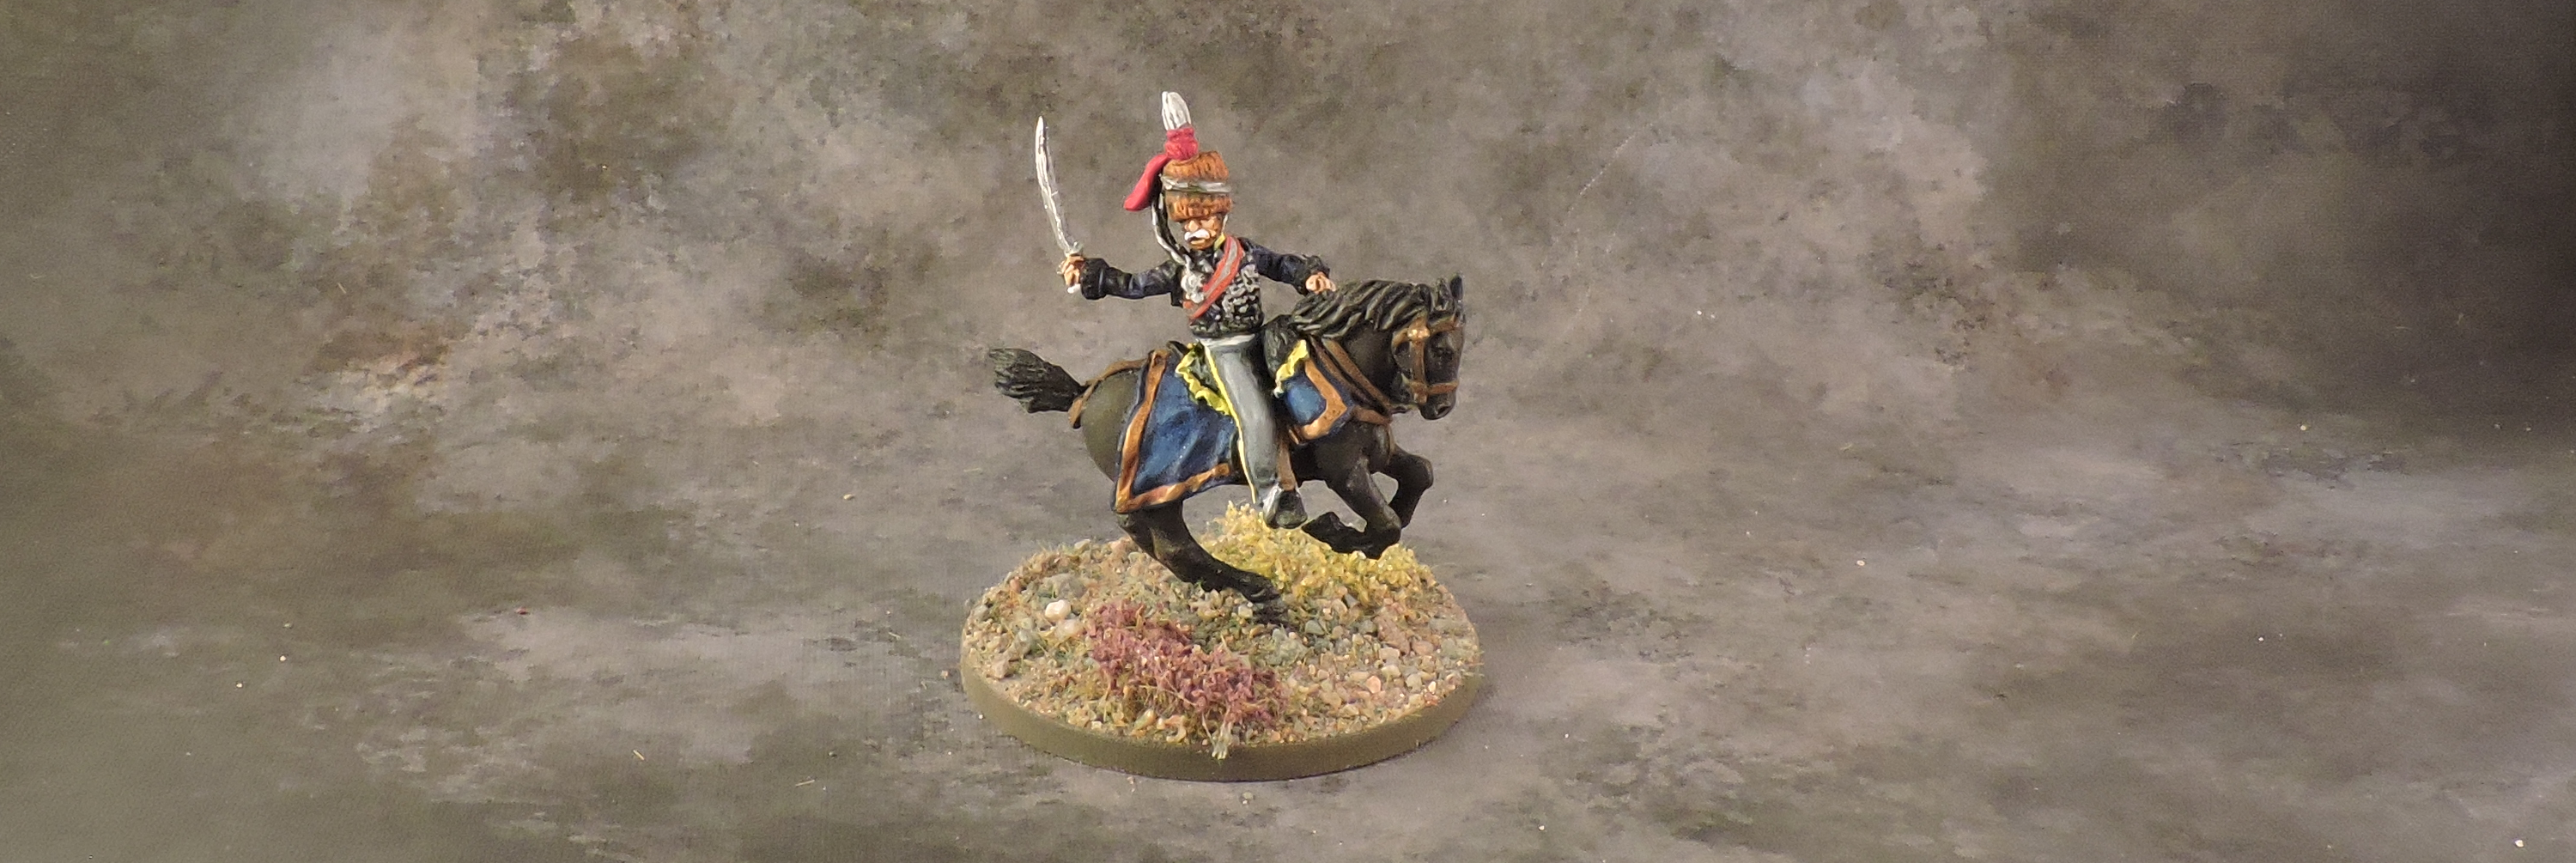
Royal Horse Artillery
Six troops of Royal Horse Artillery support the cavalry: E and F Troop with their light 6pdr cannons, H Troop and the famous G “Parachute” Troop led by Captain Mercer fielding heavy 9pdr, I Troop with 5.5” Howitzers instead of regular cannon, and the infamous 2nd Rocket Troop.
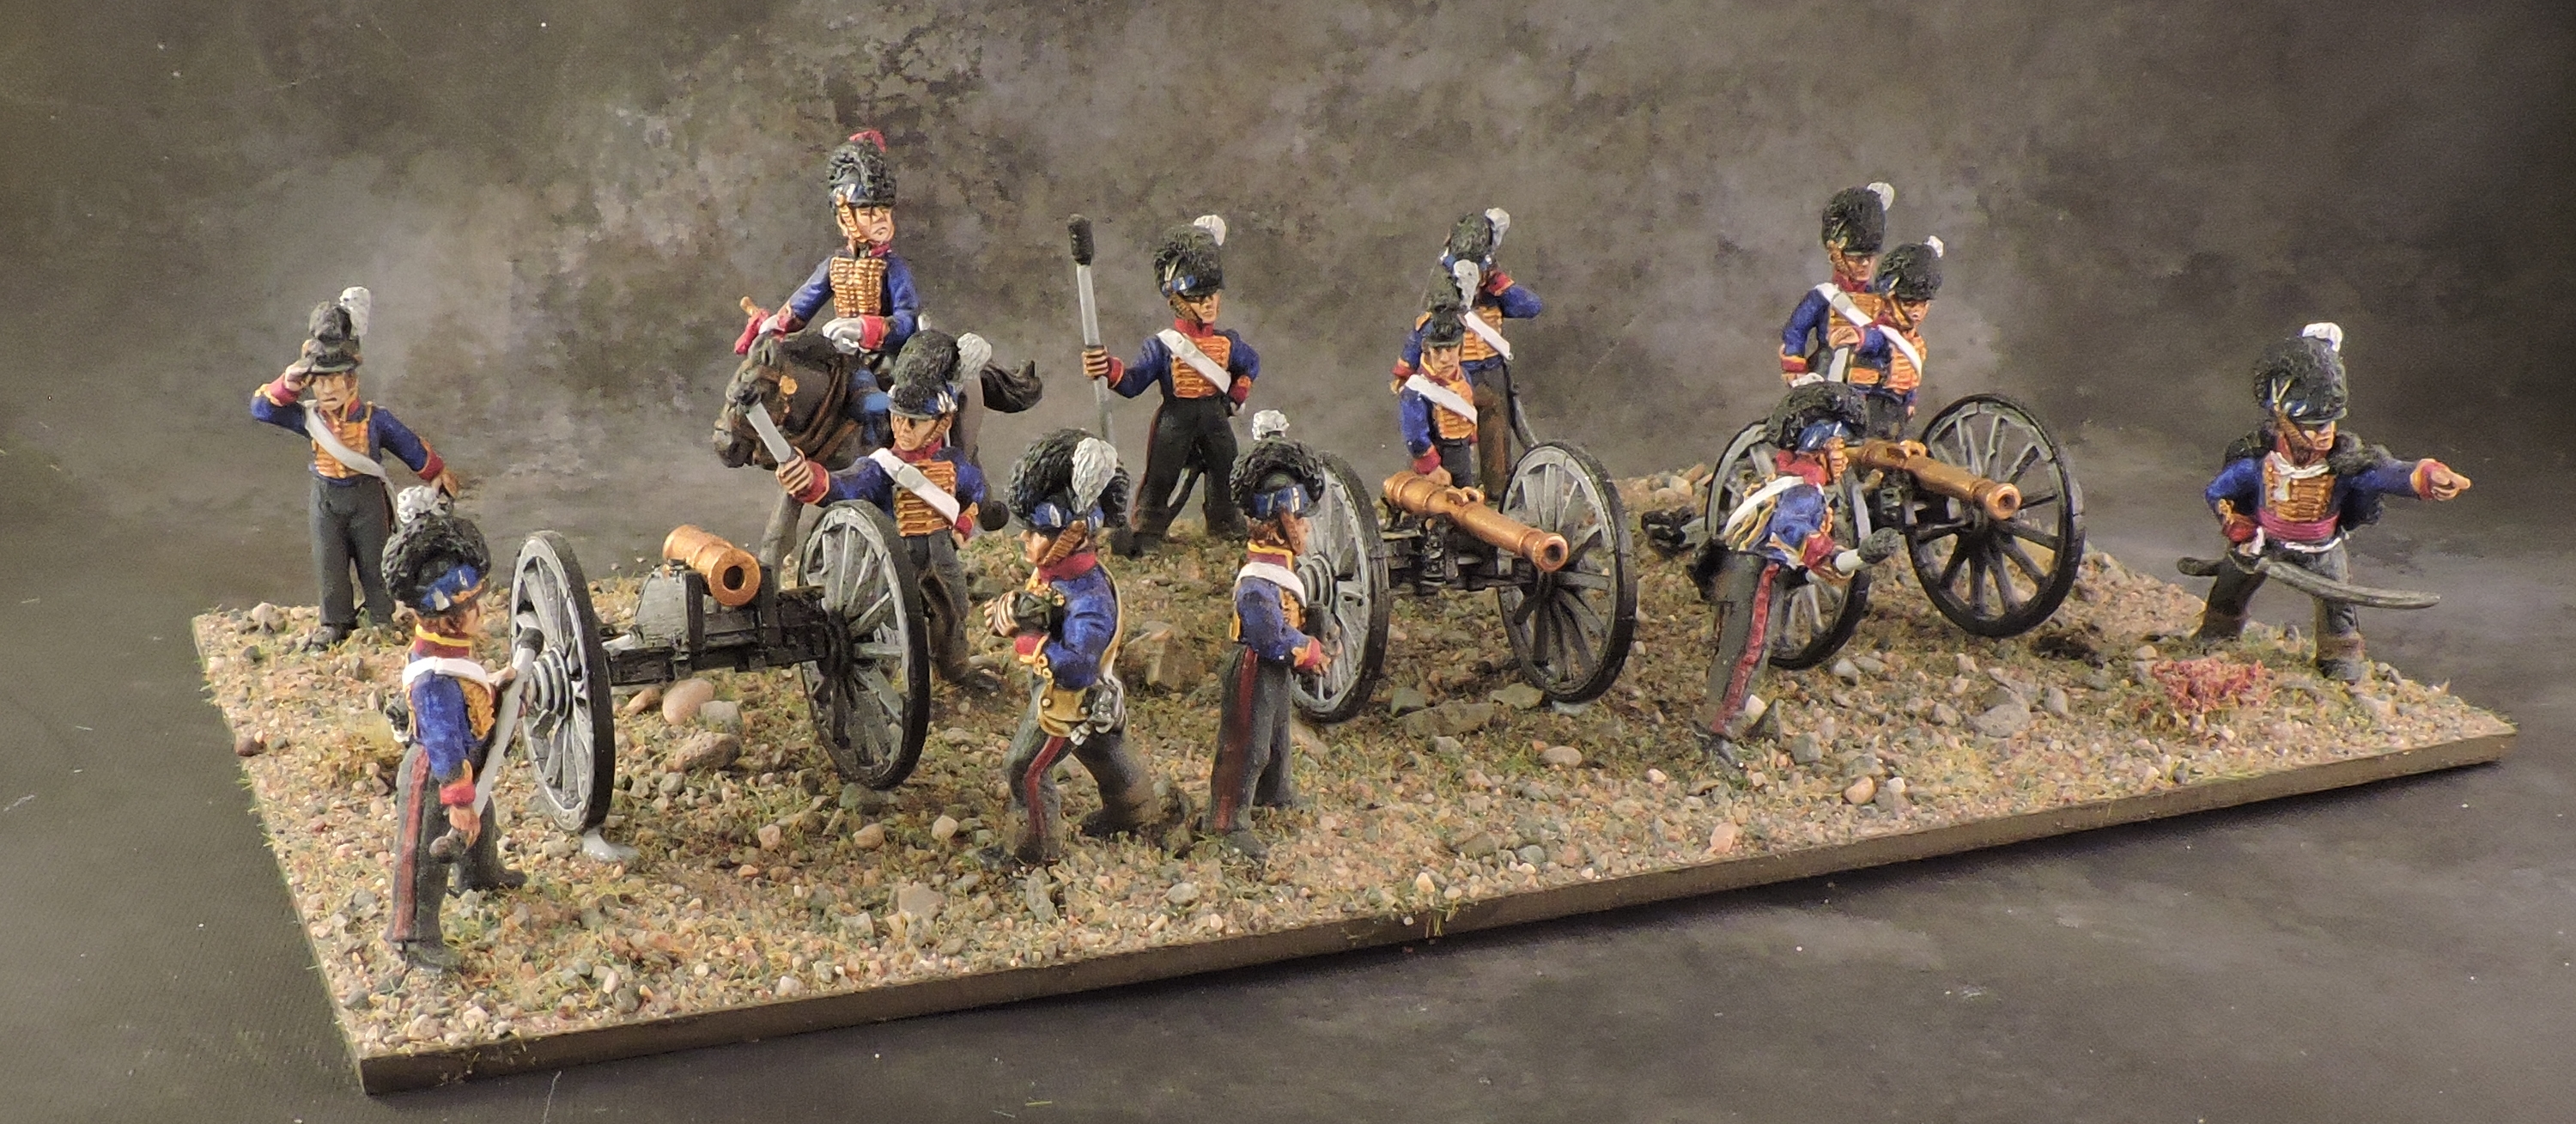


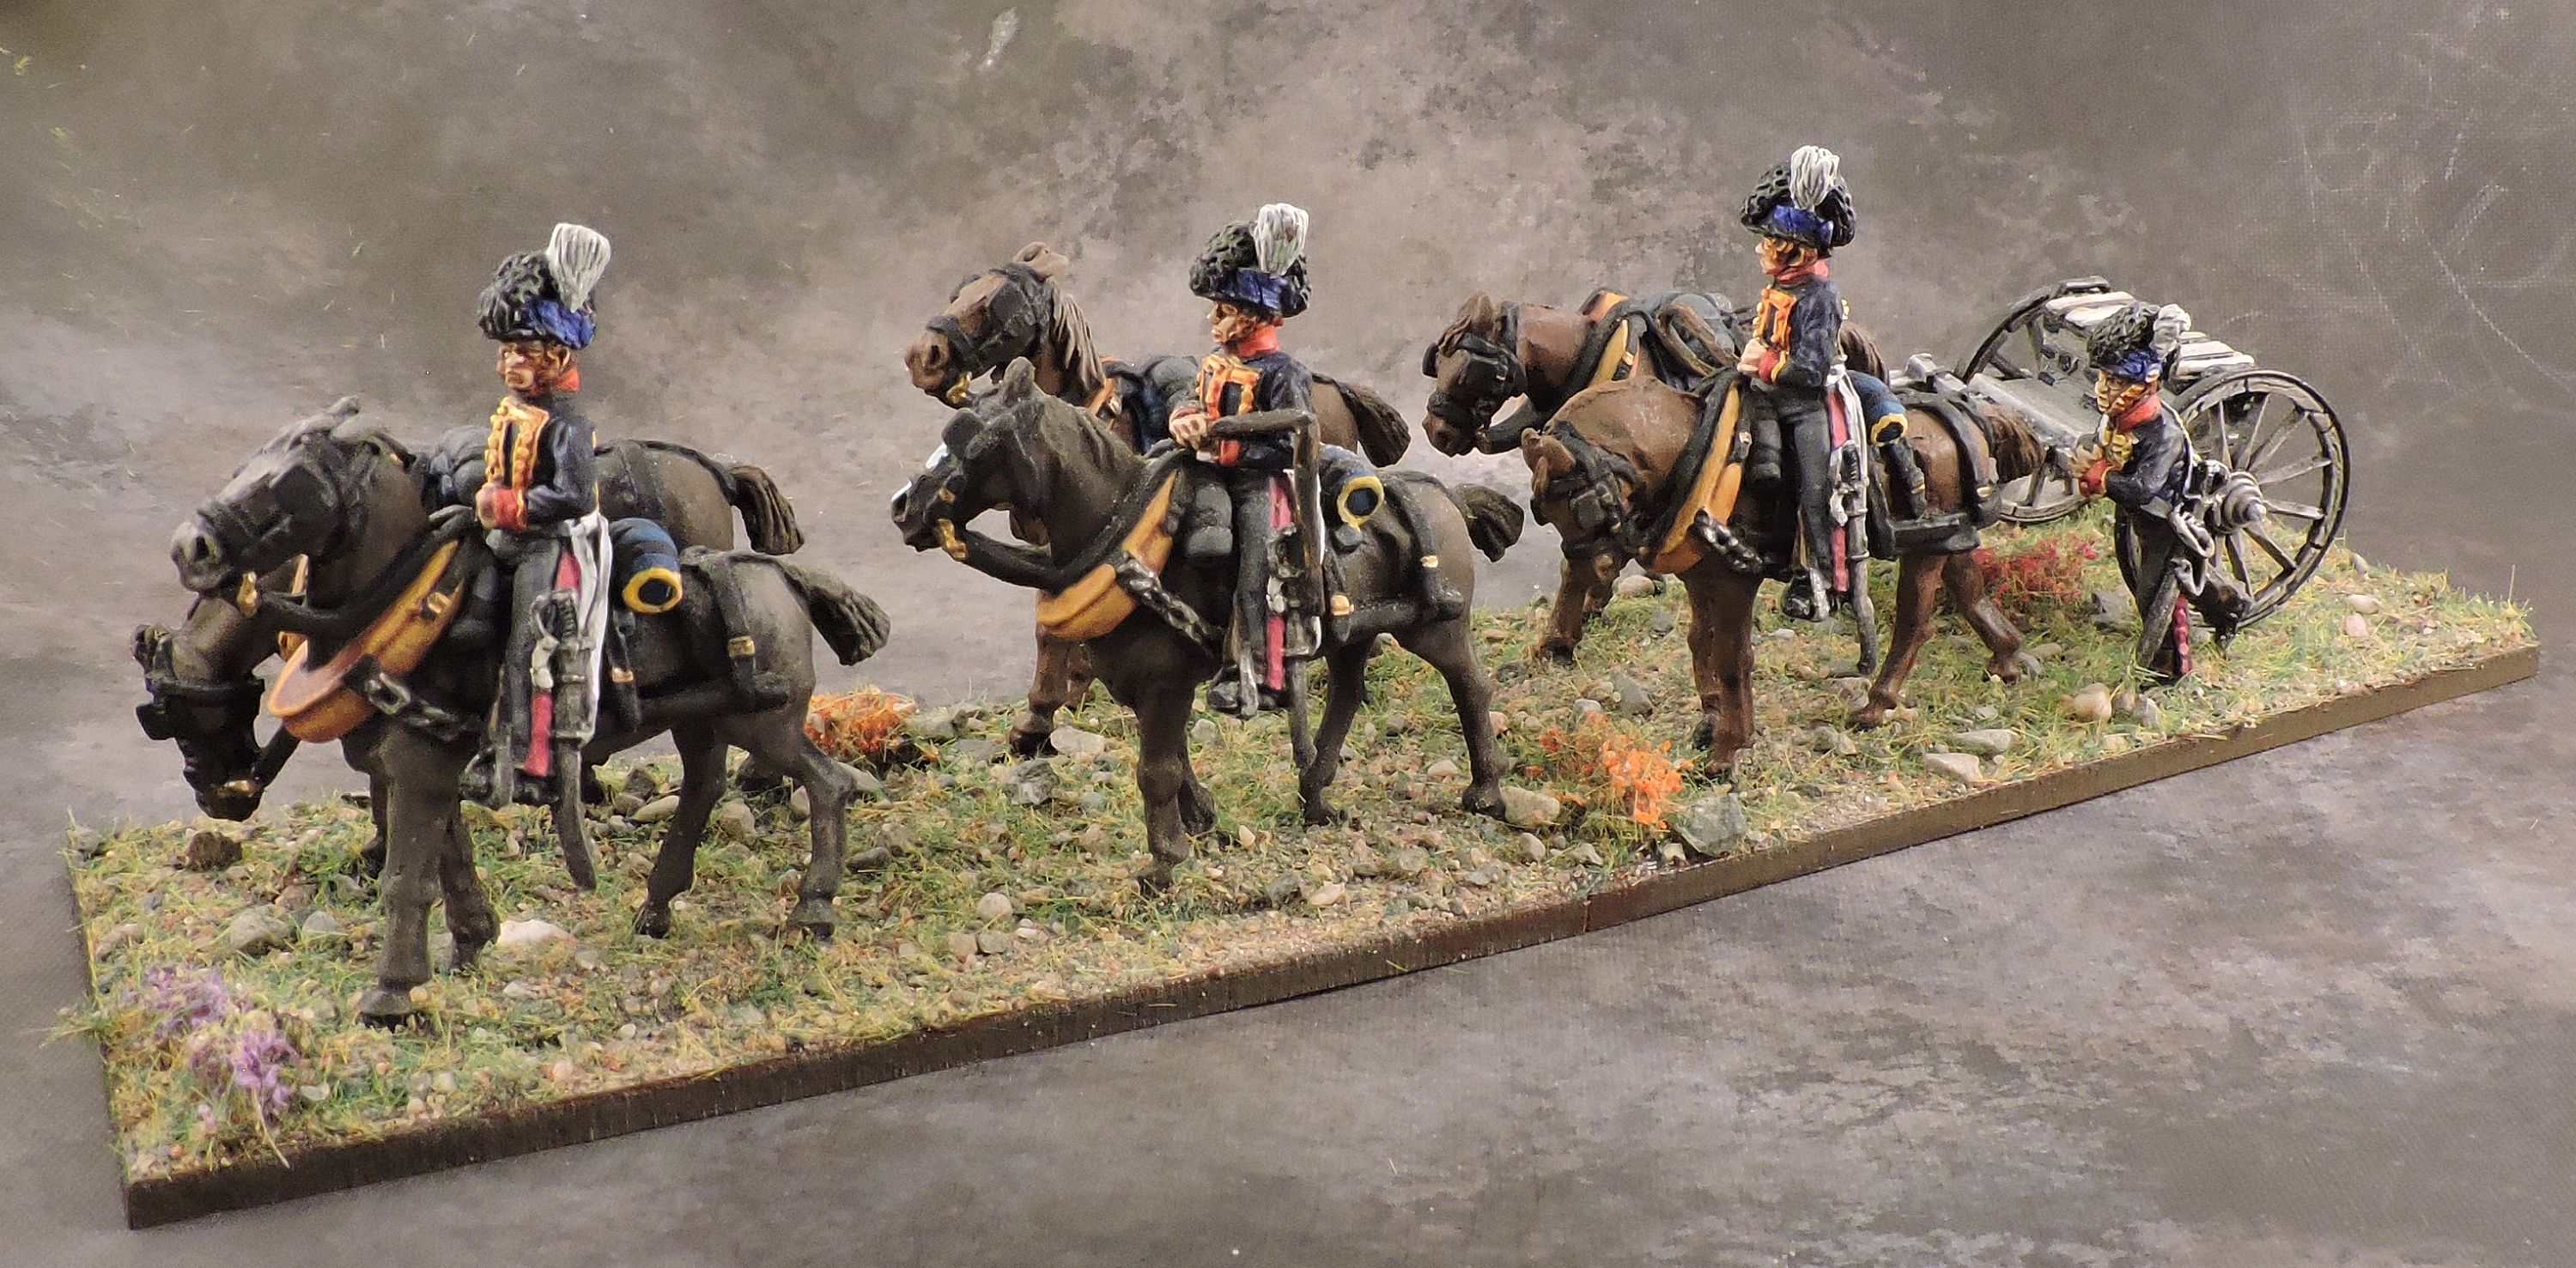
While the foot artillery has limbers for each gun, it seemed excessive – even for me – to paint up limbers for every horse artillery gun in this collection. Instead, I added a single representative limber team from Perry Miniatures.
Netherlands Cavalry Division
Commanded by Luitenant-Generaal Baron de Collaert, this division offers a mix of troop types formed into a heavy brigade of Carabiniers as well as two light brigades of Light Dragoons and Hussars.

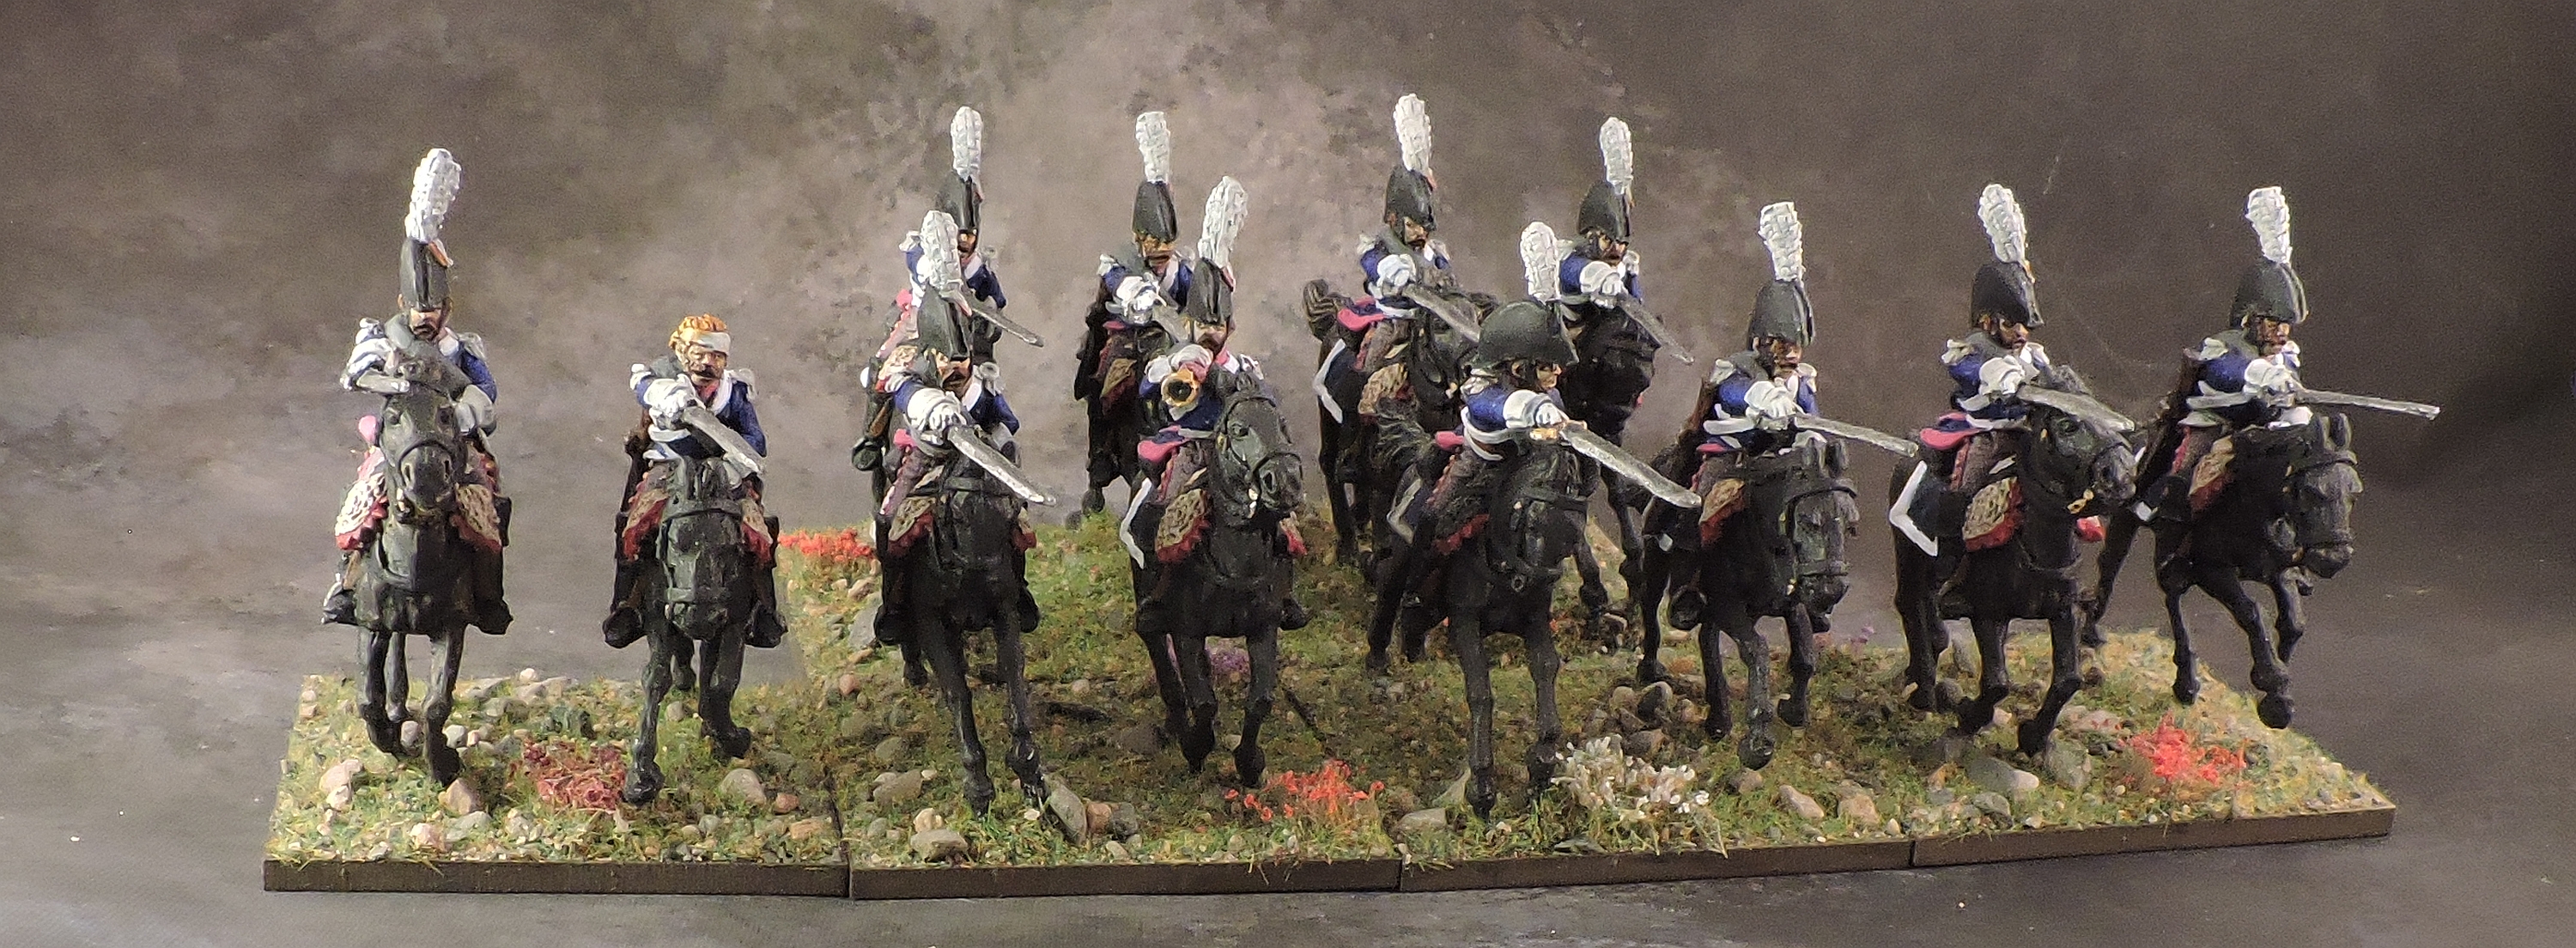
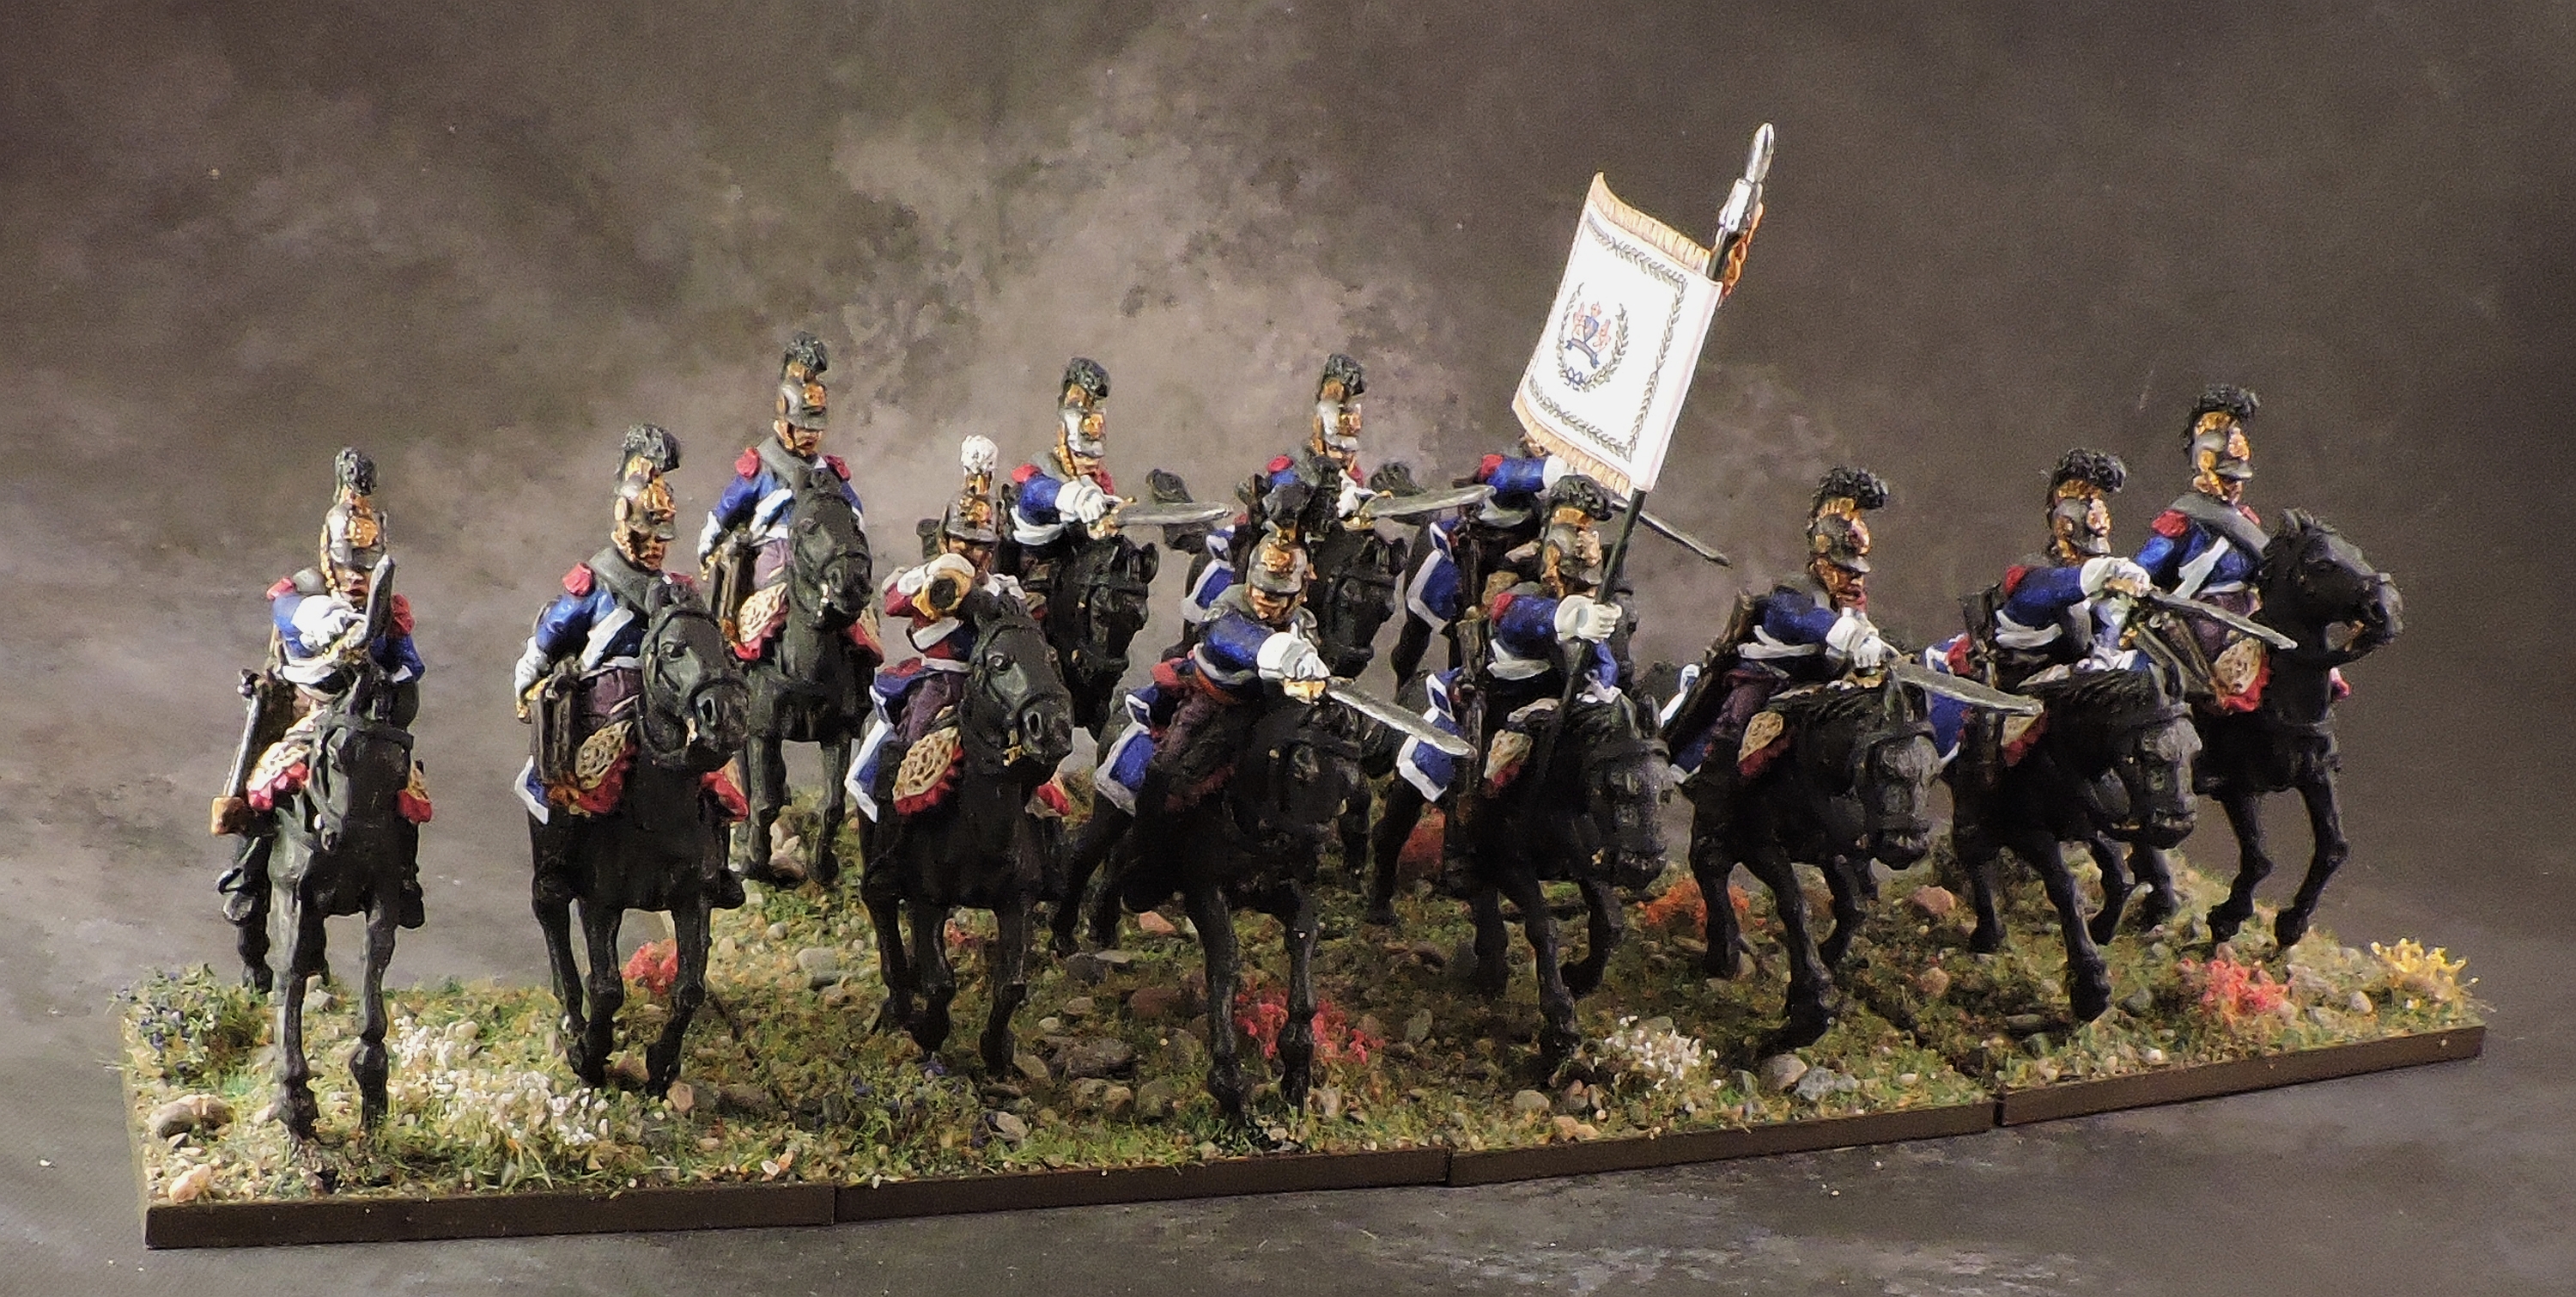
Netherlands Cavalry Division – Heavy Cavalry Brigade
Generaal-Majoor Jonkheer Tripp leads the heavy horse of the Netherlands.


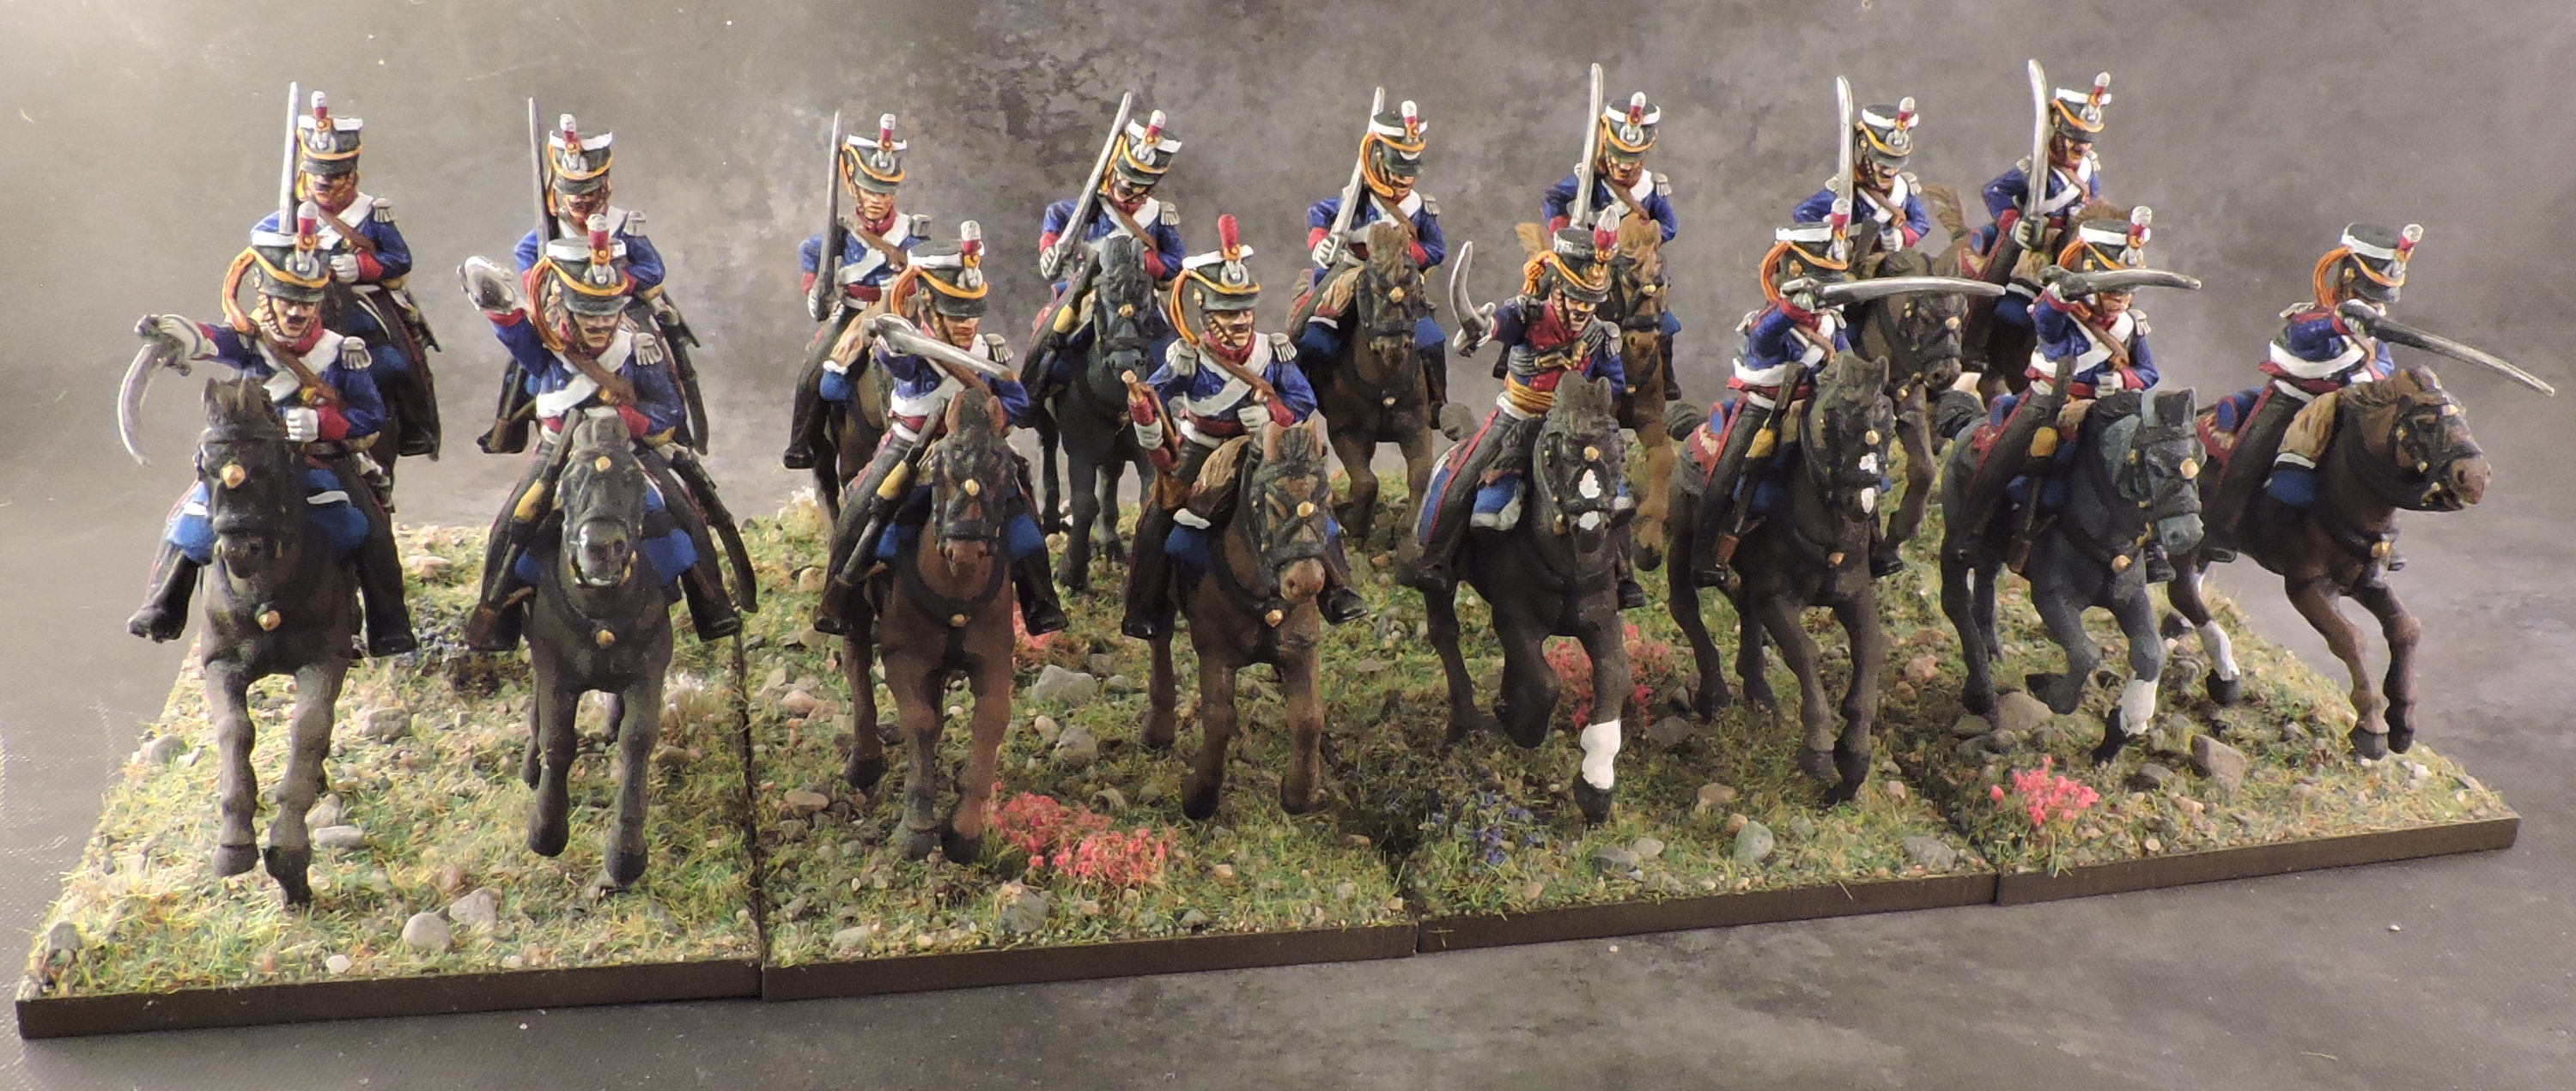
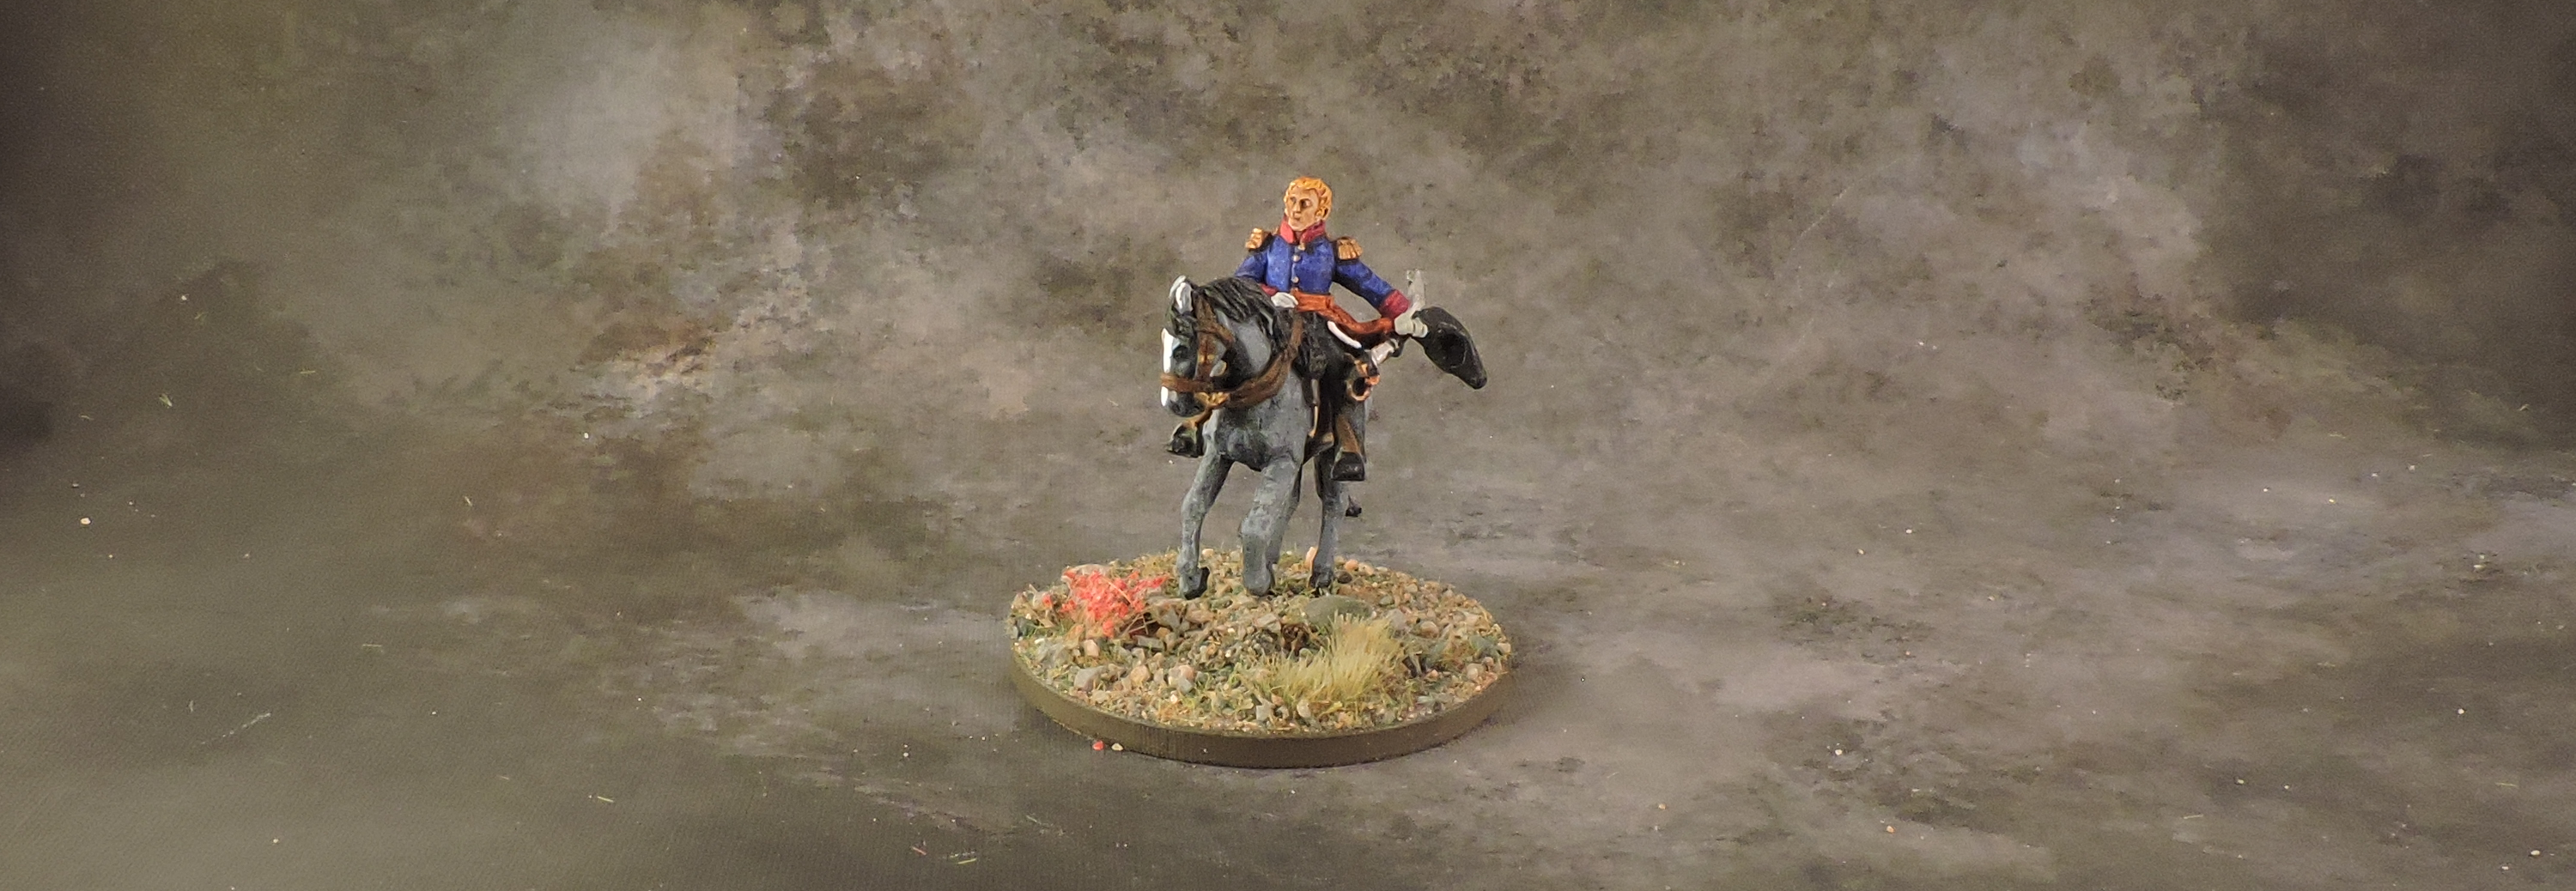
Netherlands Cavalry Division – 1st Light Cavalry Brigade
Under the command of Generaal-Majoor Baron de Ghigny, this brigade suffered heavily from artillery fire during the battle but did not engage decisively.
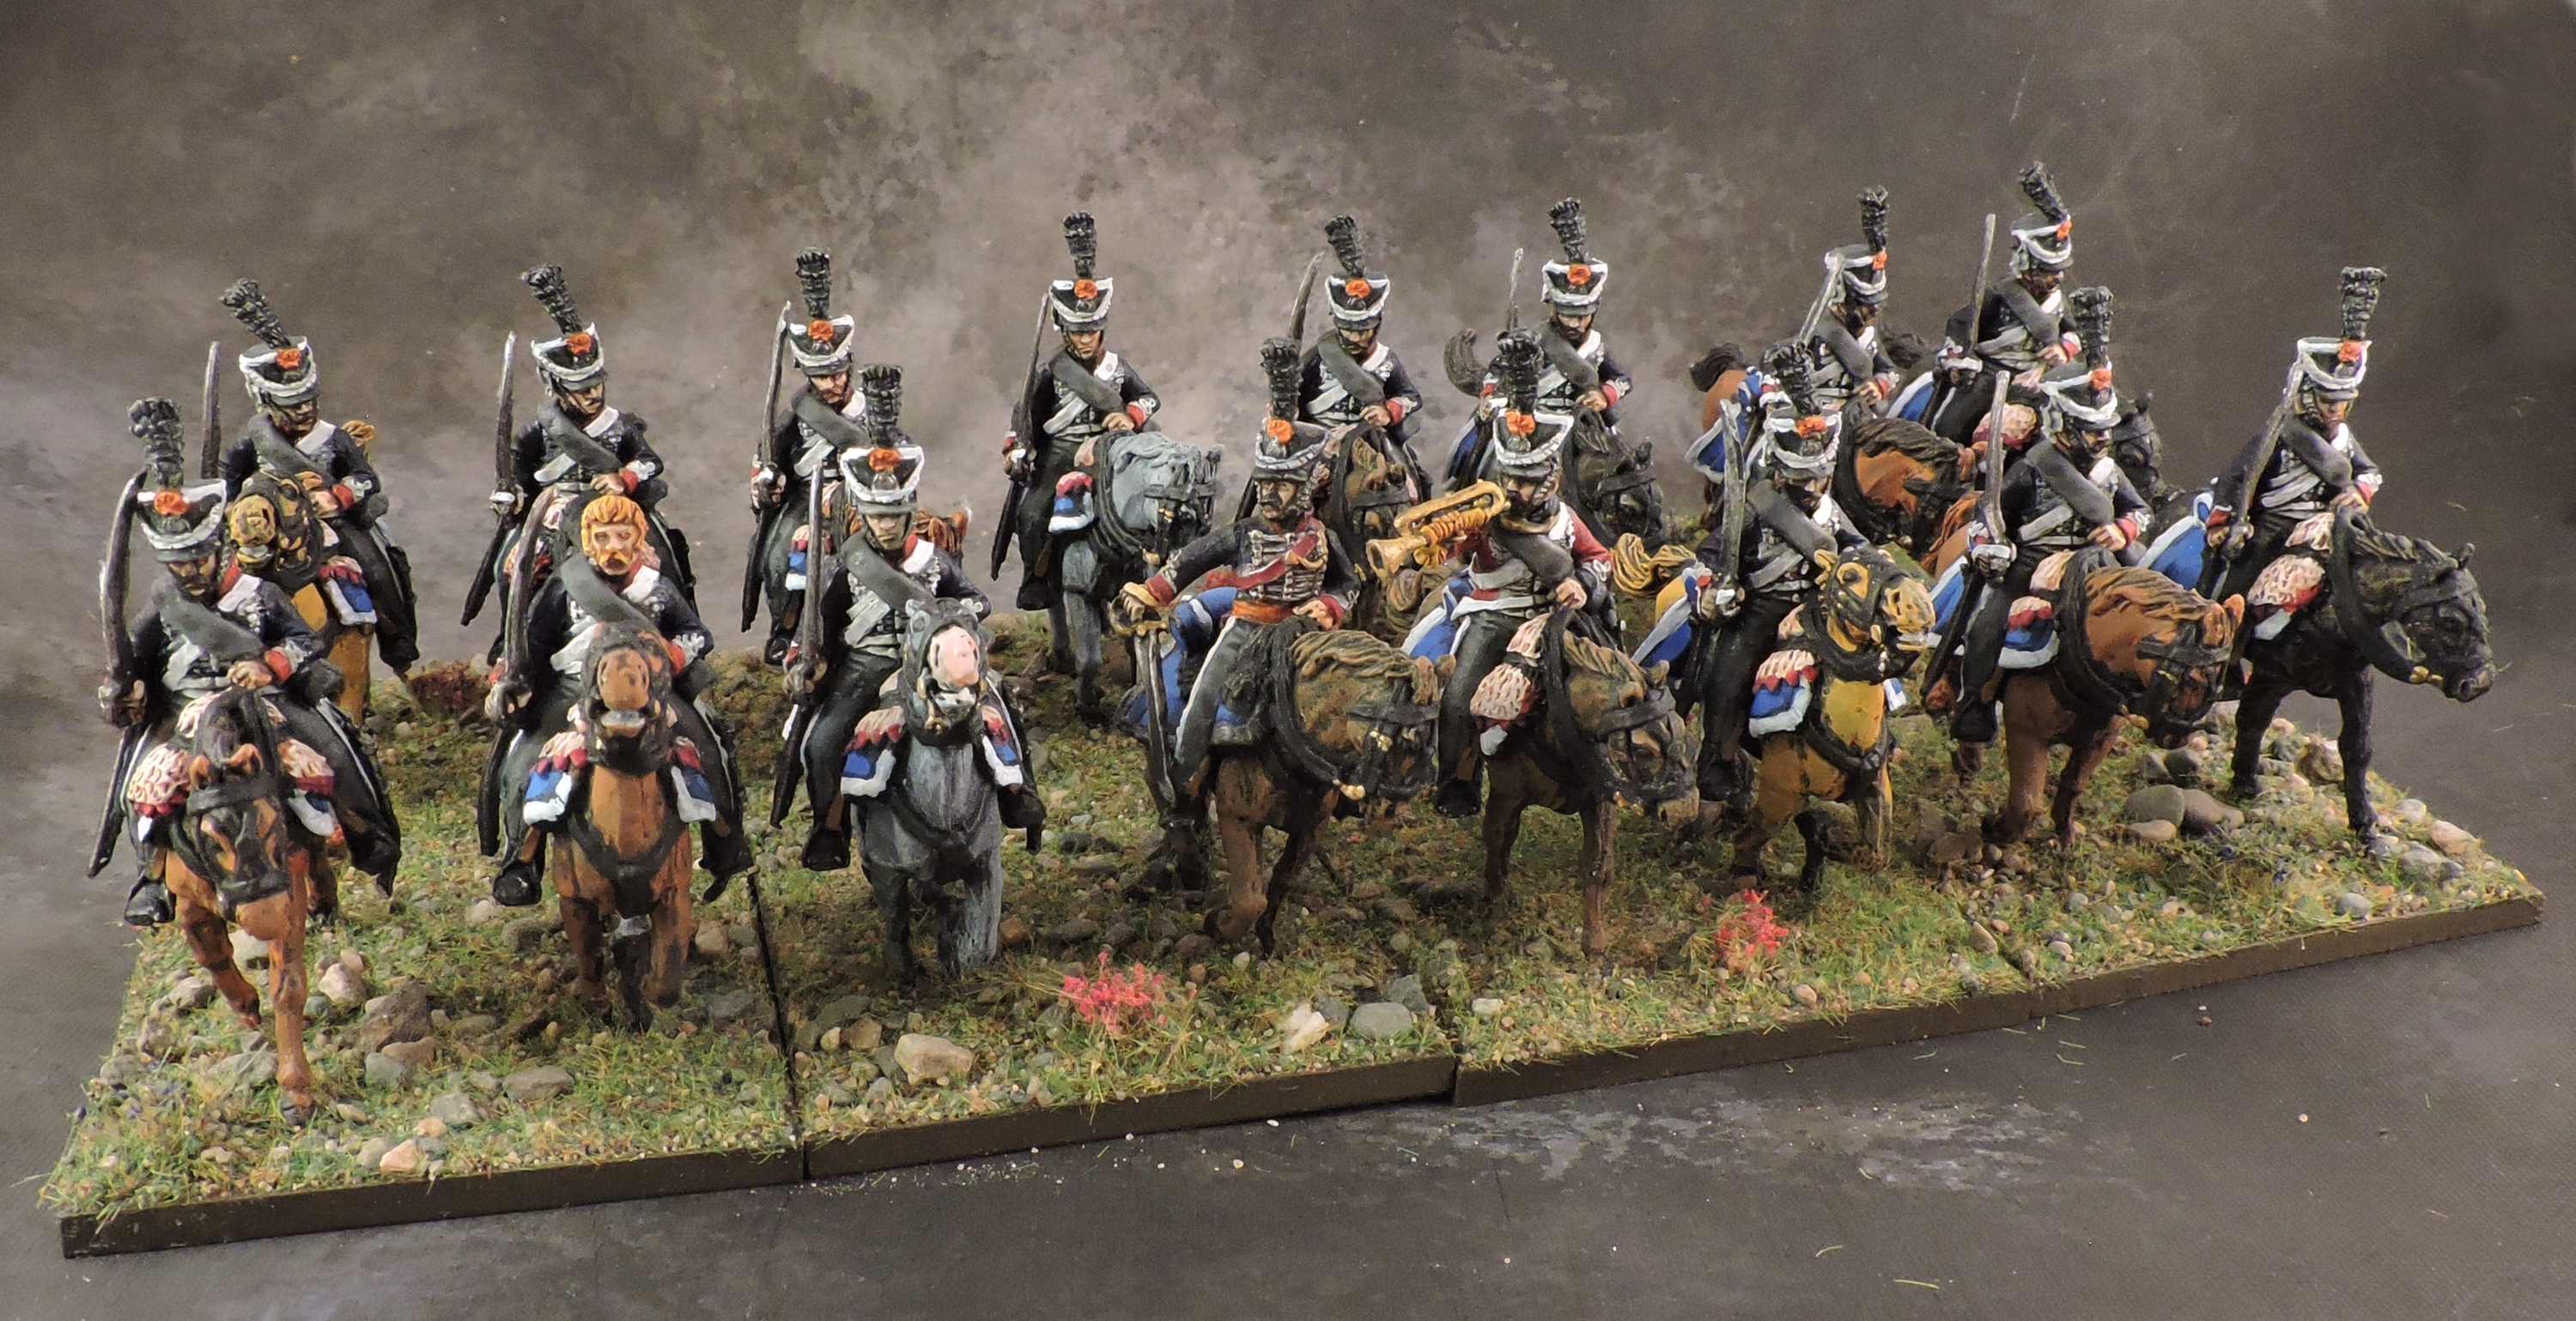

Netherlands Cavalry Division – 2nd Light Cavalry Brigade
Major General van Merlen led this brigade into the charge against d’Erlon’s infantry and, wisely, held the pursuit which allowed many of the more impulsive British heavy cavalry to seek shelter later.


Netherlands Cavalry Division – Divisional Artillery
Two half batteries with two gun sections each support the cavalry.

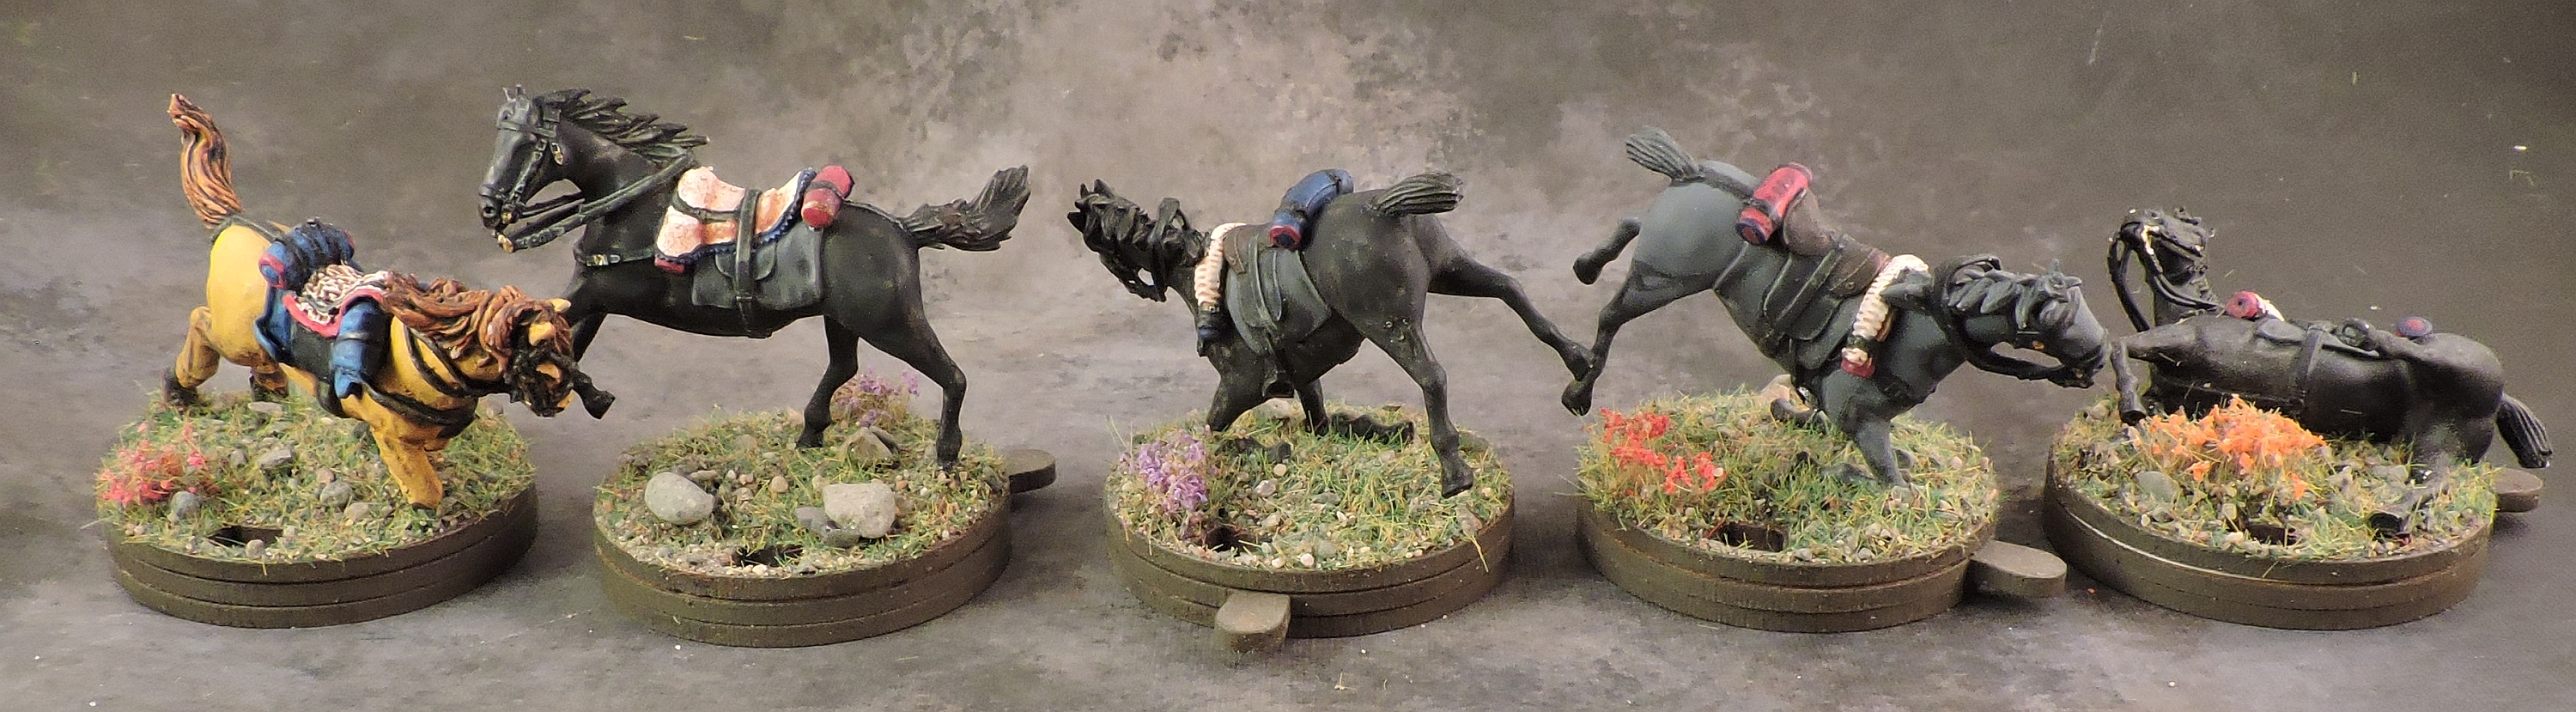
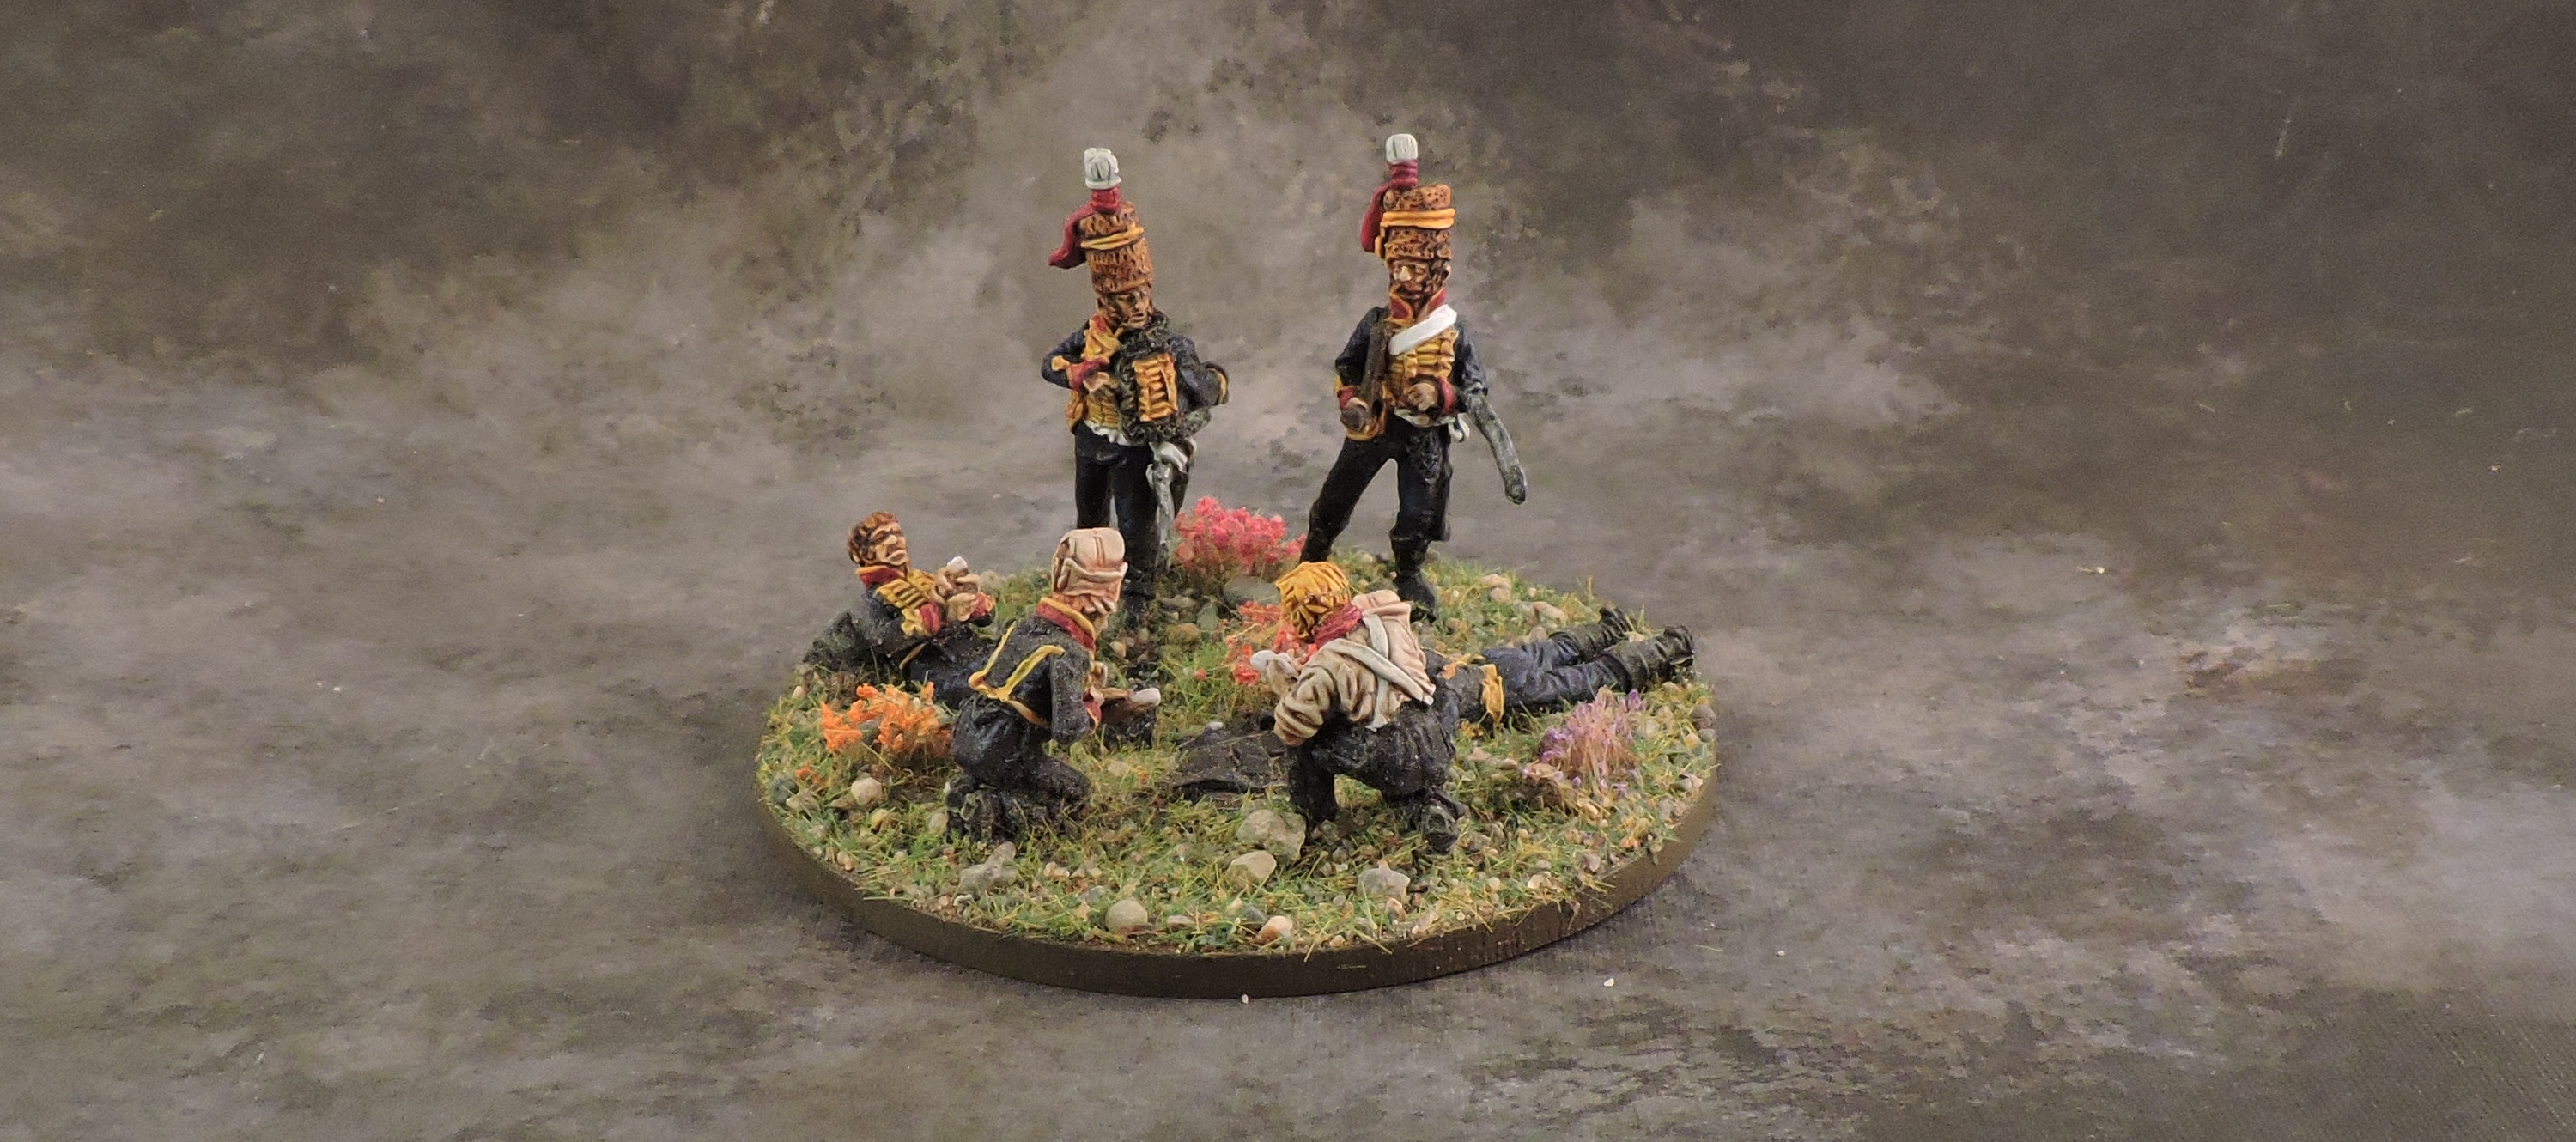
Cavalry Casualties
Unlike the infantry, I decided against using a single casualty marker per cavalry regiment. There just aren’t enough casualty figures available and especially not those that fit onto my 40mm marker base. I painted up 10 representative markets – using a mix of manufacturers and 3D printed figures – with enough saddle cloth variation to cover all of the regiments in the collection. Good enough.

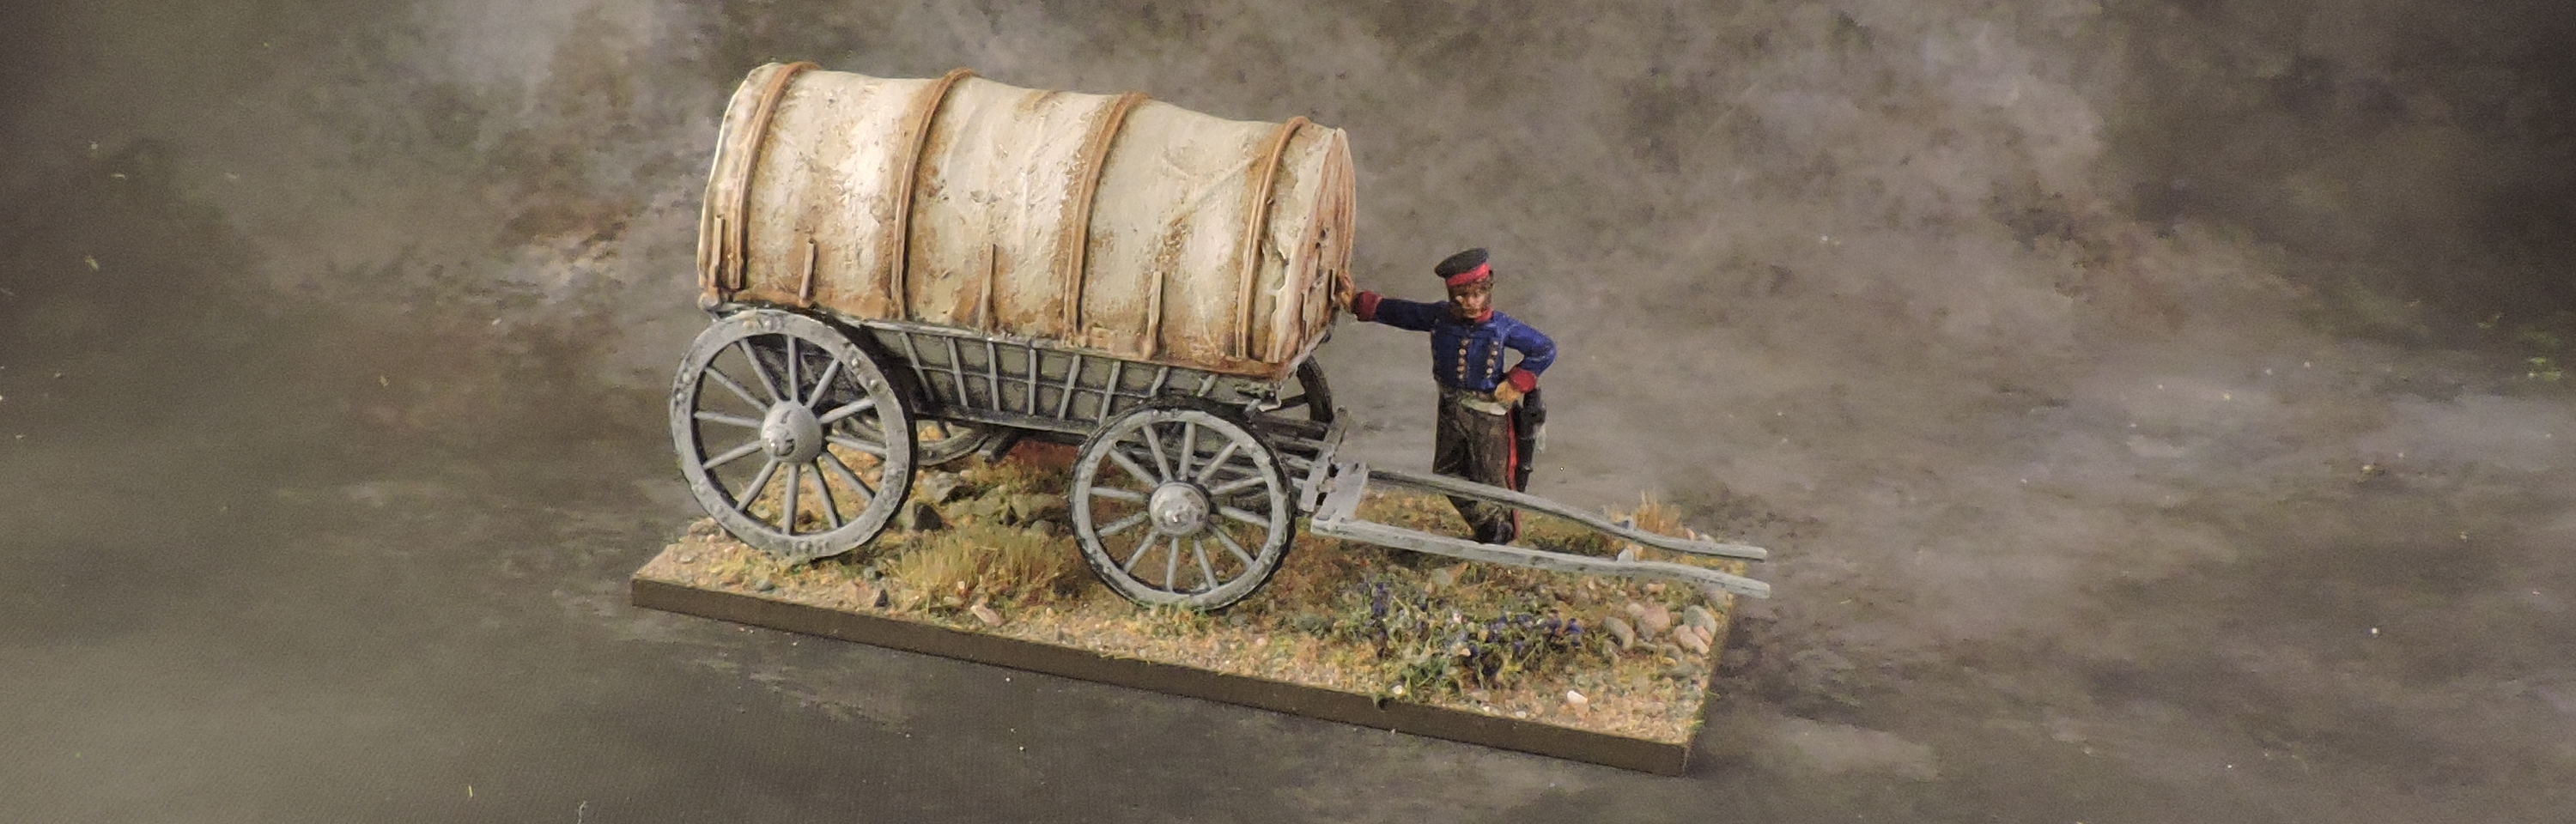
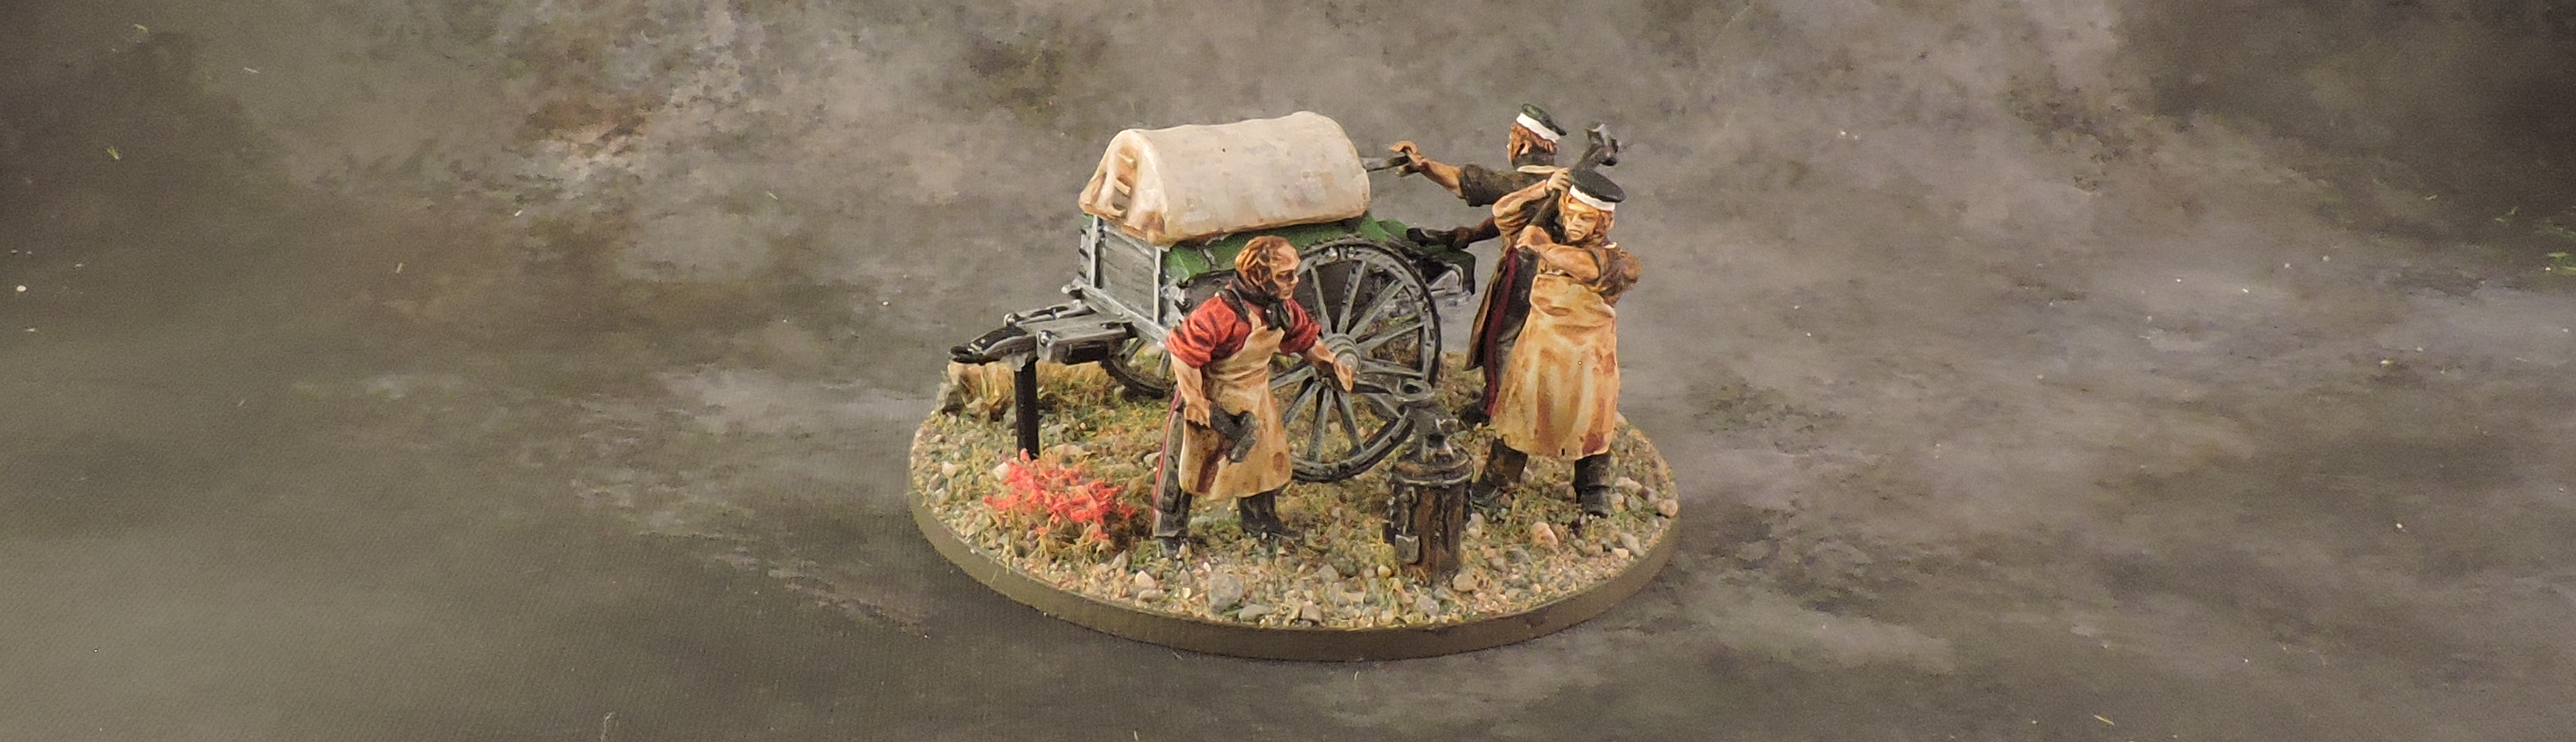
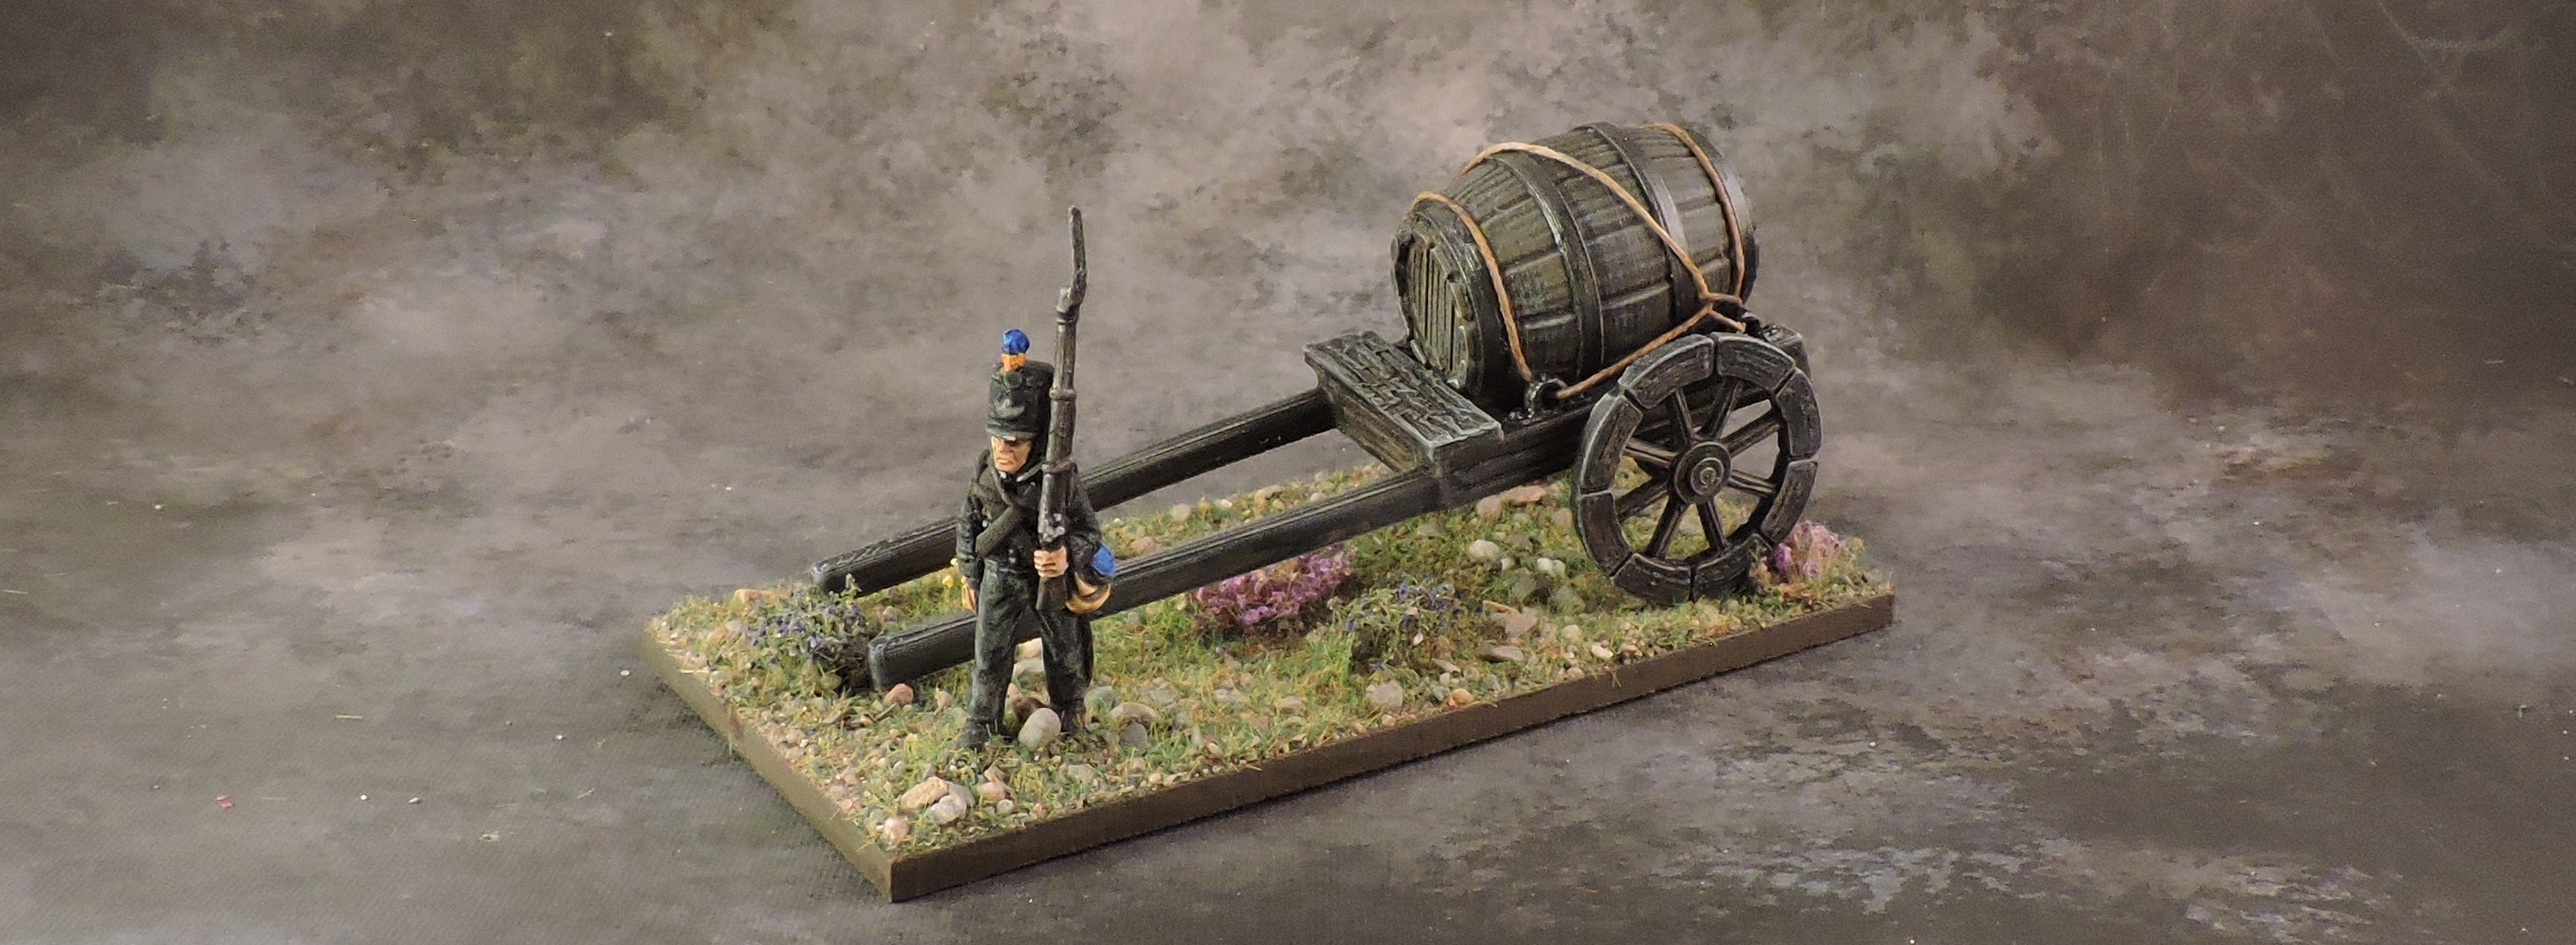
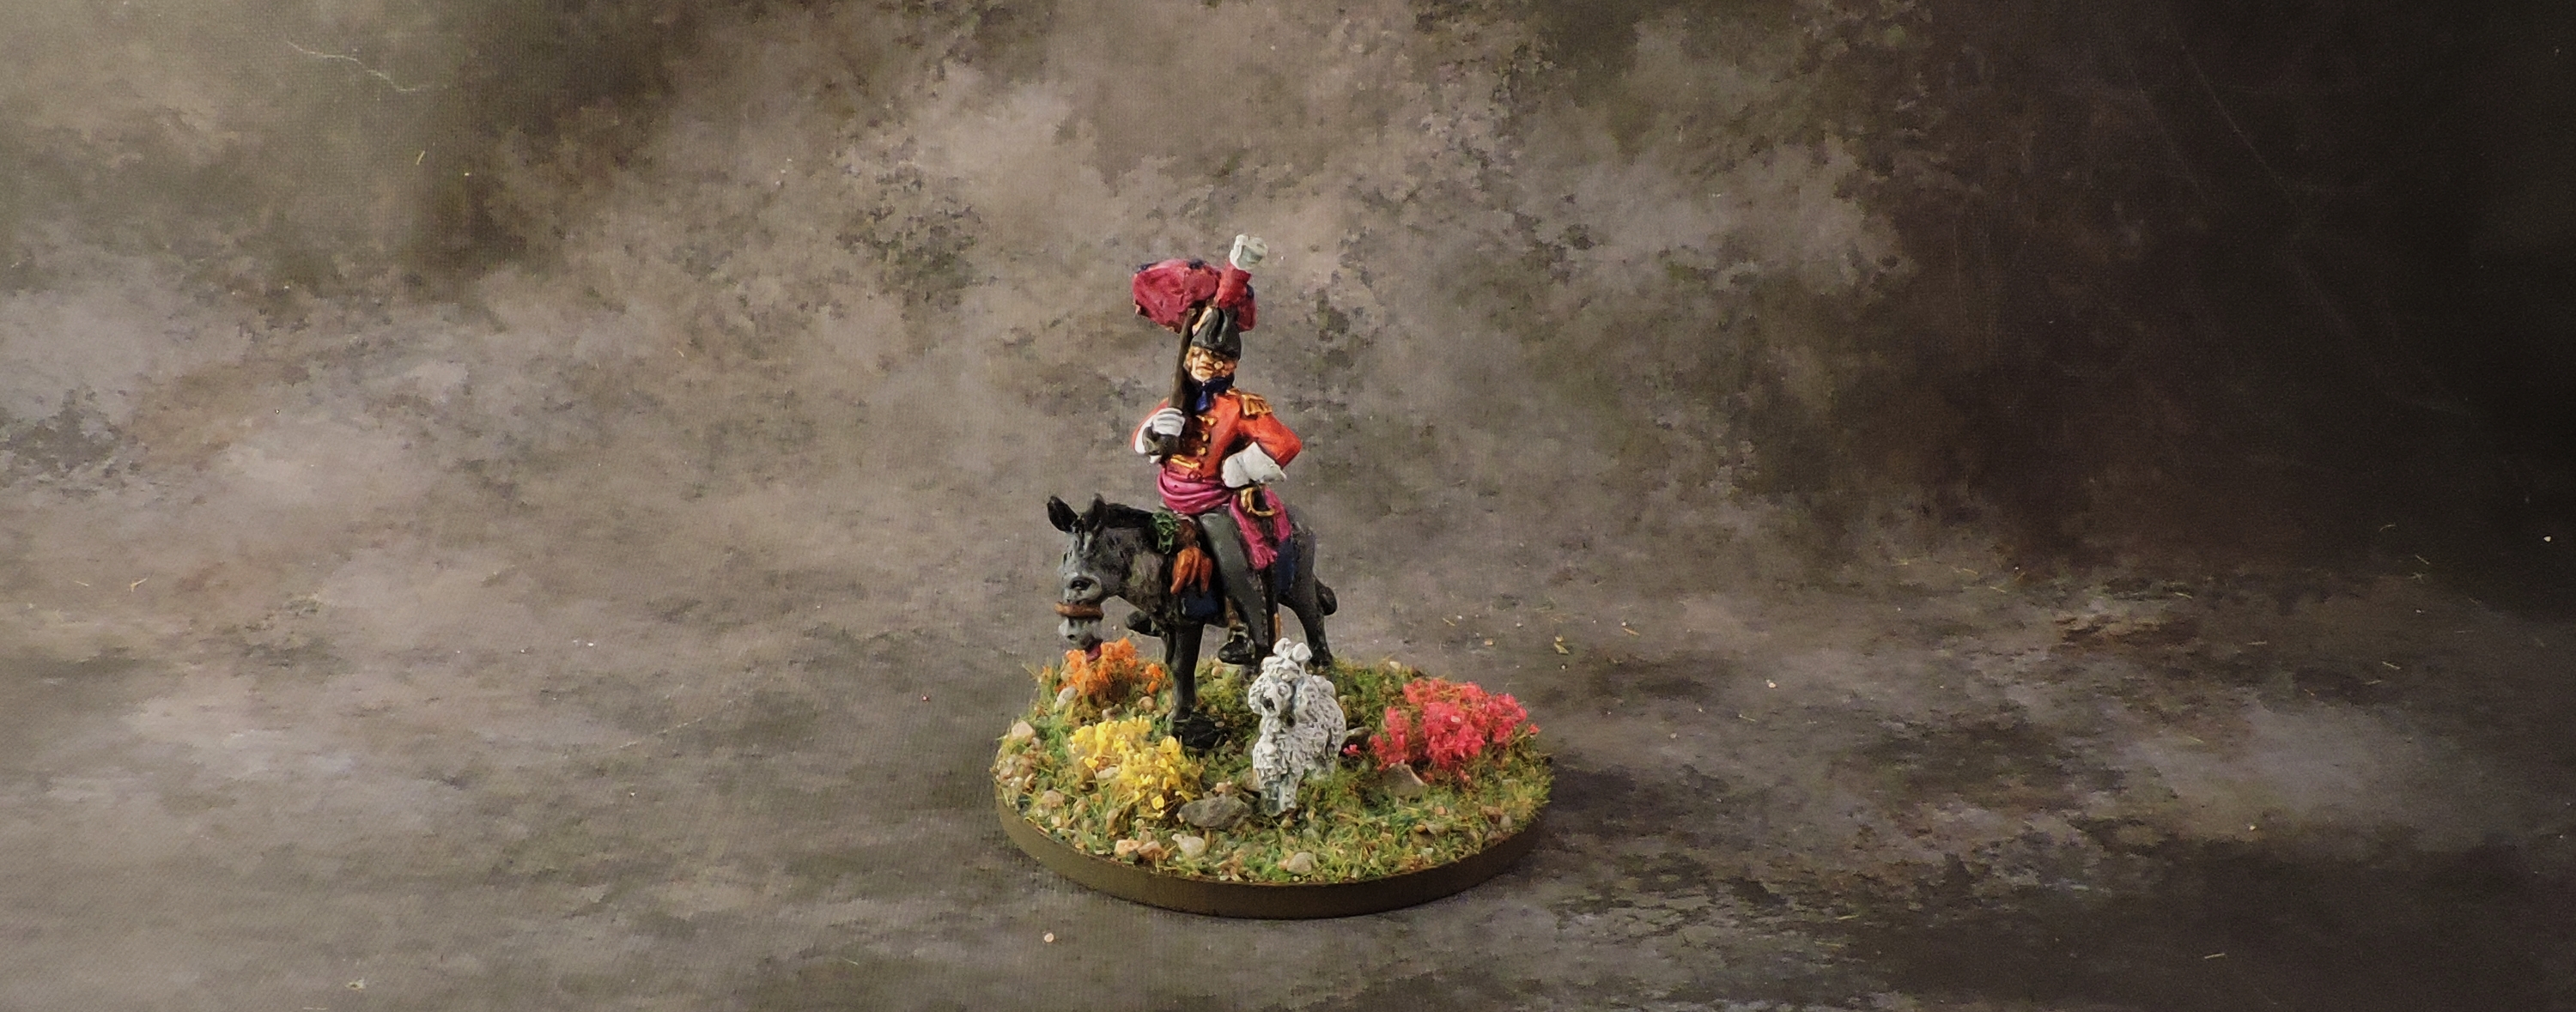
Wagon Train & Camp Followers
At the very end we have a mix of vignettes to breath a bit of life into the rigid ranks of the army. Some of these are dedicated figures, others assembled from left-over parts.


3 replies on “Allied Army of the Netherlands”
Crazy Fantastic !!!!!!
Sensational
Absolutely insane!!! Beautifully done – a credit to you.