My collection for the English Civil War is anchored on the battle of Marston Moor which featured all three major contestants: Royalist “cavaliers”, Parliamentarian “roundheads”, and the Scottish Covenanters.
Historical Context
In the summer of 1644, England was in turmoil. The initial confrontation between King Charles I and his parliament in 1643 had failed to achieve a decisive result so both sides were casting about for allies. King Charles I, from his power base in Oxford, had negotiated a “cessation” in Ireland which allowed him to pull troops back England. Meanwhile, Parliament had entered into a (fragile) alliance with the Scots by promising a variety of reforms and rights for the Presbyterian Scottish church. The stage was set for a much wider conflict.
The battle of Marston Moor on July 2nd 1644 was the first major collision of these new forces. Responding to their new alliance – the “Solemn League and Covenant” – the Scottish General Alexander Leslie, Earl of Leven, set out with a large army to invade the north of England. After some scuffles, these “Conveanters” eventually laid siege to the Royalist stronghold of York in March 1644. York were defended by the Marquess of Newcastle, a staunch royalist who had defended England’s northern regions with great skill. By June 1644, the Scots were joined by two Parliamentarian contingents: a Northern force under Lord Fernando Fairfax and the regiments of the Eastern Association under the Earl of Manchester. Together, they formed the Army of the Alliance under Leven’s overall command.
In return, King Charles I dispatched his leading general, Prince Rupert of the Rhine, to relief the siege though his actual orders were ambiguous enough to cause debate even today. A second mounted royalist column, led by Lord Goring, joined Prince Rupert on the march. Prince Rupert outwitted the Parliamentarian forces in the open moves and, after relieving York through nothing but brilliant manoeuvre, all six contingents eventually converged on Marston Moor. Here they collided in the evening of July 2nd 1644 in a battle that would seal the Royalist cause in the north of England.
Capturing the Battlefield
The order of battle for Marston Moor is relatively well established. My main source are books “Marston Moor 1644 The Campaign and the Battle” by Peter Young and “Osprey Campaign 119 – Marston Moor 1644” by John Tincey, with some additional info from more recent works where I could find it. All in, we have around 11,000 Royalist Foot with 6,000 Horse opposing the 17,000 Foot and 8,000 Horse of the allied force.
Less certain is the placement of units on the battlefield. The royalist positions are established quite accurately by the “de Gomme” map from Prince Rupert’s chief engineer and the cavalry wings of the Alliance are pretty firm as well. It’s the position of the infantry in the Parliamentarian centre that is uncertain. Specifically, there is debate on the placement of Lord Fairfax infantry which is either on the right of the line or in the rear – also resulting in uncertainty on the Scots infantry disposition which were intermingled with Fairfax.
Peter Young’s book use the “Lumsden Key” – a damaged sketch by Lieutenant-General Lumsden who commanded part of the Scottish centre – to place Fairfax at the rear behind Scots regiments. More recent publications have pointed to contemporary records placing Fairfax’ Foot at the right of the front line, next to Fairfax’ cavalry commanded by his son Sir Thomas Fairfax:
“The Right Wing of Horse was intrusted to Sir Thomas Fairfax, a man of known Valour and Resolution, it did consist of his whole Cavalry, and three Regiments of the Scottish Horse, commanded by the Earle of Dalhousie, Earle of Eglinton, and Lord Balgony: Next unto them was drawn up the Right Wing of the Foot, consisting of the Lord Fairfax his Foot, and two Brigades of the Scottish Foot for a Reserve. In the main Battell was the Regiments of the Earle of Lindsey, Lord Maitland, Earle of Cassils, and Kelheads, and two Brigades of the Earle of Manchesters: In the Reserve was the Earle of Balcleugh his Regiment, the Earle of Lowdons, Earle of Dumfermlings, Lord Coupers, Generall Hammiltouns Generall of the Artillery, Edinburgh Regiment, and a Brigade of Manchesters.” This report was signed by five men including the three main generals. Penned 5 July, published 12 July 1644.
I have settled on this interpretation, placing Fairfax on the right first line supported by two Scottish brigades. The map below reflects this arrangement. The map itself is a custom derivative of one found in an old book scan of unknown origin (I found it on a stock image site). It was merged into a single map from two pages, coloured in and generally edited to fit the style of the other maps in my “historical room”. This map, termed generically “my map” in the following, will be my lodestone for this collection with appropriate augmentation from literature and de Gomme’s battle plan for the Royalists for details. The map shows my chosen placement of troops but some of the names of commanders differ from Young’s record. For example, Rupert’s central infantry is shown as commanded by Porter whereas other records show either Lord Eythin – Lieutenant-General to the Marquess of Newcastle – or Sergeant-Major General Tillier in leader of the front line. That said, Commissary General George Porter was a senior officer in Rupert’s command so who is to say that he wasn’t in there somewhere. With ~40,000 men in a swirling late evening melee, things probably got quite messy…

Collection Design
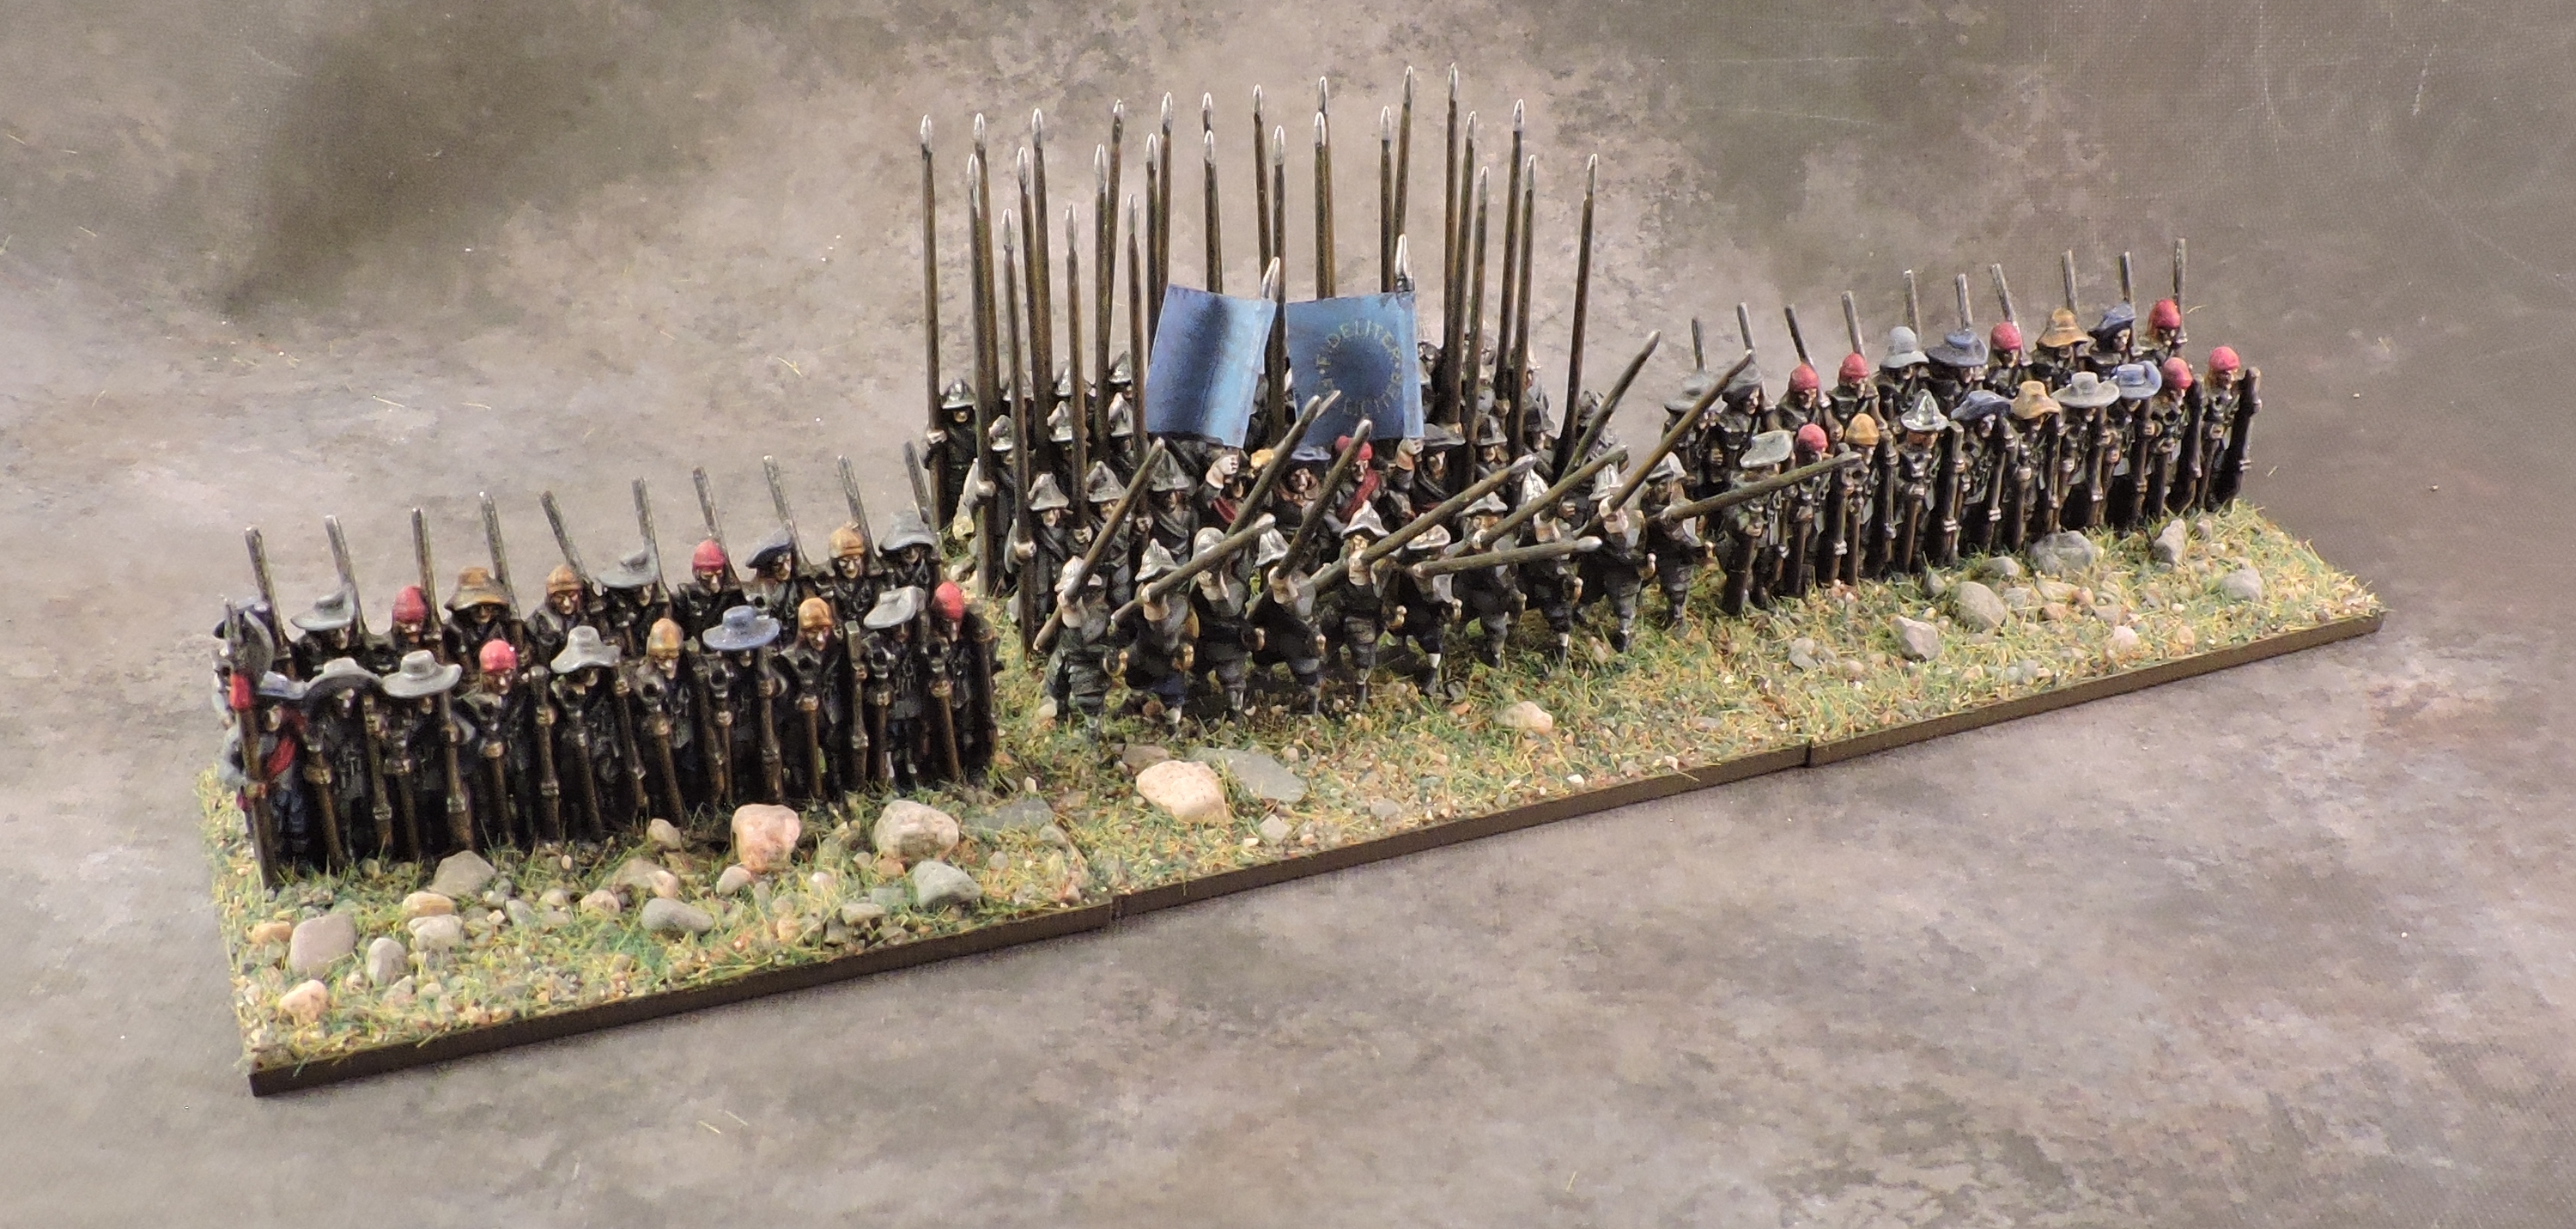
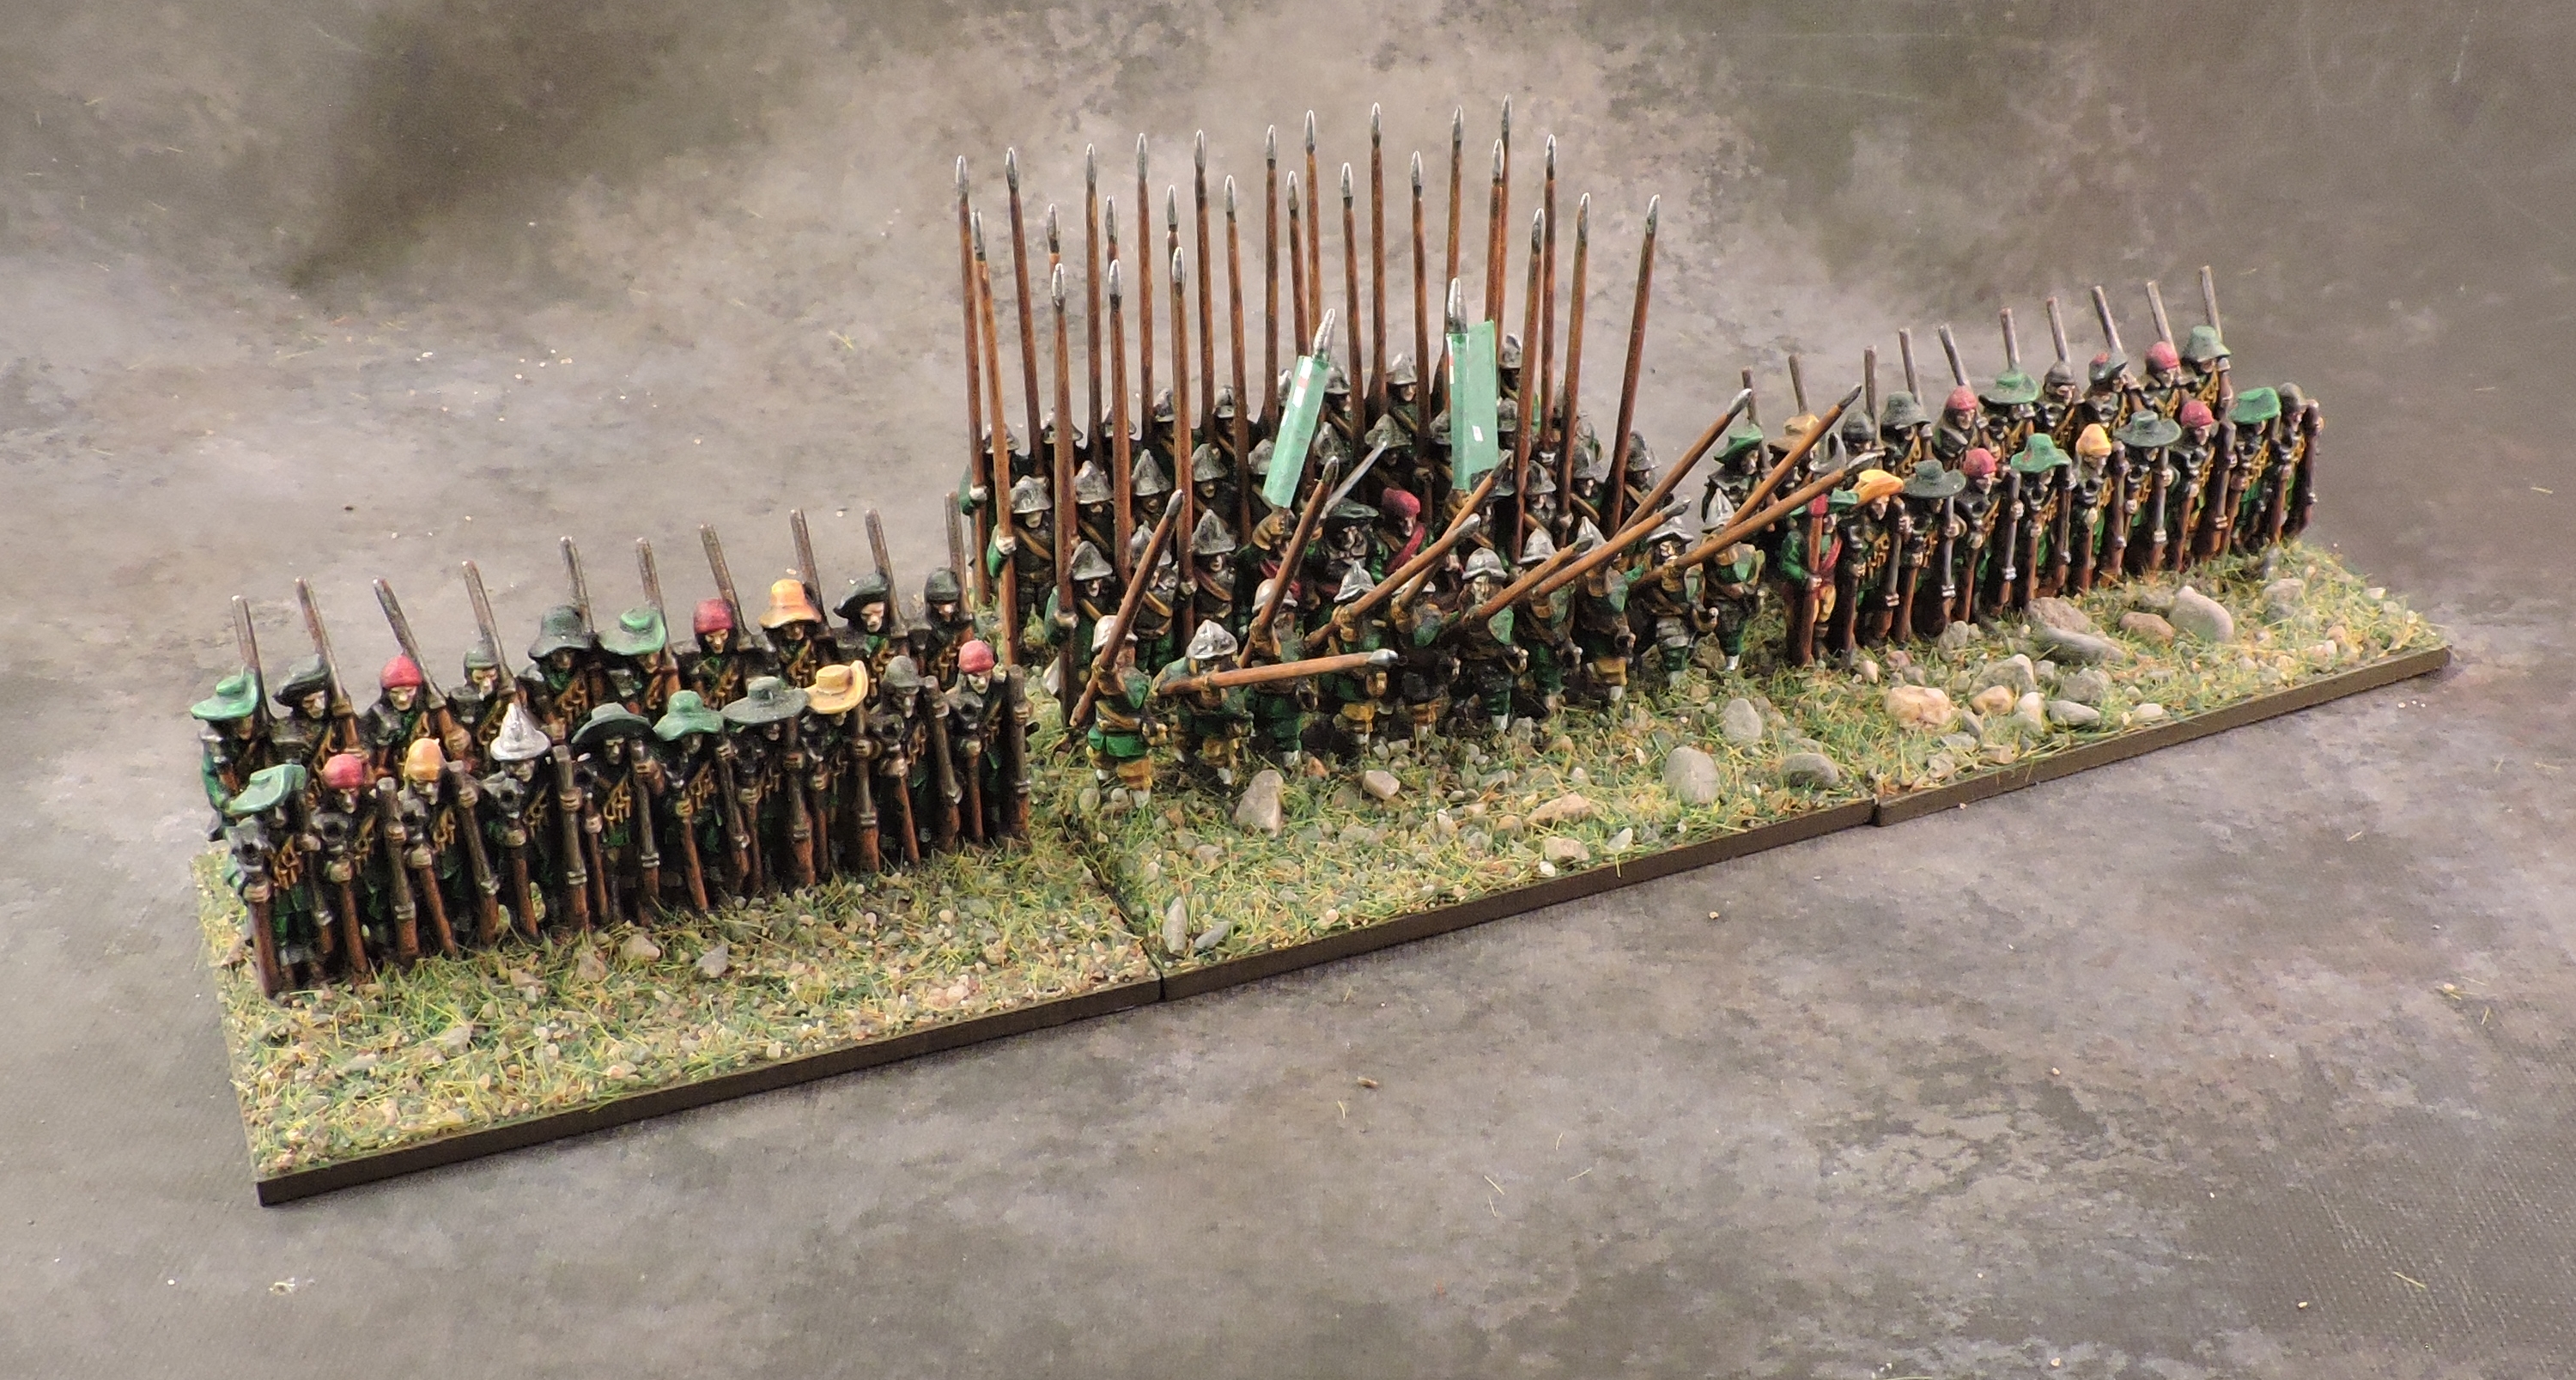
On to the actual wargaming! My collection uses 13.5mm Epic scale figures from Warlord Games with a few Peter Pig and Steelfist miniatures thrown in for variety. They are painted with GW Contrast Paints over white (technically, over grey primer washed in black and drybrushed in white to get some basic depth of shadow). For miniatures at this scale, less is more so I used quite consistent uniforms. In reality, troops of the era would have worn a wide mix of clothing but too much colour variety tends to just blur into brown mush. Instead, I used one primary uniform colour, a few accent colours and then neutral browns/beige for the rest.
For basing, I deviated from the standard base size of Warlord Games to give me room to figure the formations. Units are mounted on 2mm thick MDF bases with a standard frontage of 60mm as recommended by Warlord Games. Their depth varies with 40mm being the standard for cavalry and most infantry except as noted below. I am aiming for about 100 men represented by a single strip of figures (so ~200 men on a standard 60x40mm base of two strips). To cover the wider range of unit sizes, I am using this scheme for formations:
- Tiny Regiment of Foot: A single 60x40mm base with a mix of troops. Represents around 200 troops.
- Small Regiment of Foot: Two small musketeer bases (30x40mm) flanking a 60x40mm pike base with two strips. Represents a small regiment of ~400 troops in 5 or fewer companies.
- Standard Regiment of Foot: Two musketeer bases (60x40mm, 2 strips) flanking a 60x60mm pike base with four strips. Represents a typical regiment of ~800 troops in 8-10 companies.
- Large Regiment of Foot: Two musketeer bases (60x60mm, 3 strips) flanking a 60x80mm pike base with six strips. The musketeer bases have an extra strip of figures which adds visual scale without changing formation size on the table. Represents a double-sized regiment of ~1,200 troops in 15+ companies such as Prince Rupert’s regiment.
- Small Regiment of Horse: One base (60x40mm) representing a small single division of less than ~200 men in 5 troops.
- Standard Regiment of Horse: Two bases (60x40mm) representing a typical regiment of ~400 men in 7-10 troops.
- Large Regiment of Horse: Four bases (60x40mm) representing an oversized regiment of ~800 men in 15+ troops such as Cromwell’s Ironsides.
- Artillery: One to four bases (30x40mm) representing approximately 3 guns per base.
Overall, I am aiming for each base to representing about 200 men. Since my basing scheme is unconventional, I am assessing infantry based on the number of figure strips and then calling each two stripe a notional base.
Royalists Horse: 6,000 men represented by 30 bases (200 men per base).
Royalist Foot: 10,750 men represented by 110 strips (197 men per base).
Parliamentarian Horse: 5,500 men represented by 28 bases (196 men per base).
Parliamentarian Foot: 6,000 men represented by 60 strips (200 men per base).
Covenanter Horse: 2,000 men represented by 10 bases (200 men per base).
Covenanter Foot: ~9,500 men represented by 96 strips (192 men per base), ignoring the ~1,500 Scots in the real line.
As with all my historical collections, I am using round bases of different size and figure count to indicate command seniority. The armies of the English Civil War had a somewhat fluid command structure with titles derived from roles rather than attached to a person. Lord General commanded armies while Lieutenant-Generals command the major concentrations of force (e.g. wings and centre). Next in the hierarchy where Sergeant-Major Generals who were often professional field commanders unlike their noble masters. Each army usually also has a Commissary General – precursor of the Quartermaster General in the Napoleonic era and today’s “G4” in the General Staff System – who might step in to command troops in the field. Beyond this higher level command, the tactical element are brigades of typically two regiments – sometimes one or three – commanded by the senior Colonel of the brigade. For my basing, I am representing this as Sergeant-Major General/Commissary-Generals as single figures on a 30mm round base, Lieutenant-Generals as two figures on a 40mm round base, and Generals as three figures on a 50mm round base.
ROYALIST ARMY
General Prince Rupert of the Rhine was in overall command of the Royalist army and contributed the largest contingent. His master, King Charles I, had dispatched him with an ambiguous order to ride North and relief the siege of York. While absent from the battle, I made a base for King Charles I to give me flexibility for other battles on the tabletop.
General Prince Rupert of the Rhine (left) and King Charles I (right).
Right Wing of Horse
Lieutenant-General of Horse Lord Byron commanded Prince Rupert’s Horse which made up the right wing of the Royalist army. Sergeant-Major General of Horse Sir John Urry and Lord Molyneux served as Lord Byron’s subordinates for the first and second line respectively. Lord Byron had approximately 2,700 Horse at his command with 500 musketeers dispersed among them in small groups. By some accounts there were also around 500 Dragoons on this wing.
The first line was composed of ~1,400 horse in four regiments with a fifth, Tuke’s, strung out to refuse the far flank (represented as individual figures on 20mm bases). Lieutenant-General of Horse Lord Byron (centre),
Lieutenant-General of the Horse John Lord Byron (centre) with Sergeant-Major General of the Horse Sir John Urry (left) and Lord Molyneux (right).
Lord Byron’s Regiment of Horse (c500, Standard) and Sir John Urry’s Regiment of Horse (c400, Standard)
Col Marcus Trevor’s Regiment of Horse (c300, Standard) and Sir William Vaughan’s Regiment of Horse (c200, Small).
Col. Samuel Tuke’s Regiment of Northern Horse in skirmish line (200 men).
Col. Henry Washington’s Regiment of Dragoons (Standard, 500 men)
The second or reserve line of ~1,300 men had another four regiments including Prince Rupert’s own Regiment of Horse. Between the two lines, this comes to 14 bases including the skirmishing regiment representing ~2,700 Horse (~193 men per base).
Prince Rupert’s Regiment of Horse (c500, Standard) and Sir Thomas Tyldesley’s Regiment of Horse (c250, Small)
Lord Molyneux’s Regiment of Horse (c350, Standard), , and Thomas Leveson’s Regiment of Horse (c200, Small).
Centre
Lieutenant-General of the the Foot Lord Eythin, the Marquess of Newcastle’s professional field commander, was likely in overall command of the infantry in the centre. He had around 10,750 men to oppose the parliamentarian force. Supporting him were Sergeant-Major Generals of the Foot Henry Tillier and Sir Francis Mackworth, commanding the infantry contingent of Rupert’s and Newcastle’s armies respectively. Commissary General George Porter was also in the field somewhere, likely with the reserve contingent of horse. Many of the Royalist regiments were very small so Prince Rupert formed the infantry into 22 “bodies” rather than classical regimental groups.
General Marquess of Newcastle (centre), Lieutenant-General of Foot James King, 1st Lord Eythin (left), Sergeant-Major General of Foot Sir Francis Mackworth (right) – the Newcastle commanders.
Commissary General George Porter (left) and Sergeant-Major General of Foot Henry Tillier (right) from Rupert’s force.
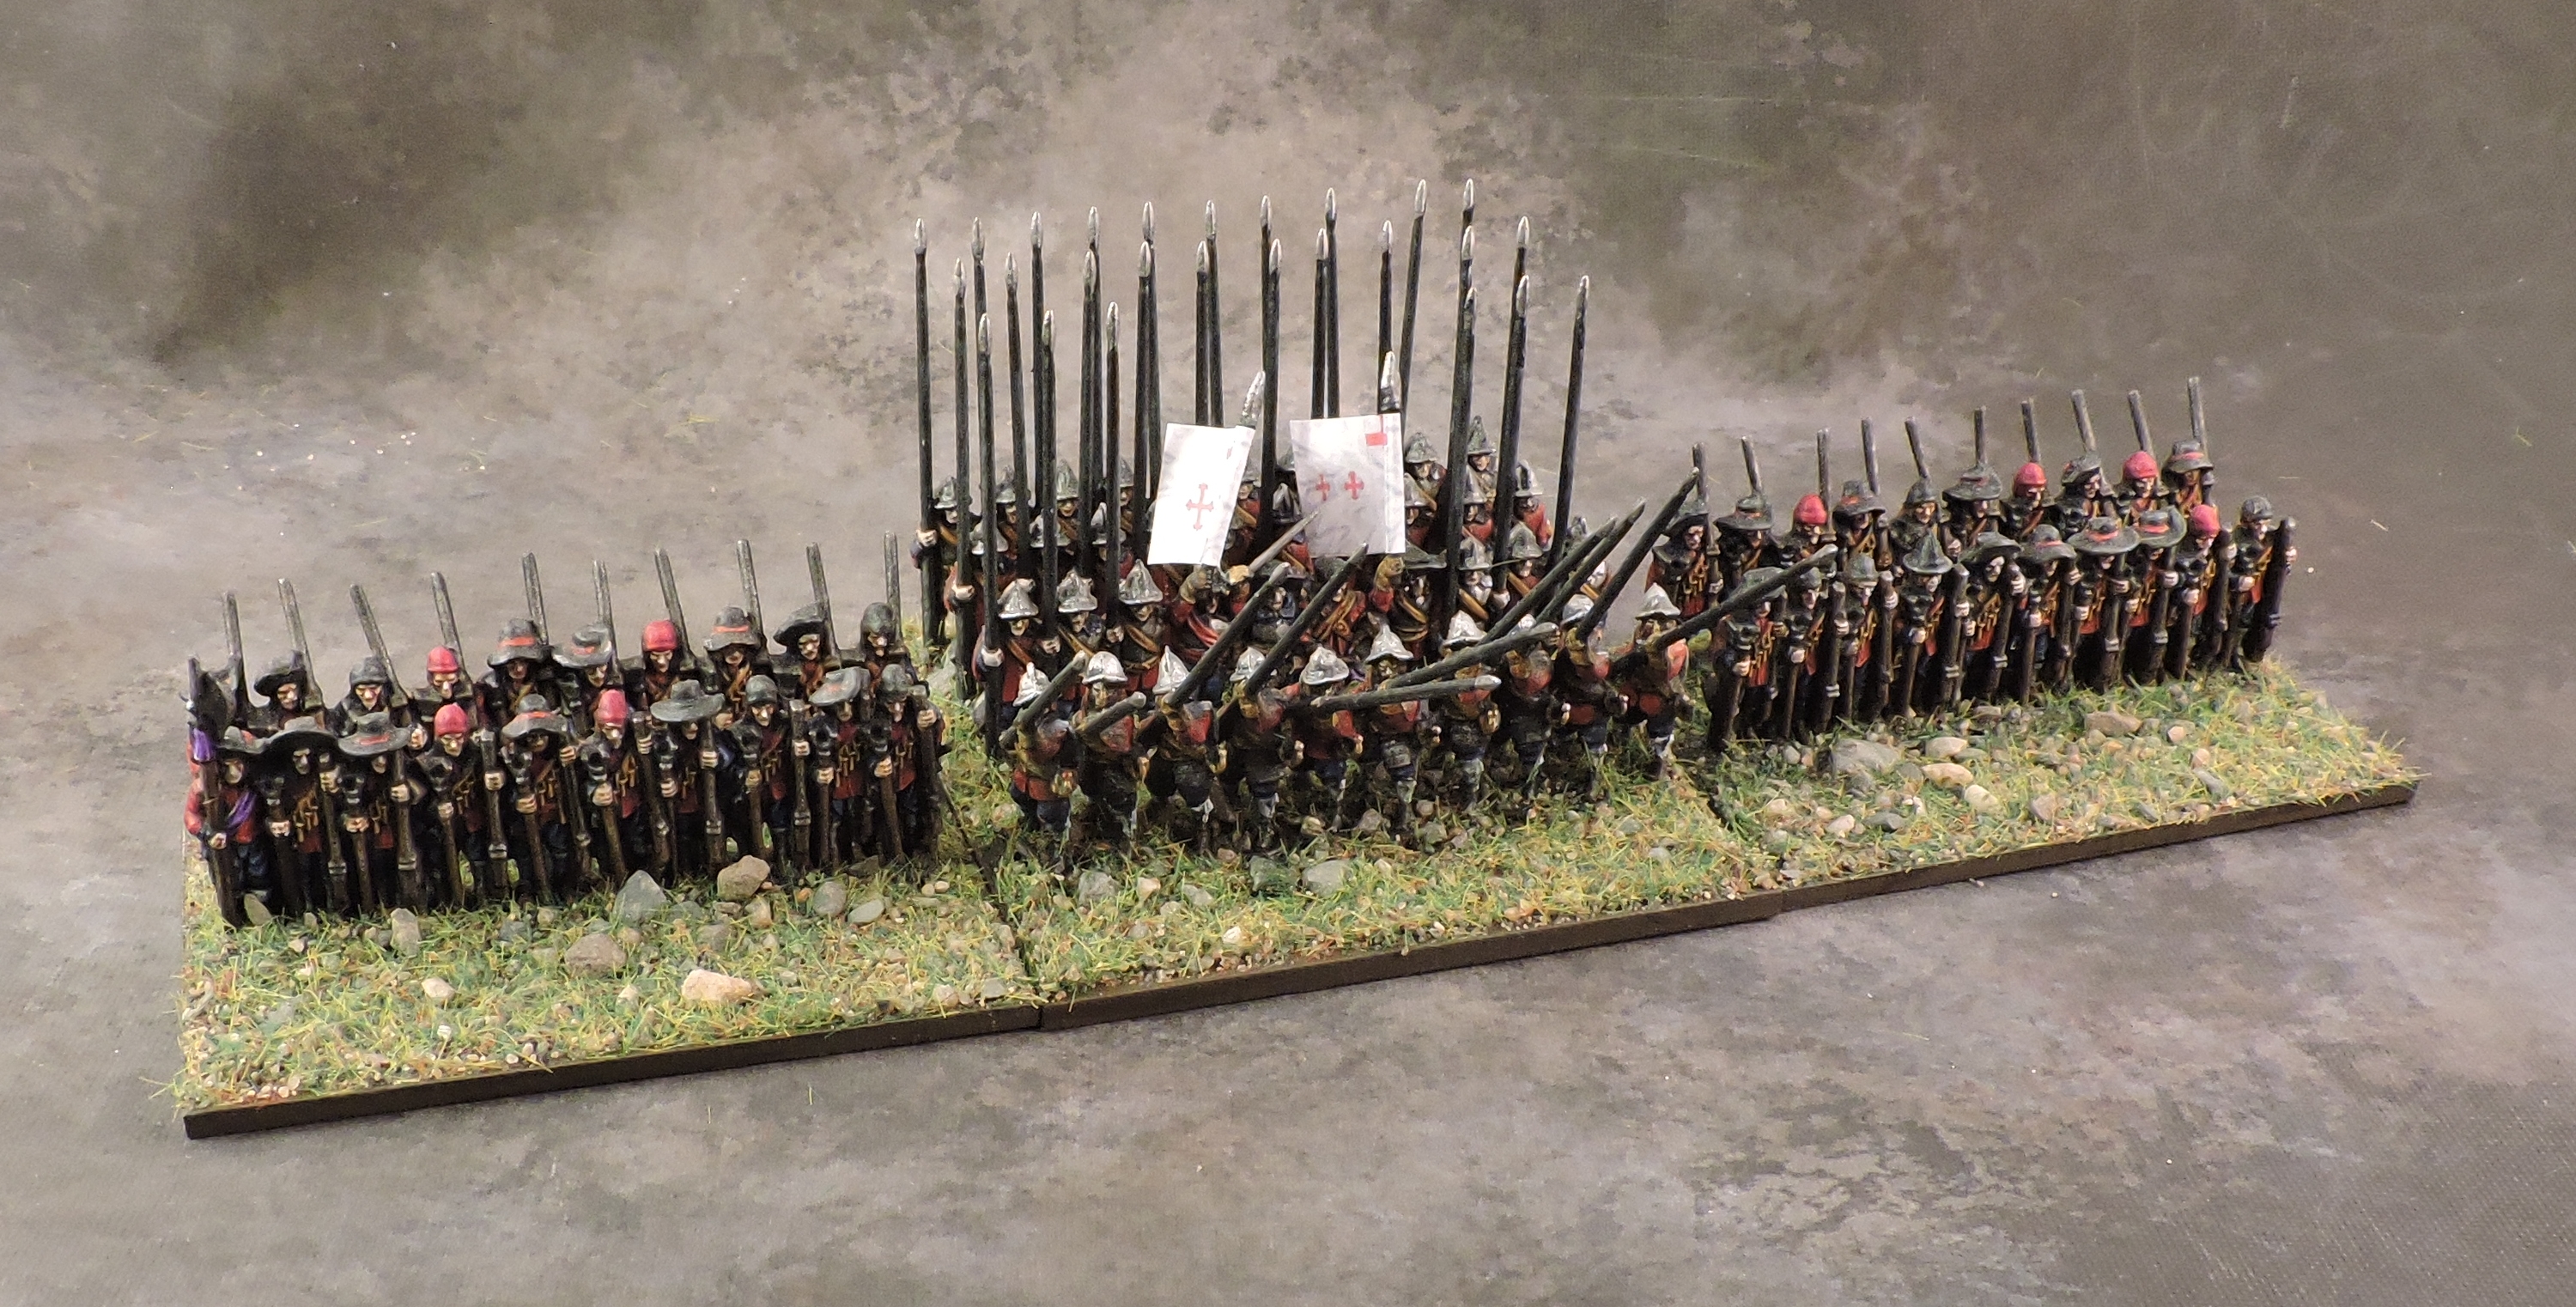
The infantry was deployed in several contingents. On the forward right were 1,500 men in a ‘Forlorn Hope’ composed of Prince Rupert’s “Bluecoats” Regiment of Foot and Lord Byron’s Regiment of Foot. Lord Byron’s colonel, Thomas Napier was in charge and his likely order was to anchor the ditch that traversed the battlefield. Small units of musketeers where stretched out across the rest of the ditch. I have modelled this as a large regiment for Rupert’s – described as “2 bodies” in Young’s book – and a large three-base formation of formed musketeers to represent Byron’s smaller regiment mixed with the musketeers in the ditch.

Lord Byron’s Regiment of Foot (c500, formed musketeers). I couldn’t find any information of Byron’s uniforms or composition, so I arbitrarily chose yellow. I also made this an all musketeer force both to reflect the screen of musketeers in the ditch and to add variety to the collection.
Behind these skirmishers was the main line of approximately 4,000 men from Rupert’s own army formed into eight “bodies”. On my map this is represented by four large blocks – two bodies per block – but de Gomme’s map shows a more detailed breakdown: Three formations of two bodies each which I have modelled as large regiments (Tyldesley’s, Broughton’s and Tillier’s regiments). The final two bodies operated independently under Warren’s and Ernely/Gibson’s command. These had sustained significant losses during the disaster at Nantwich on January 25th 1644 and Ernely/Gibson’s commands appeared to have been particularly rag-tag configuration. I this turned Warren’s regiment into a standard formation and Ernely/Gibson’s into a special base of loose figures on a standard base set. This matches about 4,000 men in my scheme plus some for the combined mob of Ernely/Gibson.


Sir Michael Erneley’s and Richard Gibson’s combined Regiment of Foot (c500, Standard – Mixed). This is a combined fighting group so I modelled them as a lose configuration on the bases of a standard regiment.
The second line was split between the remaining units of Rupert’s army and Marquess of Newcastle’s “Whitecoats”. On Rupert’s side, we have two bodies under Henry Cheator’s command (Large), a single body under Edward Chisenall (Standard) and an unnamed small body which I suspect was the very tiny contingent of 220 Derbyshire Foot that Lord Goring picked up during the march.

Derbyshire Foot (c220, Tiny).
Finally we have the regiments of the Earl of Newcastle. These white-clad troops, affectionately called “Newcastle’s Lambs” or Whitecoats, had been the garrison of York under siege and suffered significant losses. Rather than fighting as regiments, they were formed into seven “bodies” of vague size. That uncertainty gave me the excuse to avoid too much painting repetition by representing them as two large regiments – one standing in for the four body front line and one for the three in the rear line.
All in, the Royalist Foot comes to 106 strips representing 10,750 troops (101 troops per strip).
Artillery
The Royalist army was supported by a relatively small artillery contingent of 14-15 guns of mixed calibre. I represented these are with 5 stands of a variety of figure types.
Reserve of Horse
Behind the infantry, Prince Rupert placed a small contingent of about 1,000 horse as a reserve under his direct command. This is composed of his Lifeguard and and two regiments of Northern Horse. I am using Cuirassier figures for the Lifeguard which is entirely incorrect but makes them just a bit more visually distinct. I also made small skirmish bases representing Commissary-General George Porter’s Troop of 60 men and Sir Thomas Metham’s 40 riders.
Prince Rupert’s Lifeguard (Small, 140 men).
Sir William Blakiston’s Brigade of Northern Horse (c500, Standard).
Sir Edward Widdrington’s Brigade of Northern Horse (c400, Standard).
Left Wing of Horse
Left wing was composed mostly of Northern Horse brought to the battle by General George Lord Goring. He is supported by his Lieutenant-General Sir Charles Lucas and by Sir Marmaduke Langdale. His ~2,300 Northern Horse are arrayed in two lines – commanded by Langdale and Lucas respectively – with about 500 musketeers dispersed between the regiments. Two of these regiments were very small groups picked up from Derbyshire during the march. Another small regiment, Carnaby’s was stretched out to refuse the flank similar to Tuke’s on the right. As with Tuke, I have represented this as a few individual figures on 20mm bases. Overall this results in 11 bases including the skirmish regiment representing 2,300 men (~209 men per base).
Sir Charles Lucas’ Brigade of Northern Horse (c1,000, Large).
Sir Richard Dacre’s Brigade of Northern Horse (c700, Large).
John Frescheville’s Regiment of Horse (c240, Small) and Rowland Eyre’s Regiment of Horse (c160, Small) from Derbyshire.
Col. Francis Carnaby’s Regiment of Northern Horse in skirmish line (c200).
ALLIED ARMY
The allied army at Marston Moor was a composite of three contingents: the Scots regiments of the Coventanters, the Parliamentary regiments of the Eastern Association, and Lord Fairfax’ northern troops. Overall command rested with General Alexander Leslie, Earl of Leven, who was a seasoned leader driving 17,000 Foot, 8,000 Horse and 1,000 Dragoons into battle. Some of his Foot would have been in the rear, so around 12,000 seems a better estimate for the actual engagement.
General Alexander Leslie, Earl of Leven
Right Wing of Horse
Lord General Fernando Lord Fairfax was in overall command of the allied right wing. The first line of his horse was led by his son, Lieutenant-General of the Horse Sir Thomas Fairfax. He had around 3,000 horse from his own contingent in two lines and 1,000 supporting Scottish horse in the rear. Sergeant-Major General of the Horse John Lambert led the second line and the Earl of Eglington commanded the Scots. A regiment of 500 dragoons was on the far flank and 600 musketeers were interspersed with the cavalry.
Lord General Fernando Lord Fairfax (centre) with Lieutenant-General of the Horse Sir Thomas Fairfax (left). Sergeant-Major General of the Horse John Lambert (right) and the Earl of Eglington (far right).
Thomas Morgan’s Regiment of Dragoons (Standard, 500 men).
The first line is composed of four standard regiments of horse with two bases each.
Sir Thomas Fairfax’ Regiment of Horse (Standard).
Lord Fairfax’ Regiment of Horse (Standard).
Sir Hugh Bethell’s Regiment of Horse (Standard).
Charles Fairfax’ Regiment of Horse (Standard)
The second line, under Lambert, is composed of five regiments of horse. Since the lines were of comparable size and only show up as four blocks on the map, I have somewhat arbitrarily reduced two of these regiments to small size.
John Lambert’s Regiment of Horse (Standard).
Lionel Copley’s Regiment of Horse (Standard)
Francis Boynton’s Regiment of Horse (Standard).
Sir Thomas Norcliff’s Regiment of Horse (Small) and George Dodding’s Regiment of Horse (Small).
The third line of Scots Lancers was formed into three standard regiments. All in this gives me 22 bases representing around 4,000 troops (181 men per base).
Earl of Leven’s Regiment of Scots Horse (c350, Standard).
Earl of Dalhousie’s Regiment of Scots Horse (c350, Standard)
Earl of Eglinton’s Regiment of Scots Horse (c350, Standard).
Center
The infantry of the Alliance fought in three contingents with all sources concurring that the troops of the Eastern Association held the left position. The disposition of Lord Fairfax’ infantry and the Scots is less clear. Fairfax, augmented by a several Scottish regiments, either fought on the right as shown on my map, or in the centre – swapping with the main Scots formation under General-Lieutenant of Foot William Baillie. It is also not clear which Scottish regiments were detached to Fairfax. As always, my map overwrites all – even history itself potentially!
Centre – Eastern Association
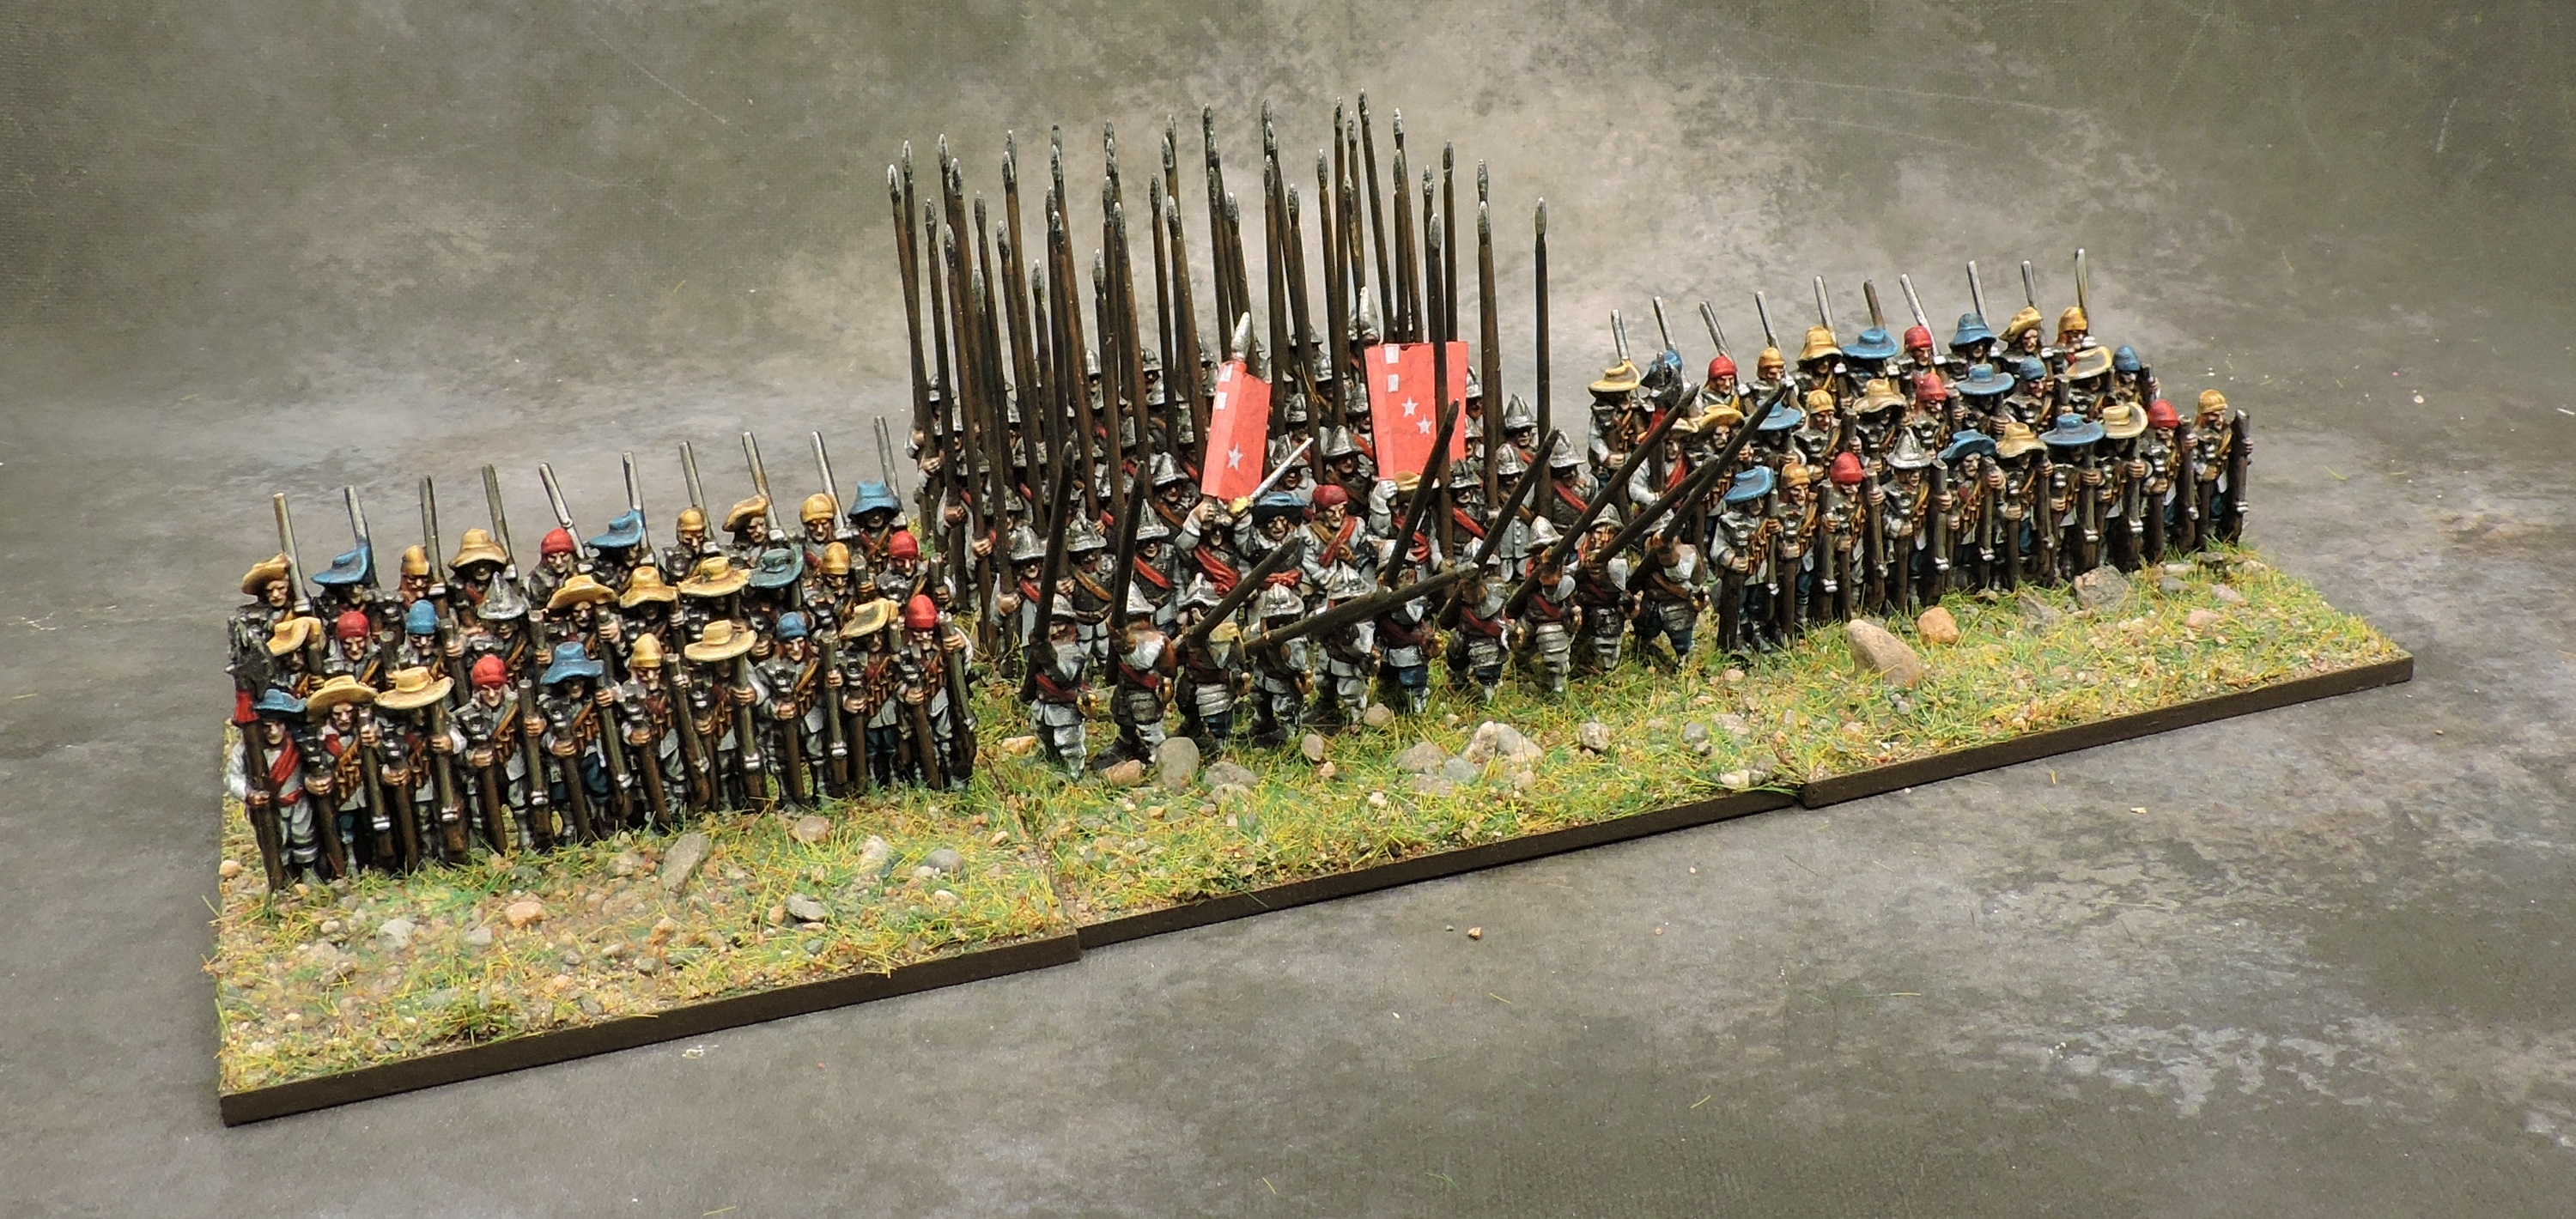
The Eastern Association contingent was led by the Earl of Manchester, though actual command on the field was held by his professional advisor, the firebrand Sergeant-Major General of Foot Lawrence Crawford. Manchester had 4,000 troops arranged in three brigades. Composition of the five regiments across the three brigades is less clear, especially since this contingent would have suffered significant losses during the storming of York a few days before the battle. We know that the Earl of Manchester’s Regiment of Foot was double-strength with 18 companies (Large) and that three of the regiments were brigaded together due to being severely under-strength (Montagu’s, Pickering’s, Russell’s). By elimination, that puts Crawford’s and Hobart’s regiments into the third brigade as two standard regiments. Those brigades where either all placed in the first line (as in my magical map) or one of them was held back in the rear line under possibly the direct command of the Earl of Manchester.
Sergeant-Major General of the Foot Lawrence Crawford (left), conferring with his master the Earl of Manchester (right)
Earl of Manchester’s Regiment of Foot, Lt. Col. Clifton commanding, with 18 companies (c1,500, Large). Literature has then in red but with either blue or green lining so I went with a bit of both for accents ((National Archive SP28/26, National Archive SP28/26).
Sergeant-Major General Crawford’s Regiment of Foot, Lt. Col. Hamilton commanding, with 8 companies (c850, Standard). Wearing blue coats and refered to as “Manchester’s blewcoats” in the description of the battle (Thomason Tracts E54/20, E54/7).
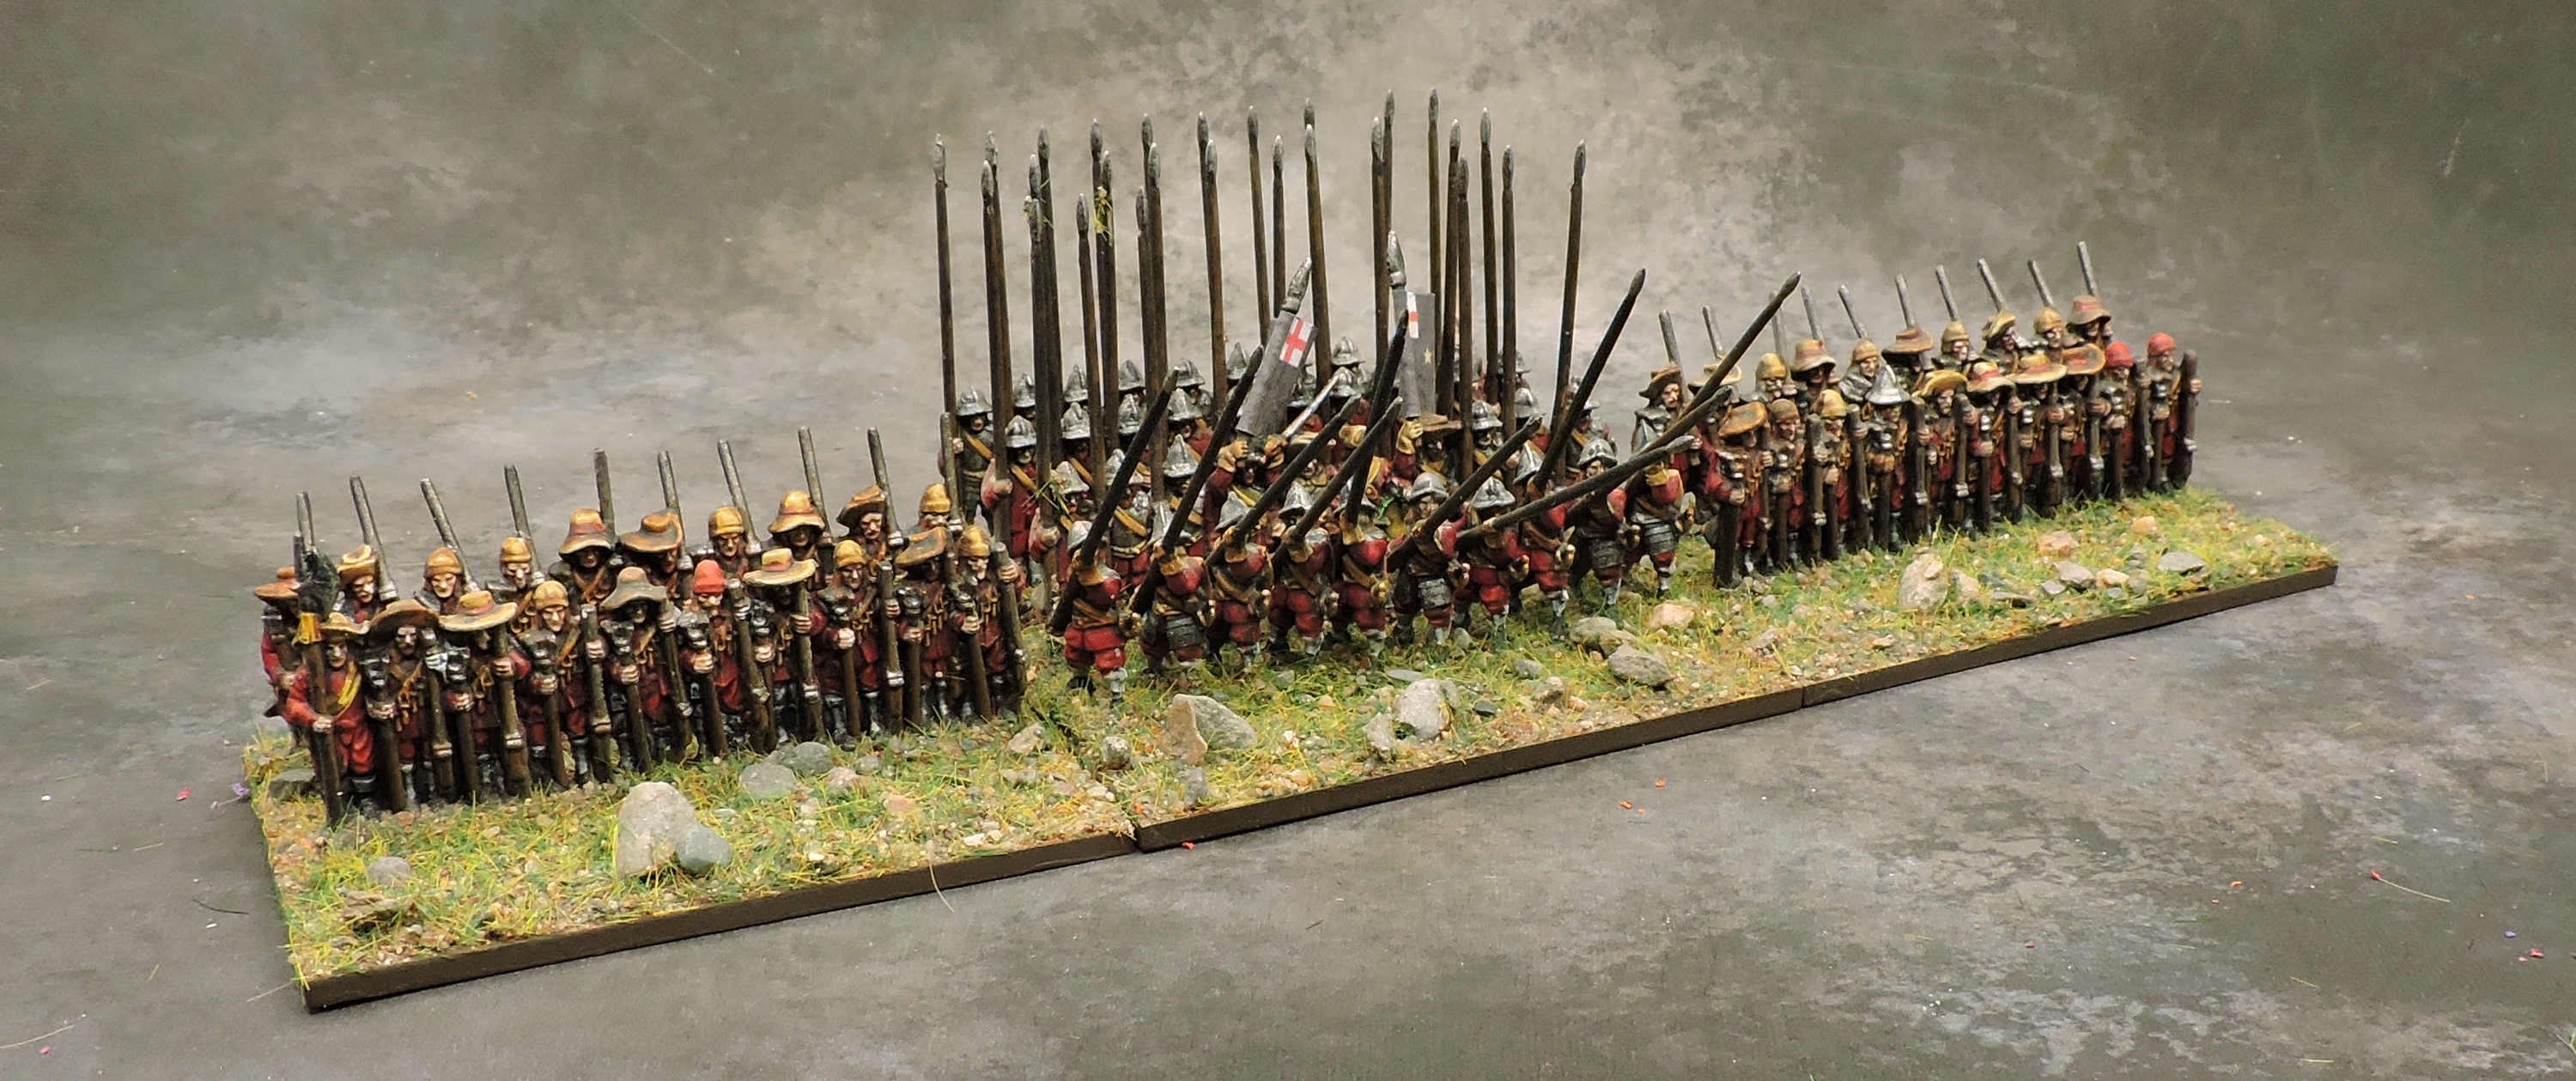
Edward Montagu’s Regiment of Foot (Small). Red coats lined white which I used for accents (National Archive SP24).
John Pickering’s Regiment of Foot (Small). Red coats lined blue for accents (National Archive SP28/26, SP28/128)
Francis Russell’s Regiment of Foot (Small). Red but with some variation to separate them from Hobart’s regiment (National Archive SP28/24, SP28/299)
Centre – Covenanters
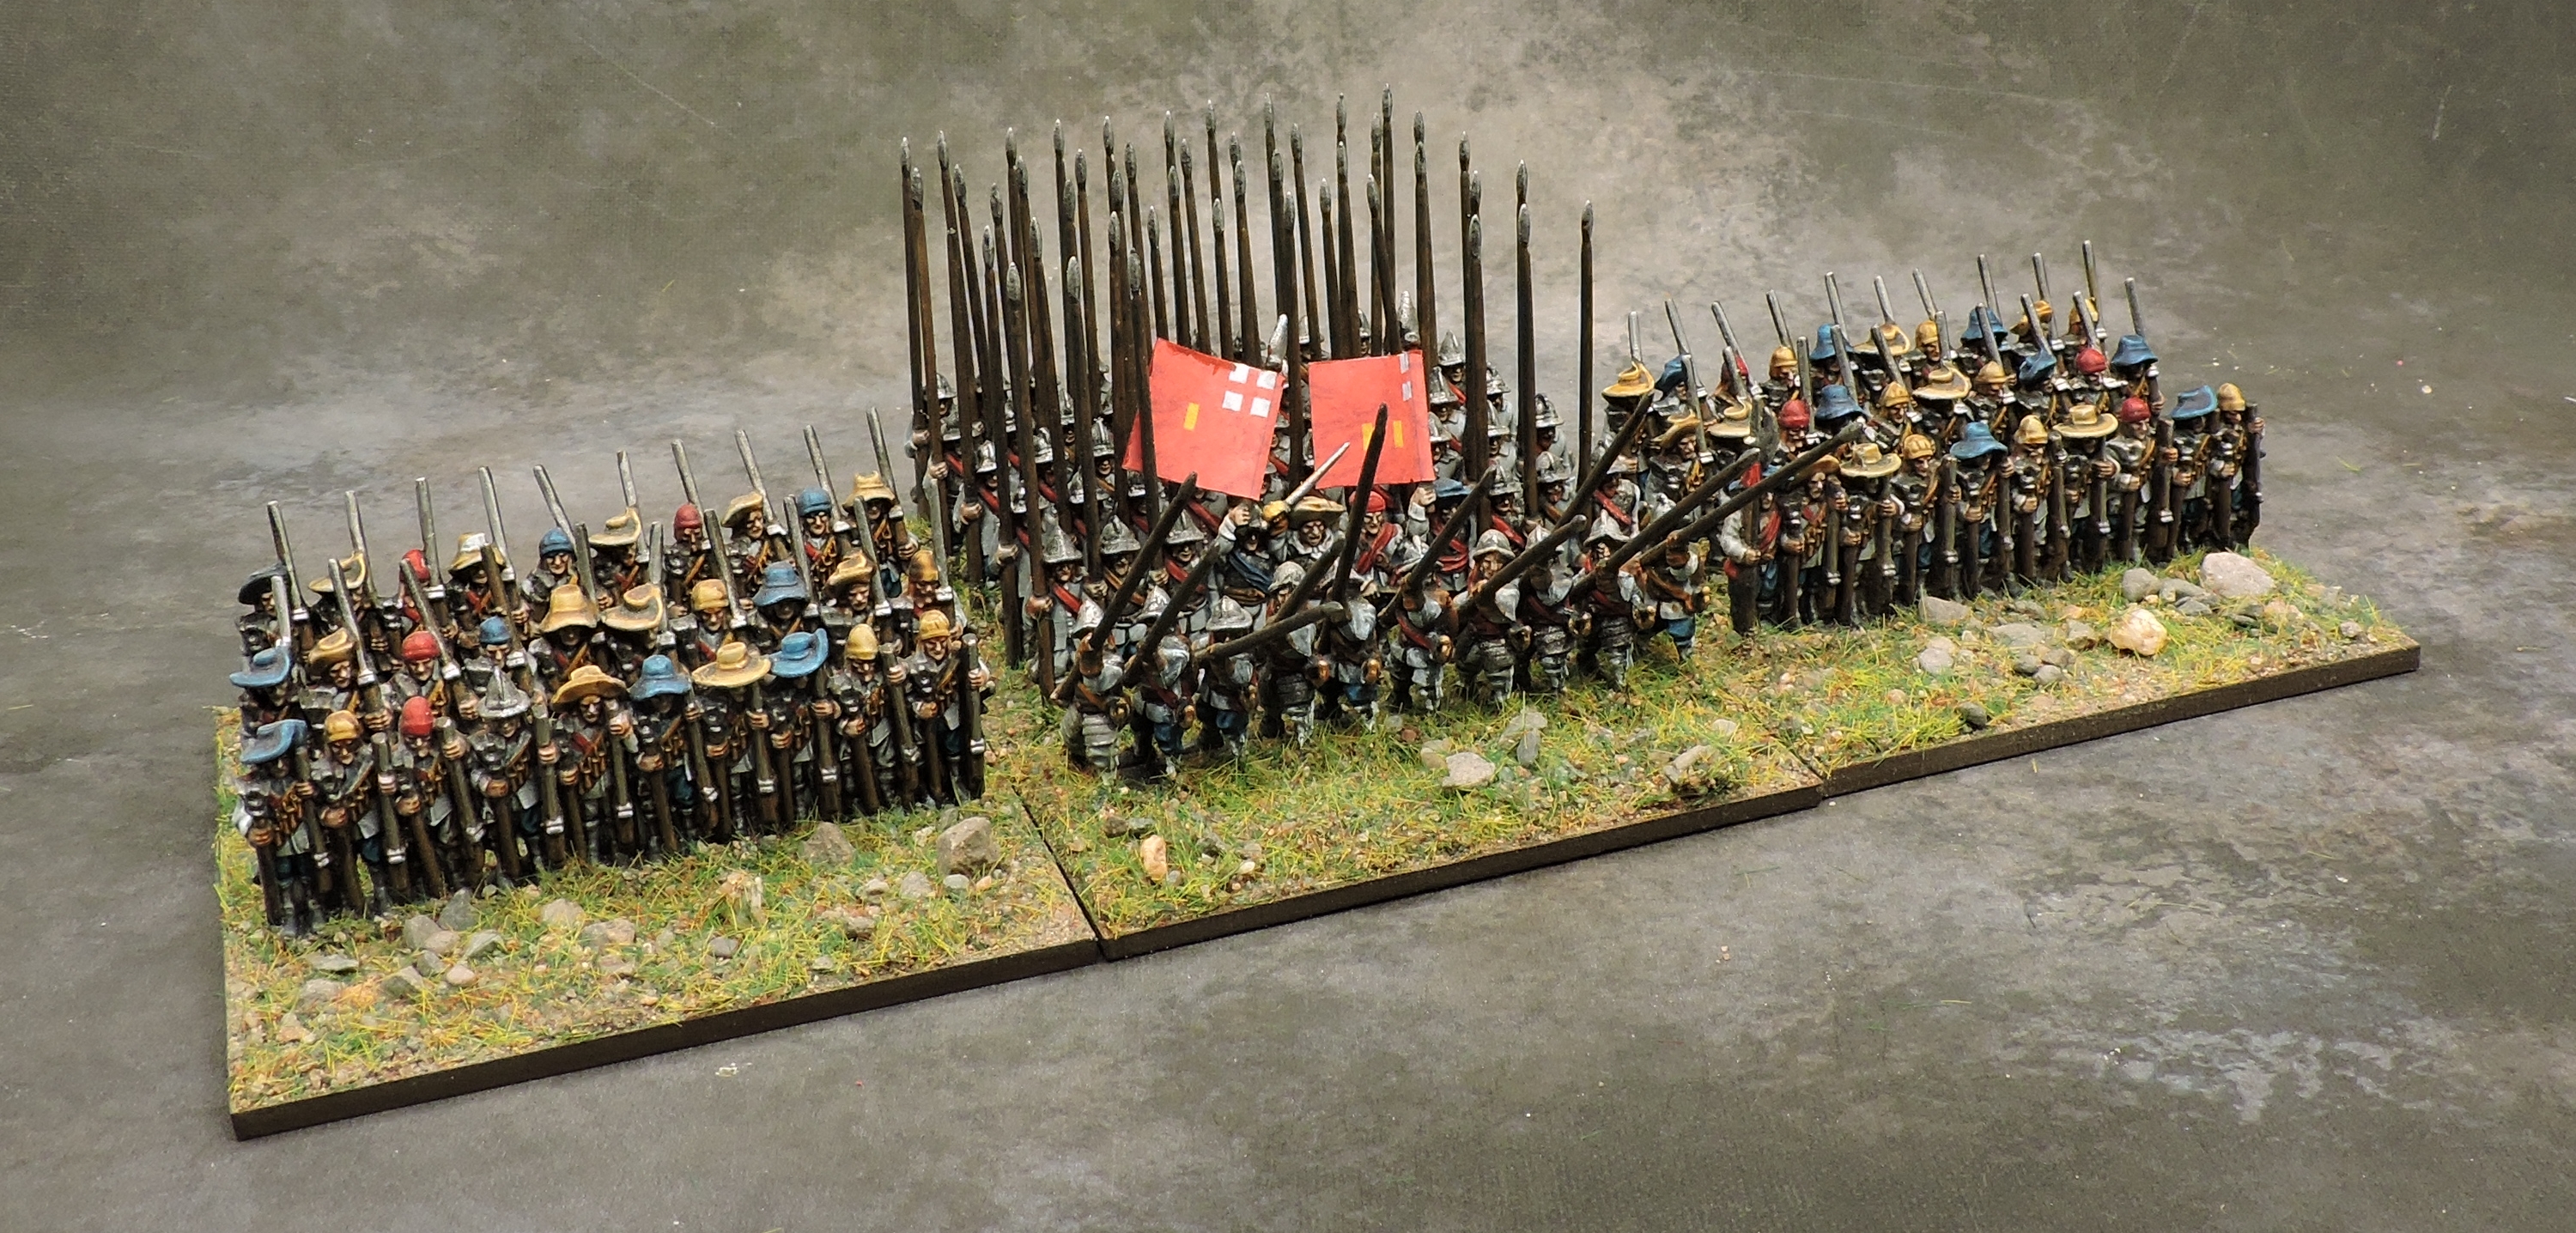
The core of the 11,000 Scottish infantry was commanded by Lieutenant-General of Foot William Baillie with Sergeant Major General of Foot Sir James Lumsden as his second in command. Their brigades were formed of two regiments each. Most of the Scots fought in two lines, though there is mention of a third line of smaller regiments in some sources. Since much of the Scottish force broke during the initial class, I am going to designate about 1,500 troops to that absent/broken third line. A further 2,500 troops were detached to Lord Fairfax, leaving around 7,000 troops for the two fighting lines.
The four regiments in the first line are described as larger and better equipped, so I made them into large regiments representing around 4,800 troops in my basing scale. This is inconsistent with historical records – which has all regiments at a nominal strength of 750 men – but makes for a more interesting collection.
Lieutenant-General of the Foot William Baillie (left) and Sergeant Major General of the Foot Sir James Lumsden (right).
The Earl of Crawford-Lindsay’s Fife Regiment of Foot.
The Midlothian Regiment of Foot, Viscount Maitland commanding.
The Kyle and Carrick Regiment of Foot, the Earl of Cassillis commanding.
The Nithsdale and Annandale Regiment of Foot. William Douglas of Kilhead commanding.
The second line, commanded by Lumsden, has three regiments shown on my map. These were smaller so I am using standard size, representing around 2,400 troops in my basing scale.
The Loudon-Glasgow Regiment of Foot, also known as The Chancellor’s Foot, Earl of Loudon commanding.
The Earl of Dunfermline’s Fife Regiment of Foot, the Earl of Dunfermline commanding.
The Strathearn Regiment of Foot, Lord Coupar commanding.
My map shows only two regiments detached to support Lord Fairfax which doesn’t match up with the ~2,500 troop count described in various sources. I suspect that there is some confusion regarding the Clydesdale Regiment of Foot commanded by Sir Alexander Hamilton. It isn’t shown on my map but definitely fought in the battle. Hamilton himself commanded the artillery so the regiment likely fought next to Colonel James Rae’s Edinburgh Regiment of Foot with which it was brigaded. The absence of Hamilton and this brigade arrangement might have left them off the map. This is supported by the historical report quoted above which references “Hamiltouns” (“In the Reserve was the Earle of Balcleugh his Regiment, the Earle of Lowdons, Earle of Dumfermlings, Lord Coupers, Generall Hammiltouns Generall of the Artillery, Edinburgh Regiment, and a Brigade of Manchesters.”). There are thus three standard regiments in this contingent, representing ~2,400 troops in my basing scale.
The Clydesdale Regiment of Foot, Sir Alexander Hamilton commanding but absent to lead the artillery.
The Edinburgh Regiment of Foot, Col. James Rae commanding.
The Tweeddale Regiment of Foot, the Earl of Buccleugh commanding.
Finally, we have the third line which broke early in battle and isn’t described in great detail. There are almost a dozen other regiments listed in various sources, but they either merged into the larger fighting formations or played no substantive part in the battle. For variety, I included the Minister’s Regiment of Foot as a small formation in their unique black uniforms, but ignores everything else.
The Stirlingshare Regiment of Foot, Lord Livingstone commanding (Livingstone’s Brigade).
The Linlithgow and Tweeddale Regiment of Foot, The Master of Yester commanding (Livingstone’s Brigade).
The Angus Regiment of Foot, Viscount Dudhope commanding (Dunhope’s Brigade).
The Minister’s Regiment of Foot, Sir Arthus Erskine of Scotscraig commanding (Dunhope’s Brigade). This is a small unit of only five companies outfitted by the clergy with black uniforms.
Centre – Fairfax
Lord Fairfax brought the smallest infantry contingent to the battle with only 2,000 Foot formed into two brigades. His troops took major losses leading up to Marston Moor and his eight regiments must have been severely under-strength. My map shows Bright’s regiment separately and Col. Forbes is shown in some records as Lord Fairfax’ senior colonel, so I made two standard regiments for Bright’s and Fairfax’ regiments of foot. The third formation, shown as “Needham” on my map is a mixed formation with a more erratic layout to represent all the other under-strength formations thrown together in the field.
Combined Northern Foot representing Sir William Constable’s, Francis Lascelles’, Robert Overton’s, Ralph Ashton’s, George Doddington’s, Alexander Rigby’s Regiments of Foot (Standard). This is just a random jumble representing combined left-overs from six shrunken regiments.
Artillery
The allied artillery, commanded by General of the Ordnance Sir Alexander Hamilton, had quite a large arsenal though not all of it made it onto the field. Guns were deployed among the infantry but also as a battery in the rear. I used different figures to represent the calibre of the guns with roughly one figure for every three real guns.
General of the Ordnance Sir Alexander Hamilton next to the largest gun in his arsenal, a single Brass Culverin.
Three bases of Saker Guns representing 8 Brass Demi-Cannons.
Four bases of Falconet Guns representing 12 Brass Demi-Culverins of the 48 such guns in the allied army though clearly not on the field).
Three bases of Falconet Guns representing 9 Iron Demi-Culverins.
One Scottish Frame Gun represenitng 3 Brass Quarter Cannons.
Left Wing
Lieutenant-General of the Horse Oliver Cromwell commanded the left wing of the Alliance. There is broad agreement that his 2,500 Horse of the Eastern Association were drawn up in two lines with Commissary General Bartholomew Vermuyden in charge of the second line. He was reinforced by Lieutenant-General of the Horse Sir David Leslie’s contingent of about 1,000 Scottish Horse and 500 Scottish Dragoons. Leslie’s contingent was either positioned on the far left or as a third line.
Lieutenant-General of the Horse Oliver Cromwell (centre) with Commissary General Bartholomew Vermuyden (left) and Lieutenant-General of Horse Sir David Leslie (right) commanding the Left Wing.
I modelled the Eastern Association Horse as two large regiments representing the two double-sized formations and two standard regiments, shown on the map as six formations.
Cromwell’s “Ironsides” Regiment of Horse with 14 Troops (c800, Large).
The Earl of Manchester’s Regiment of Horse with 11 Troops (c700, Large).
Commissary General Vermuyden’s Regiment of Horse with 5 Troops (c350, Standard).
Charles Fleetwood’s Regiment of Horse with 6 Troops (c400, Standard).
The Scottish Horse brought 1,000 men split across three standard regiments. Added to this are Col. Hugh Fraser’s Dragoons commanded by Lt.Col. Frizell on the day apparently.
LG Sir David Leslie’s Regiment of Horse with 8 Troops (c350, Standard).
Earl of Balcarre’s Regiment of Horse with 9 Troops (c350, Standard).
Lord Kirkcudbright’s Regiment of Horse with 10 Troops (c350, Small).
Col. Hugh Fraser/Lt.Col. Frizell’s Dragoons (c500, Standard).
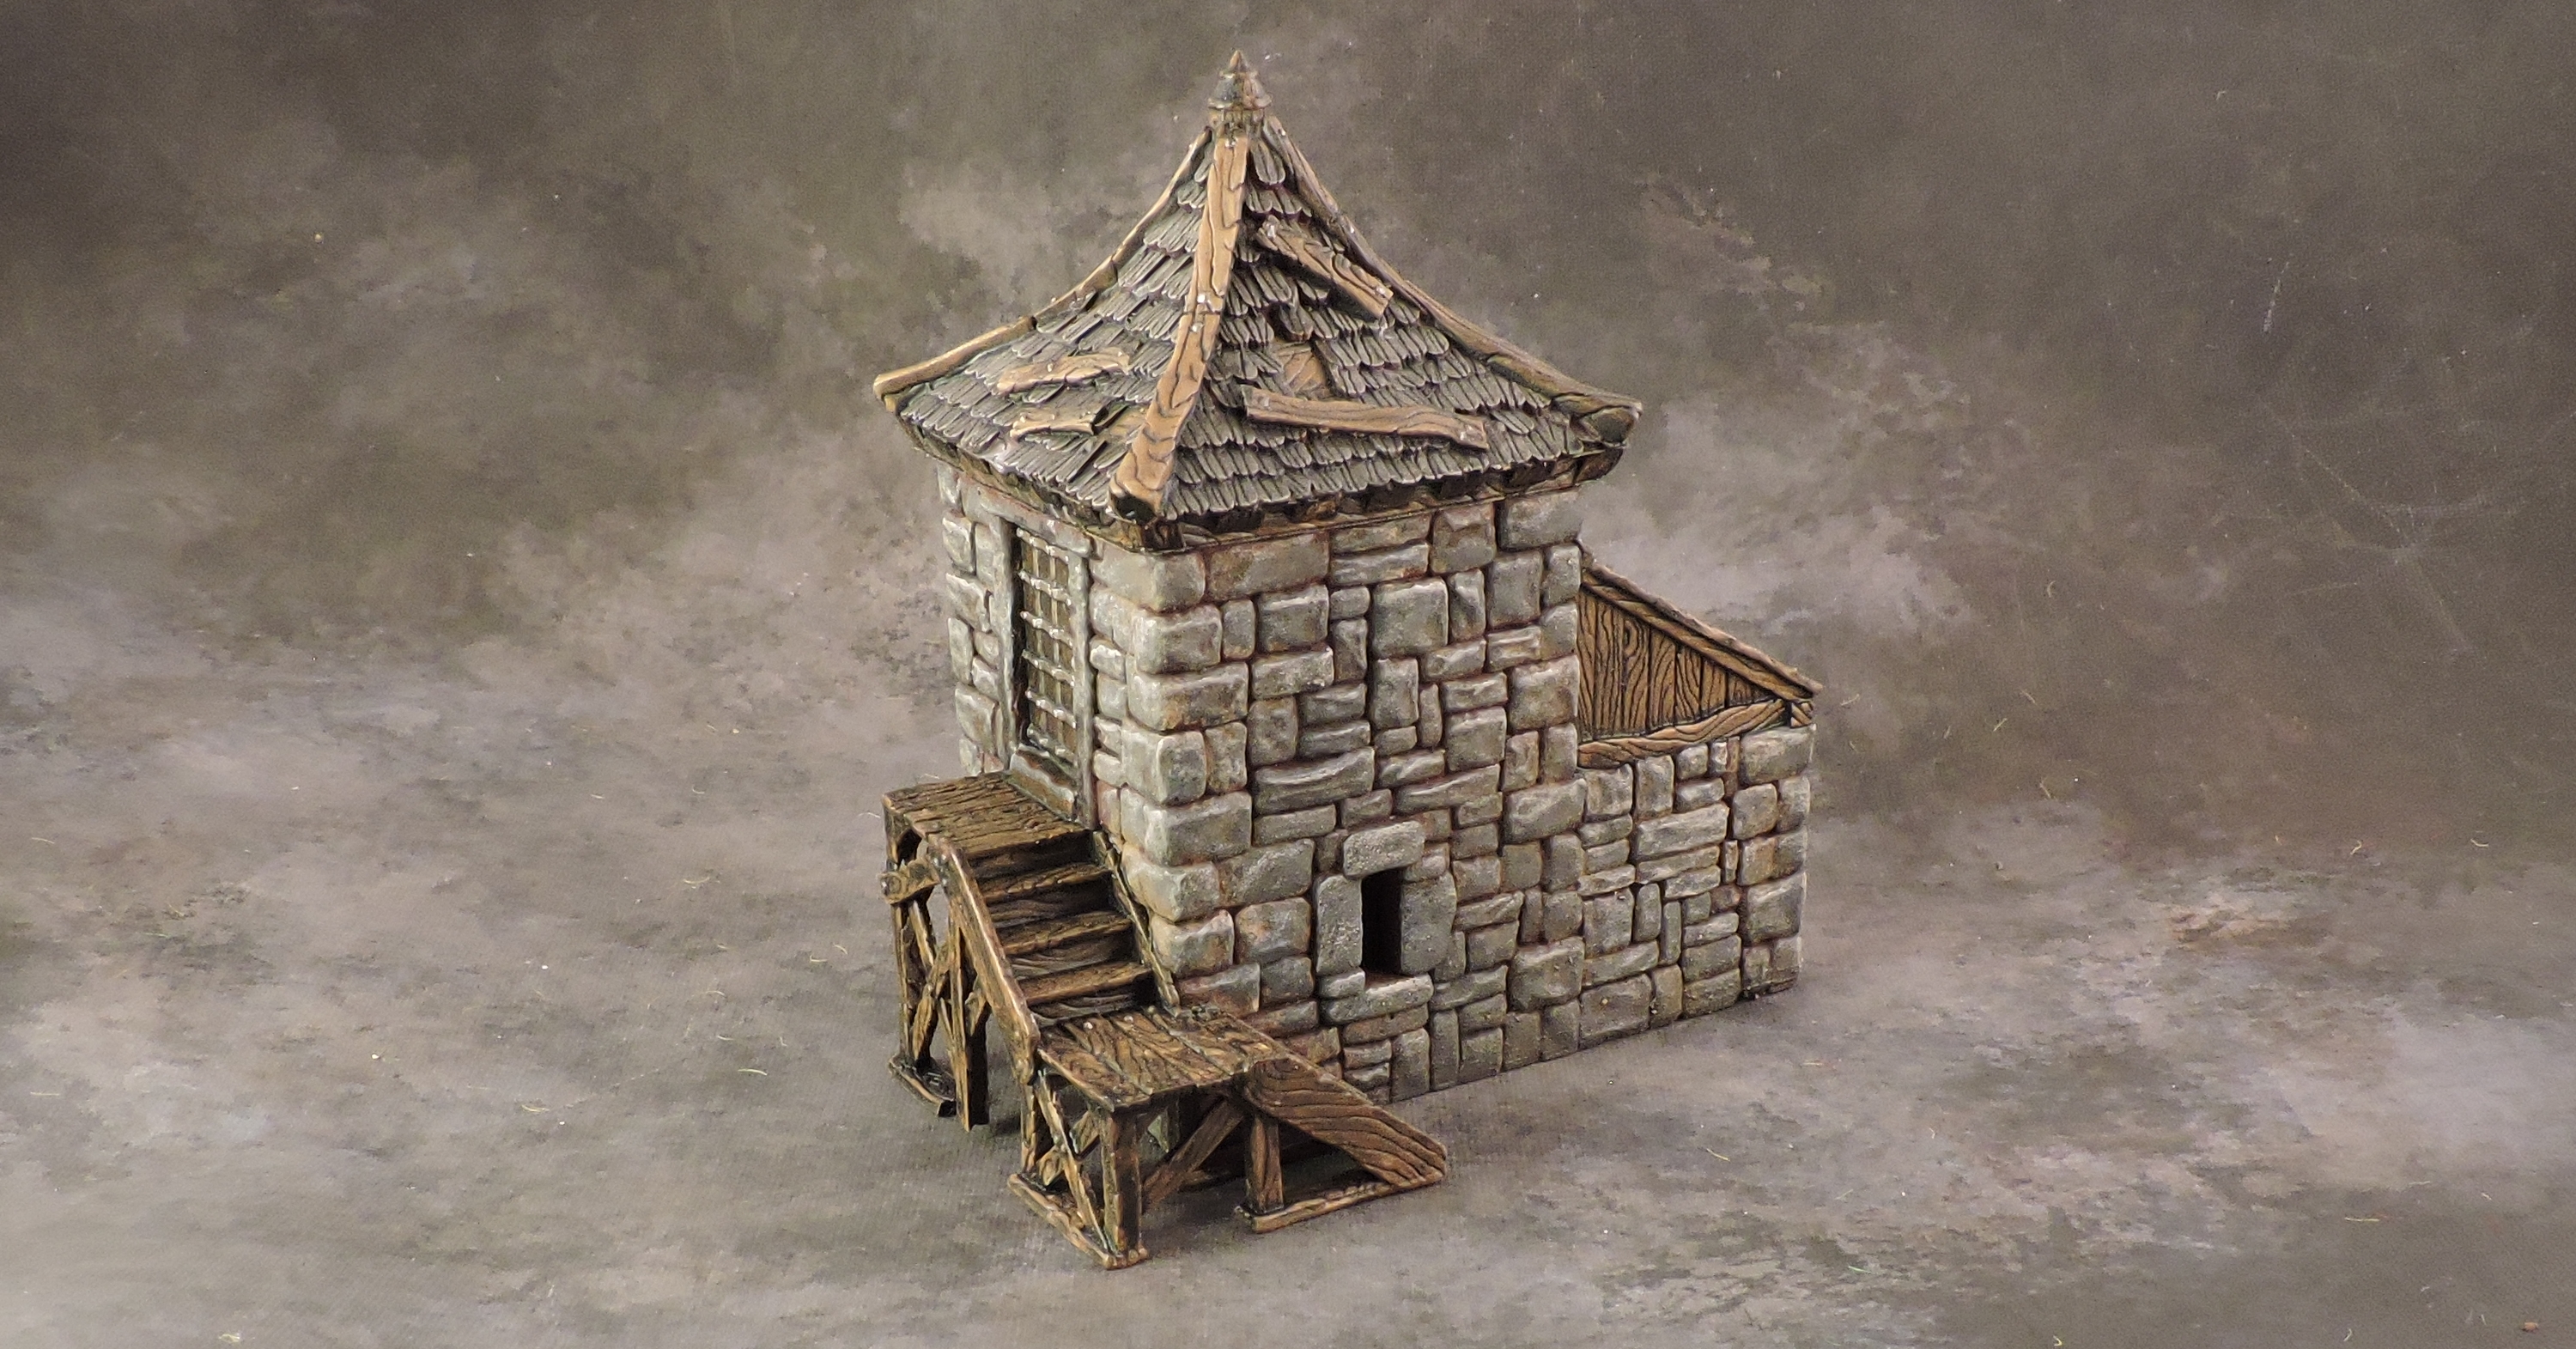
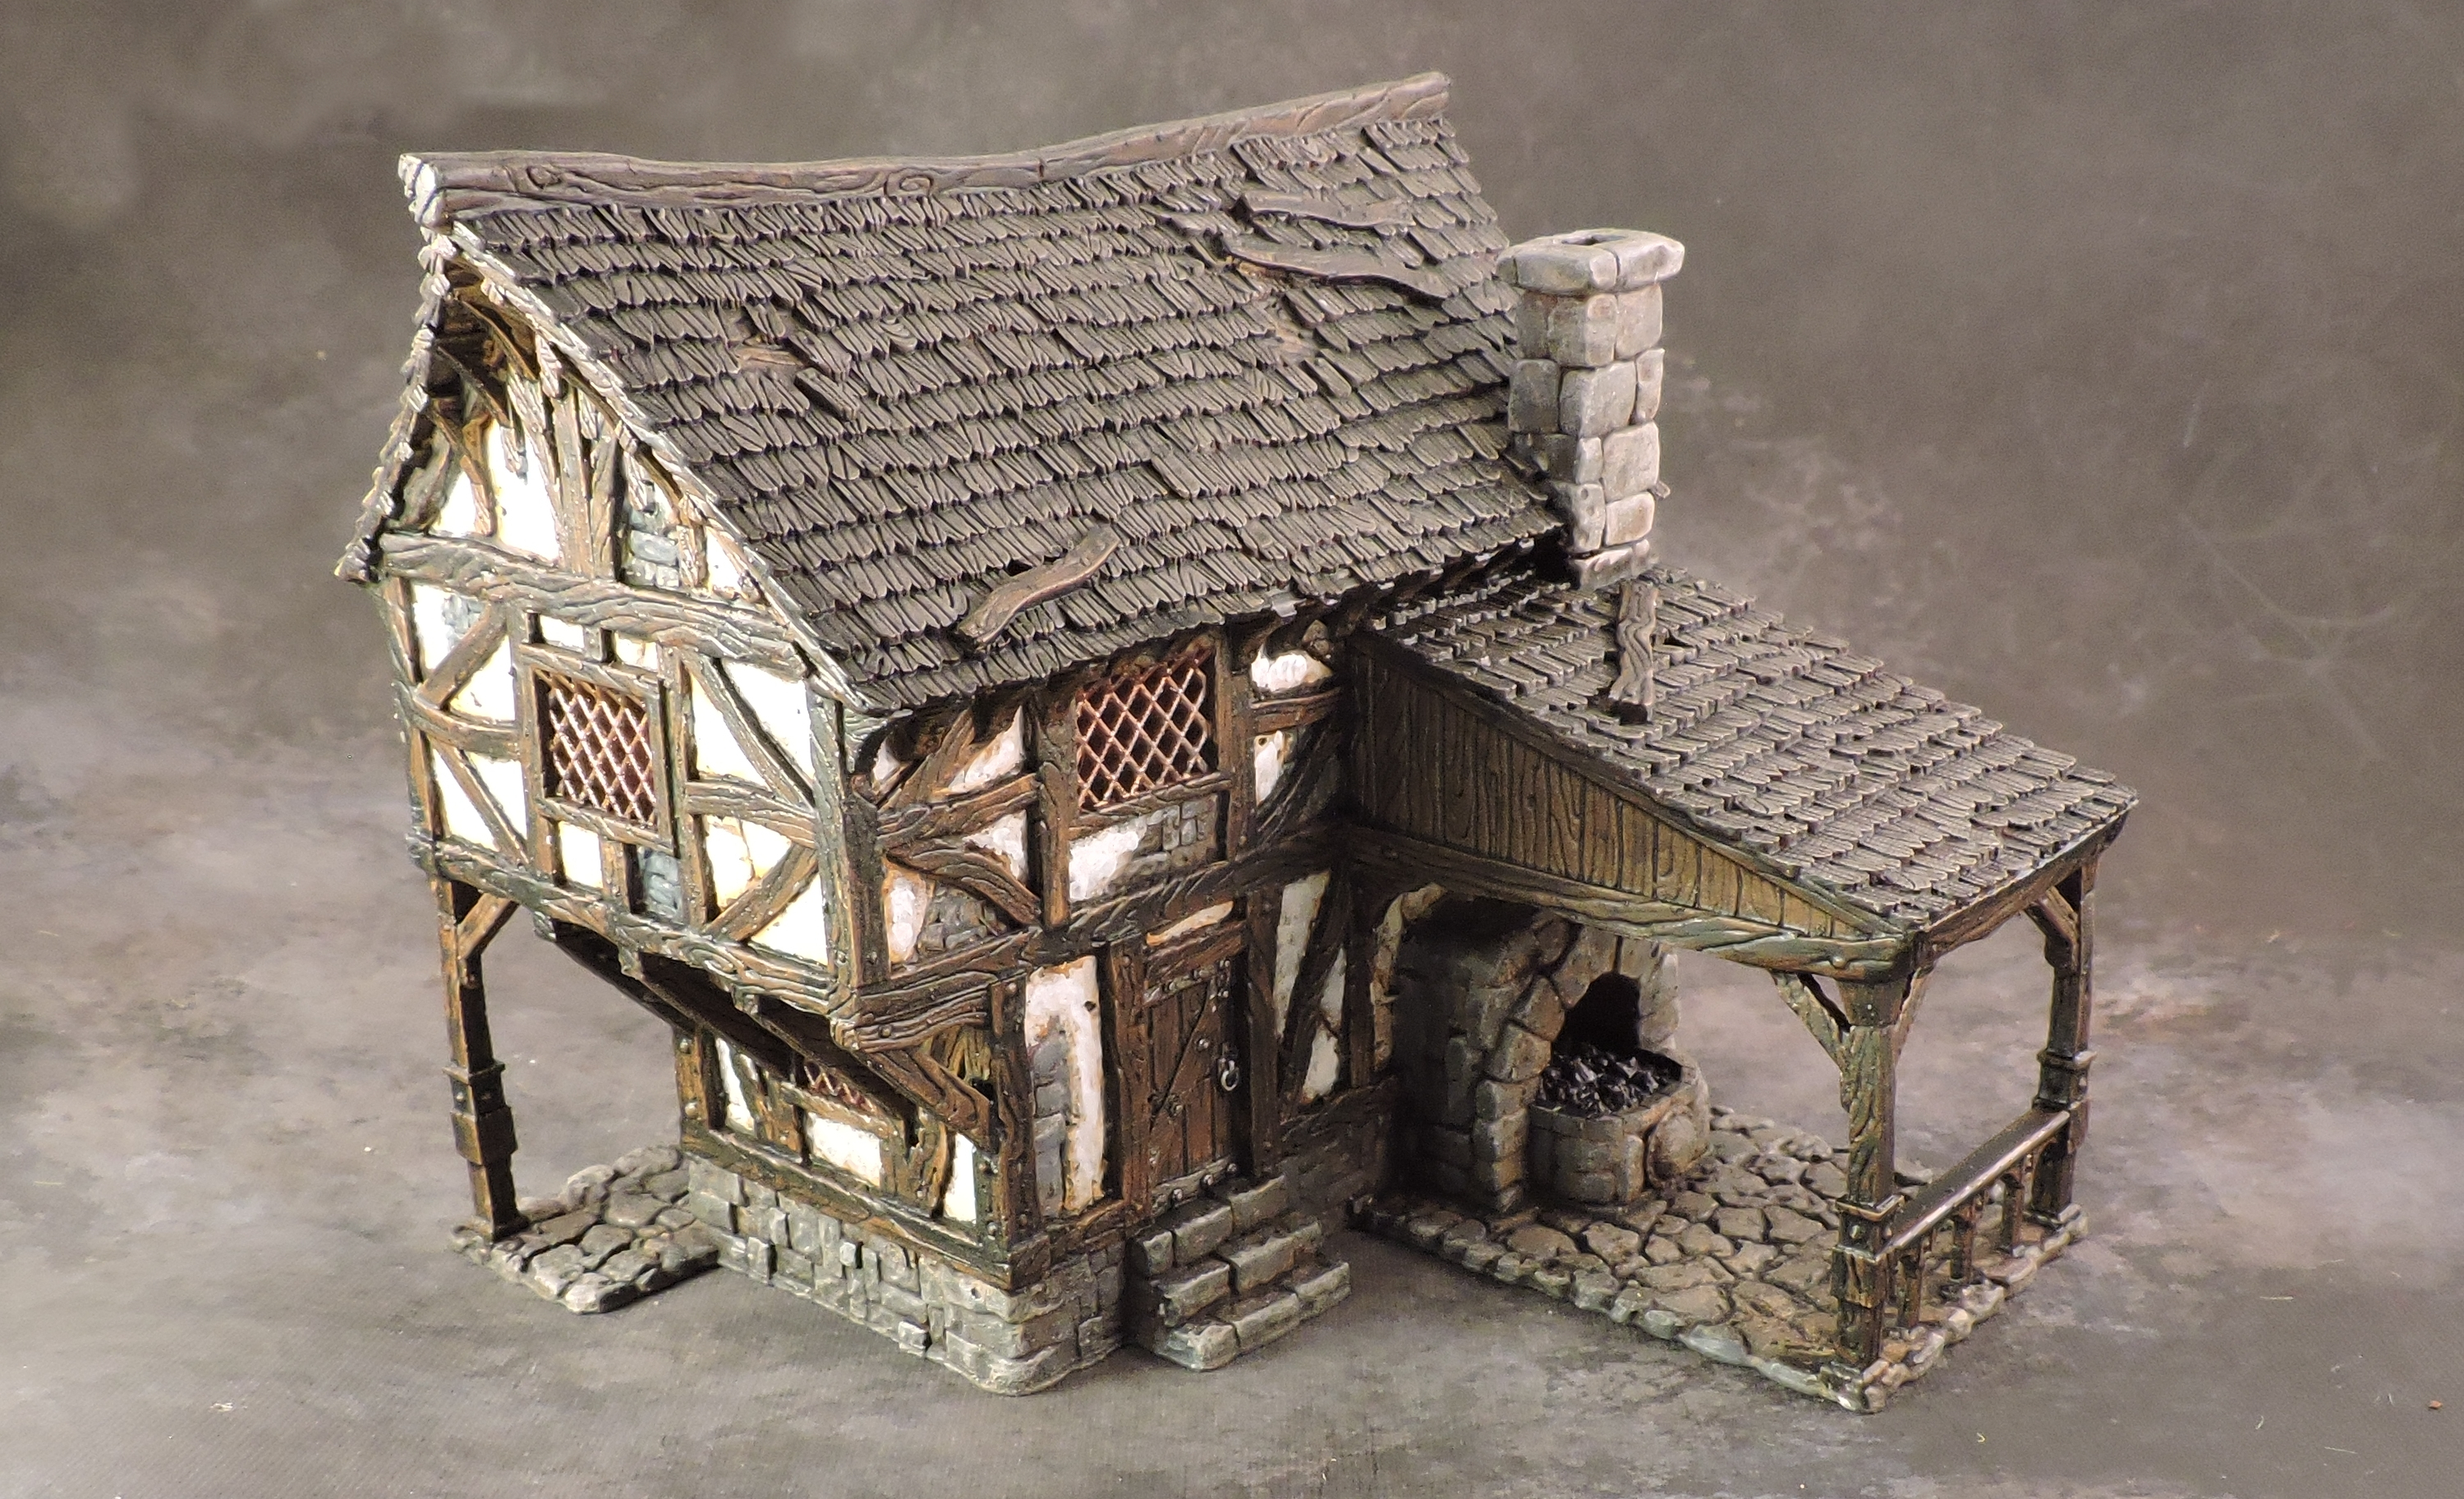
Finally, we have some buildings to represent the village of Marston Moor at the edge of the battlefield. These are 3D printed.


